Windows PC에서 macOS 실행 단계
Microsoft 장치에서 Apple의 운영 체제를 실행하는 방법을 단계별로 안내하는 가이드를 통해 Windows PC에 macOS를 설치하는 방법을 알아보세요.

노트북 단축키는 장치의 기본 기능에 액세스할 때 필수적인 도구입니다. 볼륨을 제어하여 밝기 , 키보드 백라이트, 터치패드 동작 등을 조정할 수 있습니다 . 장치에 따라 n 키 롤오버 활성화, 터치패드 비활성화, 키보드 비활성화 , 비행기 모드 활성화, 전원 모드 변경 등과 같은 전용 기능을 위한 추가 단축키가 있을 수 있습니다 .
그러나 단축키 작동이 중지되면 랩톱의 기능과 효율성이 손실될 수 있습니다. 이렇게 하면 Windows 설정 앱의 전용 옵션을 사용하여 각 설정을 변경/편집해야 하므로 상당히 번거로울 수 있습니다. 랩탑 단축키 가 랩탑에서 작동하지 않으면 아래 방법을 사용 하여 단축키 를 수정할 수 있습니다.
관련: Windows 11에서 작업 표시줄을 맨 위로 이동하는 방법
내용물
단축키가 작동하지 않는 이유는 무엇입니까?

랩톱의 단축키는 여러 가지 이유로 작동을 중지할 수 있지만 Windows 11은 아주 새롭기 때문에 가장 일반적인 이유는 백그라운드에서 드라이버 충돌 및 OEM 유틸리티 충돌인 것 같습니다. 이는 현재 OEM에서 출시한 대부분의 드라이버가 Windows 10용으로 설계되었기 때문입니다. Windows 11은 백그라운드에서 여러 다른 변경 사항과 드라이버 처리 방식을 도입하여 다양한 장치에서 단축키 기능을 중단시키는 것으로 보입니다.
가장 영향을 받는 장치는 Windows 11용으로 업데이트해야 하는 Armory Crate Service와 같은 전용 유틸리티로 인해 Asus 및 Lenovo에서 나온 것으로 보입니다. 이는 다른 제조업체가 이 문제에서 면제된다는 것을 의미하지 않으며 많은 Dell 및 Acer 장치도 Windows 11에서 단축키 기능을 잃게 됩니다.
이러한 장치를 소유하고 있거나 랩톱의 단축키가 Windows 11에서 일반적으로 작동하지 않는 경우 아래 방법을 사용하여 문제를 시도하고 해결할 수 있습니다. 시작하자.
관련: Windows 11에서 복원 지점을 만드는 방법
Windows 11 노트북에서 단축키를 수정하는 방법
다음 방법을 사용하여 랩톱에서 핫키가 다시 작동하도록 할 수 있습니다. 방법은 우선 순위에 따라 나열되었으며 가장 일반적인 수정 사항이 맨 위에 나열되었습니다. 첫 번째 수정 사항으로 시작하여 목록을 통해 작업하여 시스템에 적합한 수정 사항을 시도하고 찾을 수 있습니다. 시작하자.
방법 #1: OEM 업데이트 확인
Armory Crate Service 또는 Synaptics 유틸리티와 같이 백그라운드에서 단축키를 관리하는 전용 키보드 유틸리티가 있는 경우 OEM 웹사이트에서 드라이버를 업데이트하고 시도할 수 있습니다. 이러한 유틸리티는 특정 키보드 드라이버와 다르며 랩톱에서 핫키를 활성화하는 데 도움이 되는 서비스 및 작업을 백그라운드에서 실행합니다.
이러한 유틸리티 중 하나가 손상되었거나 작동하지 않으면 최신 업데이트를 확인하거나 랩톱에 현재 버전을 다시 설치하는 것이 좋습니다. 아래 링크를 사용하여 OEM 지원 사이트를 방문하고 최신 유틸리티 업데이트를 확인하십시오. 찾으면 클릭하여 로컬 저장소에 다운로드하고 최대한 빨리 랩톱에 설치하십시오.
설치가 완료되면 핫키가 랩톱에서 다시 작동하기 시작해야 합니다. 백그라운드에서 이전에 설치된 버전과의 충돌을 피하기 위해 랩톱을 다시 시작하는 것이 좋습니다. 단축키가 여전히 작동하지 않으면 아래 가이드를 사용하여 랩톱에서 OEM 유틸리티를 재설정하고 새로 고칠 수 있습니다.
방법 #2: OEM 유틸리티가 제대로 작동하는지 확인
OEM 유틸리티가 백그라운드에서 작동하지 않는 것 같으면 기능을 복원하기 위한 몇 가지 문제 해결 방법이 있습니다. 시작하자.
를 눌러 Windows + i키보드와 왼쪽에 '앱'을 클릭합니다.

'앱 및 기능'을 클릭합니다.

이 목록에서 해당 앱을 찾아 옆에 있는 '점 3개' 메뉴 아이콘을 클릭합니다.

'고급 옵션'을 선택합니다.

이제 선택한 앱으로 수행하려는 작업에 따라 아래 섹션 중 하나를 따르십시오.
2.1 백그라운드 기능 활성화
'백그라운드 앱 권한' 아래의 드롭다운 메뉴를 클릭하고 '전원 최적화' 또는 '항상'을 선택합니다.

'전원 최적화'는 현재 전원 관리 옵션에 따라 앱이 백그라운드에서 작동하도록 허용합니다. 반면에 '항상'은 현재 선택한 전원 관리 옵션에 관계없이 앱이 활성 상태를 유지하고 백그라운드에서 작업할 수 있는 권한을 부여합니다.
2.2 앱 복구
Windows 11에서는 앱을 복구할 수도 있습니다. 맨 아래로 스크롤하여 먼저 '종료'를 클릭하십시오.

이제 '복구'를 클릭하십시오.

Windows가 작업을 수행할 때까지 기다리세요. 옵션 옆에 확인 표시가 나타나면 랩톱에서 관련 앱을 실행해 보세요.

지금 바로 가기 키를 테스트하십시오. 사소한 문제나 충돌로 인해 앱이 백그라운드에서 작동하지 않는 경우 이제 바로 가기 키 기능이 랩톱에서 복원되어야 합니다.
2.3 앱 재설정
위의 방법이 효과가 없다면 OEM 앱을 재설정할 수 있습니다. 이렇게 하면 데이터가 재설정되고 앱이 랩톱에 방금 설치된 것처럼 새로 시작할 수 있습니다. 이렇게 하면 대부분의 경우 단축키 기능을 복원하는 데 도움이 됩니다. 그러나 앱 데이터가 재설정되므로 해당되는 경우 앱에 다시 로그인해야 합니다. 또한 앱에서 수행한 모든 변경 사항이나 사용자 지정 사항도 재설정됩니다. 시작하려면 아래 단계를 따르세요.
'종료'를 클릭하여 앱을 닫습니다.

이제 '재설정'을 클릭하십시오.

'재설정'을 다시 클릭하여 선택을 확인합니다.

이제 앱이 노트북에서 재설정됩니다. 적절한 조치를 위해 랩톱을 다시 시작하고 단축키를 다시 사용하는 것이 좋습니다. 앱이 Windows 11에서 제대로 작동하지 않았다면 이제 바로 가기 키 기능이 노트북에서 복원되어야 합니다.
방법 #3: 드라이버 업데이트
키보드 오작동의 또 다른 이유는 오래된 드라이버입니다. 과거에 키보드 드라이버를 업데이트하지 않은 경우 키보드 단축키가 Windows 11에서 작동하지 않는 이유일 수 있습니다. Windows 11은 드라이버를 다르게 관리하고 설치하며, 어떤 경우에는 Windows 11이 최신 드라이버인 경우 일반 드라이버로 OEM 키보드 드라이버를 교체하십시오.
단축키가 여전히 작동하지 않으면 드라이버를 업데이트하고 OEM에서 제공하는 최신 키보드 드라이버를 설치하는 것이 좋습니다. 아래 링크 중 하나를 사용하여 OEM 사이트를 방문하고 해당 드라이버를 로컬 저장소에 다운로드하기만 하면 됩니다.
다운로드가 완료되면 드라이버를 설치하고 랩톱을 다시 시작합니다. Windows 11에서 제공하는 모든 키보드 드라이버 업데이트를 거부하면 단축키가 다시 작동하기 시작해야 합니다. 시작하려면 아래 링크를 사용하세요.
키보드 드라이버가 여전히 구식이고 단축키가 작동하지 않으면 Windows를 통해 드라이버 업데이트를 확인해야 할 때입니다. OEM이 Windows 업데이트를 통해 최신 드라이버 업데이트를 제공할 가능성이 높습니다. 아래 가이드를 사용하여 노트북의 Windows 업데이트에서 키보드 드라이버 업데이트를 확인하십시오. 먼저 Windows Update를 통해 노트북이 드라이버 업데이트를 수신하는지 확인합니다. 시작하려면 아래 가이드를 따르세요.
Windows + S키보드에서 을 누르고 '장치 설치 설정 변경'을 검색합니다. 검색 결과에 앱이 나타나면 클릭하고 실행합니다.

'예(권장)'를 선택합니다.

'변경사항 저장'을 클릭합니다.

Windows에서 랩톱용 드라이버 업데이트를 활성화할 때까지 기다립니다. 활성화되면 장치 설치 설정 창을 닫고 Windows + i키보드에서 키를 누릅니다 . 왼쪽에서 'Windows 업데이트'를 선택합니다.

상단의 '업데이트 확인'을 클릭하고 표시되는 업데이트를 설치합니다.

설치가 완료되면 하단의 '고급 옵션'을 클릭합니다.

이제 '선택적 업데이트'를 클릭하십시오.

'드라이버 업데이트(n)'를 클릭하고 확장합니다. 여기서 n은 랩톱에 사용할 수 있는 현재 드라이버 업데이트 수를 나타냅니다. 이 목록에 표시되는 키보드 드라이버의 확인란을 선택합니다. 화면 하단의 '다운로드 및 설치'를 클릭합니다. Windows 업데이트에서 메시지가 표시되지 않더라도 랩톱을 다시 시작하여 적절한 조치를 취하십시오.
그리고 그게 다야! 이제 최신 키보드 드라이버가 랩톱에 설치되어 핫키 기능을 복원하는 데 도움이 됩니다. 그렇지 않은 경우 아래 수정 사항을 계속 진행하여 단축키를 시도하고 수정할 수 있습니다.
방법 #4: 키보드 드라이버 재설치
위의 방법이 효과가 없으면 키보드 드라이버를 다시 설치해야 합니다. 드라이버가 백그라운드에서 충돌하는 경우는 거의 없지만 잘못된 설치, 호환되지 않는 구성 요소 및 잘못된 업데이트는 특히 OEM 유틸리티에서 관리하는 사용자 지정 RGB 백라이트가 있는 경우 키보드 드라이버를 엉망으로 만들 수 있습니다.
이러한 각 앱은 키보드 백라이트에 연결하는 다른 방법을 사용하여 필요에 따라 사용자 정의할 수 있습니다. 시스템에 연결하는 이러한 방법은 키보드 매핑, 레이아웃 등을 관리하는 다른 타사 앱과 잘 작동하지 않습니다. 키보드 드라이버를 다시 설치하면 대부분의 이러한 문제를 해결하는 데 도움이 될 수 있으며 OEM의 전용 드라이버를 설치하거나 Windows에서 제공하는 일반 드라이버를 사용하여 그렇게 할 수 있습니다. 시작하자.
4.1 일반 키보드 드라이버 재설치
를 눌러 Windows + X키보드 및 '장치 관리자'를 클릭합니다.

열리면 목록에서 해당 키보드를 찾아 마우스 오른쪽 버튼으로 클릭합니다. 키보드를 찾을 수 없거나 목록이 여러 개인 경우 모두 선택하여 제거할 수 있습니다. 제거되면 남은 드라이버는 제거되고 필요한 드라이버는 자동으로 다시 다운로드됩니다.

'장치 제거'를 클릭합니다.

'제거'를 다시 클릭하여 선택을 확인합니다.

메시지가 표시되면 랩톱을 다시 시작하고 위의 단계를 반복하여 시스템에 설치된 필요한 모든 키보드 드라이버를 제거합니다. 제거한 후 빈 영역을 마우스 오른쪽 버튼으로 클릭하고 '하드웨어 변경 사항 검색'을 선택합니다. 도구 모음에서 동일한 전용 아이콘을 클릭할 수도 있습니다.

Windows는 이제 기본 키보드에 대해 누락된 일반 드라이버를 찾아 랩톱에 자동으로 다시 설치합니다.
그러나 Windows에서 드라이버를 찾을 수 없는 경우 아래 가이드를 사용하여 OEM의 전용 키보드 드라이버를 수동으로 설치할 수 있습니다.
4.2 수동으로 키보드 드라이버 재설치
필요한 키보드 드라이버를 다운로드하여 로컬 저장소에 설치합니다. 아카이브를 다운로드한 경우에 대비하여 미리 파일을 추출했는지 확인하십시오. 시스템에 수동으로 설치할 드라이버인 .inf 파일을 찾을 수 있습니다. 시작하려면 아래 단계를 따르세요.
를 눌러 Windows + X키보드 및 '장치 관리자'를 선택합니다.

이제 '키보드' 섹션을 확장하고 해당 키보드를 마우스 오른쪽 버튼으로 클릭합니다. '키보드' 아래에 여러 HID 장치가 있는 경우 충돌을 피하기 위해 불필요한 드라이버를 모두 제거하는 것이 좋습니다.

'장치 제거'를 선택합니다.

옵션을 사용할 수 있는 경우 '이 장치의 드라이버 제거 시도' 확인란을 선택합니다. '제거'를 클릭하여 선택을 확인합니다.

이제 선택한 키보드가 시스템에서 제거됩니다. 해당 드라이버가 제거되면 키보드가 작동을 멈춥니다. 이것은 정상적인 동작이며 필요한 드라이버를 다시 설치하면 키보드 기능을 복원해야 합니다. 제거하려는 모든 HID 장치에 대해 위의 단계를 반복합니다. 필요한 장치가 제거되면 도구 모음에서 '드라이버 추가' 아이콘을 클릭하십시오.

'찾아보기'를 클릭합니다.

OEM 드라이버를 저장한 폴더로 이동하고 '확인'을 클릭합니다.

안전을 위해 '하위 폴더 포함' 확인란을 선택합니다. 완료되면 '다음'을 클릭합니다.

이제 Windows에서 호환되는 드라이버의 위치를 검색하여 시스템에 자동으로 설치합니다.
설치가 완료되면 랩톱을 다시 시작하여 적절한 조치를 취하는 것이 좋습니다.
그리고 그게 다야! 백그라운드 드라이버 충돌로 인해 시스템에 문제가 발생한 경우 핫키 기능이 이제 시스템에서 복원되어야 합니다.
참고: 핫키 기능을 다시 잃지 않으려면 Windows 업데이트를 통해 키보드 드라이버를 설치하지 마십시오.
방법 #5: 게임 모드 비활성화
Windows 내의 게임 모드는 특정 랩톱에서 문제를 일으키는 것으로 알려져 있습니다. Microsoft의 게임 모드는 더욱 스마트해졌으며 모드는 게임 경험에 가장 적합한 주변 장치 설정을 자동으로 적용하려고 시도합니다. 여기에는 오디오 조정, 마우스 설정, 키보드에서 n 키 롤오버 활성화, Windows 키 잠금 등이 포함됩니다.
그러나 이러한 설정을 자동으로 활성화하려면 OEM에서 자주 관리하는 전용 드라이버 및 도구에 연결해야 합니다. 이로 인해 백그라운드에서 충돌이 발생하여 Windows 11에서 단축키를 사용하지 못할 수 있습니다. 아래 가이드를 사용하여 랩톱에서 게임 모드를 비활성화하십시오.
를 눌러 Windows + i키보드와 왼쪽에 '개인 설정'을 클릭합니다.

'기기 사용'을 클릭합니다.

'게임'에 대한 토글을 비활성화합니다.

지금 왼쪽에서 '게임'을 클릭하세요.

오른쪽의 '게임 모드'를 클릭합니다.

화면 상단의 '게임 모드' 토글을 비활성화합니다.

설정 앱을 닫고 노트북을 다시 시작하십시오.
다시 시작할 때 단축키가 작동하기 시작하면 게임 모드가 백그라운드에서 단축키를 방해할 가능성이 있습니다.
방법 #6: HID 서비스 다시 시작
You can also restart your HID service which should help restart all your HID or Human Interface Devices. This includes your keyboard and restarting the HID service should help fix your hotkeys if your custom software or mapper was unable to hook into the HID service. Use the guide below to get you started.
Press Windows + S and search for ‘Services’. Click and launch the app once it shows up in your search results.

Look for ‘Human Interface Device Service’ and right-click on it.

Select ‘Restart’.

Windows will now restart your HID service.

You can try testing out your hotkeys now. If a conflict in the background was preventing your custom software from hooking into the HID service, then this issue should now be fixed and your hotkey functionality should now be restored.
Method #7: Disable filter keys
Filter keys are another culprit within Windows that is known to cause issues on many devices. Ideally, Filter keys is an accessibility feature meant to be used so that you can avoid brief repeated key inputs which is quite useful for users with anxiety, hyperactivity, hand tremors, and other similar conditions.
However, if this feature has been enabled by mistake, then it could prevent Windows from detecting your hotkey inputs and combinations. You can check if Filter keys are enabled on your system and disable them using the guide below.
Press Windows + S and search for Control Panel. Click and launch the app once it shows up in your search results.

Switch to ‘Large icons’ by clicking on the drop-down menu in the top right corner.

Click on ‘Ease of Access Center’.

Click on ‘Make the keyboard easier to use’.

Now uncheck the box for ‘Turn on filter keys’.

Click on ‘Ok’ at the bottom.

And that’s it! Filter keys should now be disabled on your system. Check your hotkey combinations and their functionality should now be restored on your system.
Method #8: Disable Function (Fn) lock if available
Fn lock is a feature in most laptops that allows you to lock and use the Fn keys and their functionality. Most systems use Fn keys as alternate keys mapped to functions and utilities that will be needed to manage your system. For example, F7 could be used to increase brightness and F8 could be used to decrease brightness. If directly pressing these keys helps you manage your brightness then the Fn lock is disabled on your laptop.

However, if hitting F7 and F8 registers as the respective key then the Fn lock is enabled on your device. In such cases, your Fn keys will behave normally and you will need to use Fn + F7 or F8 combination to adjust your brightness. You can disable or toggle this lock using keyboard shortcuts on most laptops. Look for an ‘Fn Lock’ icon on one of your keys and pres Fn + the respective key, on your keyboard. This should help disable Fn lock on your keyboard if enabled, and restore your hotkeys functionality.
In case a key combination is not available on your device, then you will most likely need to access your BIOS. Most manufacturers allow you to disable and enable Fn lock from the BIOS for easy access. Simply press F2 on your splash screen once your laptop is booting to enter the BIOS menu. Once in the BIOS menu, find the relevant option and toggle the Fn lock for your laptop.
In case a BIOS menu option is also not available to you then your laptop most likely uses the default Fn lock combination which is ‘Fn + Esc’ on your keyboard. This will help toggle the Fn lock on your system which should help restore your hotkeys.
Method #9: Check the on-screen keyboard
On-Screen keyboard within Windows can help you determine if your hotkeys have actually stopped working or you are facing a software issue. Start by launching the on-screen keyboard on your laptop using the taskbar icon. If the icon is hidden, press Windows + S on your keyboard and search for ‘On-Screen Keyboard’. Click and launch the app from your search results.

Now try using a hotkey that does not use Fn keys on your keyboard as they would be unavailable on your on-screen keyboard. If not try testing out each key and see if it still works on your laptop.

If all your keys seem to be registering with hotkeys working via the on-screen keyboard, then this indicates a hardware issue with your keyboard. In such cases, we recommend you get in touch with your OEM support team and try to solve your issue. If however, you are unable to activate your hotkeys via the on-screen keyboard as well, then you can use the fixes below to try and solve your issue.
Method #10: Use Windows troubleshooter
If hotkeys still fail to work on your system then it’s time to run a dedicated Windows troubleshooter. Windows troubleshooters have become highly advanced in the past few years and they can help fix most issues with your system nowadays. Use the guide below to run a keyboard troubleshooter on Windows 11.
Press Windows + i on your keyboard and click on ‘Troubleshoot’ on your right.

Now click on ‘Other troubleshooters’.

Scroll down and click on ‘Run’ beside ‘Keyboard’.

Windows troubleshooter will now do its thing and try to find issues with your keyboard.

If any are found, follow the on-screen instructions to apply the relevant fixes. However, if the troubleshooter does not find anything then you can use the methods below to try and get your hotkeys working again.
Method #11: Run SFC scan
If hotkeys still aren’t working on your laptop then this might indicate an issue with your Windows installation. Let’s try to fix Windows system files and Windows 11 image on your laptop to try and fix hotkeys on your system. Use the guide below to get you started.
Press Windows + S on your keyboard and search for ‘CMD’. Click on ‘Run as administrator’ once it shows up in your search results.

Now type in the following command and press Enter on your keyboard to execute it.
sfc /scannow

Windows will now scan and verify all of your system files and replace corrupted ones with fresh system files. If a corrupted Windows 11 installation broke your hotkeys functionality, then this should help fix it on your laptop.
Method #12: Run DISM fixes to restore Windows image
If you got the following message after running the SFC scan above, then it is highly important to run the DISM commands to fix your Windows 11 image.
“Windows Resource Protection found corrupt files but was unable to fix some (or all) of them”
Additionally, if the SFC scan is completed successfully but your hotkeys still do not work, then you can use the DISM commands to try and fix your Windows image as well. This will restore system files and solve background conflicts that might be preventing you from using your hotkeys. Follow the steps below to get you started.
Press Windows + S on your keyboard, search for CMD and click on ‘Run as administrator’ once it shows up in your search results.

Type in the following command and press Enter on your keyboard to execute it.
DISM /Online /Cleanup-Image /RestoreHealth

Wait for the process to complete and restart your laptop for good measure.
If a corrupted Windows image was the cause of your issue, then hotkey functionality should now be restored on your laptop.
Method #13: Uninstall any third-party tools
If you have any third-party tools customizing your keyboard then we recommend you disable or uninstall them at once. This includes the likes of key mappers, macro customizers, keyboard backlighting customizers, keyboard layout changes, and more. Such apps use different ways to hook into your keyboard drivers via Windows and any one of these could be outdated and not compatible with Windows 11 on your system.
We recommend you uninstall any such tools from your system at the earliest and remove any additional leftover configuration files if available. You should also check for driver updates to your keyboard and roll back to a previously known driver to revert any major changes applicable to your system. Use the guide below to roll back your keyboard driver.
13.1 How to rollback your keyboard driver
Press Windows + X on your keyboard and click on ‘Device manager’.

Find the desired keyboard in your list of devices and right-click on it once found.

Select ‘Properties’.

Click and switch to the Driver tab.

Click on ‘Rollback driver’ if available.

Follow the on-screen instructions to finish rolling back your driver.
Restart your system if prompted.
Once the driver is reverted to its previous iteration hotkeys should start working on your system again.
However, if you don’t have the option to roll back your driver then you will need to uninstall the installed drivers for your keyboard and hope that Windows sources the correct drivers when it scans for new hardware on your system. If you have dedicated drivers available for your keyboard on your OEM support site, then you can install them manually. Follow Method #10 below to reinstall your keyboard drivers manually or through Windows in this case.
Method #14: Connect to a different USB port (external keyboards only)

If you are using an external keyboard then we recommend using a different USB port. Depending on your keyboard you might need a USB 2.0 or USB 3.0 port for compatibility and keyboard layout reasons. Additionally, if your keyboard uses fancy backlighting and other custom features then it likely requires a USB 3.0 port on your system to power all of its features.
In contrast, if you are trying to use a legacy keyboard via adapters then you will likely need to test USB 2.0 and USB 1.2 for best performance depending on your unit. Moreover, we recommend you ensure that your laptop is plugged into power so that it can power your USB ports properly.
If however, your external keyboard still fails to work then you can try reinstalling its drivers on your system using the guide in this post.
Method #15: Check GPO and re-enable hotkeys if disabled
If you are using Windows Pro or higher that has been issued by your organization or your educational institute then it is likely that hotkeys have been disabled on your system by your administrator. This could be a side effect due to a recent change, or it could be your new company policy.
Administrators tend to disable third-party apps on company-issued and education systems which also, in turn, disables hotkey functionality for most laptops. You can fix this issue by contacting your administrator and whitelisting your hotkey app in case you don’t have access to the Group Policy Editor. However,
If you are an administrator, with access to GPO, then you can use the guide below to re-enable hotkeys on your system.
Press Windows + R on your keyboard, type in the following term, and press Enter on your keyboard.
gpedit.msc

Navigate to the following path.
User Configuration > Administrative Templates > Windows Components > File Explorer
Double click on ‘Turn off Windows Key hotkeys’.

Click and select ‘Enabled’ in the top left. Then click ‘Apply’ in the bottom right and then click ‘OK’.

Restart your laptop for good measure and hotkey functionality will now be restored on your system. Please keep in mind that this will only work for OEMs that hook into Windows shortcuts natively to get hotkeys working again. For manufacturers that have dedicated utilities, you can use one of the guides below.
Fix hotkeys for Asus Users
If you are an Asus user with a ROG or a TUF unit, then it is likely that you are dealing with Armoury Crate. Armoury Crate is Asus’s utility that helps you manage your power plan, performance plan, overclocking, keyboard backlighting, and more depending on your laptop. Over the years Armoury Crate has grown to be quite finicky and has been riddled with telemetry and adware.
Moreover, the Aura Sync utility seems to be a hit or miss when syncing your peripherals’ backlighting with each other. If you have an Asus unit and hotkeys don’t seem to be working for you then it is likely that the Asus hotkeys app hasn’t been launching in the background. In this case, you can either try to manually start the app or reinstall AC service and the Asus System interface reconfigure your hotkeys and restore their functionality. Use one of the guides below that best fits your current needs and requirements.
Method #1: Try to manually start AsusHotkeyExec.exe
Press Ctrl + Shift + Esc on your system to open the Task Manager and switch to the ‘Details’ tab.

Depending on your preferences, the install location of AsusHotKeyExec.exe could vary. Hence we will use an already running process to find its install location. Start by right-clicking on either of the following ongoing tasks.

Select ‘Open file location’.

You should now be taken to the ‘C:\Windows\System32’ ideally, where you should find the ‘AsusHotkeyExec.exe’. Right-click on the app and select ‘Run as administrator’.

The app will now launch in the background and restore hotkey functionality on your system.
Try using one of your hotkeys now, if it seems to be working then, likely, AsusHotkeyExec.exe did not automatically launch in the background. This could be an isolated incident but if the app fails to launch even after a restart, then you will need to re-enable its auto start functionality.
You can do this by reinstalling Asus System Interface and Armoury Crate Service on your laptop using the guide below.
Method #2: Re-install Asus System Interface and Armoury Crate service
Asus System Control Interface is a prominent utility regularly updated by Asus that helps most tools like Armoury Crate, Armoury Crate Service, MyAsus System Diagnosis, and more to run properly on your system. Armoury Crate service on the other hand is your overclocking utility bundled with specific overclocking and power management configurations for your specific device. Depending on your ROG or TUF unit, AsusHotkeyExec.exe could be bundled with either of these services. Let’s re-install both of them on your system.
Visit the link above and click on ‘Laptops’.

Click on ‘Product Series’ and select your Series from the drop-down menu.

Click on the next drop-down menu and select your laptop from the list.

If your unit is not listed in this list, then you can search for it using the search bar at the top. Click on your laptop model once it shows up in your search results under ‘Products’.

Click on ‘Driver & Utility’.

Choose ‘Windows 10 64-bit’ as your OS.

Now scroll down to the ‘Software and Utility’ section and click on ‘Show all’.

Click on ‘Download’ beside the latest version of ASUS System Control Interface.

Similarly, click on ‘Download’ beside Armoury Crate Service.

Note: Asus has now started bundling the Armoury Crate app, Armoury Crate Service, Aura Sync app, and Aura Sync service in a single package for many laptops. If this is the case for your unit as well, then you can download this package.
Now let’s remove all installed services and packages that we are going to reinstall. Press Windows + i on your keyboard and click on ‘Apps’ on your left.

Click on ‘Apps and features’.

Now uninstall the following applications if you managed to source the Armoury Crate Service package from the download page.

However, if you got a single package to install Armoury Crate, Armoury Crate Service, Aura Sync app, and Aura Sync service, then uninstall the following applications from your laptop.
To uninstall an app, click on the 3-dot menu beside it and select ‘Uninstall’. Click on ‘Uninstall’ again to confirm your choice. Repeat the steps above to uninstall all the necessary apps from your system.
Note: Do not remove services like Refresh Rate service, Pointing device service, and more from your laptop during this process. Even though they hook into the Armoury crate, there is no need to uninstall them as the existing installation will work with your reinstalled Armoury Crate and its services.
We will now uninstall Asus System Control Interface from your system. The best way to do this is by using the Device Manager. Follow the guide below to get you started.
Press Windows + X on your keyboard instead and select ‘Device Manager’.

Click and expand ‘System devices’ in Device Manager.
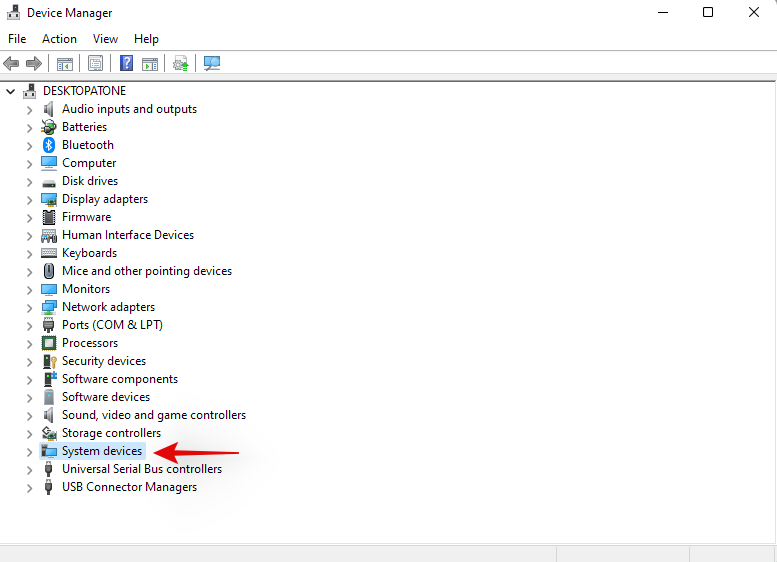
Right-click on ‘Asus System Control Interface’ and select ‘Uninstall device’.

Click on ‘Uninstall’ to confirm your choice. Additionally, check the box for ‘Attempt to remove the driver for this device’ if available.

If Asus System Control Interface is unavailable in your device manager then you can restart your laptop at this point. Once restarted, follow the subsequent steps to re-install Armoury Crate and Asus System Control Interface on your system. The concerned drivers will now be uninstalled from your system. You can now restart your laptop for the changes to take effect.
Once your laptop restarts, navigate to the packages we downloaded from Asus’s website on your local storage and start by installing Asus System Control Interface first. Double-click and launch the .exe file and follow the on-screen instructions to install Asus System Control Interface on your laptop. You will be prompted to restart your system once the process completes. We recommend you restart your system at this point before proceeding with the installation of Armoury Crate on your system.
Once your system restarts, double click and launch the Armoury Crate package.
Select the utilities you wish to install on your system. Unless you have other Asus peripherals that support RGB backlighting through Aura Sync, there is no point in installing Aura Sync. Once you have selected the desired utilities, click on ‘Next’.
Click on ‘Install’ to start the installation process.
The package will now connect to Asus’s servers, identify your laptop and install the necessary compatible utilities. Once installed, we recommend you restart your system for good measure.
And that’s it! Once your system restarts, hotkeys should be back up and running again on your system.
Fix hotkeys for Lenovo users
If you own a Lenovo unit especially from the ThinkPad or IdeaPad series, then you will need to try out the following fixes. Lenovo’s professional lineup of laptops is bundled with tons of hotkeys and there are mainly 3 fixes you can try to fix your issue. Let’s first verify if your hotkeys have actually stopped working. Follow the steps below to get you started.
Method #1: Disable all shortcuts and enhancements
Let’s start by disabling all keyboard shortcuts and keyboard enhancements within Windows for your laptop’s keyboard. Follow the guide below to get you started.
Press Windows + S on your keyboard and search for ‘Control Panel’. Click and launch the app from your search results.

Click on the drop-down menu in the top right corner and select ‘Large icons’.

Click on ‘Ease of access center’.

Click on ‘Make the keyboard easier to use’.

Uncheck all the options available on your screen.

Save your changes and restart your laptop for good measure.

If keyboard enhancements enabled by Windows were causing conflicts with your hotkeys, then your hotkey functionality should be restored on your laptop by now.
Method #2: Update your drivers using Lenovo support
You might have manually updated your drivers, you might have reinstalled and rolled back your drivers, but this isn’t similar to downloading and installing drivers through the support app. Most OEM support apps are designed to automatically scan for known issues with your hardware in the background and fix them automatically. These support app also come with hotfixes and patches that aren’t readily available to the end consumer. These hotfixes and patches are applied when downloading and installing the concerned driver or utility,
Hence we recommend that you download and reinstall the following drivers on your system through the Lenovo support app. Depending on your unit’s make and model, you could be using a different Lenovo app like Lenovo Vantage and more. The process is similar for all these apps and you simply need to manually uninstall your keyboard drivers first and then reinstall the corresponding ones from your support app.
Note: We won’t be removing your power management drivers and instead we will be simply reinstalling them. Removing power management drivers can end up harming your vital components especially if your laptop is doing some resource-heavy work in the background.
Press Windows + X and select ‘Device Manager’.

Find your keyboard under ‘Keyboards’ and right-click on it.

Select ‘Uninstall device’.

Check the box for ‘Attempt to remove the driver for this device’ if available. Click on ‘Uninstall’.

Your keyboard driver will now be uninstalled. Open the Lenovo System Update, Lenovo Vantage, or the corresponding Lenovo support app depending on your current laptop. We will be using the Lenovo System update app for this guide as that will be used by most modern systems currently and in the future. If you do not have the app installed on your unit, then you can use the link below to download it to your laptop.
Download and install the app on your system using the link above. Once installed, launch the app and log in with your device and account details if prompted.
Click on ‘Get new updates’ on your left.
Lenovo System update app will now detect your configuration and look for compatible upgrades accordingly. Once the process completes, all available updates will be shown on your screen according to their priority. Check each of the following sections and check the boxes for the updates you wish to install on your laptop. Your keyboard driver will also show up in this list as it is currently missing from your system. Ensure that you check the box for your keyboard driver before moving to the next step.
Note: Do not check the boxes for your bios updates. We recommend you download and install bios updates, individually and separately so that your laptop does not face installation conflicts in the background during this process.
Click on ‘Download’ in the bottom right corner.
Lenovo system update will now download and install all the selected drivers on your system. Your laptop could automatically restart a few times during this process which is normal. Simply log back into your account and wait until the installation process has been completed.
Once all the drivers are installed on your system, try using your keyboard hotkeys again. In most cases for Lenovo devices, your hotkeys should be back up and running on your system again. Lenovo is known to apply certain patches in the background when installing hotkey drivers and create certain tasks to maintain the functionality of your hotkeys. A reinstallation should have reinitiated this process again which should have fixed your hotkeys.
Fix hotkeys for Acer users
If you are using an Acer system then there isn’t much you can do at this point. Acer is known to keep its hotkeys simple with minimal customization available to the end-user. This in turn means that if the above-stated general fixes did not work for you then it is unlikely that resetting the CMOS will. However, if you have overclocked your unit or have been messing around with voltage values, then you can try resetting your CMOS to get hotkeys back up and running on your system again.
Resetting the CMOS does a lot of things but it mainly helps reset changes to core system values like your voltage, frequency speed, and more. Resetting the CMOS also helps discharge capacitors on some laptops which can give you a sudo-fresh start which is known to solve many persistent errors and issues with systems in the past. Use this comprehensive guide by us to reset your CMOS on your Acer unit.
Check out: How to Reset BIOS in Windows 11
Facing error codes when restarting HID services? Try these fixes!

If you decided to restart your HID service using the guide at the top, then you could end up facing two common errors depending on how your system has been configured. These are known errors and can be fixed on your system using the guides below. Follow the steps to get you started.
Method #1: For error code 126
Error code 126 can be fixed by replacing the Hidserv.dll to your system 32 folder. Follow the guide below to get you started.
Note: You will need a Windows 11 installation media or ISO in case the .dll file is unavailable on your system. Make sure you have either of these handy before proceeding with the guide below. In case you do not have an installation media handy, then you can use the link below to download Hidserv.dll to your local storage.
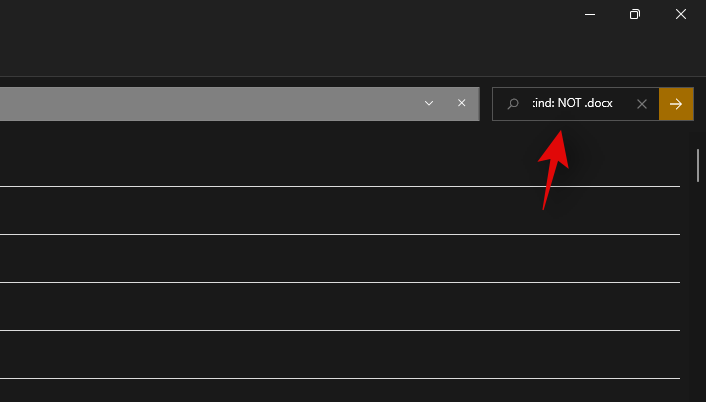
Open the Windows installation media you have handy and search for Hidserv.dll using the search box in your top right corner.
Once found, copy the file to a convenient location on your local storage. If however, you downloaded the file to your local storage using the link above, then extract the archive to a convenient location and follow the steps below to edit its security permissions.

Right-click on the downloaded Hidserv.dll and select ‘Properties’.

We will now need to manually grant permissions to the necessary users and applications so that Hidserv.dll can work properly on your system. Switch to the Security tab at the top.

Click on ‘Edit’ at the top.

Click on ‘System’ at the top and check the box for ‘Write’

Click on ‘Apply’ once done. Select ‘Yes’ to confirm your choice. Repeat the steps above and restrict permissions for Administrators and other users in the list above. Once you are done, click on ‘Add’.

Now enter the following term and press Enter on your keyboard.
All Application Packages

Select the following permissions for ‘ALL APPLICATION PACKAGES’.

Similarly, click on ‘Add’ again.

Now enter the following term and click on ‘Ok’.
NT Service\TrustedInstaller

Check the boxes for the same permissions as we did for the application packages above.

We now need to add permissions for restricted UMP packages on your system. There is no way to do this using the Windows File Explorer, so we will be using a PowerShell script instead. Press Windows + S on your keyboard and search for PowerShell. Click on ‘Run as administrator’ once it shows up in your search results.

Once PowerShell launches, copy and paste the code below in your PowerShell window. Do not execute the commands just yet.

$user = [Security.Principal.NTAccount]::new("ALL RESTRICTED APPLICATION PACKAGES").Translate([System.Security.Principal.SecurityIdentifier])
$rule = [Security.AccessControl.FileSystemAccessRule]::new($user, "ReadAndExecute", "Allow")
$directory = PATH
$acl = Get-Acl $directory
$acl.SetAccessRule($rule)
Set-Acl -Path $directory -AclObject $acl
Now navigate to the Hidserv.dll file that we just edited the permissions for and right-click on it. Select ‘Copy as path’.

Go back to your PowerShell window and replace “PATH” with the path we just copied.

Once replaced, hit Enter on your keyboard to execute the command. Once completed, the new permissions for restricted application packages should now be added to your new Hidserv.dll file.

Note: If you are typing in the path manually then you will need to include in double-quotes as shown in the final screenshot. Pasting a copied path using the method above will automatically add double quotes to it.
It’s now time to replace or add the file to your boot directory. Navigate to the Hidserv.dll file we just created and copy it to your clipboard.

Press Windows + E on your keyboard and navigate to the following path.
C:\Windows\System32

Paste your file in this location. Click on ‘Replace the file in the destination’.

Click on ‘Yes’ to grant the necessary administrator permissions. Once the file is replaced, restart your system for good measure. You can now check your HID services in the Services app to see if it is back up and running again. If not, you can try starting it manually, and you should no longer be facing Error code 126 on your system.
Method #2: For Error code 2
If you are getting Error code 2 after trying to restart the HID service then there could be a couple of reasons why you are facing this error. The main reason is due to unwanted registry changes for the HID service. This could have happened due to recently applied manual hacks or registry cleaners used by you. We will need to check for these changes and revert them if any have been made on your system. Follow the guide below to get you started.
Press Windows + R on your keyboard, type in the following term, and hit Enter on your keyboard.
regedit

Navigate to the following registry key. You can also copy-paste the same in the address bar at the top of your screen.
Computer\HKEY_LOCAL_MACHINE\SYSTEM\ControlSet001\Services\hidserv
Double click on the ‘Type’ value on your right.

Set the value to ’20’ if it is something different and click on ‘Ok’.

Now click on ‘Parameters’ under Hidserv on your left.

Double click on ServiceDll on your right.
Enter the following path in its Value data field. Even if the same path exists, copy-paste the one below just to be sure. Ensure that there are no spaces at the starting or end of the path below.
%SystemRoot%\System32\hidserv.dll

Once done, repeat the steps above for the following registry locations given below.
Additionally, if folders named ControlSet002 or more exist in the location below, then we recommend repeating the steps above for the Hidserv folder in those locations as well.
Once you have made these changes, restart your system, and HID service should be automatically working on your laptop again. If not, launch the service manually and you should no longer face Error code 2 on your laptop.
Laptop hotkeys can be quite finicky and we hope you were able to get the back up and running again on your system using the guides above. If you face any issues or have any questions for us, feel free to reach out using the comments section below.
Related:
Microsoft 장치에서 Apple의 운영 체제를 실행하는 방법을 단계별로 안내하는 가이드를 통해 Windows PC에 macOS를 설치하는 방법을 알아보세요.
스마트폰의 가장 일반적인 기능 중 하나는 스크린샷을 캡처하는 기능입니다. 시간이 지남에 따라 이러한 스크린샷을 찍는 방법이 진화해왔습니다.
Microsoft는 항상 업데이트와 최신 OS 반복을 통해 Windows에 새로운 변경 사항을 가져오려고 노력하는 아주 바쁜 회사입니다. 그러나 주님께서 주시는 것 같이 주님도 거두어 가십니다.
Zoom 회의는 전 세계 수백만 명의 학생과 일하는 전문가의 필수 요소가 되었습니다. Zoom 회의 종료 방법을 배우고 필요한 상황에 맞게 대처하세요.
Microsoft Edge는 문제를 해결하거나 새 릴리스의 버그를 건너뛰기 위해 이전 버전으로 롤백하는 두 가지 방법을 지원합니다. 방법은 다음과 같습니다.
Zoom은 전 세계 기업에서 사용하는 가장 인기 있는 협업 도구 중 하나입니다. 비용 효율적인 회의와 협업을 위해 꼭 필요한 정보를 제공합니다.
Google Meet의 볼륨을 조절하는 방법과 유용한 팁을 제공합니다.
Windows 11에서 창 게임 최적화를 활성화하려면 설정 > 시스템 > 디스플레이 > 그래픽, 기본 그래픽을 열고 기능을 켭니다.
Microsoft Teams는 팀원들과 원활하게 소통하기 위해 카메라를 테스트하는 최고의 방법을 제공합니다. 카메라 문제를 해결하는 방법을 알아보세요.
Windows 10에서 동기화 설정을 활성화 또는 비활성화하거나 개별 동기화 설정을 선택하려면 다음 단계를 사용할 수 있습니다.
Windows 11에서 개발자 모드를 쉽게 활성화할 수 있으며, 개발자용 설정 페이지에서 스위치를 켜는 단계를 안내합니다.
Windows 11에서 오래된 게임을 실행하는 방법에 대한 유용한 팁과 정보를 제공합니다.
Windows 11에서 Android 게임을 플레이하려면 Google Play 게임 또는 Android 플랫폼용 Windows 하위 시스템을 사용할 수 있습니다. 방법은 다음과 같습니다.
Windows 11에서 마우스 오버 시 검색 열기를 활성화하려면 명령 프롬프트(관리자)를 열고 vivetool /enable /id:43572857,43572692 명령을 실행합니다.
Windows 11에서 존재 감지 설정을 활성화하려면 설정 > 개인 정보 보호 및 보안 > 존재 감지를 열고 기능을 켜십시오.
작업 스케줄러에서 숨겨진 상태로 실행되도록 예약된 작업을 구성하려면 작업 일반 설정에서 사용자 로그온 여부에 관계없이 실행을 선택합니다.
Windows 11에서는 스냅 지원, 레이아웃(최대화 및 상단 화면), 스냅 그룹을 사용하여 키보드 및 마우스를 사용하여 창을 나란히 스냅하는 단계를 제공합니다.
Windows 11에서 작업 관리자 검색 표시줄을 활성화하려면 Vivetool /enable /id:39420424 명령을 사용하고 컴퓨터를 다시 시작하십시오.
Windows 11에서 새로운 제품 키 변경 UI를 활성화하려면 다음 vivetool /enable /id:36390579 및 vivetool /enable /id:42733866 명령을 실행하세요.
Windows 11에서 게임 성능을 향상하려면 메모리 무결성 및 가상 머신 플랫폼을 비활성화하세요. 단계는 다음과 같습니다.
Windows 11 보안 센터 서비스가 사라져서 어려움을 겪고 계신가요? 안전하고 간편하게 PC를 보호하고 서비스를 복원할 수 있는 검증된 단계별 해결 방법을 알아보세요. 최적의 보호를 위해 최신 방법으로 업데이트되었습니다.
Windows 11에서 Stream Deck 앱이 열리지 않아 어려움을 겪고 계신가요? Elgato Stream Deck을 다시 원활하게 실행할 수 있는 검증된 단계별 해결 방법을 알아보세요. 기술적인 전문 지식은 필요하지 않습니다!
Windows 11에서 내장 마이크 소리가 먹먹하게 들리시나요? 검증된 단계별 해결 방법을 통해 깨끗한 음질을 손쉽게 복원해 보세요. 지금 바로 마이크를 완벽하게 작동하도록 만들어 보세요!
Windows 11에서 코어 격리 기능이 켜지지 않아 어려움을 겪고 계신가요? 이 중요한 보안 기능을 활성화하고, 일반적인 문제를 해결하고, PC 성능을 향상시키는 단계별 해결 방법을 알아보세요.
Windows 11에서 느린 성능 때문에 어려움을 겪고 계신가요? PC 성능 향상을 위한 최적의 성능 플랜에 대한 단계별 해결 방법을 알아보세요.
Windows 11에서 wget 및 curl 명령 오류로 어려움을 겪고 계신가요? 이 단계별 가이드에서는 일반적인 문제, 빠른 해결 방법, 그리고 효율적인 문제 해결을 위한 전문가 팁을 다룹니다. 지금 바로 다운로드 및 API 호출을 다시 원활하게 실행하세요.
Windows 11에서 클래식 셸 또는 Start11 오류가 발생하여 어려움을 겪고 계신가요? 충돌, 호환성 문제 등을 해결하고 사용자 지정 시작 메뉴를 다시 사용할 수 있도록 단계별 해결 방법을 알아보세요. 최신 문제 해결 팁이 포함되어 있습니다.
Windows 11 DirectAccess 연결 오류로 어려움을 겪고 계신가요? 원활한 VPN 접속을 복원하고 생산성을 향상시키는 검증된 단계별 해결 방법을 확인해 보세요. 번거로움 없는 네트워크를 위한 최신 솔루션이 업데이트되었습니다.
윈도우 11 속도가 느려서 불편하신가요? 레지스트리 용량 증가 문제를 해결하고 속도를 최적화하여 PC 성능을 되찾는 검증된 방법을 알아보세요.
Windows 11 시작 로고 화면에서 멈춰서 답답하신가요? 2026년 버전을 위한 이 종합적인 문제 해결 가이드는 안전 모드부터 고급 복구까지 검증된 해결 방법을 제공하여 문제를 빠르고 간편하게 해결할 수 있도록 도와줍니다.
