Как очистить реестр в Windows 11 [4 способа]
![Как очистить реестр в Windows 11 [4 способа] Как очистить реестр в Windows 11 [4 способа]](https://cloudo3.com/resources8/images31/image-9744-0105182733836.png)
Реестр Windows - это банк памяти вашего ПК. Узнайте, как правильно очистить его в Windows 11 и ускорить работу вашего компьютера.

Горячие клавиши на ноутбуке - важные инструменты при попытке получить доступ к основным функциям на вашем устройстве. Они позволяют управлять громкостью, регулировать яркость , подсветку клавиатуры, поведение сенсорной панели и многое другое. В зависимости от вашего устройства у вас могут быть дополнительные горячие клавиши для специальных функций, таких как включение n одновременного нажатия клавиш, отключение сенсорной панели, отключение клавиатуры , активация режима полета, изменение режимов питания и многое другое.
Однако ваш ноутбук может потерять свою функциональность и эффективность, если ваши горячие клавиши перестанут работать. Это заставит вас изменить / отредактировать каждый параметр, используя соответствующие параметры в приложении Windows Settings, что может быть довольно громоздким. Если горячие клавиши ноутбука не работают на вашем ноутбуке, вы можете использовать следующие методы, чтобы исправить свои горячие клавиши.
Связанный: Как переместить панель задач наверх в Windows 11
СОДЕРЖАНИЕ
Почему не работают горячие клавиши?

Горячие клавиши на вашем ноутбуке могут перестать работать по нескольким причинам, но, поскольку Windows 11 является довольно новой, наиболее частой причиной, по-видимому, являются конфликты драйверов и конфликты OEM-утилит в фоновом режиме. Это связано с тем, что большинство драйверов, выпускаемых в настоящее время OEM-производителями, разработаны для Windows 10. Windows 11 вносит несколько различных изменений в фоновый режим и способ обработки драйверов, что, похоже, нарушает функциональность горячих клавиш на многих различных устройствах.
Наиболее затронутые устройства, похоже, принадлежат Asus и Lenovo из-за их специальных утилит, таких как Armory Crate Service, которые необходимо обновить для Windows 11. Это не означает, что другие производители освобождены от этой проблемы, многие устройства Dell и Acer также, похоже, теряют функциональность горячих клавиш с Windows 11.
Если у вас есть какое-либо из этих устройств или горячие клавиши вашего ноутбука в целом не работают в Windows 11, вы можете использовать приведенные ниже методы, чтобы попытаться решить вашу проблему. Давайте начнем.
Связанный: Как создать точку восстановления в Windows 11
Как исправить горячие клавиши на ноутбуках с Windows 11
Вы можете использовать следующие методы, чтобы снова попытаться заставить горячие клавиши работать на вашем ноутбуке. Методы перечислены в порядке их приоритета, а наиболее распространенные исправления перечислены вверху. Вы можете начать с первого исправления и пройтись по списку, чтобы попытаться найти исправление, которое подходит для вашей системы. Давайте начнем.
Метод №1: проверьте наличие обновлений OEM
Если у вас есть специальная утилита для управления горячими клавишами в фоновом режиме, такая как Armory Crate Service или утилита Synaptics, вы можете попробовать обновить драйверы с веб-сайта вашего OEM-производителя. Эти утилиты отличаются от конкретных драйверов клавиатуры и запускают в фоновом режиме службы и задачи, которые помогают активировать горячие клавиши на вашем ноутбуке.
Если какая-либо из этих утилит не работает или не работает, мы рекомендуем проверить наличие последних обновлений или переустановить текущую версию на вашем ноутбуке. Воспользуйтесь приведенными ниже ссылками, чтобы посетить сайт поддержки вашего OEM-производителя и проверить наличие последних обновлений утилит. Найдя их, щелкните, загрузите их в локальное хранилище и как можно скорее установите на свой ноутбук.
После установки горячие клавиши должны снова начать работать на вашем ноутбуке. Мы рекомендуем перезагрузить ноутбук, чтобы избежать конфликтов с ранее установленными версиями в фоновом режиме. Если горячие клавиши по-прежнему не работают, вы можете использовать приведенное ниже руководство для сброса и обновления OEM-утилит на своем ноутбуке.
Связанный: Как восстановить Windows 11
Метод № 2: убедитесь, что OEM-утилиты работают правильно
Если ваши OEM-утилиты не работают в фоновом режиме, вот несколько методов устранения неполадок, чтобы восстановить их функциональность. Давайте начнем.
Нажмите Windows + iна клавиатуре и нажмите «Приложения» слева.

Щелкните «Приложения и функции».

Найдите в этом списке соответствующее приложение и щелкните значок меню с тремя точками рядом с ним.

Выберите "Дополнительные параметры".

Теперь следуйте одному из разделов ниже, в зависимости от того, что вы хотите делать с выбранным приложением.
2.1 Включение фоновой функции
Щелкните раскрывающееся меню в разделе «Разрешения фоновых приложений» и выберите «Оптимизация энергопотребления» или «Всегда».

«Оптимизированное энергопотребление» позволит приложению работать в фоновом режиме в зависимости от вашего текущего плана электропитания. «Всегда», с другой стороны, даст приложению разрешение оставаться активным и работать в фоновом режиме независимо от выбранного вами плана управления питанием.
2.2 Восстановить приложение
Windows 11 также позволяет вам восстановить ваше приложение. Просто прокрутите вниз и сначала нажмите «Завершить».

Теперь нажмите «Восстановить».

Подождите, пока Windows сделает свое дело, как только рядом с опцией появится галочка, попробуйте запустить соответствующее приложение на своем ноутбуке.

Проверьте свои горячие клавиши сейчас, если из-за незначительной проблемы или конфликта приложение не работало в фоновом режиме, тогда функциональность горячих клавиш должна быть восстановлена на вашем ноутбуке.
2.3 Сбросить приложение
Если вышеуказанные методы не помогли вам, вы можете сбросить OEM-приложение. Это сбросит его данные и даст вам возможность начать заново, как если бы приложение было только что установлено на ваш ноутбук. Это должно помочь восстановить функциональность горячих клавиш в большинстве случаев. Однако имейте в виду, что данные вашего приложения будут сброшены, что заставит вас повторно войти в приложение, если это применимо. Кроме того, все изменения или настройки, внесенные вами в приложение, также будут сброшены. Следуйте инструкциям ниже, чтобы начать работу.
Нажмите «Завершить», чтобы закрыть приложение.

Теперь нажмите «Сброс».

Снова нажмите «Сброс», чтобы подтвердить свой выбор.

Теперь приложение будет сброшено на вашем ноутбуке. Мы рекомендуем перезагрузить ноутбук и попробовать еще раз использовать горячие клавиши. Если приложение не работало должным образом в Windows 11, тогда функциональность горячих клавиш должна быть восстановлена на вашем ноутбуке.
Способ №3: Обновите драйверы
Еще одна причина неисправности вашей клавиатуры - устаревшие драйверы. Если вы ранее не обновляли драйверы клавиатуры, вероятно, это причина того, что горячие клавиши клавиатуры не работают в Windows 11. Windows 11 по-другому управляет и устанавливает драйверы, более того, в некоторых случаях Windows 11, как известно, замените драйвер OEM-клавиатуры на универсальный драйвер, если он самый последний.
Если горячие клавиши по-прежнему не работают, мы рекомендуем обновить драйверы и установить последние версии драйверов клавиатуры, доступные у вашего OEM-производителя. Просто посетите свой сайт OEM, используя одну из приведенных ниже ссылок, и загрузите соответствующий драйвер в локальное хранилище.
Once downloaded, install the driver and restart your laptop. Deny any keyboard driver updates offered by Windows 11 and your hotkeys should start working again. Use the links below to get you started.
If your keyboard drivers are still outdated and hotkeys are not working then it might be time to check for driver updates via Windows. Your OEM is likely delivering the latest driver updates to you via Windows Updates. Check for keyboard driver updates in Windows updates on your laptop using the guide below. We will first make sure that your laptop is receiving driver updates via Windows Update. Follow the guide below to get you started.
Press Windows + S on your keyboard and search for ‘Change device installation settings’. Click and launch the app once it shows up in your search results.

Select ‘Yes (recommended)’.

Click on ‘Save changes’.

Wait for Windows to enable driver updates for your laptop. Once enabled close the device installation settings window and press Windows + i on your keyboard. Select ‘Windows Update’ from your left.

Click on ‘Check updates’ at the top and install any updates that show up.

Once installed, click on ‘Advanced options’ at the bottom.

Now click on ‘Optional updates’.

Click and expand ‘Driver updates (n)’ where n represents the current number of driver updates available for your laptop. Check the box for any keyboard drivers that show up in this list. Click on ‘Download & install’ at the bottom of your screen. Restart your laptop for good measure even if not prompted by a Windows update.
And that’s it! Your latest keyboard drivers should now be installed on your laptop which should help restore hotkeys functionality for you. If not, you can continue with the fixes below to try and fix your hotkeys.
Method #4: Reinstall keyboard drivers
If none of the methods above work for you, then it’s time to reinstall your keyboard drivers. While drivers rarely face conflicts in the background, botched installations, incompatible components, and wrong updates can mess up your keyboard drivers, especially if you have custom RGB backlighting managed by an OEM utility.
Each of these apps uses a different way of hooking into your keyboard backlighting to help customize it according to your needs. These ways to hook into the system don’t play well with other third-party apps managing your keyboard mapping, layout, and more. Reinstalling your keyboard driver can help fix most such issues, and you can do so by either installing a dedicated driver from your OEM or by using a generic driver sourced by Windows. Let’s get started.
4.1 Reinstall generic keyboard driver
Press Windows + X on your keyboard and click on ‘Device Manager’.

Once opened, find your concerned keyboard in the list and right-click on it. If you can’t find your keyboard or have multiple listings, then you can select and uninstall all of them. Once uninstalled, leftover drivers will be removed while the necessary ones will be automatically re-downloaded.

Click on ‘Uninstall device’.

Click on ‘Uninstall’ again to confirm your choice.

Restart your laptop if prompted, and repeat the steps above to remove all necessary keyboard drivers installed on your system. Once uninstalled, right-click on an empty area and select ‘Scan for hardware changes’. You can also click on the dedicated icon for the same in your toolbar.

Windows will now look for generic missing drivers for your native keyboard and reinstall them automatically on your laptop.
If however, your drivers aren’t found by Windows, then you can use the guide below to manually install the dedicated keyboard drivers from your OEM.
4.2 Reinstall keyboard drivers manually
Download and install the necessary keyboard drivers to your local storage. Ensure that you extract the file beforehand in case you downloaded an archive. You should find a .inf file inside which is the driver we will be installed manually on your system. Follow the steps below to get you started.
Press Windows + X on your keyboard and select ‘Device Manager’.

Now expand the ‘Keyboards’ section and right-click on your concerned keyboard. If you have multiple HID devices under ‘Keyboards’ then we recommend you uninstall all unnecessary drivers to avoid conflicts.

Select ‘Uninstall device’.

Check the box for ‘Attempt to remove the driver for this device’ if the option is available. Click on ‘Uninstall’ to confirm your choice.

The selected keyboard will now be uninstalled from your system. Your keyboard will stop working after the concerned driver has been uninstalled. This is normal behavior and your keyboard’s functionality should be restored once we reinstall the necessary drivers. Repeat the steps above for all HID devices you wish to remove. Once the necessary devices have been removed, click on the ‘Add drivers’ icon in your toolbar.

Click on ‘Browse’.

Navigate to the folder where you have stored your OEM drivers and click on ‘OK’.

Check the box for ‘Include subfolders’ just to be safe. Click on ‘Next’ once you are done.

Windows will now scan the location for compatible drivers and automatically install them on your system.
Once installed, we recommend you restart your laptop for good measure.
And that’s it! Your hotkey functionality should now be restored on your system if a background driver conflict was causing issues on your system.
Note: Do not install any keyboard drivers via Windows Update in the future to avoid losing hotkey functionality again.
Method #5: Disable gaming mode
Gaming mode within Windows is known to cause issues on certain laptops. Microsoft’s gaming mode has gotten smarter and the mode automatically tries to apply the best peripheral settings for your gaming experience. This includes tweaking your audio, mouse settings, enabling n key rollover on your keyboard, windows key lock, and a lot more.
However, automatically enabling these settings requires hooking into dedicated drivers and tools which are often managed by your OEM. This could create conflicts in the background which might be preventing you from using your hotkeys on Windows 11. Use the guide below to disable gaming mode on your laptop.
Press Windows + i on your keyboard and click on ‘Personalization’ on your left.

Click on ‘Device usage’.

Disable the toggle for ‘Gaming’.

Click on ‘Gaming’ on your left now.

Click on ‘Game Mode’ on your right.

Disable the toggle for ‘Game mode’ at the top of your screen.

Close the Settings app and restart your laptop.
If your hotkeys start working upon a restart then game mode was likely interfering with your hotkeys in the background.
Method #6: Restart HID service
You can also restart your HID service which should help restart all your HID or Human Interface Devices. This includes your keyboard and restarting the HID service should help fix your hotkeys if your custom software or mapper was unable to hook into the HID service. Use the guide below to get you started.
Press Windows + S and search for ‘Services’. Click and launch the app once it shows up in your search results.

Look for ‘Human Interface Device Service’ and right-click on it.

Select ‘Restart’.

Windows will now restart your HID service.

You can try testing out your hotkeys now. If a conflict in the background was preventing your custom software from hooking into the HID service, then this issue should now be fixed and your hotkey functionality should now be restored.
Method #7: Disable filter keys
Filter keys are another culprit within Windows that is known to cause issues on many devices. Ideally, Filter keys is an accessibility feature meant to be used so that you can avoid brief repeated key inputs which is quite useful for users with anxiety, hyperactivity, hand tremors, and other similar conditions.
However, if this feature has been enabled by mistake, then it could prevent Windows from detecting your hotkey inputs and combinations. You can check if Filter keys are enabled on your system and disable them using the guide below.
Press Windows + S and search for Control Panel. Click and launch the app once it shows up in your search results.

Switch to ‘Large icons’ by clicking on the drop-down menu in the top right corner.

Click on ‘Ease of Access Center’.

Click on ‘Make the keyboard easier to use’.

Now uncheck the box for ‘Turn on filter keys’.

Click on ‘Ok’ at the bottom.

And that’s it! Filter keys should now be disabled on your system. Check your hotkey combinations and their functionality should now be restored on your system.
Method #8: Disable Function (Fn) lock if available
Fn lock is a feature in most laptops that allows you to lock and use the Fn keys and their functionality. Most systems use Fn keys as alternate keys mapped to functions and utilities that will be needed to manage your system. For example, F7 could be used to increase brightness and F8 could be used to decrease brightness. If directly pressing these keys helps you manage your brightness then the Fn lock is disabled on your laptop.

However, if hitting F7 and F8 registers as the respective key then the Fn lock is enabled on your device. In such cases, your Fn keys will behave normally and you will need to use Fn + F7 or F8 combination to adjust your brightness. You can disable or toggle this lock using keyboard shortcuts on most laptops. Look for an ‘Fn Lock’ icon on one of your keys and pres Fn + the respective key, on your keyboard. This should help disable Fn lock on your keyboard if enabled, and restore your hotkeys functionality.
In case a key combination is not available on your device, then you will most likely need to access your BIOS. Most manufacturers allow you to disable and enable Fn lock from the BIOS for easy access. Simply press F2 on your splash screen once your laptop is booting to enter the BIOS menu. Once in the BIOS menu, find the relevant option and toggle the Fn lock for your laptop.
In case a BIOS menu option is also not available to you then your laptop most likely uses the default Fn lock combination which is ‘Fn + Esc’ on your keyboard. This will help toggle the Fn lock on your system which should help restore your hotkeys.
Method #9: Check the on-screen keyboard
On-Screen keyboard within Windows can help you determine if your hotkeys have actually stopped working or you are facing a software issue. Start by launching the on-screen keyboard on your laptop using the taskbar icon. If the icon is hidden, press Windows + S on your keyboard and search for ‘On-Screen Keyboard’. Click and launch the app from your search results.

Now try using a hotkey that does not use Fn keys on your keyboard as they would be unavailable on your on-screen keyboard. If not try testing out each key and see if it still works on your laptop.

If all your keys seem to be registering with hotkeys working via the on-screen keyboard, then this indicates a hardware issue with your keyboard. In such cases, we recommend you get in touch with your OEM support team and try to solve your issue. If however, you are unable to activate your hotkeys via the on-screen keyboard as well, then you can use the fixes below to try and solve your issue.
Method #10: Use Windows troubleshooter
If hotkeys still fail to work on your system then it’s time to run a dedicated Windows troubleshooter. Windows troubleshooters have become highly advanced in the past few years and they can help fix most issues with your system nowadays. Use the guide below to run a keyboard troubleshooter on Windows 11.
Press Windows + i on your keyboard and click on ‘Troubleshoot’ on your right.

Now click on ‘Other troubleshooters’.

Scroll down and click on ‘Run’ beside ‘Keyboard’.

Windows troubleshooter will now do its thing and try to find issues with your keyboard.

If any are found, follow the on-screen instructions to apply the relevant fixes. However, if the troubleshooter does not find anything then you can use the methods below to try and get your hotkeys working again.
Method #11: Run SFC scan
If hotkeys still aren’t working on your laptop then this might indicate an issue with your Windows installation. Let’s try to fix Windows system files and Windows 11 image on your laptop to try and fix hotkeys on your system. Use the guide below to get you started.
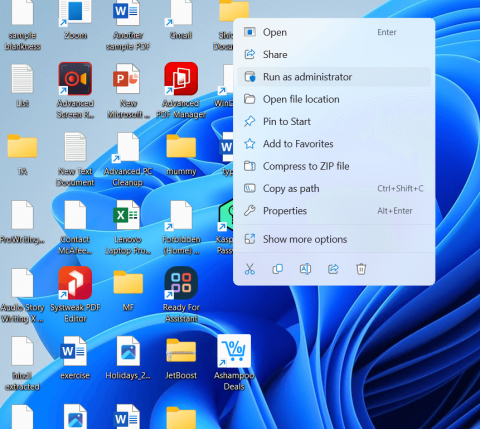
Press Windows + S on your keyboard and search for ‘CMD’. Click on ‘Run as administrator’ once it shows up in your search results.

Now type in the following command and press Enter on your keyboard to execute it.
sfc /scannow

Windows will now scan and verify all of your system files and replace corrupted ones with fresh system files. If a corrupted Windows 11 installation broke your hotkeys functionality, then this should help fix it on your laptop.
Method #12: Run DISM fixes to restore Windows image
If you got the following message after running the SFC scan above, then it is highly important to run the DISM commands to fix your Windows 11 image.
“Windows Resource Protection found corrupt files but was unable to fix some (or all) of them”
Additionally, if the SFC scan is completed successfully but your hotkeys still do not work, then you can use the DISM commands to try and fix your Windows image as well. This will restore system files and solve background conflicts that might be preventing you from using your hotkeys. Follow the steps below to get you started.
Press Windows + S on your keyboard, search for CMD and click on ‘Run as administrator’ once it shows up in your search results.

Type in the following command and press Enter on your keyboard to execute it.
DISM /Online /Cleanup-Image /RestoreHealth

Wait for the process to complete and restart your laptop for good measure.
If a corrupted Windows image was the cause of your issue, then hotkey functionality should now be restored on your laptop.
Method #13: Uninstall any third-party tools
If you have any third-party tools customizing your keyboard then we recommend you disable or uninstall them at once. This includes the likes of key mappers, macro customizers, keyboard backlighting customizers, keyboard layout changes, and more. Such apps use different ways to hook into your keyboard drivers via Windows and any one of these could be outdated and not compatible with Windows 11 on your system.
We recommend you uninstall any such tools from your system at the earliest and remove any additional leftover configuration files if available. You should also check for driver updates to your keyboard and roll back to a previously known driver to revert any major changes applicable to your system. Use the guide below to roll back your keyboard driver.
13.1 How to rollback your keyboard driver
Press Windows + X on your keyboard and click on ‘Device manager’.

Find the desired keyboard in your list of devices and right-click on it once found.

Select ‘Properties’.

Click and switch to the Driver tab.

Click on ‘Rollback driver’ if available.

Follow the on-screen instructions to finish rolling back your driver.
Restart your system if prompted.
Once the driver is reverted to its previous iteration hotkeys should start working on your system again.
However, if you don’t have the option to roll back your driver then you will need to uninstall the installed drivers for your keyboard and hope that Windows sources the correct drivers when it scans for new hardware on your system. If you have dedicated drivers available for your keyboard on your OEM support site, then you can install them manually. Follow Method #10 below to reinstall your keyboard drivers manually or through Windows in this case.
Method #14: Connect to a different USB port (external keyboards only)

If you are using an external keyboard then we recommend using a different USB port. Depending on your keyboard you might need a USB 2.0 or USB 3.0 port for compatibility and keyboard layout reasons. Additionally, if your keyboard uses fancy backlighting and other custom features then it likely requires a USB 3.0 port on your system to power all of its features.
In contrast, if you are trying to use a legacy keyboard via adapters then you will likely need to test USB 2.0 and USB 1.2 for best performance depending on your unit. Moreover, we recommend you ensure that your laptop is plugged into power so that it can power your USB ports properly.
If however, your external keyboard still fails to work then you can try reinstalling its drivers on your system using the guide in this post.
Method #15: Check GPO and re-enable hotkeys if disabled
If you are using Windows Pro or higher that has been issued by your organization or your educational institute then it is likely that hotkeys have been disabled on your system by your administrator. This could be a side effect due to a recent change, or it could be your new company policy.
Administrators tend to disable third-party apps on company-issued and education systems which also, in turn, disables hotkey functionality for most laptops. You can fix this issue by contacting your administrator and whitelisting your hotkey app in case you don’t have access to the Group Policy Editor. However,
If you are an administrator, with access to GPO, then you can use the guide below to re-enable hotkeys on your system.
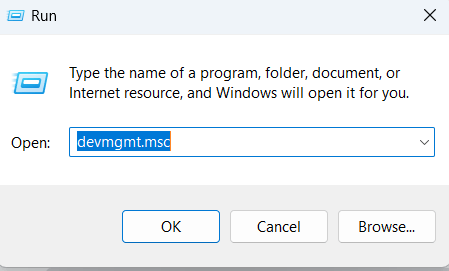
Press Windows + R on your keyboard, type in the following term, and press Enter on your keyboard.
gpedit.msc

Navigate to the following path.
User Configuration > Administrative Templates > Windows Components > File Explorer
Double click on ‘Turn off Windows Key hotkeys’.

Click and select ‘Enabled’ in the top left. Then click ‘Apply’ in the bottom right and then click ‘OK’.

Restart your laptop for good measure and hotkey functionality will now be restored on your system. Please keep in mind that this will only work for OEMs that hook into Windows shortcuts natively to get hotkeys working again. For manufacturers that have dedicated utilities, you can use one of the guides below.
Fix hotkeys for Asus Users
If you are an Asus user with a ROG or a TUF unit, then it is likely that you are dealing with Armoury Crate. Armoury Crate is Asus’s utility that helps you manage your power plan, performance plan, overclocking, keyboard backlighting, and more depending on your laptop. Over the years Armoury Crate has grown to be quite finicky and has been riddled with telemetry and adware.
Moreover, the Aura Sync utility seems to be a hit or miss when syncing your peripherals’ backlighting with each other. If you have an Asus unit and hotkeys don’t seem to be working for you then it is likely that the Asus hotkeys app hasn’t been launching in the background. In this case, you can either try to manually start the app or reinstall AC service and the Asus System interface reconfigure your hotkeys and restore their functionality. Use one of the guides below that best fits your current needs and requirements.
Method #1: Try to manually start AsusHotkeyExec.exe
Press Ctrl + Shift + Esc on your system to open the Task Manager and switch to the ‘Details’ tab.

Depending on your preferences, the install location of AsusHotKeyExec.exe could vary. Hence we will use an already running process to find its install location. Start by right-clicking on either of the following ongoing tasks.

Select ‘Open file location’.

You should now be taken to the ‘C:\Windows\System32’ ideally, where you should find the ‘AsusHotkeyExec.exe’. Right-click on the app and select ‘Run as administrator’.

The app will now launch in the background and restore hotkey functionality on your system.
Try using one of your hotkeys now, if it seems to be working then, likely, AsusHotkeyExec.exe did not automatically launch in the background. This could be an isolated incident but if the app fails to launch even after a restart, then you will need to re-enable its auto start functionality.
You can do this by reinstalling Asus System Interface and Armoury Crate Service on your laptop using the guide below.
Method #2: Re-install Asus System Interface and Armoury Crate service
Asus System Control Interface is a prominent utility regularly updated by Asus that helps most tools like Armoury Crate, Armoury Crate Service, MyAsus System Diagnosis, and more to run properly on your system. Armoury Crate service on the other hand is your overclocking utility bundled with specific overclocking and power management configurations for your specific device. Depending on your ROG or TUF unit, AsusHotkeyExec.exe could be bundled with either of these services. Let’s re-install both of them on your system.
Visit the link above and click on ‘Laptops’.

Click on ‘Product Series’ and select your Series from the drop-down menu.

Click on the next drop-down menu and select your laptop from the list.

If your unit is not listed in this list, then you can search for it using the search bar at the top. Click on your laptop model once it shows up in your search results under ‘Products’.

Click on ‘Driver & Utility’.

Choose ‘Windows 10 64-bit’ as your OS.

Now scroll down to the ‘Software and Utility’ section and click on ‘Show all’.

Click on ‘Download’ beside the latest version of ASUS System Control Interface.

Similarly, click on ‘Download’ beside Armoury Crate Service.

Note: Asus has now started bundling the Armoury Crate app, Armoury Crate Service, Aura Sync app, and Aura Sync service in a single package for many laptops. If this is the case for your unit as well, then you can download this package.
Now let’s remove all installed services and packages that we are going to reinstall. Press Windows + i on your keyboard and click on ‘Apps’ on your left.

Click on ‘Apps and features’.

Now uninstall the following applications if you managed to source the Armoury Crate Service package from the download page.

However, if you got a single package to install Armoury Crate, Armoury Crate Service, Aura Sync app, and Aura Sync service, then uninstall the following applications from your laptop.
To uninstall an app, click on the 3-dot menu beside it and select ‘Uninstall’. Click on ‘Uninstall’ again to confirm your choice. Repeat the steps above to uninstall all the necessary apps from your system.
Note: Do not remove services like Refresh Rate service, Pointing device service, and more from your laptop during this process. Even though they hook into the Armoury crate, there is no need to uninstall them as the existing installation will work with your reinstalled Armoury Crate and its services.
We will now uninstall Asus System Control Interface from your system. The best way to do this is by using the Device Manager. Follow the guide below to get you started.
Press Windows + X on your keyboard instead and select ‘Device Manager’.

Click and expand ‘System devices’ in Device Manager.
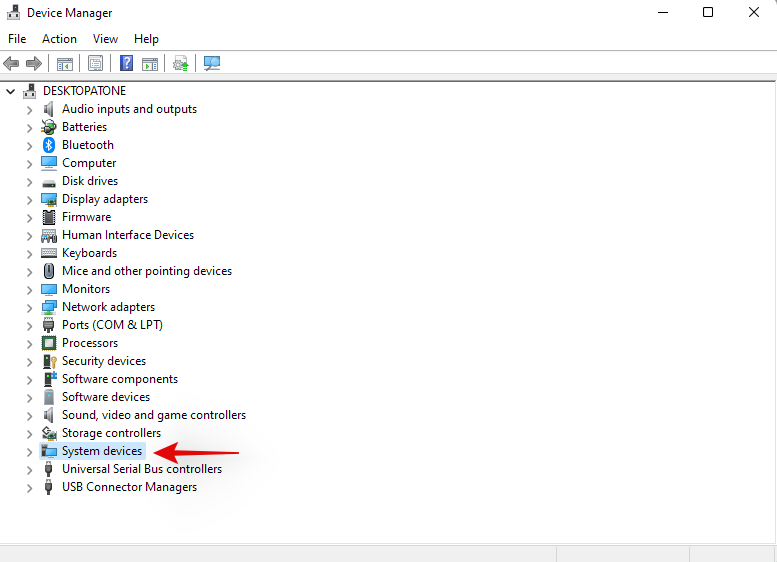
Right-click on ‘Asus System Control Interface’ and select ‘Uninstall device’.

Click on ‘Uninstall’ to confirm your choice. Additionally, check the box for ‘Attempt to remove the driver for this device’ if available.

If Asus System Control Interface is unavailable in your device manager then you can restart your laptop at this point. Once restarted, follow the subsequent steps to re-install Armoury Crate and Asus System Control Interface on your system. The concerned drivers will now be uninstalled from your system. You can now restart your laptop for the changes to take effect.
Once your laptop restarts, navigate to the packages we downloaded from Asus’s website on your local storage and start by installing Asus System Control Interface first. Double-click and launch the .exe file and follow the on-screen instructions to install Asus System Control Interface on your laptop. You will be prompted to restart your system once the process completes. We recommend you restart your system at this point before proceeding with the installation of Armoury Crate on your system.
Once your system restarts, double click and launch the Armoury Crate package.
Select the utilities you wish to install on your system. Unless you have other Asus peripherals that support RGB backlighting through Aura Sync, there is no point in installing Aura Sync. Once you have selected the desired utilities, click on ‘Next’.
Click on ‘Install’ to start the installation process.
The package will now connect to Asus’s servers, identify your laptop and install the necessary compatible utilities. Once installed, we recommend you restart your system for good measure.
And that’s it! Once your system restarts, hotkeys should be back up and running again on your system.
Fix hotkeys for Lenovo users
If you own a Lenovo unit especially from the ThinkPad or IdeaPad series, then you will need to try out the following fixes. Lenovo’s professional lineup of laptops is bundled with tons of hotkeys and there are mainly 3 fixes you can try to fix your issue. Let’s first verify if your hotkeys have actually stopped working. Follow the steps below to get you started.
Method #1: Disable all shortcuts and enhancements
Let’s start by disabling all keyboard shortcuts and keyboard enhancements within Windows for your laptop’s keyboard. Follow the guide below to get you started.
Press Windows + S on your keyboard and search for ‘Control Panel’. Click and launch the app from your search results.

Click on the drop-down menu in the top right corner and select ‘Large icons’.

Click on ‘Ease of access center’.

Click on ‘Make the keyboard easier to use’.

Uncheck all the options available on your screen.

Save your changes and restart your laptop for good measure.

If keyboard enhancements enabled by Windows were causing conflicts with your hotkeys, then your hotkey functionality should be restored on your laptop by now.
Method #2: Update your drivers using Lenovo support
You might have manually updated your drivers, you might have reinstalled and rolled back your drivers, but this isn’t similar to downloading and installing drivers through the support app. Most OEM support apps are designed to automatically scan for known issues with your hardware in the background and fix them automatically. These support app also come with hotfixes and patches that aren’t readily available to the end consumer. These hotfixes and patches are applied when downloading and installing the concerned driver or utility,
Hence we recommend that you download and reinstall the following drivers on your system through the Lenovo support app. Depending on your unit’s make and model, you could be using a different Lenovo app like Lenovo Vantage and more. The process is similar for all these apps and you simply need to manually uninstall your keyboard drivers first and then reinstall the corresponding ones from your support app.
Note: We won’t be removing your power management drivers and instead we will be simply reinstalling them. Removing power management drivers can end up harming your vital components especially if your laptop is doing some resource-heavy work in the background.
Press Windows + X and select ‘Device Manager’.

Find your keyboard under ‘Keyboards’ and right-click on it.

Select ‘Uninstall device’.

Check the box for ‘Attempt to remove the driver for this device’ if available. Click on ‘Uninstall’.

Your keyboard driver will now be uninstalled. Open the Lenovo System Update, Lenovo Vantage, or the corresponding Lenovo support app depending on your current laptop. We will be using the Lenovo System update app for this guide as that will be used by most modern systems currently and in the future. If you do not have the app installed on your unit, then you can use the link below to download it to your laptop.
Download and install the app on your system using the link above. Once installed, launch the app and log in with your device and account details if prompted.
Click on ‘Get new updates’ on your left.
Lenovo System update app will now detect your configuration and look for compatible upgrades accordingly. Once the process completes, all available updates will be shown on your screen according to their priority. Check each of the following sections and check the boxes for the updates you wish to install on your laptop. Your keyboard driver will also show up in this list as it is currently missing from your system. Ensure that you check the box for your keyboard driver before moving to the next step.
Note: Do not check the boxes for your bios updates. We recommend you download and install bios updates, individually and separately so that your laptop does not face installation conflicts in the background during this process.
Click on ‘Download’ in the bottom right corner.
Lenovo system update will now download and install all the selected drivers on your system. Your laptop could automatically restart a few times during this process which is normal. Simply log back into your account and wait until the installation process has been completed.
Once all the drivers are installed on your system, try using your keyboard hotkeys again. In most cases for Lenovo devices, your hotkeys should be back up and running on your system again. Lenovo is known to apply certain patches in the background when installing hotkey drivers and create certain tasks to maintain the functionality of your hotkeys. A reinstallation should have reinitiated this process again which should have fixed your hotkeys.
Fix hotkeys for Acer users
If you are using an Acer system then there isn’t much you can do at this point. Acer is known to keep its hotkeys simple with minimal customization available to the end-user. This in turn means that if the above-stated general fixes did not work for you then it is unlikely that resetting the CMOS will. However, if you have overclocked your unit or have been messing around with voltage values, then you can try resetting your CMOS to get hotkeys back up and running on your system again.
Resetting the CMOS does a lot of things but it mainly helps reset changes to core system values like your voltage, frequency speed, and more. Resetting the CMOS also helps discharge capacitors on some laptops which can give you a sudo-fresh start which is known to solve many persistent errors and issues with systems in the past. Use this comprehensive guide by us to reset your CMOS on your Acer unit.
Check out: How to Reset BIOS in Windows 11
Facing error codes when restarting HID services? Try these fixes!

If you decided to restart your HID service using the guide at the top, then you could end up facing two common errors depending on how your system has been configured. These are known errors and can be fixed on your system using the guides below. Follow the steps to get you started.
Method #1: For error code 126
Error code 126 can be fixed by replacing the Hidserv.dll to your system 32 folder. Follow the guide below to get you started.
Note: You will need a Windows 11 installation media or ISO in case the .dll file is unavailable on your system. Make sure you have either of these handy before proceeding with the guide below. In case you do not have an installation media handy, then you can use the link below to download Hidserv.dll to your local storage.
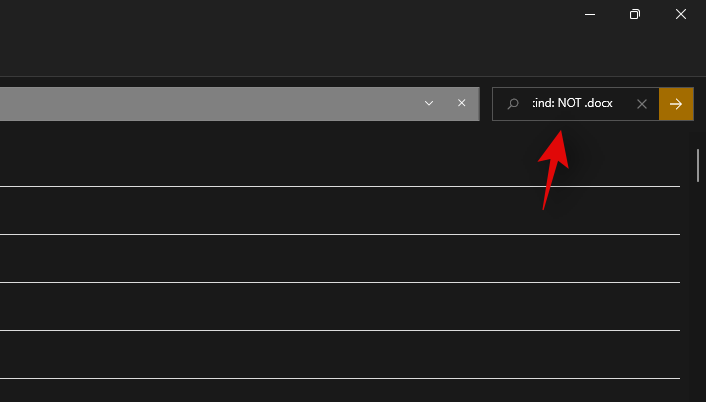
Open the Windows installation media you have handy and search for Hidserv.dll using the search box in your top right corner.
Once found, copy the file to a convenient location on your local storage. If however, you downloaded the file to your local storage using the link above, then extract the archive to a convenient location and follow the steps below to edit its security permissions.

Right-click on the downloaded Hidserv.dll and select ‘Properties’.

We will now need to manually grant permissions to the necessary users and applications so that Hidserv.dll can work properly on your system. Switch to the Security tab at the top.

Click on ‘Edit’ at the top.

Click on ‘System’ at the top and check the box for ‘Write’

Click on ‘Apply’ once done. Select ‘Yes’ to confirm your choice. Repeat the steps above and restrict permissions for Administrators and other users in the list above. Once you are done, click on ‘Add’.

Now enter the following term and press Enter on your keyboard.
All Application Packages

Select the following permissions for ‘ALL APPLICATION PACKAGES’.

Similarly, click on ‘Add’ again.

Now enter the following term and click on ‘Ok’.
NT Service\TrustedInstaller

Check the boxes for the same permissions as we did for the application packages above.

We now need to add permissions for restricted UMP packages on your system. There is no way to do this using the Windows File Explorer, so we will be using a PowerShell script instead. Press Windows + S on your keyboard and search for PowerShell. Click on ‘Run as administrator’ once it shows up in your search results.

Once PowerShell launches, copy and paste the code below in your PowerShell window. Do not execute the commands just yet.

$user = [Security.Principal.NTAccount]::new("ALL RESTRICTED APPLICATION PACKAGES").Translate([System.Security.Principal.SecurityIdentifier])
$rule = [Security.AccessControl.FileSystemAccessRule]::new($user, "ReadAndExecute", "Allow")
$directory = PATH
$acl = Get-Acl $directory
$acl.SetAccessRule($rule)
Set-Acl -Path $directory -AclObject $acl
Now navigate to the Hidserv.dll file that we just edited the permissions for and right-click on it. Select ‘Copy as path’.

Go back to your PowerShell window and replace “PATH” with the path we just copied.

Once replaced, hit Enter on your keyboard to execute the command. Once completed, the new permissions for restricted application packages should now be added to your new Hidserv.dll file.

Note: If you are typing in the path manually then you will need to include in double-quotes as shown in the final screenshot. Pasting a copied path using the method above will automatically add double quotes to it.
It’s now time to replace or add the file to your boot directory. Navigate to the Hidserv.dll file we just created and copy it to your clipboard.

Press Windows + E on your keyboard and navigate to the following path.
C:\Windows\System32

Paste your file in this location. Click on ‘Replace the file in the destination’.

Click on ‘Yes’ to grant the necessary administrator permissions. Once the file is replaced, restart your system for good measure. You can now check your HID services in the Services app to see if it is back up and running again. If not, you can try starting it manually, and you should no longer be facing Error code 126 on your system.
Method #2: For Error code 2
If you are getting Error code 2 after trying to restart the HID service then there could be a couple of reasons why you are facing this error. The main reason is due to unwanted registry changes for the HID service. This could have happened due to recently applied manual hacks or registry cleaners used by you. We will need to check for these changes and revert them if any have been made on your system. Follow the guide below to get you started.
Press Windows + R on your keyboard, type in the following term, and hit Enter on your keyboard.
regedit

Navigate to the following registry key. You can also copy-paste the same in the address bar at the top of your screen.
Computer\HKEY_LOCAL_MACHINE\SYSTEM\ControlSet001\Services\hidserv
Double click on the ‘Type’ value on your right.

Set the value to ’20’ if it is something different and click on ‘Ok’.

Now click on ‘Parameters’ under Hidserv on your left.

Double click on ServiceDll on your right.
Enter the following path in its Value data field. Even if the same path exists, copy-paste the one below just to be sure. Ensure that there are no spaces at the starting or end of the path below.
%SystemRoot%\System32\hidserv.dll

Once done, repeat the steps above for the following registry locations given below.
Additionally, if folders named ControlSet002 or more exist in the location below, then we recommend repeating the steps above for the Hidserv folder in those locations as well.
Once you have made these changes, restart your system, and HID service should be automatically working on your laptop again. If not, launch the service manually and you should no longer face Error code 2 on your laptop.
Laptop hotkeys can be quite finicky and we hope you were able to get the back up and running again on your system using the guides above. If you face any issues or have any questions for us, feel free to reach out using the comments section below.
Related:
Реестр Windows - это банк памяти вашего ПК. Узнайте, как правильно очистить его в Windows 11 и ускорить работу вашего компьютера.
Изучите эффективные методы решения неприятной проблемы с бесконечным экраном загрузки Skyrim, гарантируя более плавный и бесперебойный игровой процесс.
Я внезапно не могу работать со своим сенсорным экраном, на который жалуется HID. Я понятия не имею, что поразило мой компьютер. Если это вы, вот несколько исправлений.
Хотите знать, как транслировать «Аквамен», даже если он недоступен для потоковой передачи в вашей стране? Читайте дальше, и к концу статьи вы сможете насладиться Акваменом.
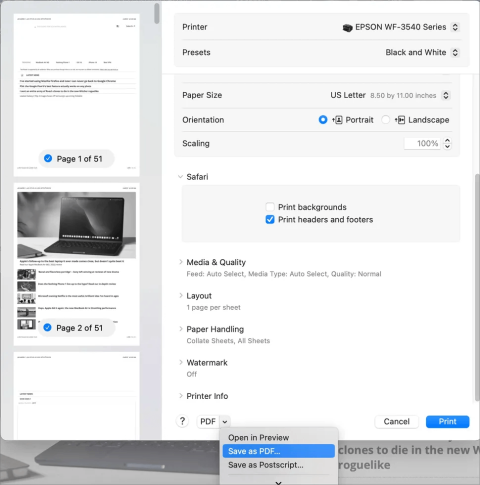
Узнайте, как легко сохранить веб-страницу в формате PDF, а также откройте для себя различные методы и инструменты для преобразования веб-контента в переносимые файлы PDF для автономного доступа и совместного использования.
Этот блог поможет пользователям загрузить, установить и обновить драйвер Logitech G510, чтобы они могли в полной мере использовать функции этой клавиатуры Logitech.
Изучите шаги по устранению неполадок и проверенные методы решения проблем с задержкой в Rainbow Six Siege, чтобы обеспечить более плавный и приятный игровой процесс.
Что конвертировать PDF-файл в текстовый файл? Не волнуйтесь, в этом руководстве вы найдете два простейших метода преобразования PDF-файла в текстовый файл.
Редактор групповой политики может не работать на вашем компьютере из-за ошибки gpedit.msc не найден. Вот как это исправить!
Google Найти мое устройство не работает? Не волнуйтесь, блог предоставит вам подробное руководство по устранению неполадок и решению проблем с Google Find My Device.
Изучите пошаговые решения, адаптированные для систем Mac, обеспечивающие бесперебойную работу Discord без сбоев.
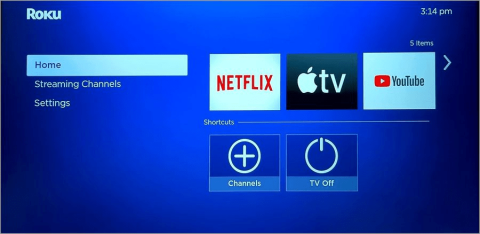
Изучите шаги по устранению неполадок, чтобы решить распространенные проблемы и беспрепятственно вернуть потоковую передачу Netflix на Roku.
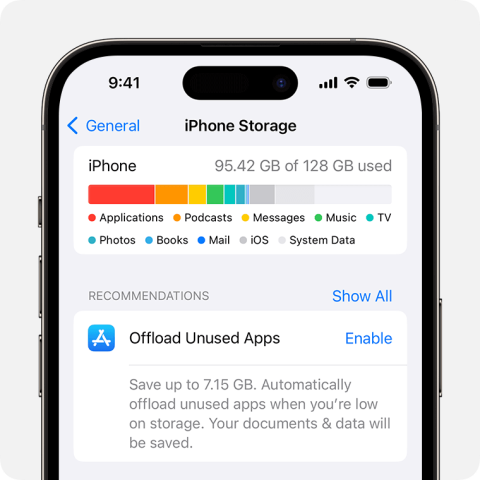
Узнайте, как эффективно увеличить объем памяти вашего iPhone, с помощью нашего подробного руководства. Узнайте практические шаги и варианты, которые помогут вам никогда больше не исчерпать место для своих дорогих воспоминаний и важных данных.
Знаете ли вы, как увидеть все приложения, отслеживающие вас на Facebook? И есть ли у вас идеи, как их заблокировать? Читайте дальше, чтобы узнать, как защитить ваши данные от приложений, отслеживаемых Facebook.
Этот блог поможет читателям загрузить и обновить драйвер Canon MF237W для Windows 11/10, выполнив действия, рекомендованные экспертами.
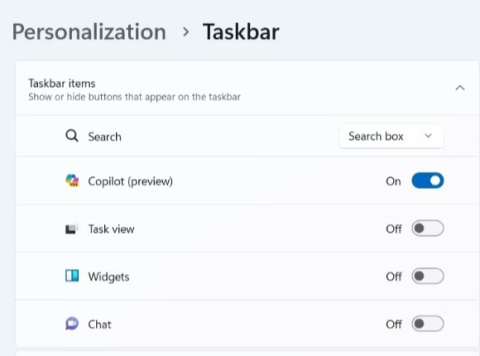
Этот блог поможет читателям отключить функцию Copilot в Windows, если они не хотят использовать модель искусственного интеллекта.
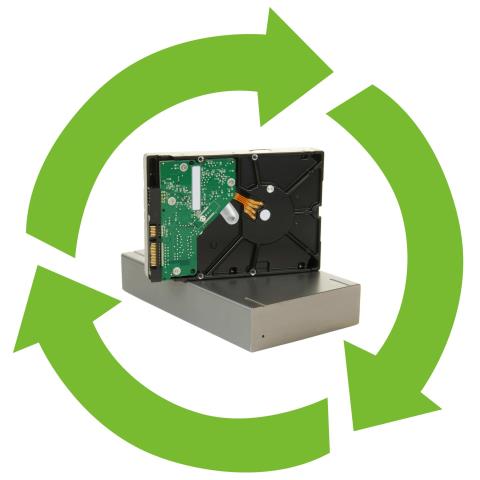
Покупаете новый внешний диск? Сэкономьте немного денег и преобразуйте свой старый жесткий диск во внешний жесткий диск. Прочтите, чтобы узнать больше о переоборудовании и типах корпусов для вашего нового жесткого диска.
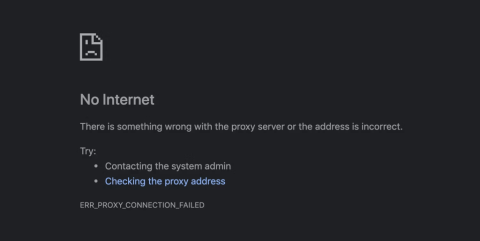
Этот блог поможет читателям, которые столкнулись с ошибкой «Что-то не так с прокси-сервером» в Chrome в Windows.
Kaspersky Password Manager не работает должным образом на вашем компьютере с Windows 11/10. Независимо от причины, вот несколько лучших способов решить проблему.
Этот блог поможет читателям решить проблему с сенсорной панелью ASUS, не работающей в Windows, с помощью рекомендованных экспертами шагов, которые можно быстро и легко выполнить.
Возникли проблемы с ошибкой «Отсутствует драйвер Precision в Windows 11»? Узнайте о проверенных способах восстановления точности сенсорной панели и мыши. Пошаговое руководство для простого устранения неполадок.
Застряли в надоедливом цикле восстановления с помощью ключа BitLocker в Windows 11? Узнайте пошаговые инструкции, как обойти бесконечные запросы, восстановить диск и вернуться к нормальной работе. Никаких технических знаний не требуется — простые и эффективные решения внутри.
Возникли проблемы с ошибкой обновления Windows 11 0x80073712? Узнайте о проверенных пошаговых решениях для обновления до 2026 года, включая советы по устранению неполадок, которые помогут вам обновить систему без проблем и безопасно. Больше никаких головных болей с обновлениями!
Возникли проблемы с ошибкой каталога обновлений Windows 11? Узнайте о проверенных пошаговых решениях для беспроблемного восстановления обновлений. Быстро верните свою систему в рабочее состояние — никаких технических знаний не требуется!
Проблемы с медленной работой Windows 11? Узнайте пошаговые решения для плана Ultimate Performance Plan, чтобы повысить производительность вашего ПК.
Проблемы с приглушенным звуком встроенного микрофона в Windows 11? Откройте для себя проверенные пошаговые решения для восстановления кристально чистого качества звука без лишних хлопот. Верните своему микрофону безупречную работу уже сегодня!
Возникли проблемы с Classic Shell или ошибками Start11 в Windows 11? Узнайте о пошаговых решениях проблем со сбоями, совместимостью и многом другом, чтобы восстановить работоспособность вашего персонализированного меню «Пуск». Обновлено с учетом последних советов по устранению неполадок.
Проблемы с задержками в играх на Windows 11 из-за VBS и HVCI? Узнайте о проверенных шагах по устранению неполадок, которые помогут оптимизировать производительность, уменьшить зависания и повысить FPS без ущерба для безопасности. Простые решения для геймеров.
Возникли проблемы со сбросом PIN-кода Windows Hello в Windows 11? Ознакомьтесь с проверенными шагами по устранению неполадок, чтобы быстро решить эту проблему и восстановить безопасный доступ к вашему устройству. Обновлено с учетом последних исправлений.
Возникли проблемы с отображением эффектов «Акрил» и «Слюда» в Windows 11? Узнайте о проверенных способах восстановления этих потрясающих визуальных эффектов и легкого улучшения работы с рабочим столом.
