Kita semua mempunyai masa di mana kita berharap dapat kembali ke detik sebelumnya dan memulihkan keadaan ketika itu. Walaupun tidak mungkin dalam kehidupan sebenar, ia adalah realiti yang mudah pada Windows 11 (sama seperti pada lelaran Windows sebelumnya) kerana ia memberi kita pilihan untuk kembali kepada cara sistem berada pada masa sebelumnya.
Walau bagaimanapun, untuk berbuat demikian, seseorang perlu mencipta titik pemulihan secara manual, atau sekurang-kurangnya mempunyai Windows dikonfigurasikan supaya titik ini dicipta secara automatik. Berikut ialah segala-galanya yang anda perlu tahu untuk mencipta titik pemulihan dalam Windows 11 dan kebaikannya.
kandungan
Cara membuat Titik Pemulihan dalam Windows 11 secara manual
Atas sebab apa pun, jika anda ingin membuat titik pemulihan sendiri, terdapat beberapa cara yang boleh anda lakukan. Mari lihat mereka dan buat pemulihan secara manual.
Kaedah #01: Menggunakan Sifat Sistem
Tekan Mula, taip 'Buat titik pemulihan', dan pilih pilihan seperti yang ditunjukkan di bawah.

Ini akan membuka tetingkap System Properties. Klik pada butang Cipta di bahagian bawah.

Jika ini dikelabukan, anda perlu menghidupkan perlindungan sistem terlebih dahulu (lihat bahagian sebelumnya untuk ini).
Beri nama tempat pemulihan ini dan klik Buat .

Membuat titik pemulihan ini mungkin mengambil sedikit masa, jadi bersabarlah.
Kaedah #02: Menggunakan Prompt Perintah
Satu lagi cara untuk mencipta titik pemulihan ialah melakukannya daripada Prompt Perintah. Begini cara berbuat demikian:
Tekan Mula, taip cmd dan klik pada Jalankan sebagai pentadbir .

Sekarang, taip arahan berikut dan tekan Enter:
wmic.exe /Namespace:\\root\default Path SystemRestore Call CreateRestorePoint "Restore Point Name", 100, 7

Gantikan Restore Point Namedalam arahan di atas dengan apa sahaja yang anda ingin panggil titik pemulihan. Titik pemulihan sistem anda berjaya dibuat apabila anda mendapat mesej 'Pelaksanaan kaedah' dan 'ReturnValue=0'.

Kaedah #03: Menggunakan PowerShell
Pengguna kuasa boleh membuat titik pemulihan menggunakan PowerShell juga. Begini cara berbuat demikian:
Tekan Mula, taip PowerShell dan pilih Jalankan sebagai pentadbir .

Sekarang taip arahan berikut dan tekan Enter:
powershell.exe -ExecutionPolicy Bypass -NoExit -Command "Checkpoint-Computer -Description 'Restore Point Name' -RestorePointType 'MODIFY_SETTINGS'"

Gantikan Restore Point Namedalam arahan di atas dengan apa sahaja yang anda ingin panggil titik pemulihan. Anda sepatutnya melihat laporan kemajuan penciptaan titik pemulihan anda.

Jika PowerShell memaparkan mesej (seperti yang ditunjukkan di bawah) yang mengatakan bahawa anda tidak boleh mencipta lebih daripada satu titik pemulihan sistem dalam masa 24 jam, anda perlu mengedit pendaftaran untuknya.

Rujuk kepada pembaikan yang diberikan kemudian untuk mengatasinya.
Cara membuat Titik Pemulihan secara automatik
Windows mencipta titik pemulihan dengan sendirinya secara automatik dalam beberapa keadaan tetapi anda juga boleh menetapkannya untuk mencipta pada setiap permulaan semula. Mari kita lihat kedua-dua topik ini dahulu.
Semak Mata Pemulihan yang telah dibuat secara automatik oleh sistem
Jika konfigurasi titik pemulihan sistem ditetapkan dengan betul, Windows 11 akan membuat titik pemulihan secara automatik untuk anda kembali. Berikut ialah cara untuk memastikan bahawa Windows menjaga kapsul masa PC anda untuk anda:
Tekan Mula, taip 'Buat titik pemulihan', dan pilih pilihan seperti yang ditunjukkan di bawah.

Ini akan membuka tetingkap System Properties. Pilih pemacu sistem dan klik pada Konfigurasi .
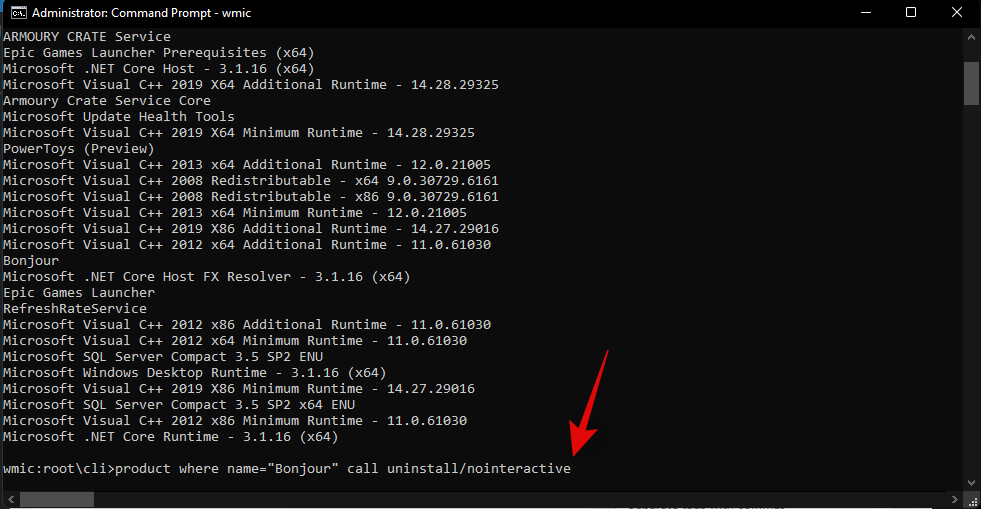
Sekarang pilih Hidupkan perlindungan sistem .

Windows akan secara automatik memperuntukkan ruang cakera untuk titik pemulihan sistem sendiri. Tetapi anda boleh menukar jumlah perlindungan sistem ruang cakera boleh digunakan. Untuk berbuat demikian, gerakkan peluncur di bawah 'Penggunaan Ruang Cakera' untuk memperuntukkan ruang cakera sendiri.

Terdapat juga butang Padam untuk mengalih keluar titik pemulihan sebelumnya. Setelah selesai, klik pada 'Apply'.

Windows 11 akan mencipta titik pemulihan sistem apabila perubahan besar dibuat seperti apabila kemas kini baharu digunakan.
Bagaimana untuk mencipta titik pemulihan sistem secara automatik semasa permulaan
Jika anda tidak mahu menghadapi masalah mencipta titik pemulihan sistem setiap kali anda membuat perubahan yang berpotensi mengganggu cara sistem anda berfungsi, anda boleh menyediakan titik pemulihan untuk dibuat secara automatik pada permulaan. Begini cara berbuat demikian:
Perkara pertama yang anda perlu lakukan ialah menukar kekerapan penciptaan titik pemulihan. Secara lalai, Windows tidak akan mencipta titik pemulihan jika satu telah dibuat dalam 24 jam yang lalu. Untuk menukar ini, ikuti langkah di bawah:
Tekan Win + Runtuk membuka kotak RUN, taip regedit , dan tekan Enter.

Sekarang, navigasi ke alamat berikut (atau salin dan tampalkannya dalam bar alamat pendaftaran):
Computer\HKEY_LOCAL_MACHINE\SOFTWARE\Microsoft\Windows NT\CurrentVersion\SystemRestore

Klik kanan dalam ruang kosong di sebelah kanan dan pilih New , kemudian DWORD (32-bit) Value .

Nama itu SystemRestorePointCreationFrequency .

Secara lalai, nilainya ditetapkan kepada 0. Biarkan begitu dan tutup editor pendaftaran.
Sekarang, langkah seterusnya ialah membuat tugasan dalam Windows Task Scheduler supaya titik pemulihan dibuat apabila Windows bermula. Untuk berbuat demikian, tekan Mula, taip Penjadual Tugas dan tekan Enter.

Di panel kanan, klik pada Cipta Tugas .

Sekarang, di bawah tab 'Umum', berikan nama tugas ini dan pilih Jalankan sama ada pengguna dilog masuk atau tidak , dan Jalankan dengan keistimewaan tertinggi .

Juga, di bahagian bawah, klik pada butang radio di sebelah "Konfigurasikan untuk" dan pilih Windows 10 .

Jangan risau jika Windows 11 bukan antara pilihan. Memandangkan belum ada binaan yang stabil untuk Windows 11, anda mungkin belum melihat Windows 11 lagi. Tetapi yakinlah, pilihan Windows 10 masih akan berfungsi.
Sekarang klik pada tab "Pencetus" untuk beralih kepadanya.

Kemudian klik pada Baharu di bahagian bawah.

Sekarang, klik pada menu lungsur di sebelah "Mulakan tugas ini" dan pilih Pada permulaan .
Kemudian klik OK

Seterusnya, klik pada tab "Tindakan" dan beralih kepadanya.

Klik pada Baharu di bahagian bawah.

Di sini, kami akan menggunakan beberapa hujah untuk menjalankan Program Kawalan Instrumen Pengurusan Windows dan untuk memberitahu tindakan yang perlu diambil. Dalam tetingkap "Tindakan Baharu", pastikan Tindakan adalah untuk "Mulakan program" (lalai).

Dalam medan Program/skrip, taip wmic.exe .

Kemudian, di sebelah "Tambah argumen (pilihan)", taip arahan berikut:
/Namespace:\\root\default Path SystemRestore Call CreateRestorePoint "Startup Restore Point", 100, 7

Kemudian klik OK .

Sekarang, tukar ke "tab Syarat".

Jika anda menggunakan komputer riba, nyahtanda pilihan di bawah "Kuasa" yang menyatakan Mulakan tugas hanya jika komputer dihidupkan kuasa AC . Kemudian klik OK .

Penjadual Tugas akan menggesa anda untuk memasukkan kata laluan anda untuk menyelesaikan penyediaan tugas. Lakukan dan klik OK .

And that’s it. Now, every time you start your computer, a system restore point will be created.
How to restore Windows 11 back to a restore point
If your system runs into any trouble, you can use your restore points, whether they be created automatically or manually, to get your system back to how it was before.
There are a few ways you can restore your system. Depending on how bad a trouble your system has run into, you can use a different way to restore it.
Method #01: Using System Properties
This is the simplest way to restore your system, but it also requires you to be able to at least access the desktop and the start menu.
Press Start, type ‘Create a restore point’, and choose the option as shown below.

This will open up the System Properties window. Here, click on System Restore.

This will lead you to the System Restore window. Click Next.

Select a system restore point and click Next.

Click Finish.

Your system will now be restored.
Method #02: Using Advanced Startup
If you are not able to boot up your system, you may have to access the Advanced Startup settings and restore your system through it. There are a couple of ways you can access the Advanced Startup screen.
The first way is to turn off the device and pressing F8 before you see the Windows logo. This will boot your PC into recovery.
An alternate way is to access recovery using Windows installation media. In the Windows Setup, click Next…

and then click on Repair your computer in the bottom left corner.

Both these ways will get you to Advanced Startup.
Select Troubleshoot.

Then Advanced options.

Now click on System Restore.

Click Next.

Choose your system restore point and hit Continue.

Click Finish to have your system restored.

Can’t create a system restore point? How to fix
There can be times when, for one reason or another, you may not be able to create a system restore point. But there are a few easy fixes that you can implement to get around the issue.
Method #01: Change system restore frequency using Registry Editor
As mentioned before, by default, Windows only lets you create one system restore point if one has already been created in the last 24 hours. This can be problematic, especially if you’re looking to edit the registry or other system settings but want to ensure that there’s a restore point in case things go south. To allow the creation of system restore points at any time, you will have to change the frequency of system restore points.
Press Win + R to open the RUN box, type regedit, and hit Enter.

Now, navigate to the following address (or copy and paste it in the registry address bar):
Computer\HKEY_LOCAL_MACHINE\SOFTWARE\Microsoft\Windows NT\CurrentVersion\SystemRestore

Right-click in the empty space to the right and select New, then DWORD (32-bit) Value.

Name it SystemRestorePointCreationFrequency.

By default, its value is set to 0. Let it be that way and close the registry editor. You should now be able to create a system restore point manually without having to worry about any frequency limitations.
Method #02: Enable system restore via Group Policy Editor
Press Win + R to open the RUN box, type gpedit.msc and hit Enter.

This will open up the Group Policy Editor. In the left panel, navigate to Administrative Templated > System > System Restore.

On the right, check the state of the two Settings. They should both be set to Not configured.

If either of them is enabled, double-click on it and set it to Not configured.

You should be able to create a system restore point as shown before.
Method #03: Turn on Volume Shadow Copy service
When you’re not able to create a system restore point, another fix that you may want to implement is to turn or (or reset) the Volume Shadow Copy service. Here’s how to do so:
Press Win + R to open the RUN box, type services.msc and hit Enter.

Scroll down and look for Volume Shadow Copy. Double-click on it.

Click on Start if the service isn’t already running.

If it running, restart it by clicking on Stop…

And then on Start again.

Creating a restore point in Windows 11: FAQs
So these were all the ways that you can create a restore point and some fixes if you’re not able to create one. Now, let’s consider the most commonly asked questions about system restore points and why it’s crucial that you create them from time to time, or at least have your system set up to create them automatically.
Are restore points created automatically on Windows 11?
Yes, Windows 11 by default has its System Properties set to create system restore points automatically from time to time, such as when you apply an update or make important changes to your system.
Why should you manually create a restore point?
As mentioned earlier, by default, Windows 11 will create restore points for your system to revert to should it run into a problem. But there can be instances when, for one reason or another, Windows might not be able to do so itself.
Although there are fixes that can resolve this issue (mentioned earlier), you should look to manually create a system restore point in case they don’t work out. It is even more crucial that you do so if you’re messing around with the registry or making other drastic changes to your system. You never know when they might come in to save your system from becoming unusable.
What happens when you create a restore point?
When a system restore point is created, Windows takes a snapshot of your system data as it is at a particular time. The state of the operating system is thus saved so that you can revert back to it in case things go wrong.
How long does it take to create a restore point?
Depending on how much data needs to be saved, creating a restore point can take anywhere from a few minutes to a few hours. However, if after four to five hours you find that a restore point is still being created, it is likely that Windows has run into some problems. In such a scenario, you may want to cancel the whole process and start again.
We hope that you were able to create system restore points with the help of this guide.
