如何在手機和 PC 上的 Google Meet 上模糊背景

學習如何在Google Meet中使用背景模糊功能,讓你的視頻通話看起來更專業。

操作系統是任何 PC 的生命線,因為沒有它們,發送電子郵件、觀看貓視頻或與我們的朋友聊天將變得不可能。但每隔一段時間,每個操作系統都會遇到諸如啟動緩慢、應用程序崩潰、顯示故障、聲音不穩定等問題。
如果您覺得您的 Windows 11 副本最近也表現得很奇怪,我們認為是時候自己解決問題並修復 Windows 11。
現在,在您急於使用最近的 PC 維修技術之前,讓我們來看看您可以使用的多種方法來幫助您修復損壞的 Windows 11 安裝。
內容
方法 #1:使用 Windows 疑難解答
Windows 疑難解答已經取得了長足的進步,現在只需單擊一下,他們就可以解決您的大部分問題。大多數通常通過 CMD 和 PowerShell 執行的故障排除命令和檢查現在都捆綁在故障排除程序中,這使得它們在遇到問題時更加有用。如果您仍然無法修復和修復您的 Windows 11 安裝,那麼故障排除程序可能值得一試。使用以下指南幫助您入門。
按下Windows + i鍵盤上的以打開“設置”應用。確保在左側選擇了“系統”,然後單擊右側的“疑難解答”。
![如何修復 Windows 11 [15 種方法] 如何修復 Windows 11 [15 種方法]](/resources8/images31/image-6439-0105182722076.png)
單擊“其他疑難解答”。
![如何修復 Windows 11 [15 種方法] 如何修復 Windows 11 [15 種方法]](/resources8/images31/image-405-0105182722143.png)
現在,根據您在安裝時遇到的問題,找到您當前問題的相關疑難解答。單擊疑難解答旁邊的“運行”。
![如何修復 Windows 11 [15 種方法] 如何修復 Windows 11 [15 種方法]](/resources8/images31/image-9440-0105182722204.png)
疑難解答程序現在將做它的事情並修復它發現的有關組件或功能的任何問題。
![如何修復 Windows 11 [15 種方法] 如何修復 Windows 11 [15 種方法]](/resources8/images31/image-9235-0105182955896.png)
方法#2:卸載並重新安裝所有最近的 Windows 更新
如果您在最近的 Windows 更新後遇到隨機崩潰、性能下降、抖動或突然出現的錯誤,那麼您可以嘗試卸載最近的更新來解決您的問題。這些更新應該使用頂部的指南通過系統還原來恢復,但如果您沒有還原點,則可以使用下面的指南從 Windows 11 系統手動卸載 Windows 更新。
按下Windows + i鍵盤上的以打開“設置”應用。現在單擊左側的 Windows 更新。
![如何修復 Windows 11 [15 種方法] 如何修復 Windows 11 [15 種方法]](/resources8/images31/image-6752-0105182955965.png)
單擊“更新歷史記錄”。
![如何修復 Windows 11 [15 種方法] 如何修復 Windows 11 [15 種方法]](/resources8/images31/image-9408-0105182722517.png)
滾動到底部並單擊“卸載更新”。
![如何修復 Windows 11 [15 種方法] 如何修復 Windows 11 [15 種方法]](/resources8/images31/image-1959-0105182722745.png)
您現在將被帶到控制面板,在那裡您將獲得系統上安裝的所有最新主要更新的列表。您不會獲得此列表中列出的安全更新,因為出於安全原因無法卸載它們。單擊並選擇要卸載的更新。
![如何修復 Windows 11 [15 種方法] 如何修復 Windows 11 [15 種方法]](/resources8/images31/image-3028-0105182722836.png)
現在點擊頂部的“卸載”。
![如何修復 Windows 11 [15 種方法] 如何修復 Windows 11 [15 種方法]](/resources8/images31/image-2165-0105182722899.png)
注意:如果您沒有獲得卸載選項,那麼很可能是因為您正在嘗試卸載會破壞當前安裝功能的重要 Windows 組件。
單擊“是”以確認您的選擇。
![如何修復 Windows 11 [15 種方法] 如何修復 Windows 11 [15 種方法]](/resources8/images31/image-9581-0105182722985.png)
所選更新現在將從您的系統中卸載。我們建議您重新啟動系統並檢查您面臨的問題是否已解決。如果沒有,請繼續卸載 Windows 更新,直到找到罪魁禍首。
方法#3:還原到較舊的系統還原點
注意:此方法假定您擁有可以啟動的 Windows 11 的功能副本。
您可以將系統還原點視為將系統還原到 Windows 早期狀態(創建還原點時)以及 PC 那時擁有的應用程序和設置的途徑。
Windows 11 會定期自動創建系統還原點。如果需要,您還可以創建還原點。
它們也是在安裝新應用程序或 Windows 更新時創建的。
以下是您可以嘗試使用還原點修復 Windows 11 的方法。
打開“開始”菜單並輸入“創建還原點”。然後點擊下圖所示的選項。
![如何修復 Windows 11 [15 種方法] 如何修復 Windows 11 [15 種方法]](/resources8/images31/image-7098-0105182723056.png)
現在應該打開一個標題為“系統屬性”的彈出菜單,您應該能夠看到與系統還原相關的選項,如下所示。
![如何修復 Windows 11 [15 種方法] 如何修復 Windows 11 [15 種方法]](/resources8/images31/image-1063-0105182723121.png)
如果您的彈出菜單看起來與我們的相同,並且所有驅動器的“保護”都已關閉,那麼我們有一個壞消息要告訴您。由於缺少以前的系統還原點,因此沒有必要繼續使用此方法,因為沒有任何還原點可以回滾到。
此時,我們建議嘗試下一種方法。
提示:如果您閱讀本文只是為了了解工作原理,我們建議您打開系統驅動器保護(在下面突出顯示),即包含 Windows 11 的驅動器,並立即創建一個還原點。
![如何修復 Windows 11 [15 種方法] 如何修復 Windows 11 [15 種方法]](/resources8/images31/image-2132-0105182723214.png)
這是您如何做到的。
選擇標有“系統”的驅動器,然後單擊“配置”。
![如何修復 Windows 11 [15 種方法] 如何修復 Windows 11 [15 種方法]](/resources8/images31/image-6753-0105182723323.png)
然後單擊“打開系統保護”按鈕,並通過移動下面的滑塊為系統還原點分配一些空間。我們只分配了系統驅動器的 4%,接近 4.5GB。
如果還原點的數量或大小增加,舊的將自動刪除,為新的騰出空間。
單擊“應用”,然後單擊“確定”。
![如何修復 Windows 11 [15 種方法] 如何修復 Windows 11 [15 種方法]](/resources8/images31/image-2650-0105182723417.png)
您之前選擇的驅動器現在應該打開了“保護”,您現在應該能夠創建系統還原點。
![如何修復 Windows 11 [15 種方法] 如何修復 Windows 11 [15 種方法]](/resources8/images31/image-3719-0105182723520.png)
當您在同一個彈出菜單上時,單擊“創建”按鈕以創建 PC 的第一個系統還原點。
![如何修復 Windows 11 [15 種方法] 如何修復 Windows 11 [15 種方法]](/resources8/images31/image-7789-0105182723725.png)
現在應該會有一個彈出窗口詢問您的還原點名稱,您可以隨意輸入任何您想要的內容。為方便起見,您 PC 的當前系統時間和數據會自動添加,以使此還原點與其他還原點區分開來。目前,我們在最近重新安裝 Windows 11 時鍵入“全新安裝”。
完成後,單擊“創建”。
![如何修復 Windows 11 [15 種方法] 如何修復 Windows 11 [15 種方法]](/resources8/images31/image-2823-0105182723892.png)
片刻之後,您的還原點應該準備好了。您現在應該可以通過單擊“系統還原”按鈕來檢查它。
![如何修復 Windows 11 [15 種方法] 如何修復 Windows 11 [15 種方法]](/resources8/images31/image-7821-0105182956057.png)
單擊下一步。
![如何修復 Windows 11 [15 種方法] 如何修復 Windows 11 [15 種方法]](/resources8/images31/image-7756-0105182724049.png)
您新創建的系統還原點應該在這裡。
![如何修復 Windows 11 [15 種方法] 如何修復 Windows 11 [15 種方法]](/resources8/images31/image-6893-0105182724113.png)
選擇還原點並單擊(然後啟用)“下一步”按鈕應該會將您的 PC 還原到創建還原點的那一刻。
方法#4:使用SFC命令提示工具
系統文件檢查器 (SFC) 和部署映像服務和管理 (DISM) 是兩個命令行工具,企業中的 IT 技術人員更常使用它們來為 Windows 機器提供服務。
如果這是您第一次聽說這些工具,那麼沒有什麼可擔心的,因為它們通常被認為是電動工具,而了解它們的人並不多。
讓我們先從 SFC 開始,看看如何修復 Windows 11。
SFC 可用於掃描和驗證受保護的文件(Windows 文件)。如果它發現文件已損壞且無法驗證,它會嘗試從您 PC 中的以下文件夾恢復新副本。
C:\Windows
以下是您可以嘗試使用此選項的方法。
單擊“開始”按鈕,輸入“命令提示符”,並確保以管理員身份運行應用程序,如下所示。
![如何修復 Windows 11 [15 種方法] 如何修復 Windows 11 [15 種方法]](/resources8/images31/image-8890-0105182956148.png)
進入命令提示符後,輸入以下命令或簡單地複制並粘貼它。然後點擊“輸入”。
sfc /scannow
上面的命令立即開始掃描,大約需要幾分鐘才能完成一次完整的檢查。
![如何修復 Windows 11 [15 種方法] 如何修復 Windows 11 [15 種方法]](/resources8/images31/image-4377-0105182724504.png)
如果掃描發現您的所有文件都完好無損,則會顯示如下。
![如何修復 Windows 11 [15 種方法] 如何修復 Windows 11 [15 種方法]](/resources8/images31/image-5446-0105182724592.png)
但是,如果您的 PC 上有一些損壞的 Windows 文件,SFC 應該能夠使用新副本修復它們。
方法 #5:使用 DISM 命令提示工具
DISM 是另一個比 SFC 強大得多的命令行工具。它可以使用 .wim 和 .esd 格式的多種類型的 Windows 11 映像,在將映像部署到 PC 之前管理驅動程序等等。
讓我們來看看如何使用 DISM 修復 Windows 11。
使用我們剛剛提到的 SFC 步驟以管理員身份打開命令提示符。
然後粘貼以下命令以掃描您的 Windows 11 安裝是否有錯誤,然後按 Enter。
Dism /Online /Cleanup-Image /ScanHealth
你應該看到這樣的東西。
![如何修復 Windows 11 [15 種方法] 如何修復 Windows 11 [15 種方法]](/resources8/images31/image-5068-0105182725172.png)
完成後,該工具應報告其發現。這是我們的屏幕的樣子。
![如何修復 Windows 11 [15 種方法] 如何修復 Windows 11 [15 種方法]](/resources8/images31/image-9689-0105182725280.png)
然後運行此命令以查看是否檢測到任何問題以及您的問題的可修復性。
Dism /Online /Cleanup-Image /CheckHealth
由於我們的 PC 工作正常,上述命令報告零問題。你的可能不同。
![如何修復 Windows 11 [15 種方法] 如何修復 Windows 11 [15 種方法]](/resources8/images31/image-3654-0105182725335.png)
如果 DISM 報告您的 PC 出現問題,您應該運行的下一個命令如下所述。粘貼它並點擊“Enter”。
DISM /Online /Cleanup-Image /RestoreHealth
上述命令將從 Windows 更新請求損壞文件的有效副本。以下是該命令的實際效果。
![如何修復 Windows 11 [15 種方法] 如何修復 Windows 11 [15 種方法]](/resources8/images31/image-7724-0105182725565.png)
這是完成處理後的樣子。
![如何修復 Windows 11 [15 種方法] 如何修復 Windows 11 [15 種方法]](/resources8/images31/image-9311-0105182725854.png)
您需要做的就是重新啟動您的 PC。
如果您認為自己是了解命令行工具及其參數的人,並且想了解更多關於 SFC 和 DISM 以及可與它們一起使用的參數範圍的信息,請參閱有關 SFC的完整文檔和完整參考對於 DISM。信息盛宴!
提示:如果您的 Windows 11 進程經常崩潰,請在幾秒鐘後重新啟動並顯示帶有一堆數字和字母(又名錯誤代碼)的警報,我們強烈建議將它們放入 Google 等搜索引擎中並理解它們的含義。這種故障排除方法對於特定的錯誤和問題非常有效,並且通常可以證明是一種救星。
方法 #6:使用 Windows 11 啟動修復
Windows 11 配備了一個內置的啟動修復工具,旨在檢測和修復您可能面臨的常見啟動問題。讓我們來看看如何使用啟動修復來修復 Windows 11。
打開“開始”菜單,然後單擊“電源”按鈕。
![如何修復 Windows 11 [15 種方法] 如何修復 Windows 11 [15 種方法]](/resources8/images31/image-3277-0105182725914.png)
按住“Shift”鍵並單擊“重新啟動”。
![如何修復 Windows 11 [15 種方法] 如何修復 Windows 11 [15 種方法]](/resources8/images31/image-794-0105182726004.png)
您的 PC 應該啟動到帶有一系列選項的藍屏。單擊“疑難解答”。
![如何修復 Windows 11 [15 種方法] 如何修復 Windows 11 [15 種方法]](/resources8/images31/image-5932-0105182726311.jpg)
單擊“高級選項”。
![如何修復 Windows 11 [15 種方法] 如何修復 Windows 11 [15 種方法]](/resources8/images31/image-5382-0105182726417.jpg)
單擊“啟動修復”。
不久之後,Windows 現在應該會掃描和診斷您的 PC,以查找可能阻止其正常運行的任何問題。讓它發揮它的魔力,一段時間後,您的 Windows 11 副本應該不會出現所有問題。
提示:如果“啟動修復”失敗並且您看到如下所示的屏幕,則可能有兩個原因。Windows 11 未能識別問題,或者您的 PC 根本沒有問題。
![如何修復 Windows 11 [15 種方法] 如何修復 Windows 11 [15 種方法]](/resources8/images31/image-4518-0105182726486.jpg)
此時,您可以嘗試按照方法 #3 的選項 2 啟動 Windows 11 修復。您也可以嘗試使用 Windows 11 安裝程序中的“升級”選項重新安裝 Windows 11,而不是進行全新安裝和擦拭你的驅動器。
此安裝方法應重新安裝 Windows 11,同時保留您的所有文件、應用和設置。
方法 #7:使用 Windows 11 安裝程序 ISO 文件
您是否知道用於安裝 Windows 11 的文件也可用於修復損壞的 Windows 11 副本?
沒有多少人知道這一點,但它很容易完成,而且根本不需要太長時間。
要使此方法起作用,您需要訪問 Windows 11 安裝文件 (ISO) 或您之前可能用於安裝 Windows 11 的安裝程序 USB 驅動器。
選項 1:使用 Windows 11 ISO 中的安裝文件
查看您的 PC 上是否存儲了 Windows 11 ISO。如果你這樣做,完美!無需下載任何東西。
如果您沒有 Windows 11 ISO,我們建議您按照本指南下載最新的可用 ISO。
在繼續之前,請確保您可以啟動到 Windows 11 並訪問 ISO。如果可以,讓我們進入下一步。
找到 Windows 11 ISO 並雙擊它。
![如何修復 Windows 11 [15 種方法] 如何修復 Windows 11 [15 種方法]](/resources8/images31/image-7519-0105182726601.png)
ISO 現在應該安裝在您的 Windows 11 PC 上的虛擬磁盤驅動器上,並且看起來應該與此類似
![如何修復 Windows 11 [15 種方法] 如何修復 Windows 11 [15 種方法]](/resources8/images31/image-6969-0105182726712.png)
雙擊虛擬驅動器。進入後,應該有一個名為“setup”的文件,雙擊它。
![如何修復 Windows 11 [15 種方法] 如何修復 Windows 11 [15 種方法]](/resources8/images31/image-4486-0105182726796.png)
提示:或者,您也可以將 ISO 提取到 PC 上的某個位置,這當然需要一些時間,但應該會得到相同的結果。
等待 Windows 11 設置啟動。完成後,您應該會看到類似於下面的屏幕。單擊“下一步”。
![如何修復 Windows 11 [15 種方法] 如何修復 Windows 11 [15 種方法]](/resources8/images31/image-3622-0105182726853.png)
接受條款和條件。
![如何修復 Windows 11 [15 種方法] 如何修復 Windows 11 [15 種方法]](/resources8/images31/image-4691-0105182726957.png)
在此處選擇最適合您的選項,然後單擊“下一步”。我們想保留我們的文件,因此我們選擇了“保留個人文件和應用程序”。
![如何修復 Windows 11 [15 種方法] 如何修復 Windows 11 [15 種方法]](/resources8/images31/image-4141-0105182727056.png)
單擊“安裝”開始安裝。
![如何修復 Windows 11 [15 種方法] 如何修復 Windows 11 [15 種方法]](/resources8/images31/image-7142-0105182727192.png)
幾秒鐘後,安裝程序應該開始準備您的 PC 進行就地升級,這將修復和刷新在您的 PC 上運行 Windows 11 所需的所有文件。
![如何修復 Windows 11 [15 種方法] 如何修復 Windows 11 [15 種方法]](/resources8/images31/image-4659-0105182727255.png)
您的 PC 可能會重新啟動幾次以完成修復。
設置完成後,您的 Windows 11 副本應該已完全修復並可以使用。
選項 2:使用可引導的 USB 驅動器
如果由於某種原因,您的 PC 無法啟動到 Windows 11 或由於 Windows 文件損壞而只是反復重啟,那麼此選項將非常適合您。
在我們開始之前,請查看您是否還有用於在 PC 上安裝 Windows 11 的 Windows 11 USB 安裝棒。如果你這樣做了,那就沒什麼可擔心的了。
如果您不這樣做,以下是您可以在幾分鐘內創建 Windows 11 USB 安裝程序的方法。請記住,它需要另一台具有互聯網功能的 PC 才能下載 Rufus 和 Windows 11 ISO。只需將 USB 驅動器連接到您的 PC 並重新啟動您的系統。當提示從恢復媒體啟動時按鍵盤上的任意鍵,然後按照屏幕上的說明繼續修復 Windows。您可以選擇重新安裝 Windows、修復丟失的文件、修復引導順序,甚至使用 CMD 執行您自己的檢查。如果您需要任何幫助,那麼您可以通過本指南從恢復媒體設置等中重置 Windows。
檢查本指南: 如何從 USB 安裝 Windows 11
方法 #8:修復或修復驅動程序
很多時候,由於系統上安裝的驅動程序不兼容、過時或衝突,您可能會遇到 Windows 安裝問題。驅動程序是必不可少的程序,可讓您的組件與 CPU 和 GPU 通信,以確保系統正常運行。具有不兼容或衝突的驅動程序可能會導致 Windows 出現問題,甚至會對您的性能產生重大影響。如果您的某些組件似乎行為不正常,或者您覺得您的系統比預期的要慢得多,那麼最好檢查您的驅動程序並在需要時進行任何維修。
1. 檢查衝突或過時的驅動程序
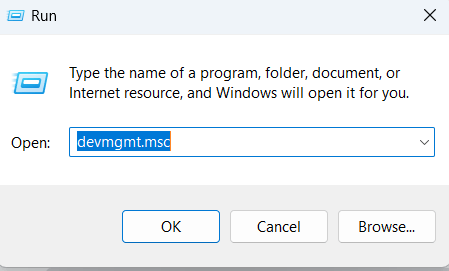
Let’s check for conflicting or outdated drivers on your system. Windows automatically shows you a warning sign for misbehaving components or outdated drivers in Device Manager. Use the guide below to look for driver issues on your installation of Windows 11.
Press Windows + X on your keyboard and click on Device Manager.
![如何修復 Windows 11 [15 種方法] 如何修復 Windows 11 [15 種方法]](/resources8/images31/image-5728-0105182727364.png)
Look for components in the list with a warning side beside them. If any are found, use the methods below to troubleshoot driver issues on your system. However, if none are found then let’s check for new components on your system to identify misbehaving components.
Click on the ‘Scan for hardware changes’ button at the top of your screen.
![如何修復 Windows 11 [15 種方法] 如何修復 Windows 11 [15 種方法]](/resources8/images31/image-5177-0105182727469.png)
Windows will now scan for hardware changes and install any new components or drivers found on your PC.
![如何修復 Windows 11 [15 種方法] 如何修復 Windows 11 [15 種方法]](/resources8/images31/image-6246-0105182727564.png)
2. Fix driver issues
If you wish to fix driver issues on your system then you will need to reinstall drivers for the concerned component on your system. This can be done through Windows and manually as well. We recommend manually force removing drivers only if you are unable to remove the driver through Device Manager in Windows. Force removing the wrong drivers can cause serious issues on your system and even force you to reinstall Windows altogether. Hence, ensure that you identify and properly force remove drivers from your system only for the malfunctioning component. Use one of the guides below depending on your current needs and requirements.
Note: If you are using a laptop or a pre-built system then we recommend you download specific drivers for the concerned component from your OEM support side beforehand. This will allow you to install the necessary drivers easily once you have removed the malfunctioning driver.
Read: 6 Ways to Update Drivers on Windows 11
Option 1: Remove and reinstall a component through Device Manager
Press Windows + X on your keyboard and click on ‘Device Manager’.
![如何修復 Windows 11 [15 種方法] 如何修復 Windows 11 [15 種方法]](/resources8/images31/image-5728-0105182727364.png)
Right-click on the component for which you wish to remove the driver and select Properties.
![如何修復 Windows 11 [15 種方法] 如何修復 Windows 11 [15 種方法]](/resources8/images31/image-5695-0105182727667.png)
Now click and switch to the Driver tab at the top.
![如何修復 Windows 11 [15 種方法] 如何修復 Windows 11 [15 種方法]](/resources8/images31/image-3418-0105182727905.png)
Click on ‘Uninstall device’.
![如何修復 Windows 11 [15 種方法] 如何修復 Windows 11 [15 種方法]](/resources8/images31/image-2867-0105182728010.png)
Check the box for ‘Attempt to remove the driver for this device’.
![如何修復 Windows 11 [15 種方法] 如何修復 Windows 11 [15 種方法]](/resources8/images31/image-2316-0105182728120.png)
Finally, click on ‘Uninstall’.
![如何修復 Windows 11 [15 種方法] 如何修復 Windows 11 [15 種方法]](/resources8/images31/image-902-0105182728296.png)
The device driver will now be removed and the device will be uninstalled from your system. You will now be prompted to restart your device. Restart your device as soon as possible and then reinstall the concerned drivers from your OEM’s support site. If you do not have the concerned drivers on your OEM site, then simply scan for hardware changes using the guide above and the necessary drivers will be automatically installed on your system.
Option 2: Manually force remove a driver and reinstall it
You can also manually force remove a driver using a third-party utility. This is not recommended as if Windows is not allowing you to remove a driver then it is probably an essential component that could cause issues on your system. We recommend you properly identify the concerned drivers before removing them from your system. Additionally, you should keep the latest replacement drivers handy so that you can reinstall them as soon as possible. Use the guide below to manually force delete concerned drivers from your system.
We will be using Driver Store Explorer to manually force remove the concerned drivers from your system. Driver Store Explorer is an open-source utility used to identify and remove all the drivers installed on your system. It is hosted on GitHub and can be compiled natively too in case privacy is a concern.
Download Driver Store Explorer to your local storage using the link above. Extract the archive to a convenient location and then launch the app using Rapr.exe.
![如何修復 Windows 11 [15 種方法] 如何修復 Windows 11 [15 種方法]](/resources8/images31/image-3903-0105182728416.png)
The app will now launch and scan all the drivers installed on your system. Once the list shows up, you can sort it based on the various columns available to you. We recommend you sort your drivers by ‘Provider’ as this will make it easier for you to search the concerned driver based on the manufacturer. Click on Provider at the top to arrange all the drivers ascendingly based on their provider’s name.
![如何修復 Windows 11 [15 種方法] 如何修復 Windows 11 [15 種方法]](/resources8/images31/image-1420-0105182728498.png)
Scroll the list and identify the concerned driver. Once found check the box beside it.
![如何修復 Windows 11 [15 種方法] 如何修復 Windows 11 [15 種方法]](/resources8/images31/image-2489-0105182728594.png)
You can now also click on ‘Select oid drivers’ on your right to automatically identify and select other old drivers installed on your system. However, we wouldn’t recommend this on pre-built systems and laptops that can sometimes get faulty driver updates in the future as the device gets older which degrade overall performance in return.
![如何修復 Windows 11 [15 種方法] 如何修復 Windows 11 [15 種方法]](/resources8/images31/image-3558-0105182728684.png)
Check the box for ‘Force Deletion’ on your right.
![如何修復 Windows 11 [15 種方法] 如何修復 Windows 11 [15 種方法]](/resources8/images31/image-7422-0105182728754.png)
Finally, click on ‘Delete Driver(s)’. This will force delete all the selected drivers from your system. We highly recommend you restart your system after this and install the new updated drivers you downloaded as soon as possible.
![如何修復 Windows 11 [15 種方法] 如何修復 Windows 11 [15 種方法]](/resources8/images31/image-212-0105182728819.png)
If faulty drivers were the cause of your issues with Windows 11, then a manual reinstall should help fix this in most cases.
Method #9: Resetting your PC
Like Windows 10, Windows 11 also comes with a nifty feature called ‘Reset this PC’. This can be a lifesaver if you need to clean your PC and start over with Windows 11. Once initiated, the process will roll back Windows 11 to its factory settings.
Here’s how you can proceed with it.
Open the ‘Start’ menu and type in “reset this pc”. You should get a result similar to what’s shown below. Click on ‘Reset this PC’.
![如何修復 Windows 11 [15 種方法] 如何修復 Windows 11 [15 種方法]](/resources8/images31/image-3525-0105182728991.png)
You should now be in your PC’s Recovery section within the Settings app. To proceed with the reset, simply click on the ‘Reset PC’ button.
![如何修復 Windows 11 [15 種方法] 如何修復 Windows 11 [15 種方法]](/resources8/images31/image-4594-0105182729090.png)
The next screen should ask you if you’d like to keep your files or remove them entirely. Pick the appropriate option to start resetting your Windows 11.
![如何修復 Windows 11 [15 種方法] 如何修復 Windows 11 [15 種方法]](/resources8/images31/image-9527-0105182729253.png)
Your selection should be followed by a reboot or two and in a few minutes, your PC should boot into a refreshed Windows 11.
Method #10: Fix boot issues with Windows 11
If you are having boot issues with Windows 11 then we can use bootrec.exe tool to fix most boot issues. Use the guide below to run bootrec.exe on your system. You will need to boot into Windows Recovery and then use CMD to execute these commands though. Use one of the methods above to boot into recovery mode in Windows via Settings or a recovery media and then use the guide below to execute bootrec commands and fix boot issues with Windows 11.
When at the recovery screen press Shift + F10 to bring up the CMD at any point during the recovery process.
Type in the following command to run bootrec.exe and press Enter on your keyboard to execute it.
bootrec.exe
Enter the following command first and press Enter on your keyboard to execute it.
Bootrec /fixmbr
Now enter the one below and execute it.
Bootrec /fixboot
Finally, enter the command below to rebuild your boot device order.
Bootrec /rebuildbcd
And that’s it! We recommend you restart your system for good measure or exit the recovery screen and try booting into Windows again. If you were facing boot issues, then this will have most likely fixed the issue for you.
If you have been facing start menu issues within Windows 11 then there are many fixes that you can try. The new start menu seems to be a hit or miss with users and many have tried to customize it in their own way. This has been known to break start menu functionality with recent updates and if you are facing issues after a recent update then this is likely the cause for you as well.
You can use this comprehensive guide by us to fix all kinds of Start menu issues on your Windows 11 system. You will even find ways to restore the older start menu and new ways to get the start menu back up and running on your system in no time.
Related: How to Fix ‘Windows 11 Start Menu Not Working’ Issue? [17 Ways]
Method #12: Fix random app crashes
Random app crashes have been a known issue since Windows 11 was first announced and the first insider build hit the shelves. This is mainly due to some core changes to Windows that now break functionality for previously compatible programs with Windows 10. This might be heartbreaking for many users that are unable to get their favorite programs and apps back up and running within Windows 11. There are a couple of things you can do to fix this issue and the most prominent ones have been covered by us in this comprehensive guide. If you are facing random app crashes then this will most likely help you solve the majority of crashes on your system.
Read: How To Fix Software Crashing on Windows 11 Dev Build
Method #13: Fix corrupt registry
Registry changes, incorrect values, and deleted or missing registry entries can also cause a lot of issues with your system. Chances are that if you modified your registry with a registry hack or used a third-party tool to clean your registry then the values were messed up during this process.
Due to the core changes in Windows 11, the registry values, locations, and entries are different from the ones on Windows 10. Additionally, the ones that were okay to be deleted earlier might be vital to the functioning of Windows in the latest version.
Hence using a compatible cleaner or repair tool for the registry can remove vital values that could cause issues with your system. You can use the guide below to try and fix the registry on your Windows 11 installation. But as the OS is fairly new, this might not work for you and in case it doesn’t you will have to reset your Windows to restore your registry values to their default entries.
By this point, the registry should have been fixed on your system as you will have already run SFC and DISM scans on your system (as given above). However if your registry still seems to be corrupted, then you can use a third-party app to fix it.
We recommend you use CCleaner’s free utility which can be downloaded using the link above. Once downloaded, run the .exe file and install CCleaner on your system. Then launch the app and follow the on-screen instructions to fix your registry.
We recommend you do not clean your registry or temporary files using CCleaner until it has been officially updated to support Windows 11. As for fixing the registry, the app did not produce any issues on our end despite multiple tries so you should be safe to fix your registry using CCleaner.
Method #14: Fix lack of storage space
If you seem to be missing storage space to random files on your system and are unable to identify large files on your system then it is likely that temporary files have started to take a toll on your local storage. Windows 11 is designed to clear most temporary files by default but this can option can sometimes bug out which can cause a large number of temporary files to accumulate on your system.
You can use our guide to delete the temporary files from your system. Once deleted, you should be able to gain back some significant storage space especially after clearing previous Windows installation files and downloaded Windows Updates.
Method #15: Boot into safe mode to identify third party culprits
Lastly, it could also be that your issue is being caused by a third-party app. As Windows 11 is fairly new and most recent updates to popular apps are using compatibility layers to work, it is likely that you are facing a bug with a third-party app. Third-party apps can create huge conflicts and issues in the background depending on what they do and it can end up being quite tough to identify the culprit.
Thankfully, Windows comes with a safe mode to troubleshoot exactly this problem. Safe mode helps disable all third-party apps, services, and tasks in the background. You can then verify the functioning of Windows in safe mode and start removing the suspected culprits one by one.
Once you find the culprit, you can restore your previously removed apps and continue using the OS until a fix is released by the concerned developer.
Unfortunately, this is a tedious process and there is no way around it, but if a third-party app is causing issues on your system, safe mode can help you identify and remove the culprit easily. You can use this guide to help you navigate and activate safe mode in Windows 11.
You can also use this trick to directly restart your system in the advanced recovery options state. Click on the ‘Start’ menu icon in your taskbar.
Now click on the ‘Power’ icon.
![如何修復 Windows 11 [15 種方法] 如何修復 Windows 11 [15 種方法]](/resources8/images31/image-4249-0105182729349.png)
Hold down the ‘Shift’ key on your keyboard and then click on ‘Restart’.
![如何修復 Windows 11 [15 種方法] 如何修復 Windows 11 [15 種方法]](/resources8/images31/image-2835-0105182729531.png)
Your Windows 11 PC will now automatically reboot into the Advanced recovery options.
Click on ‘Troubleshoot’ to get started. Now, click Advanced options > See more recovery options > Startup Settings > Restart.
You will now get a list of all the ways your computer can start up with elevated settings or restricted services. You will have the following options for Safe modes.
Press the desired key on your keyboard and your system will automatically restart in the desired Safe mode.
Well, these are all the proven methods that you can try to repair corrupted Windows 11. Some of these methods are fairly easy to use, while some may seem advanced for an average joe.
If you ever feel stuck at any point while following our methods, drop us a comment and we’d be happy to sort out the confusion.
Related:
學習如何在Google Meet中使用背景模糊功能,讓你的視頻通話看起來更專業。
以下是您作為主持人或參與者結束 Google Meet 會議所需了解的所有信息,並探討如何在沒有主持人的情況下結束會議,不必擔心會議的持續進行。
了解並修復 Google Meet 的“永遠加載”問題,提升您的視頻會議體驗。
視頻通話應用程序已成為遠程工作和學習的最重要部分。學習如何在 Zoom、Google Meet 和 Microsoft Teams 中有效降低音量。
您是否在 Zoom 上與很多人開會?使用 Zoom 的<strong>畫廊視圖</strong>可以使會議更高效地查看所有參與者。
Zoom 已成為我們日常生活中的重要組成部分,以至於我們的 Zoom 名稱幾乎與我們的身份相同。探索在 Zoom 上更改名稱的原因及解決方案。
學習如何在 Windows 11 上運行舊遊戲,探索最佳方法和提供解決方案。
了解如何快速找到 Windows 11 的“我的電腦”或“這台電腦”,並了解其重要性和功能。
上個月,總部位於美國的遠程會議平台 Zoom 已成為數千家組織的救星,本文將提供破解 Zoom 40 分鐘限制的多種有效解決方案。
學習有效的方法來解決《天際》令人沮喪的無限加載畫面問題,確保更流暢、不間斷的遊戲體驗。
我突然無法使用符合 HID 標準的觸控螢幕。我不知道是什麼襲擊了我的電腦。如果是你,這裡有一些修復方法。
想知道如何觀看《水行俠》,即使您所在的國家/地區無法觀看該節目嗎?繼續閱讀,在文章結束時,您將能夠欣賞《海王》。
了解如何輕鬆地將網頁另存為 PDF,並了解將網頁內容轉換為便攜式 PDF 文件以供離線存取和共享的各種方法和工具。
本部落格將幫助用戶下載、安裝和更新羅技 G510 驅動程序,以確保他們能夠充分利用這款羅技鍵盤的功能。
探索故障排除步驟和行之有效的方法來解決《虹彩六號:圍攻行動》中的延遲問題,確保更流暢、更愉快的遊戲體驗
如何將 PDF 文件轉換為文字檔?別擔心,在本指南中您會發現兩種將 PDF 轉換為文字檔案的最簡單方法。
Google 尋找我的裝置無法正常運作?別擔心,部落格將為您提供全面的指南,幫助您排查和解決 Google 尋找我的裝置問題。
探索針對 Mac 系統量身打造的逐步解決方案,確保無中斷的無縫 Discord 體驗。
探索故障排除步驟來解決常見問題,並使您的 Netflix 串流媒體無縫地恢復到 Roku 上。
透過我們的綜合指南了解如何有效擴充 iPhone 的儲存容量。了解實用的步驟和選項,以確保您再也不會用完寶貴的回憶和重要數據的空間。
Windows 11 安全中心服務缺失,讓您束手無策?我們提供經過驗證的分步修復方案,協助您安全地恢復本服務,輕鬆保護您的電腦安全。所有方法均已更新,確保最佳防護效果。
Windows 11 系統陷入令人抓狂的 BitLocker 復原金鑰循環?本文提供逐步教程,幫助您繞過無止盡的提示,恢復驅動器,重回正軌。無需任何技術知識——簡單有效的解決方案盡在其中。
還在為 Windows 11 系統下 VBS 和 HVCI 導致的遊戲卡頓而苦惱嗎?我們提供經過驗證的故障排除步驟,協助您優化效能、減少卡頓、提升幀率,且不影響安全性。輕鬆解決遊戲難題。
Windows 11 運作緩慢?了解「終極效能計畫」的逐步修復方案,提升您的電腦效能。
遇到 Windows 11 沙盒功能錯誤?我們提供經過驗證的逐步修復方案,讓您輕鬆打造流暢的隔離測試環境。無需任何技術專長!
Windows 11 內建麥克風聲音模糊不清?我們提供經過驗證的逐步修復方案,可協助您輕鬆恢復清晰的音訊品質。立即讓您的麥克風完美運作!
遇到 Windows 11 上的 Classic Shell 或 Start11 錯誤?本文提供逐步修復方案,解決當機、相容性問題等,協助您恢復自訂「開始」功能表的正常使用。已更新最新故障排除技巧。
遇到 Windows 11 系統下 Windows Hello PIN 碼重設錯誤?本文提供經過驗證的故障排除步驟,可快速解決此問題並重新安全地存取您的裝置。已更新至最新修復程式。
還在為 Windows 11 上的 PowerShell ISE 已棄用錯誤而苦惱嗎?本文提供經過驗證的解決方法,幫助您輕鬆解決此問題,恢復功能,並提升腳本編寫效率。內含詳細步驟指南。
遇到 Windows 11 藍牙低功耗裝置同步錯誤?了解經過驗證的故障排除步驟,以解決連線問題、更新驅動程式並恢復週邊裝置的無縫配對。


