So automatisieren Sie PowerPoint 365

Ein Tutorial, das zeigt, wie Sie Microsoft PowerPoint 365 dazu bringen, Ihre Diashow automatisch abzuspielen, indem Sie die Zeit für den Folienwechsel einstellen.

Dies ist eine vollständige Anleitung zur Durchführung der Mandanten-zu-Mandanten-Migration Office 365.
2 oder mehr Wochen vor der Migration
1. Überprüfen Sie den Domänenbesitz und erfassen Sie die Informationen und speichern Sie sie.
2. Erfassen Sie alle DNS-Einträge mit diesem Link .
3. Identifizieren und erfassen Sie die DNS-Einträge, die für Exchange relevant sind (bei Durchführung eines Domänentransfers) – TXT , MX und SPF .
4. Notieren Sie sich bei jedem MX-Eintrag den TTL-Wert
5. Überprüfen Sie die Verfügbarkeit der Domain über diesen Link .


6. Ermitteln Sie, welche Microsoft 365-Dienste für die Domäne erforderlich sind.
7. Entscheidung erforderlich – Erörtern Sie die Domänen- und DNS-Anforderungen
Domänenname:
DNS-Einträge:
Kopieren Sie ALLE (nicht nur Exchange) Datensätze, damit die Datensätze auf den Ziel-DNS-Servern eingerichtet werden.
8. Besprechen Sie mit dem Projektteam, welche Elemente NICHT mit dem BitTitan-Migrationstool migriert werden.
9. Fordern Sie Domänenadministratorrechte für das O365-Verwaltungsportal bei Source an
Administratorrechte sind als Teil des Prozesses erforderlich, den wir zum Entfernen der Domäne aus dem Admin-Portal an der Quelle und zum anschließenden Hinzufügen der Domäne zum Ziel benötigen.
10. Melden Sie sich beim O365-Verwaltungsportal unter Source an und überprüfen Sie die EXO-Mailregeln und -Konnektoren
11. Überprüfen Sie mithilfe der mxtoolbox-Blacklists , dass die Domänen/IP-Adressen NICHT auf der schwarzen Liste stehen .
Wichtig : Wenn auf der schwarzen Liste, wenn wir die Domains / IP-Adressen auf die weiße Liste setzen.
12. Melden Sie sich bei O365 Admin Portal at Source an und exportieren Sie akzeptierte Domänen, Gruppen, Postfächer, Ressourcen, freigegebene Postfächer und die Liste der Benutzer in EXCEL.
13. Überprüfen Sie die Größe jedes zu migrierenden Postfachs.
14. Überprüfen Sie die E-Mail-Einrichtung
15. Schließen Sie die Liste der zu migrierenden Benutzer, Gruppen und freigegebenen Postfächer ab
16. Erstellen Sie alle Benutzerpostfächer, freigegebenen Postfächer, Verteilergruppen, Sicherheitsgruppen, Kontakte und Ressourcen am Zielort.
17. Delegiertenzugriff auf Postfächer/Kalender am Zielort hinzufügen
18. Erstellen Sie Benutzerkommunikationen
19. Erstellen Sie 2 Testkonten bei Source
20. Füllen Sie die 2 Testkonten an der Quelle mit den folgenden Daten aus
21. Erstellen Sie 2 Testkonten am Zielort
22. Gewähren Sie dem globalen Administratorkonto vollen Zugriff auf Postfächer:
Get-Mailbox -ResultSize unbegrenzt | Add-MailboxPermission -Benutzer "Administratorkonto" -AccessRights FullAccess -InheritanceType All -AutoMapping $false
23. EWS muss auf dem Quell-Exchange-Server funktionieren
24. Testen Sie den Postfachzugriff, indem Sie mit OWA ein beliebiges anderes Postfach mit dem Administratorkonto öffnen
25. Fügen Sie jedem Postfach an der Quelle das Konto tenantname.onmicrosoft.com als Proxyadresse hinzu.
Dazu müssen wir die Domänen-E-Mail-Adressen aus allen Postfächern entfernen, bevor wir die Domäne aus dem Mandanten entfernen können.
26. Verbinden Sie sich mit EXO Powershell unter SOURCE
27. Exportieren und aktualisieren Sie Proxyadressen, um @tenantname.onmicrosoft.com einzuschließen
Get-Mailbox -ResultSize Unlimited -Filter „emailaddresses -notlike '*@tenantname.onmicrosoft.com'“ | wählen Sie Alias, primäre SMTP-Adresse, E-Mail-Adressen | export-csv -NoTypeInformation „C:\Temp\mailboxes_output.csv“
Import-csv C:\Temp\mailboxes_output.csv| ForEach-Object {
$ID = $_.PrimarySmtpAddress
$alias = $_.Alias
$365Email = $alias + „@tenantname.onmicrosoft.com“
Set-Mailbox -Identity $ID -EmailAddresses @{add = $365Email}
}
28. Bestätigen Sie, dass alle Postfächer aktualisiert wurden. Die Ergebnisse sollten Null sein.
Get-Mailbox -ResultSize Unlimited -Filter „emailaddresses -notlike '*@tenantname.onmicrosoft.com'“ | wählen Sie Alias, primäre SMTP-Adresse, E-Mail-Adressen
29. Gewähren Sie dem Administratorkonto vollen Zugriff auf Postfächer am Ziel
30. Verbinden Sie sich mit EXO Powershell am Ziel
Gewähren Sie dem BitTitan-Dienstkonto vollen Postfachzugriff über alle erworbenen Domänenpostfächer am Zielort.
Add-MailboxPermission -Identity "Zielpostfach -Benutzer "BitTitan-Dienstkonto" -AccessRights FullAccess -InheritanceType All -AutoMapping $false
31. Testen Sie den Postfachzugriff, indem Sie mit OWA ein beliebiges anderes Postfach mit dem Administratorkonto öffnen
32. BitTitan-Lizenzanforderungen
Notiz:
Eine Lizenz kann bis zu 10 Mal pro Postfach verwendet werden. Dies setzt voraus, dass sich der Endpunkt nicht ändert.
Wenn Sie die BitTitan-Migration mit Testkonten testen, stellen Sie sicher, dass Sie die Gesamtzahl der benötigten Testkonten in die Lizenzzählung einbeziehen.
33. Lizenzen einlösen
Hinweis : Registrieren Sie sich für ein BitTitan-Konto, wenn Sie kein Konto haben, stellen Sie sicher, dass Ihr Konto aktiv ist, indem Sie Ihre E-Mail-Adresse bestätigen.
34. Erstellen Sie ein BitTitan-Projekt
35. At Source Settings:
36. At Destination Settings:
37. At Tenant to Tenant Migration
38. Migrate Test accounts to Destination using BitTitan – Pre-Stage Migration
39. Perform a Pre-Stage Migration
Important:
40. Resolve any BitTitan error messages
41. Use OWA to confirm the mailboxes contain the migrated data
42. At Source: Use OWA to send and receive additional email
43. Perform a full migration
44. Resolve any BitTitan error messages
45. Use OWA to confirm the mailboxes contain the migrated data
46. Liaise with the business and confirms date and time of migration. Confirm other resources are available for migration
47. If the decision was made to take ownership of the domain and DNS before migration, initiate the transfer
1 week before migration
Export Exchange objects from Source:
48. Log into EXO Powershell at Source
49. Mailboxes: Export UPN, Alias, SMTP and Proxy addresses
Get-Mailbox -ResultSize Unlimited | select userprincipalname,alias,primarysmtpaddress,emailaddresses | export-csv -NoTypeInformation “Backup_Source_Mailboxes.csv”
50. Groups: Export Alias, SMTP and Proxy addresses
Get-DistributionGroup -ResultSize Unlimited | select alias,primarysmtpaddress,emailaddresses | export-csv -NoTypeInformation “Backup_ Source_Groups.csv”
51. Calendar Delegation:
Get-Mailbox | foreach {
write-host -fore green “Processing $_”
Get-MailboxFolderPermission -Identity “$($_.alias):\Calendar” | where {$_.User -notlike “Anonymous” -and $_.User -notlike “Default”}} | select Identity,User,@{name=’AccessRights’;expression={$_.AccessRights -join ‘,’}} | Export-Csv -NoTypeInformation “Backup_ Source_Calendar_Delegation.csv”
Export Exchange objects from Destination:
52. Log into EXO Powershell at Destination
53. Contacts: Export Name and Email addresses
Get-Recipient -Filter {RecipientType -eq “MailContact” -and EmailAddresses -like ‘domainname‘} | select DisplayName,RecipientType,ExternalEmailAddress,EmailAddresses | export-csv -NoTypeInformation “Backup_Destination_Contacts.csv”
54. Mailboxes: Export Forwarding
For each MAILBOX:
get-Mailbox -Identity | select UserPrincipalName,DeliverToMailboxAndForward,ForwardingAddress,ForwardingSmtpAddress | export-csv -notypeinformation ‘Backup_Destination_Forwarding.csv’ -append
55. Pre-Stage Migration of all Mailboxes – email older than 10 days
Important: For the Source, use the onmicrosoft.com address
Select the Project Name
Click on the drop-down arrow beside “Add” and select “Bulk Add”
Click on “Select File”, locate the CSV file created in step 1 then click “Open”
The contents of the CSV will get imported and displayed on screen, click “Save”
Pre-stage migration:
Important:
Allow time for the migration to complete
The Pre-Stage migrates emails only
Calendars, contacts, journals, notes, and tasks will only migrate during a full migration
56. Resolve any BitTitan error messages
57. Add the domain then request a TXT record to verify we own the domain
58. Setup IM federation so you have chat communications during pre-cutover
Important: Cannot migrate any IM contacts to Microsoft Teams.
59. 1 day before migration
Migrate mailboxes – Full migration
Important: Allow time for the migration to complete.
60. Resolve any BitTitan error messages
61. Migration day
[Optional] Change the TTL value on each MX record
Remove domain dependencies from Source:
62. Log into Azure AD and EXO Powershell at Source
[Optional] Change FEDERATED domains to MANAGED, if applicable.
63. Run the following cmdlet to determine which domains are FEDERATED or MANAGED
Get-MsolDomain
If FEDERATED change to MANAGED:
Set-MsolADFSContext -Computer ADFS_Server_FQDN
Convert-MsolDomainToStandard -DomainName “Domain Name Here” -SkipUserConversion:$true -PasswordFile C:\passwords.txt
64. Run the following cmdlets to verify the domains are managed
Get-MsolDomain
[If Applicable] Disable the directory synchronization
Set-MsolDirSyncEnabled -EnableDirSync $false
[If Applicable] SharePoint Online public website
65. If you had also set up your domain with a SharePoint Online public website, then before you can remove the domain, you first have to set the website’s URL back to the initial domain.
[If Applicable] Skype for Business and Teams
Remove all Skype for Business and Teams licenses from the users in the source tenant. This will remove the SIP attribute from their proxy addresses.
66. Set the default domain in source tenant to domainname.onmicrosoft.com
67. Change all Mailboxes UPNs to domainname .onmicrosoft.com domain. Replace the domainname with your domain name.
Get-MsolUser -all | select-object UserPrincipalName,ObjectID | export-csv -NoTypeInformation “User.csv”
Import-csv User.csv| ForEach-Object {
$ID = $_.UserPrincipalName
$ObjectID = $_.ObjectID
$365Email = $ID.Split(“@”)[0] + “@ domainname.onmicrosoft.com”
Set-MsolUserPrincipalName -ObjectId $ObjectID -NewUserPrincipalName $365Email}
68. Confirm the UPNs have been updated
Get-MsolUser -all | select-object UserPrincipalName,ObjectID
69. Change all Distribution Groups Primary SMTP address to domainname.onmicrosoft.com domain. Replace the domainname with your domain name.
Get-DistributionGroup -ResultSize Unlimited | select-object PrimarySMTPAddress | export-csv -NoTypeInformation “DL.csv”
Import-csv DL.csv| ForEach-Object {
$ID = $_.PrimarySmtpAddress
$365Email = $ID.Split(“@”)[0] + “@domainname.onmicrosoft.com”
Set-DistributionGroup -Identity $ID -primarysmtpaddress $365Email}
70. Confirm the primary smtp’s have been updated
Get-DistributionGroup -ResultSize Unlimited | select-object PrimarySMTPAddress
71. As we changed every mailboxes UPN, the primary SMTP addresses has also been updated to domainname.onmicrosoft.com. Now remove all aliases from every mailbox using this script:
$users = Get-Mailbox -ResultSize Unlimited | Where {$_.Emailaddresses.count -gt 1}
foreach ($user in $users) {
foreach ($email in $user.emailaddresses){
if ($email -ne “SMTP:”+$user.PrimarySmtpAddress){
Set-Mailbox -Identity $user.name -EmailAddresses @{Remove=$email}
}
}
Write-host $user.primarysmtpaddress “has been processed”
}
72. Confirm the Primary and Alias addresses are both domainname.onmicrosoft.com ONLY
Get-Mailbox | select PrimarySmtpAddress,EmailAddresses
73. Remove all aliases from every distribution group
$groups = Get-DistributionGroup -ResultSize Unlimited | Where {$_.Emailaddresses.count -gt 1}
foreach ($group in $groups) {
foreach ($email in $group.emailaddresses){
if ($email -ne “SMTP:”+$group.PrimarySmtpAddress){
Set-DistributionGroup -Identity $group.name -EmailAddresses @{Remove=$email}
}
}
Write-host $group.primarysmtpaddress “has been processed”
}
74. Confirm the Primary and Alias addresses are both domainname.onmicrosoft.com ONLY
Get-DistributionGroup | select PrimarySmtpAddress,EmailAddresses
[If Required] O365 Groups: User the cmdlets below to remove the domain:
Get-UnifiedGroup -Identity “name” | select primarysmtpaddress,emailaddresses
Set-UnifiedGroup -Identity “name” -PrimarySMTPAddress [email protected]
Set-UnifiedGroup -Identity “name” -EmailAddresses @{remove=”smtp:[email protected]”}
75. Confirm all dependencies have been removed. Replace the domainname with your domain name.
Get-MsolUser -DomainName domainname.com -all
Important:
76. Remove the domain from the source Microsoft 365 tenant
Important:
77. Add Mail Rules and Connectors at Destination
[If required]
78. Verify the domain
79. Verify changes
80. Check Domain
To check everything is setup as it should be, wait around an hour for all updates to take effect then launch: https://centralops.net/co/
Type in the domain name and check all records are set as in ‘View DNS Settings’ above.
81. Remove Email Forwarding at Destination
Log into EXO Powershell at Destination and run the following cmdlets for each user:
Set-Mailbox -Identity “DestinationUserEmailAddress” -ForwardingAddress $null -DeliverToMailboxAndForward $false
82. Add aliases for each user at Destination:
Set-RemoteMailbox -Identity “[email protected]” -EmailAddresses @{Add=”smtp:name1@domain”,”smtp:name2@domain”}
83. For each GROUP:
Set-DistributionGroup -Identity “groupname” -EmailAddresses @{add=”[email protected]”}
84. Change the TTL value on each MX record back to the original setting eg 1 hour
85. Migrate Mailboxes – Final Migration
Important: Allow time for the migration to complete
86. Resolve any BitTitan error messages
87. Delete Contacts at Destination
Connect to EXO at Destination and run the following cmdlet:
Import-csv “Backup_Destination_Contacts.csv”| ForEach-Object {
$DisplayName = $_.DisplayName
Remove-MailContact -Identity $Displayname}
88. Confirm the Contact has been deleted:
Import-csv “Backup_Destination_Contacts.csv”| ForEach-Object {
$DisplayName = $_.DisplayName
Get-MailContact -Identity $Displayname}
89. Set the default email address at Destination
For each USER:
Set-RemoteMailbox “[email protected]” -PrimarySmtpAddress “[email protected]”
90. For each GROUP:
Set-DistributionGroup -Identity ‘DisplayName’ -PrimarySmtpAddress “[email protected]” -EmailAddressPolicyEnabled $false
91. For each SHARED MAILBOX:
Important: Allow time for all changes to sync to O365.
Post-Migration Activities
92. Verify delegates / aliases have been correctly populated
Migrate Mailboxes – Final Migration
Important: Allow time for the migration to complete.
93. Resolve any BitTitan error messages
Select the accounts that errored
Click on the down arrow beside “Start” and select “Retry Errors”
In the “Retry Errors” window, review the settings
Click “Retry Errors”
Click on the “Refresh list” icon to get a status of the migration or click on the dashboard on the left-hand side menu
94. Execute End User Test Plan
Launch Outlook at Destination and verify the contents of the following:
Email
Contacts
Calendar
Send and Receive emails INTERNALLY and verify emails have been received
Send and Receive emails EXTERNALLY and verify emails have been received
Verify the sender’s email address
Send and Receive emails form a SHARED MAILBOX and confirm emails have been received.
Verify the sender’s email address
Send a test Calendar invite to a colleague and confirm the invite was received
95. Log into EXO Powershell at Destination
For each mailbox, remove the service account
Remove-MailboxPermission -Identity “User1” -User “BitTitan service account” -AccessRights FullAccess -InheritanceType All
96. Take ownership of Domain and DNS records
[If not already actioned] – If the current owner made the required changes to DNS, take ownership of the domains and DNS records.
Back-out Plan
97. Change default email address back to old email address
Set-RemoteMailbox “[email protected]” -PrimarySmtpAddress “[email protected]”
98. For each USER:
Log into the on-premise Exchange server
Run Exchange powershell and execute the following cmdlets:
Set-RemoteMailbox “[email protected]” -EmailAddresses @{remove=”[email protected]”}
99. For each GROUP:
Log into the on-premise Exchange server
Run Exchange powershell and execute the following cmdlets:
Set-DistributionGroup -Identity “groupname” -EmailAddresses @{remove=”[email protected]”}
100. Verify attributes have been updated:
Get-RemoteMailbox-Identität | Wählen Sie den Hauptbenutzernamen, den Alias, die primäre SMTP-Adresse und die E-Mail-Adressen aus
101. Kontakte am Ziel neu erstellen:
Melden Sie sich unter Destination bei EXO Powershell an und führen Sie die folgenden Cmdlets aus:
Import-csv „Backup_Destination_Contacts.csv“| ForEach-Object {
$DisplayName = $_.DisplayName
$Email = $_.EmailAddresses
New-MailContact -Name $Displayname -ExternalEmailAddress $Email}
102. Aktivieren der Weiterleitung vom Ziel zu CONTACT
Melden Sie sich am Zielort bei EXO Powershell an
. Führen Sie die folgenden Cmdlets aus:
Set-Mailbox -Identity „[email protected]“ -DeliverToMailboxAndForward $true -ForwardingAddress „[email protected]“
103. Reverse DNS-Änderungen
104. Bestätigen Sie, dass alle Abhängigkeiten entfernt wurden. Ersetzen Sie den Domänennamen durch Ihren Domänennamen.
Get-MsolUser -Domänenname Domänenname.com -all
105. Entfernen Sie die Domäne aus dem Microsoft 365-Zielmandanten
Wichtig :
Warten Sie bis zu 60 Minuten, bevor Sie die Domänen zum Zielmandanten hinzufügen
. O365 kann immer noch davon ausgehen, dass die Domäne noch verwendet wird
106. Fügen Sie die Domain bei Source hinzu und fordern Sie dann einen TXT-Eintrag an, um zu bestätigen, dass wir der Eigentümer der Domain sind
107. Überprüfen Sie die Domäne
108. Änderungen überprüfen
109. Domäne prüfen
Um zu überprüfen, ob alles so eingerichtet ist, wie es sein sollte, warten Sie etwa eine Stunde, bis alle Updates wirksam werden, und starten Sie dann: http://centralops.net/co/
Geben Sie den Domänennamen ein und überprüfen Sie, ob alle Einträge wie in „DNS-Einstellungen anzeigen“ festgelegt sind ' Oben.
110. Fügen Sie ggf. alle Skype for Business- und Teams-Lizenzen von den Benutzern im Quellmandanten hinzu. Dadurch wird das SIP-Attribut zu ihren Proxy-Adressen hinzugefügt.
111. Stellen Sie die ursprüngliche Proxy-Adresse für alle Benutzer wieder her:
Set-Mailbox -Identity „alias“ -EmailAddresses SMTP:[email protected],smtp:[email protected]
112. Stellen Sie den UPN für alle Benutzer wieder her:
Import-csv „Backup_Mailboxes.csv“| ForEach-Object {
$NewUPN = $_.PrimarySmtpAddress
$alias = $_.Alias
$OldUPN = $alias + „@vivacityhealth.onmicrosoft.com“
Set-MsolUserPrincipalName -UserPrincipalName $OldUPN -NewUserPrincipalName $Newupn
}
113. Überprüfen Sie, ob UPN, E-Mail und Proxy-Adresse aktualisiert wurden:
Get-Mailbox-Identity | Wählen Sie den Hauptbenutzernamen, den Alias, die primäre SMTP-Adresse und die E-Mail-Adressen aus
114. Ändern Sie die SMTP-Adresse aller Verteilergruppen in die Domäne domainname.onmicrosoft.com. Ersetzen Sie den Domänennamen durch Ihren Domänennamen.
Get-DistributionGroup -ResultSize Unbegrenzt | select-object PrimarySMTPAddress | export-csv -NoTypeInformation „DL.csv“
Import-csv DL.csv| ForEach-Object {
$ID = $_.PrimarySmtpAddress
$365Email = $ID.Split(“@”)[0] + “@domainname.onmicrosoft.com”
Set-DistributionGroup -Identity $ID -primarysmtpaddress $365Email}
115. Entfernen Sie alle Aliase aus jeder Verteilergruppe
$groups = Get-DistributionGroup -ResultSize Unlimited | Wobei {$_.Emailaddresses.count -gt 1}
foreach ($group in $groups) {
foreach ($email in $group.emailaddresses){
if ($email -ne „SMTP:“+$group.PrimarySmtpAddress){
Set -DistributionGroup -Identity $group.name -EmailAddresses @{Remove=$email}
}
}
Write-host $group.primarysmtpaddress „wurde verarbeitet“ $
}
So funktioniert die Mandanten-zu-Mandant-Migration Office 365.
Ein Tutorial, das zeigt, wie Sie Microsoft PowerPoint 365 dazu bringen, Ihre Diashow automatisch abzuspielen, indem Sie die Zeit für den Folienwechsel einstellen.
Stylesets können Ihrem gesamten Dokument auf einen Schlag ein gepflegtes und konsistentes Aussehen verleihen. So verwenden Sie Stylesets in Word und finden sie.
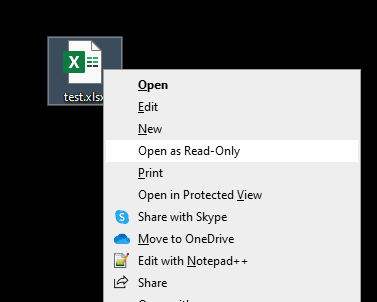
Erzwingen Sie eine Aufforderung bei Ihren Microsoft Excel für Office 365-Dateien, die "Öffnen als schreibgeschützt" anzeigt, mit diesem Leitfaden.
Wir zeigen Ihnen einen Trick, mit dem Sie ganz einfach alle Ihre Microsoft Outlook 365 Kontakte in vCard-Dateien exportieren können.
Erfahren Sie, wie Sie die Anzeige von Formeln in Zellen in Microsoft Excel aktivieren oder deaktivieren können.
Erfahren Sie, wie Sie Zellen in Microsoft Excel 365 mit diesem Tutorial sperren und entsperren können.
Es ist üblich, dass die Junk-Option in Microsoft Outlook ausgegraut ist. Dieser Artikel zeigt Ihnen, wie Sie damit umgehen können.
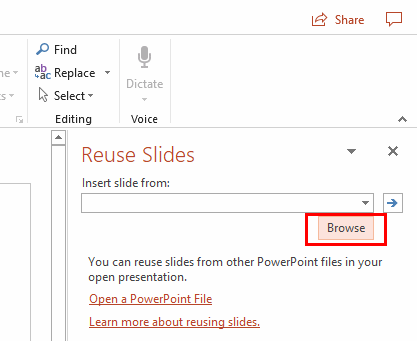
Ein Tutorial, das zeigt, wie man Folien aus einer anderen Microsoft PowerPoint 365-Präsentationsdatei importiert.
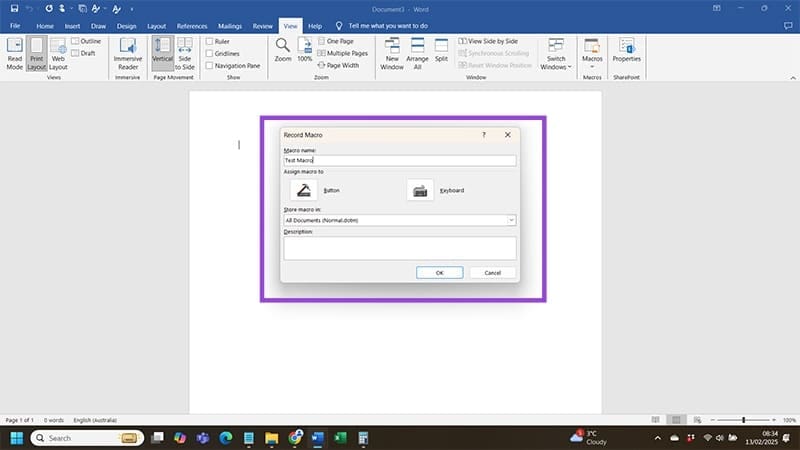
Erfahren Sie, wie Sie ein Makro in Word erstellen, um Ihre häufigsten Funktionen in kürzerer Zeit einfacher auszuführen.
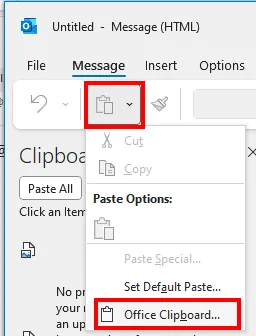
Wir zeigen Ihnen, wie Sie die sichtbaren Clipboard-Optionen in Microsoft Office 365-Anwendungen aktivieren oder deaktivieren können.


