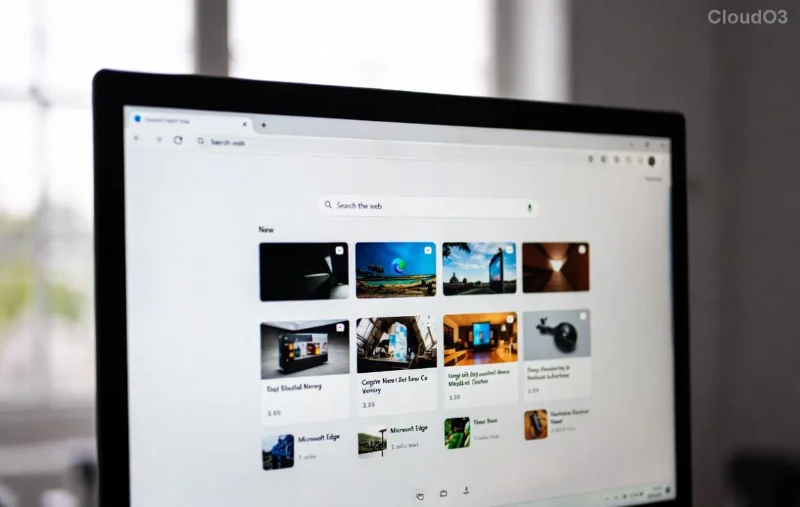
Ever scrolled through a lengthy webpage only to realize your screenshot tool chops off the bottom? 😩 Say goodbye to frustration! Microsoft Edge Web Capture is your secret weapon for grabbing full-page screenshots in one seamless click. Built right into the latest Microsoft Edge browser, this powerhouse tool captures every pixel—from top to bottom—without missing a beat.
Whether you're documenting articles, sharing research, or creating tutorials, mastering Microsoft Edge Web Capture for full-page screenshots will supercharge your workflow. Ready to dive in? Let's capture some magic! ✨
What is Microsoft Edge Web Capture?
Microsoft Edge Web Capture is an integrated screenshot and annotation tool (shortcut: Ctrl + Shift + S) that goes beyond basic snips. It shines for full-page screenshots, automatically scrolling and stitching the entire page into a single, editable image.
Key perks include:
- ✅ Instant full-page capture—no manual scrolling.
- ✏️ Built-in editing: Crop, highlight, draw, and add text.
- 📤 Quick save or copy to clipboard.
- 🎨 Annotation tools for professional touches.
Pro tip: It's faster and more reliable than extensions, using Edge's native engine for crisp results.
Why Choose Microsoft Edge Web Capture for Full-Page Screenshots?
In a world of clunky tools, Microsoft Edge Web Capture stands out. Here's a quick comparison:
| Feature |
Microsoft Edge Web Capture |
Chrome Extensions |
Other Browsers |
| Full-Page Capture |
Native ✅ |
Often glitchy |
Limited |
| Editing Tools |
Full suite |
Basic |
Extra apps needed |
| Speed |
Lightning-fast |
Slower |
Variable |
| Privacy |
No third-party |
Permissions required |
Browser-dependent |
Save time, ditch ads, and keep it simple. Your full-page screenshots will look pro every time!
Step-by-Step: How to Use Microsoft Edge Web Capture for Full-Page Screenshots
🔥 Let's get hands-on. Follow these steps for flawless captures:
- 1️⃣ Open Your Webpage
Navigate to the page in Microsoft Edge. Ensure it's fully loaded—no half-baked captures here!
- 2️⃣ Launch Web Capture
Hit Ctrl + Shift + S (Windows/Linux) or Cmd + Shift + S (Mac). The overlay appears instantly.
- 3️⃣ Select Full Page
Click "Capture full page" (top option). Edge auto-scrolls and grabs everything—headers, footers, and all!
- 4️⃣ Edit Your Masterpiece
Use tools to crop, add arrows 📍, highlight text, or blur sensitive info. Feeling creative? Draw or emoji it up! 😎
- 5️⃣ Save or Share
Hit Copy for clipboard, Save as PNG, or Save as PDF. Done! 🚀
Voilà! Your full-page screenshot is ready. But what if you want more? Keep reading for pro tips. 👇
![Editing full-page screenshot in Microsoft Edge Web Capture]()
Advanced Tips for Microsoft Edge Web Capture Full-Page Screenshots
Level up your game:
- ⭐ Capture Multiple Pages: For tab groups, select "Capture region" and stitch manually—easy peasy.
- 📱 Mobile Sync: Edge on Android/iOS mirrors this tool. Capture on phone, edit on desktop.
- 🎯 Exclude Elements: Edit out pop-ups or nav bars post-capture.
- ⌨️ Shortcuts Galore: Ctrl + Shift + S is king, but pin to toolbar for one-click access.
- PDF Power: Convert screenshots to PDF for reports—print-ready perfection.
Trouble with infinite scroll sites? Zoom out first (Ctrl + -) for cleaner captures. Genius, right? 💡
Common Issues and Fixes
Stuck? Quick fixes:
| Problem |
Solution |
| Partial capture |
Disable extensions; refresh page. |
| No full-page option |
Update Microsoft Edge to latest version. |
| Blurry image |
Capture at 100% zoom; save as PNG. |
For official details, check Microsoft Edge Support.
Wrap-Up: Screenshot Like a Pro Today!
Congrats—you're now a Microsoft Edge Web Capture wizard! 🎉 Start capturing full-page screenshots and watch your productivity soar. Share your epic shots in comments below—what's your go-to use case?
Stick around for more Edge hacks. Next up: Automate with Collections. Happy capturing! 📸