ZPanel y Sentora en CentOS 6 x64
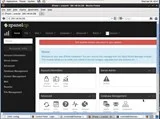
ZPanel, un panel de control de alojamiento web popular, se bifurcó en 2014 a un nuevo proyecto llamado Sentora. Aprende a instalar Sentora en tu servidor con este tutorial.
Fork is an open source CMS written in PHP. Fork's source code is hosted on GitHub. This guide will show you how to install Fork CMS on a fresh Debian 9 Vultr instance.
cURLlibxmlDOMSimpleXMLSPLPDO (with MySQL driver)mb_stringiconvGD2 graphics libraryjsonPCREintlCheck the Debian version.
lsb_release -ds
# Debian GNU/Linux 9.4 (stretch)
Ensure that your system is up to date.
apt update && apt upgrade -y
Install required packages.
apt install -y apt-transport-https sudo curl wget dirmngr
Create a new non-root user account with sudo access and switch to it.
adduser johndoe --gecos "John Doe"
usermod -aG sudo johndoe
su - johndoe
NOTE: Replace johndoe with your username.
Set up the timezone.
timedatectl list-timezones
sudo timedatectl set-timezone Region/City
Debian does not provide the latest PHP version in its default software repositories. We’ll need to add a community maintained third-party repository.
sudo wget -O /etc/apt/trusted.gpg.d/php.gpg https://packages.sury.org/php/apt.gpg
echo "deb https://packages.sury.org/php/ $(lsb_release -sc) main" | sudo tee /etc/apt/sources.list.d/php.list
sudo apt update
Install PHP 7.2 and required PHP extensions.
sudo apt install -y php7.2 php7.2-cli php7.2-fpm php7.2-common php7.2-curl php7.2-mbstring php7.2-gd php7.2-intl php7.2-mysql php7.2-xml php7.2-json
Check the version.
php --version

PHP 7.2.5-1+0~20180505045740.21+stretch~1.gbpca2fa6 (cli) (built: May  5 2018 04:57:44) ( NTS )
Copyright (c) 1997-2018 The PHP Group
Zend Engine v3.2.0, Copyright (c) 1998-2018 Zend Technologies
    with Zend OPcache v7.2.5-1+0~20180505045740.21+stretch~1.gbpca2fa6, Copyright (c) 1999-2018, by Zend Technologies
Install MySQL/MariaDB.
sudo apt install -y mysql-server
Check MySQL/MariaDB version.
mysql --version
# mysql  Ver 15.1 Distrib 10.1.26-MariaDB, for debian-linux-gnu (x86_64) using readline 5.2
Run mysql_secure installation script to improve MySQL security and set the password for MySQL root user.
sudo mysql_secure_installation
Connect to MySQL shell as the root user.
sudo mysql -u root -p
# Enter password
Create an empty MySQL database and user for Fork CMS, and remember the credentials.
CREATE DATABASE dbname;
CREATE USER 'username'@'localhost' IDENTIFIED BY 'password';
GRANT ALL PRIVILEGES ON dbname.* TO username@localhost;
FLUSH PRIVILEGES;
EXIT;
Install Nginx.
sudo apt install -y nginx
Check the version.
sudo nginx -v
# nginx version: nginx/1.10.3
Run sudo vim /etc/nginx/sites-available/fork.conf and configure Nginx for Fork.
server {
    listen 80;

    root /var/www/fork;
    index index.php index.html;

    server_name example.com;

    location / {
    # Checks whether the requested url exists as a file $uri or directory $uri/ in the root, else redirect to /index.php.
        try_files $uri $uri/ @redirects;
    }

    location @redirects {
        rewrite ^ /index.php;
    }

    location ~ \.php$ {
        try_files $uri =404;
        include fastcgi_params;
        fastcgi_pass unix:/var/run/php/php7.2-fpm.sock; # Make sure to doublecheck this!
        fastcgi_index index.php;
        fastcgi_read_timeout 60;
        fastcgi_split_path_info ^(.+\.php)(/.+)$;
        fastcgi_param SCRIPT_FILENAME $document_root$fastcgi_script_name;
    }

    # Don't pollute the logs with common requests
    location = /robots.txt  { access_log off; log_not_found off; }
    location = /favicon.ico { access_log off; log_not_found off; }

    # As Fork CMS has the app_root as doc_root, we need to restrict access to a few things for security purposes!
    location ~* ^/(composer\..*|vendor\/.*|Procfile$|\.git\/.*|src\/Console.*|.*\.gitignore|\.editorconfig|\.travis.yml|autoload\.php|bower\.json|phpunit\.xml\.dist|.*\.md|app\/logs\/.*|app\/config\/.*|src\/Frontend\/Cache\/CompiledTemplates.*|src\/Frontend\/Cache\/Locale\/.*\.php|src\/Frontend\/Cache\/Navigation\/.*\.php|src\/Frontend\/Cache\/Search\/.*|src\/Backend\/Cache\/CompiledTemplates\/.*|src\/Backend\/Cache\/Locale\/.*\.php)$ {
        deny all;
        access_log off;
        log_not_found off;
    }

    # Deny access to dot-files.
    location ~ /\. {
        deny all;
        access_log off;
        log_not_found off;
    }
}
A summary of the changes that you will be making are as follows.
root directive to point to the correct location of your website, such as /var/www/fork.server_name directive to point to your domain name or IP address.fastcgi_pass is set correctly.Save the file and exit.
Activate the new fork.conf configuration by linking the file to the sites-enabled directory.
sudo ln -s /etc/nginx/sites-available/fork.conf /etc/nginx/sites-enabled/
Test the Nginx configuration.
sudo nginx -t
Reload Nginx.
sudo systemctl reload nginx.service
Download Composer dependencies.
sudo apt install -y curl git unzip
Download and install Composer, the dependency manager for PHP.
php -r "copy('https://getcomposer.org/installer', 'composer-setup.php');"
php -r "if (hash_file('SHA384', 'composer-setup.php') === '544e09ee996cdf60ece3804abc52599c22b1f40f4323403c44d44fdfdd586475ca9813a858088ffbc1f233e9b180f061') { echo 'Installer verified'; } else { echo 'Installer corrupt'; unlink('composer-setup.php'); } echo PHP_EOL;"
php composer-setup.php
php -r "unlink('composer-setup.php');"
sudo mv composer.phar /usr/local/bin/composer
Check the version.
composer --version
# Composer version 1.6.5 2018-05-04 11:44:59
Create a document root directory.
sudo mkdir -p /var/www/fork
Change ownership of the /var/www/fork directory to johndoe.
sudo chown -R johndoe:johndoe /var/www/fork
Download the latest stable release of Fork CMS from the command line.
cd /var/www/fork
composer create-project forkcms/forkcms .
Change ownership of the /var/www/fork directory to www-data.
sudo chown -R www-data:www-data /var/www/fork
Edit the app/config/parameters.yml.dist file and set the database information.
sudo vim /var/www/fork/app/config/parameters_install.yml
Using your preferred web browser, open your site and follow the Fork CMS installer. After following the installer you should have Fork up and running. To access the Fork admin area just append /private to your site URL.
ZPanel, un panel de control de alojamiento web popular, se bifurcó en 2014 a un nuevo proyecto llamado Sentora. Aprende a instalar Sentora en tu servidor con este tutorial.
Aprende cómo instalar Vtiger CRM, una aplicación de gestión de relaciones con el cliente, en CentOS 7 para aumentar tus ventas y mejorar el servicio al cliente.
Esta guía completa le mostrará cómo configurar un servidor Counter-Strike 1.6 en Linux, optimizando el rendimiento y la seguridad para el mejor juego. Aprende los pasos más recientes aquí.
Los ataques de ransomware van en aumento, pero ¿puede la IA ayudar a lidiar con el último virus informático? ¿Es la IA la respuesta? Lea aquí, sepa que la IA es una bendición o una perdición
ReactOS, un sistema operativo de código abierto y gratuito, está aquí con la última versión. ¿Puede satisfacer las necesidades de los usuarios de Windows de hoy en día y acabar con Microsoft? Averigüemos más sobre este estilo antiguo, pero una experiencia de sistema operativo más nueva.
Whatsapp finalmente lanzó la aplicación de escritorio para usuarios de Mac y Windows. Ahora puede acceder a Whatsapp desde Windows o Mac fácilmente. Disponible para Windows 8+ y Mac OS 10.9+
Lea esto para saber cómo la Inteligencia Artificial se está volviendo popular entre las empresas de pequeña escala y cómo está aumentando las probabilidades de hacerlas crecer y dar ventaja a sus competidores.
Recientemente, Apple lanzó macOS Catalina 10.15.4, una actualización complementaria para solucionar problemas, pero parece que la actualización está causando más problemas que conducen al bloqueo de las máquinas Mac. Lee este artículo para obtener más información
13 Herramientas comerciales de extracción de datos de Big Data
Nuestra computadora almacena todos los datos de una manera organizada conocida como sistema de archivos de diario. Es un método eficiente que permite a la computadora buscar y mostrar archivos tan pronto como presiona buscar.