Lo spazio di archiviazione è uno dei componenti essenziali del tuo sistema e, che ti piaccia o no, molto probabilmente lo esaurirai in futuro. Un buon modo per liberare spazio di archiviazione è gestire i file più grandi. È possibile passare a una diversa unità , cloud storage, o addirittura eliminarli se non sono più necessari.
In alcuni casi, puoi persino comprimere i tuoi file se non desideri utilizzarli in tempi brevi. Ma come si trovano file di grandi dimensioni? Passare attraverso ogni cartella manualmente può essere noioso e l'utilizzo di un pulitore non è semplicemente abbastanza efficiente. Per fortuna ci sono alcuni modi accurati per trovare file di grandi dimensioni sul tuo sistema in Windows 11. Usa le guide qui sotto per iniziare.
Contenuti
Trova file di grandi dimensioni su Windows 11: suggerimenti
L'ordinamento di file di grandi dimensioni può essere eseguito in base a tipo, tipo, data e altro. Il modo migliore per farlo è utilizzare Ricerca di Windows in Esplora file. Puoi utilizzare termini dedicati per definire i file che stai cercando e filtrarli in base alla loro dimensione. Puoi quindi utilizzare le opzioni di ordinamento di Esplora file per trovare quelle più grandi nei risultati della ricerca.
Di conseguenza, se questo non soddisfa i tuoi criteri o non riesci a trovare i file che stai cercando, puoi utilizzare uno degli altri metodi elencati in questa guida.
Correlati: Come cambiare il colore della barra delle applicazioni su Windows 11
Metodo n. 01: utilizzo della ricerca in Explorer (consigliato)
Ora cercheremo file di grandi dimensioni in base ai tuoi criteri.
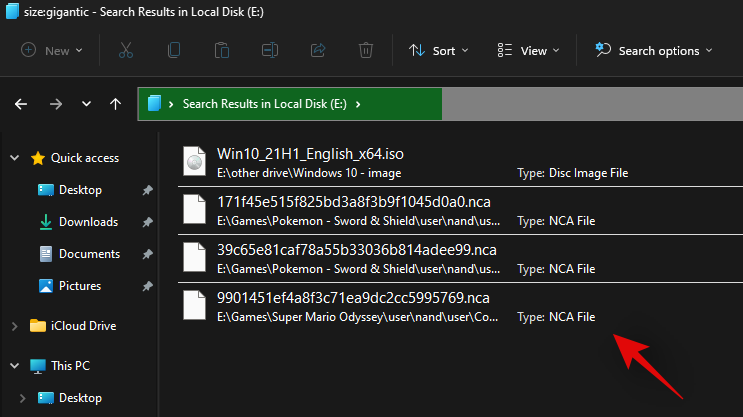
Premi Windows + Esulla tastiera per aprire Esplora file e fai clic sulla casella di ricerca nell'angolo in alto a destra. Cerca il termine seguente.
size:gigantic
I risultati verranno ora filtrati e i file più grandi di 4 GB verranno ora visualizzati sullo schermo. Seleziona i file non necessari che non ti servono sul tuo PC ed eliminali semplicemente per liberare spazio. Se desideri utilizzare una dimensione minima del file più piccola, sostituisci "gigantesco" con uno dei termini seguenti a seconda della dimensione che preferisci.
- Grandi: file tra 128 MB e 1 GB
- Enorme: file da 1 GB a 4 GB
- Medio: file da 1 MB a 128 MB
E questo è tutto! Puoi utilizzare la ricerca di Windows in questo modo per filtrare i file in base alla loro dimensione e trovare quelli più grandi attualmente sul tuo PC.
Nota: nel caso in cui il tuo PC indicizzi e mostri anche i file di sistema, ti consigliamo di ricontrollare i file prima di eliminarli per evitare di eliminare tutti i file di sistema vitali dal tuo sistema.
Ora avrai trovato file di grandi dimensioni sul tuo PC utilizzando Windows Search.
1.1 Cosa succede se la ricerca non funziona per te: consigli da provare
Se digitando "size:gigantic" non funziona per te, dovrai passare al vecchio file explorer da Windows 10. Usa la guida qui sotto per iniziare.
Una volta tornato al vecchio file explorer, usa la guida sopra per cercare file di grandi dimensioni. Una volta trovato, usa la guida successiva di seguito per ripristinare il nuovo esploratore di file di Windows 11 sul tuo sistema.
1.1.1 Passa al vecchio file explorer
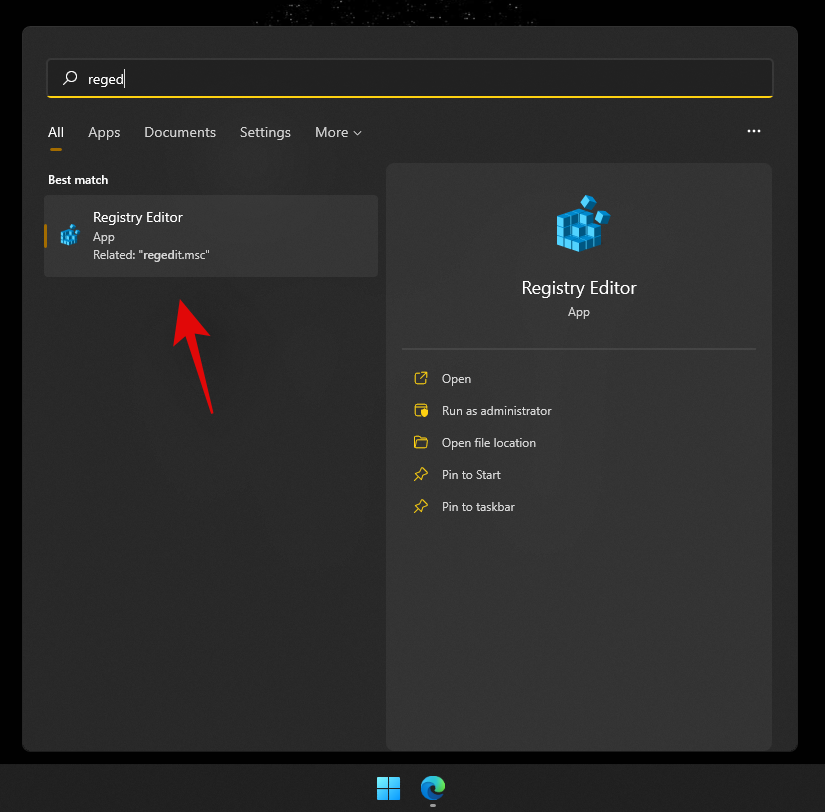
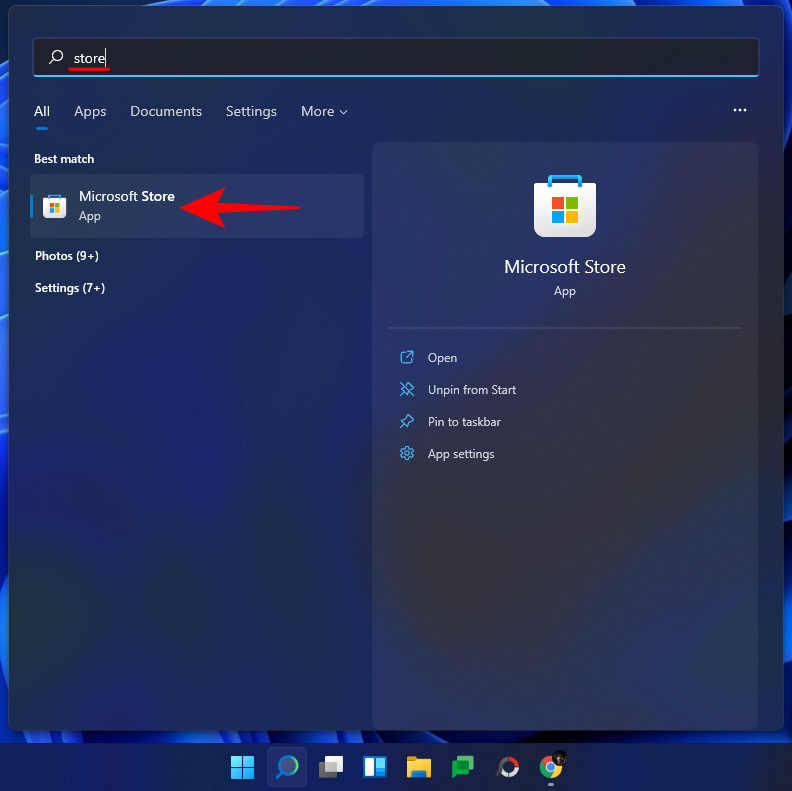
Premi Windows + Ssulla tastiera e cerca "Regedit". Fare clic e avviare l'app dai risultati della ricerca.
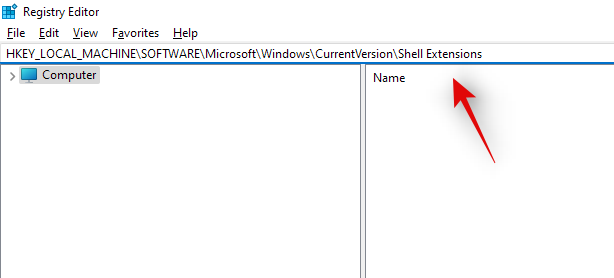
Passa alla directory seguente o copia e incolla l'indirizzo di seguito nella barra degli indirizzi.
HKEY_LOCAL_MACHINE\SOFTWARE\Microsoft\Windows\CurrentVersion\Shell Extensions
Fare clic sulla cartella denominata "Bloccato".
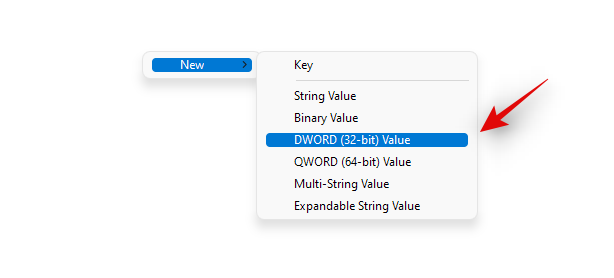
Fai clic con il pulsante destro del mouse su un'area vuota alla tua destra, seleziona "Nuovo", quindi fai clic su "Valore DWORD (32 bit)".
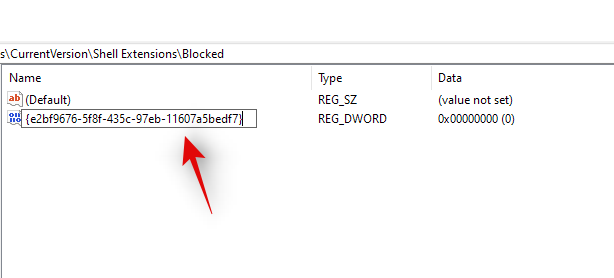
Inserisci il seguente nome e premi Invio sulla tastiera. Ti consigliamo di copiare e incollare lo stesso per evitare errori di denominazione.
{e2bf9676-5f8f-435c-97eb-11607a5bedf7}
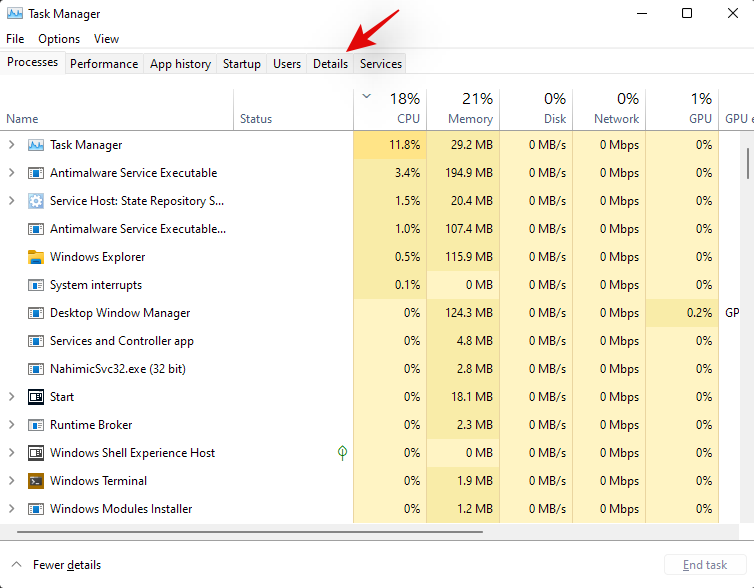
Chiudi l'editor del registro e premi Ctrl + Maiusc + Esc per aprire il Task Manager. Passa alla scheda "Dettagli".
Fare clic su "Explorer.exe" e premere Del sulla tastiera.
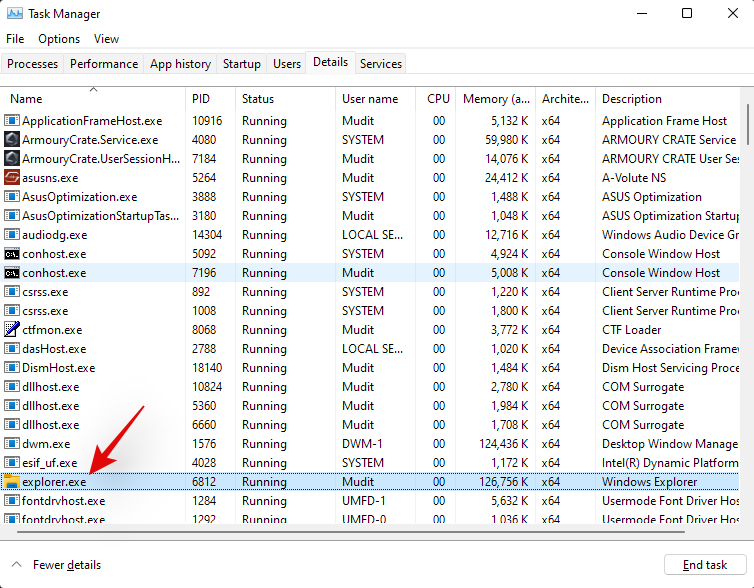
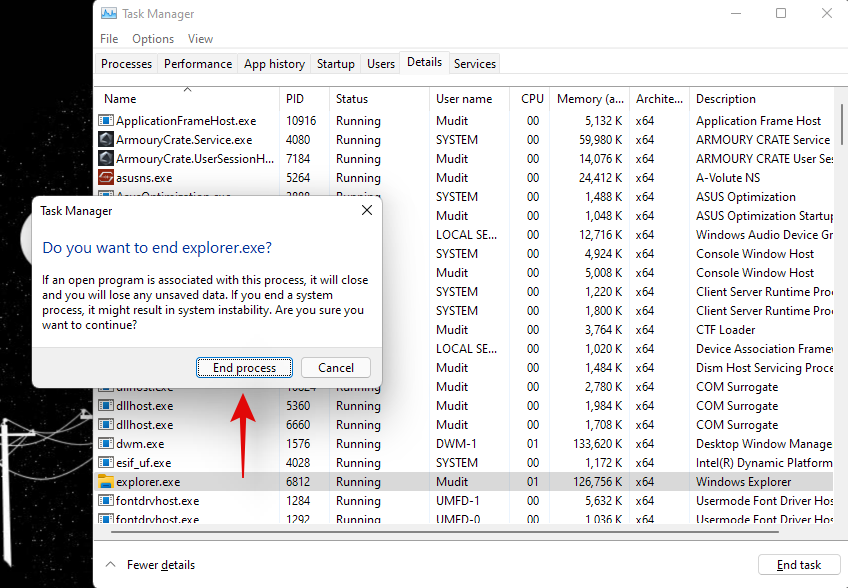
Fare clic su "Termina processo" per confermare la scelta.
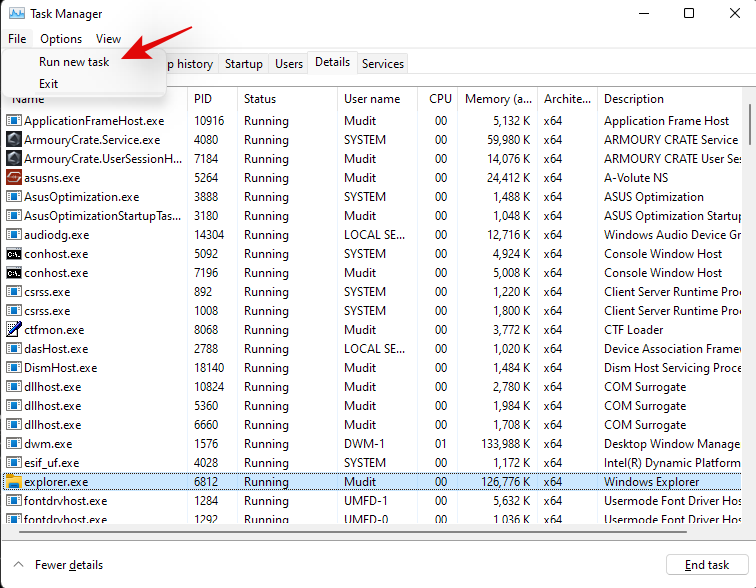
Fare clic su "File" e selezionare "Esegui nuova attività".
Immettere quanto segue nella casella di testo e fare clic su "Ok".
explorer.exe
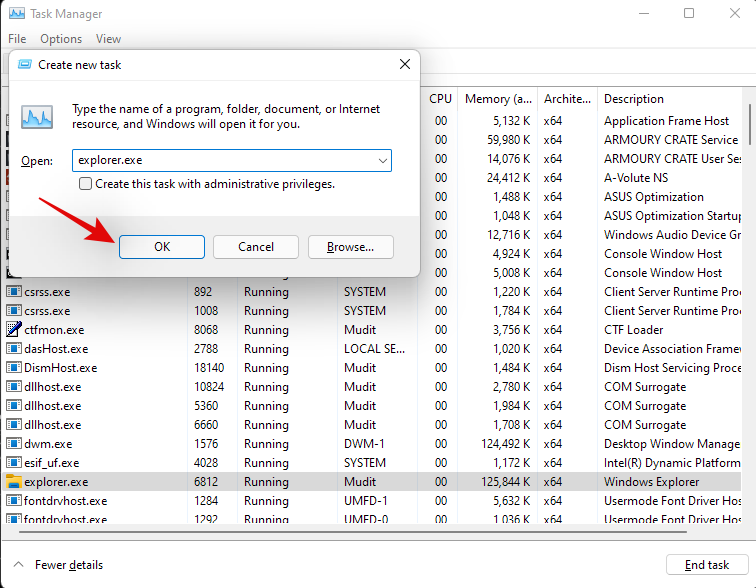
Windows File Explorer si riavvierà ora sul tuo sistema e dovrebbe essere ripristinato in Windows 10 File Explorer. Puoi aprire una cartella casuale per controllare lo stesso. Conferma di essere tornato al vecchio file explorer e usa la guida sopra per trovare file di grandi dimensioni sul tuo sistema.
1.1.2 Tornare al nuovo esploratore di file
Ora possiamo tornare al vecchio esploratore di file. Segui la guida qui sotto per iniziare.
Premi Windows + Ssulla tastiera e cerca Regedit. Fare clic e avviare l'app una volta visualizzata nei risultati di ricerca.

Vai al percorso seguente o copialo e incollalo nella barra degli indirizzi.
HKEY_LOCAL_MACHINE\SOFTWARE\Microsoft\Windows\CurrentVersion\Shell Extensions

Basta fare clic sul valore DWORD (32 bit) che abbiamo creato in precedenza e premere Del sulla tastiera. Fare clic su "Sì" per confermare la scelta.

Premi Ctrl + Maiusc + Esc sulla tastiera e passa alla scheda "Dettagli".

Fai clic su "explorer.exe" e premi Del sulla tastiera.

Fare clic su "Termina processo".

Fare clic su "File" e selezionare "Esegui nuova attività".

Digita "explorer.exe" e premi Invio sulla tastiera.

Ora puoi chiudere il task manager e l'editor del registro sul tuo PC.
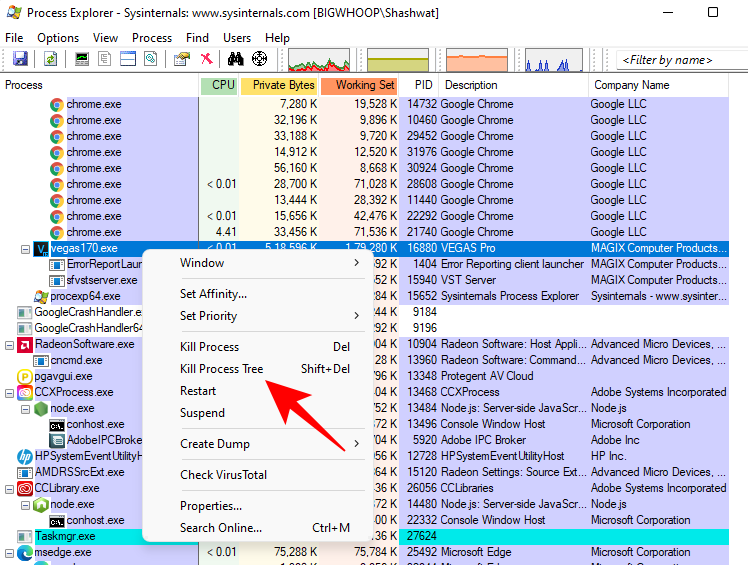
E questo è tutto! Ora sarai tornato al nuovo File Explorer su Windows 11. Oltre al parametro dimensione, puoi anche utilizzare i comandi seguenti per cercare diversi file sul tuo PC e ordinarli per dimensione. In questo modo puoi trovare quelli più grandi sul tuo sistema.
1.2 Trova per tipo di file
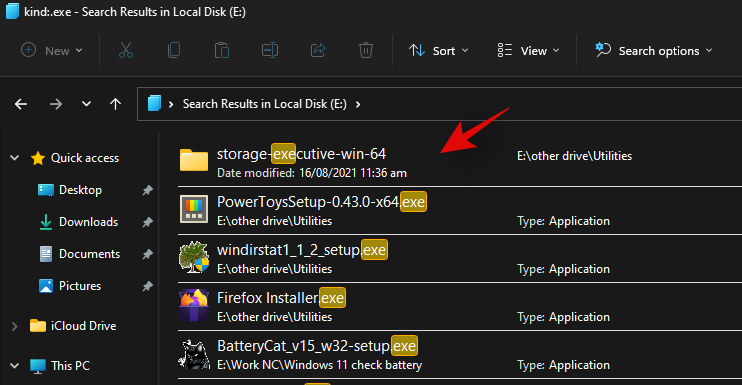
Simile al comando precedente, puoi utilizzare il parametro 'kind:' per trovare determinati file nella directory corrente. Il parametro "kind" ti consentirà di cercare file di calendario, documenti di testo, immagini, videogiochi e altro.
Quando utilizzi il parametro kind in questo modo non sei limitato alle categorie predefinite di Windows, ma puoi definire anche estensioni di file specifiche per trovarle sul tuo PC come mostrato di seguito.
kind:.exe
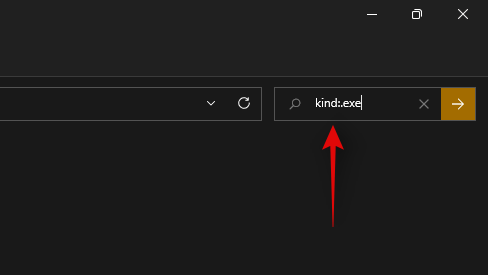
Il comando sopra ti aiuterà a cercare gli eseguibili nella directory corrente.
Allo stesso modo, l'utilizzo del comando seguente ti aiuterà a trovare i file PDF nella directory selezionata.
kind:.pdf
E questo è tutto! Puoi utilizzare questi comandi per trovare determinati file sul tuo PC utilizzando Windows Search.
1.3 Trova file per data
Puoi anche usare il parametro 'date:' per cercare i file creati in una certa data. Inoltre, questo comando può essere utilizzato insieme ai filtri booleani di seguito per trovare i file creati o modificati prima o dopo una certa data sul tuo PC. Ad esempio, se cerchi un file creato il 1 gennaio 2020, puoi utilizzare il seguente comando di seguito.
date: 1/1/2020
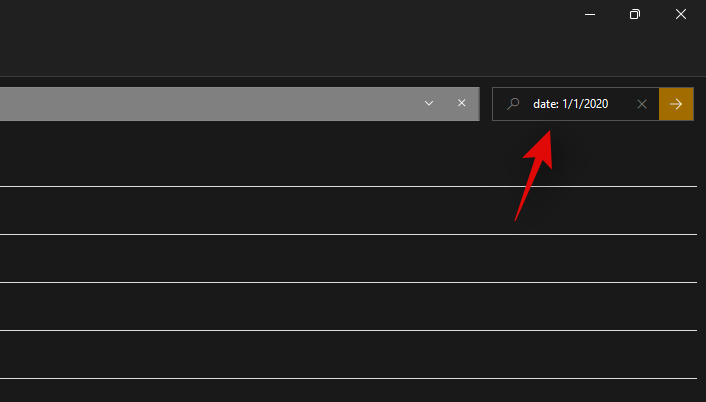
Allo stesso modo, se cerchi un file creato il 1 gennaio 2021, puoi utilizzare il seguente comando.
date: 1/1/2021
1.4 Usa filtri booleani
I filtri booleani possono aiutarti a cercare più termini contemporaneamente o insieme tra loro. Utilizza i filtri sottostanti che meglio si adattano alle tue esigenze attuali.
1.4.1 Il parametro 'AND'
You can use the AND parameter to search for two search terms together. This way you can look for a file containing both the terms and not either one of them which should help you filter out unwanted results containing either of the terms.
For example, if looking for a file containing the words ‘Samsung and ‘galaxy’ in its name then I can use the following term to search for your file.
Samsung AND galaxy
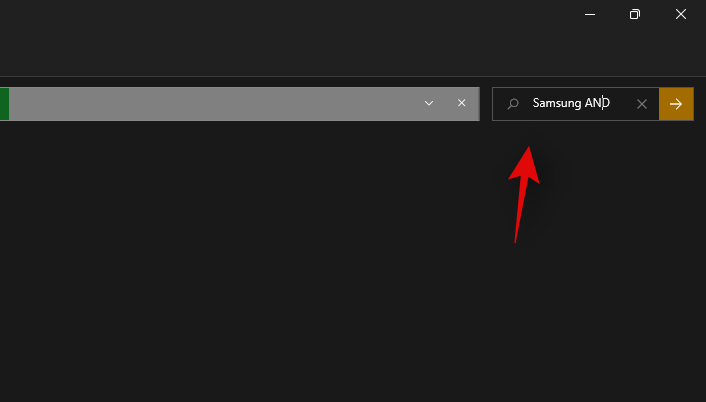
This will filter out files with only ‘Samsung’ and ‘Galaxy’ in their name. Files with either term will be filtered out.
The ‘OR’ parameter
The OR parameter is opposite to the AND parameter and allows you to search for files containing either of the terms in your search term. For example, if I wish to search for files with either ‘Apple’ or ‘Airpods’ in their name, then I can use the following search term.
apple OR airpods
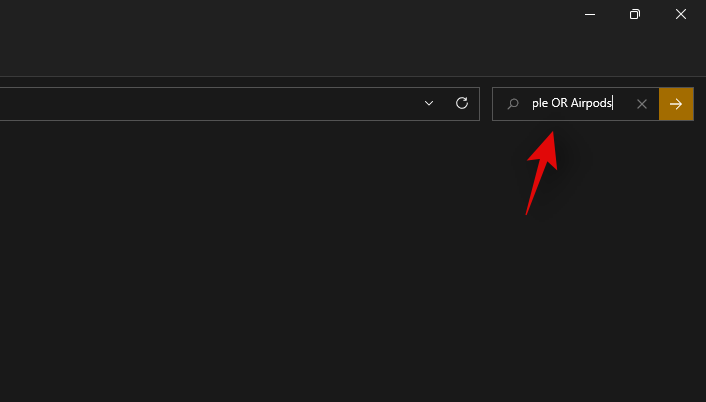
Similarly, if I am looking for PDF and EXE files in a particular directory, then I can use the following command below.
kind:.exe OR .pdf
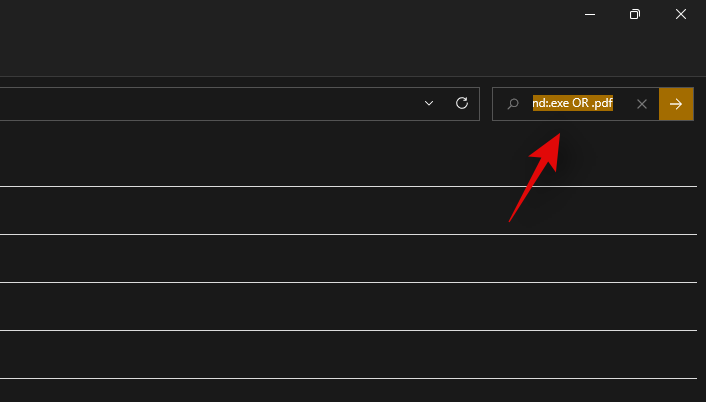
And that’s how you can use the OR parameter to look for multiple search terms in a single file name.
1.4.2 The ‘NOT’ parameter
If you are looking to filter out a certain search term or a filet type then you can use the NOT parameter. The NOT parameter will exclude the desired file type, kind, size, or name depending on your choice.
For example, if in a folder full of .docx files you are looking for other file types and wish to filter them all out, then you can use the following command.
kind: NOT .docx
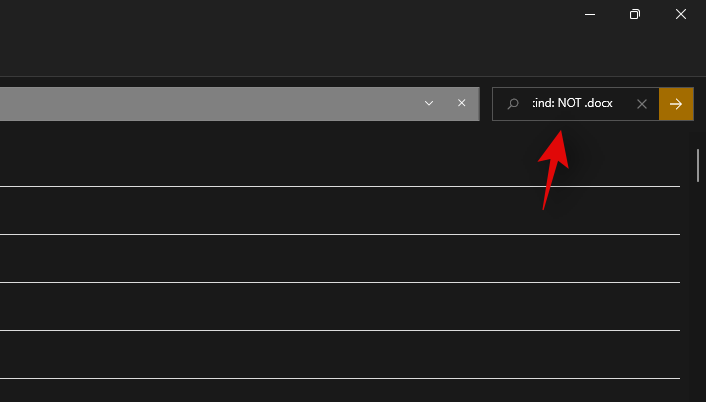
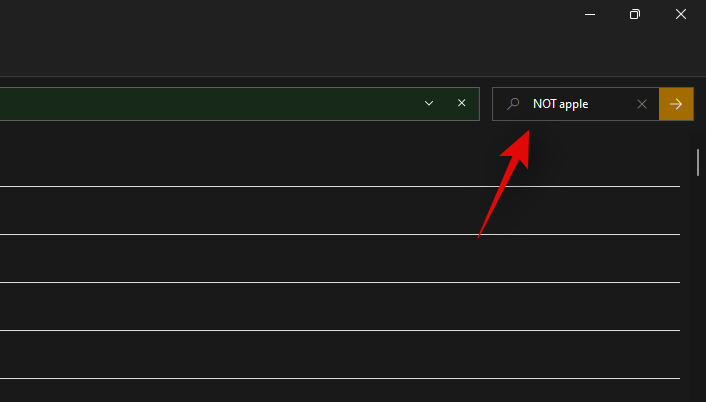
Similarly, if I am looking for a file that does not have ‘Apple” in its name then I can use the following search term.
NOT apple
1.4.3 Parentheses
Parentheses is a Boolean filter that is usually used when you are searching file contents as well. Anything included between the parentheses () is searched for and files with either or all of the terms are displayed on your screen.
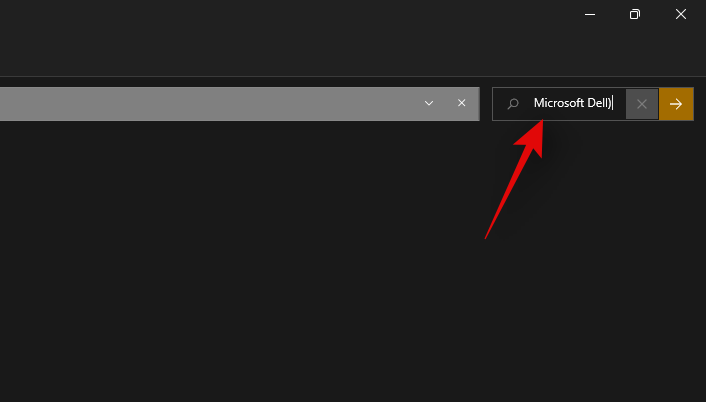
For example, if looking for a file containing either ‘Apple, Samsung, Mi, Microsoft, and Dell’ or all of these terms, then you can use the following term.
(Apple Samsung Mi Microsoft Dell)
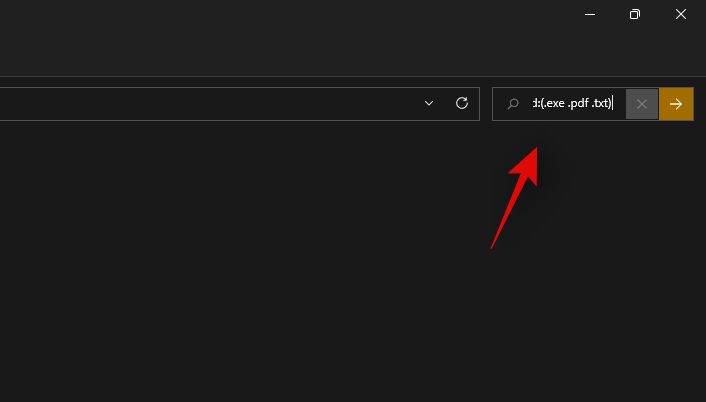
Similarly, you can use the following command if looking for multiple file types.
kind:(.exe .pdf .txt)
And that’s it! You will now have used parentheses to your advantage to look for multiple search terms in a particular file.
1.4.4 ‘>’ and ‘<‘>
These two Boolean filters are usually used when looking for file types or when sorting your results based on a parameter.
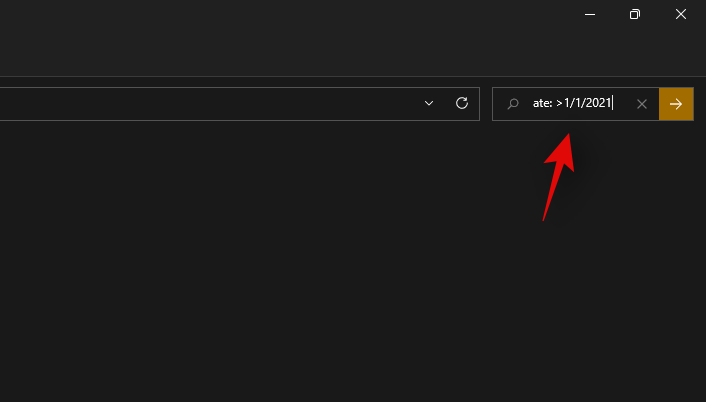
The greater than and less than parameters can be used to filter your results based on a number. For example, if looking for files dated after 1st January 2021 then you can use the following command.
date: >1/1/2021
Similarly, if looking for files less than 10GB then you can use the following command.
size: <>
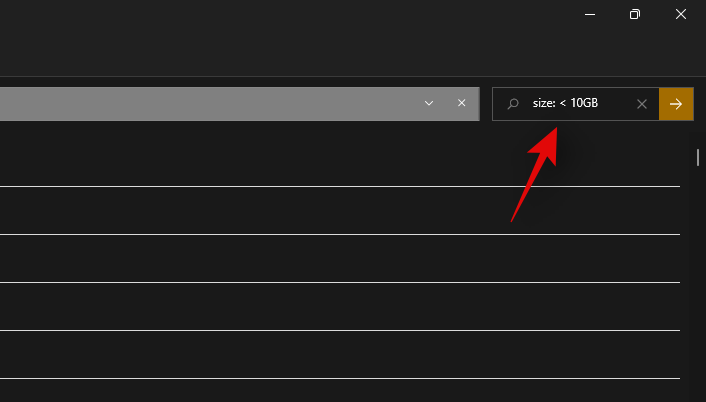
You can use the greater than and less than parameters to your advantage this way and find the desired files on your system.
Advanced methods to find large files on Windows
Some other ways in which you can find large files on your system have been listed below. Follow the guides to get you started.
Method #02: Using CMD
CMD can also help you find large files on your system. Use the guide below to get you started.
Press Windows + E on your keyboard and navigate to a location where you wish to search for large files and click on the address bar at the top.
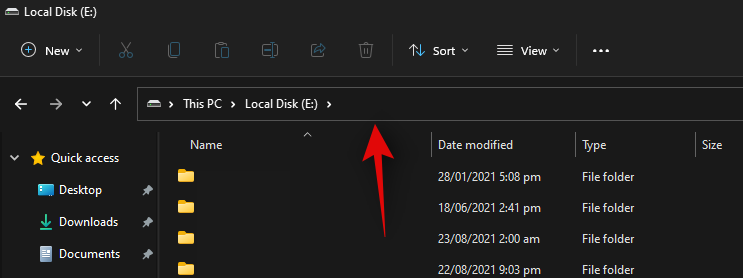
Type in CMD and press Enter on your keyboard.
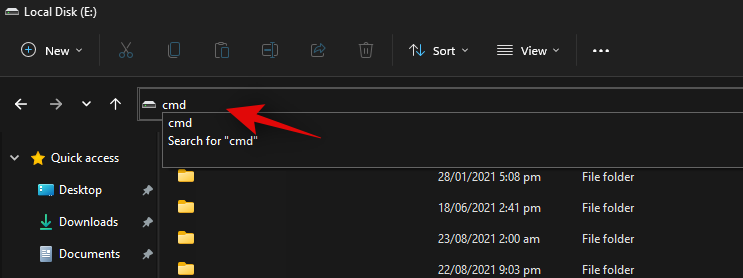
CMD will now be launched in the particular folder. Type in the following command and replace ‘PATH’ with the path we copied to your clipboard.
forfiles /S /M * /C “cmd /c if @fsize GEQ 1073741824 echo @path > largefiles.txt
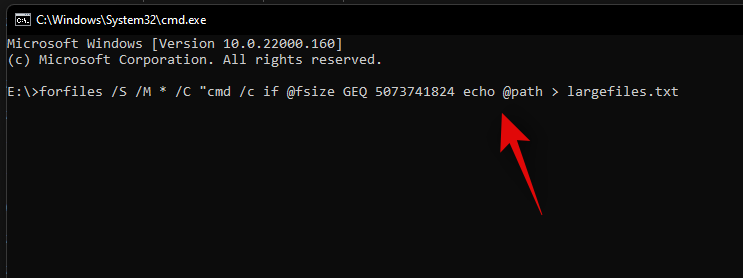
The above command will look for files larger than 1GB on your PC. If you wish to define a larger minimum size, then replace ‘1073741824’ with one of the following options below.
- 2GB: 2147483648
- 5GB: 5368709120
- 10GB: 10737418240
Execute the command with your desired variables and a text file will be created in the same location with a list of all the large files found on your system based on your criteria. You will also find the path for each file on your local storage in the text file.
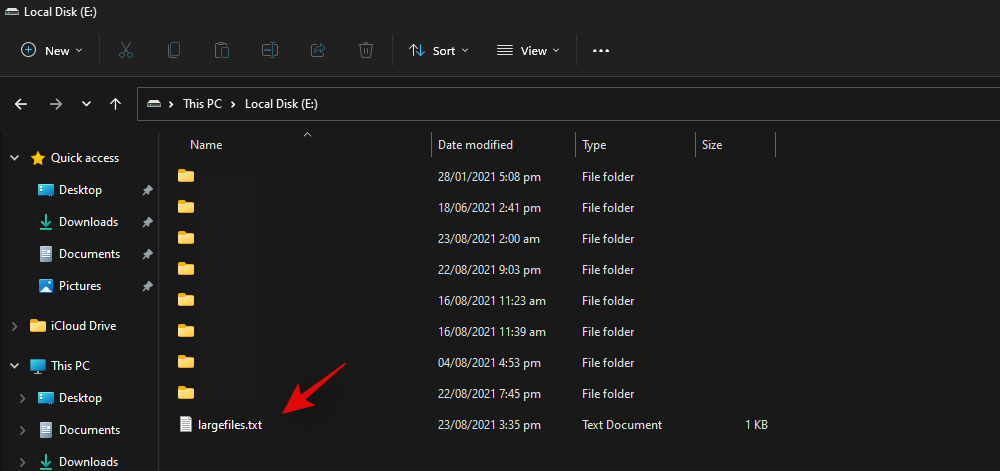
You can use this list to identify the largest files in the current location and then delete them at your discretion to free up some disk space on your system.
Method #03: Using PowerShell
You can also find large files on your system using PowerShell. Just like the command for CMD, PowerShell will scour your local files based on a minimum size and display all the files larger than it. Use the guide below to get you started.
Press Windows + E on your keyboard and navigate to the location where you wish to look for large files. Click on the address bar at the top and type in ‘PowerShell’. Press Enter on your keyboard once you are done.
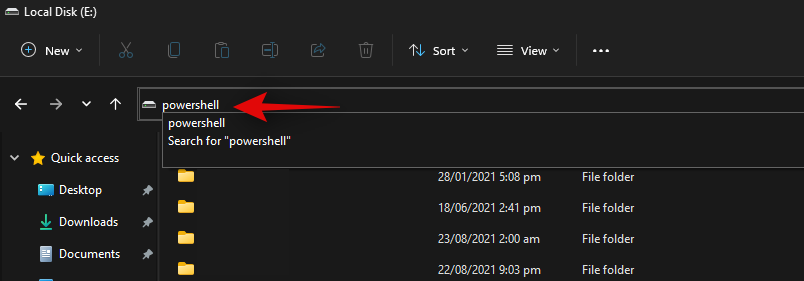
Copy-paste the command below in the PowerShell window and press Enter on your keyboard.
gci -r| sort -descending -property length | select -first 10 name, length

You will now get a list of the top 10 largest files currently taking the most disk space on your system. If you wish to view the top 20 files, then replace ‘select-first 10’ with ‘select-first 20’.
PowerShell will now find and display the 20 largest files on your system along with their size. The file size will be in bytes which can make it a bit difficult to judge the size of files in terms of gigabytes.
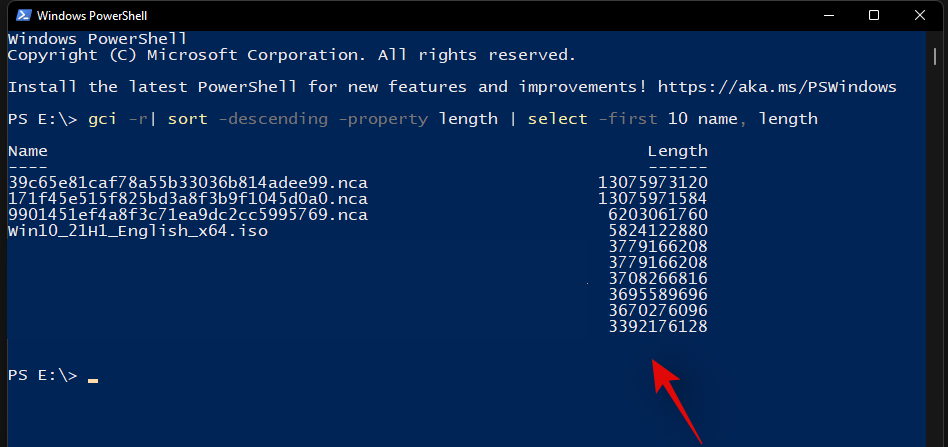
And that’s it! You will now have found the largest files on your PC using PowerShell in Windows 11.
2 Best apps to find large files on Windows
Many third-party tools allow you to view a visual representation of your PC’s disk usage.
This makes it much easier for you to identify large chunks of files taking significant space on your hard drive. Our recommended tools would be SpaceSniffer and WinDirStat. Use one of the guides below depending on the tool that you wish to use.
Method #04: Using SpaceSniffer
Space Sniffer is another popular third-party utility used to analyze disk space usage on Windows 11. SpaceSniffer can help you identify large files using huge amounts of space on your system. You can also find hidden files taking huge disk space on your PC using the SpaceSniffer. Use the guide below to get you started.
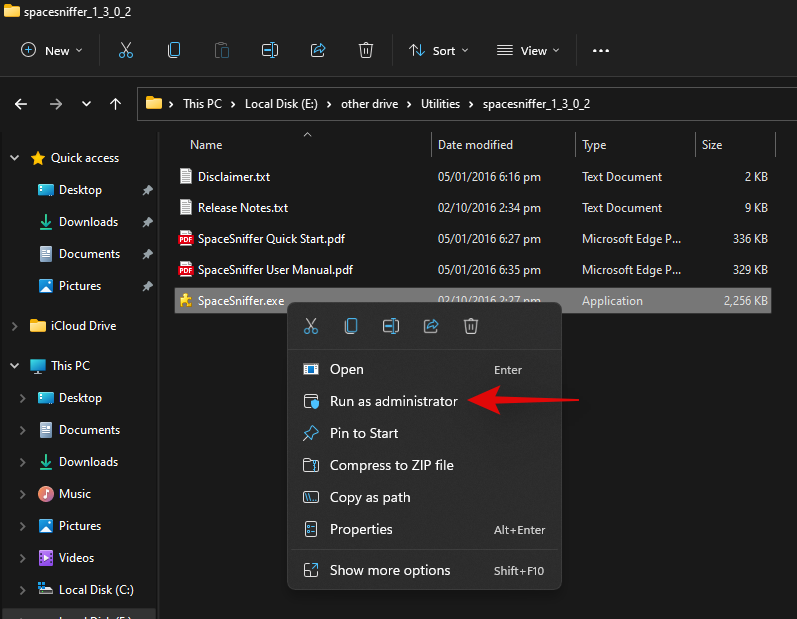
Download SpaceSniffer to your PC using the link above. A portable .exe will be downloaded to your system. Extract the archive and right-click on the .exe file.
Select ‘Run as administrator’.
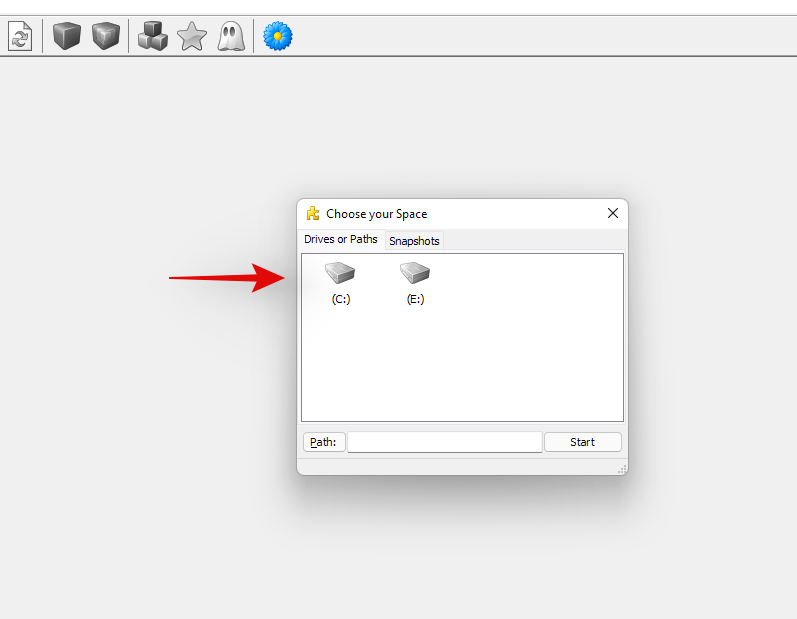
Now select the drive you wish to scan. If you wish to analyze and find large files in a particular directory, then you can enter its path in the text box below.
You will now be shown a graphical representation of your disk space usage on your screen. Simply hover over the largest chunk and you will be shown the name of the folder or file occupying that space.
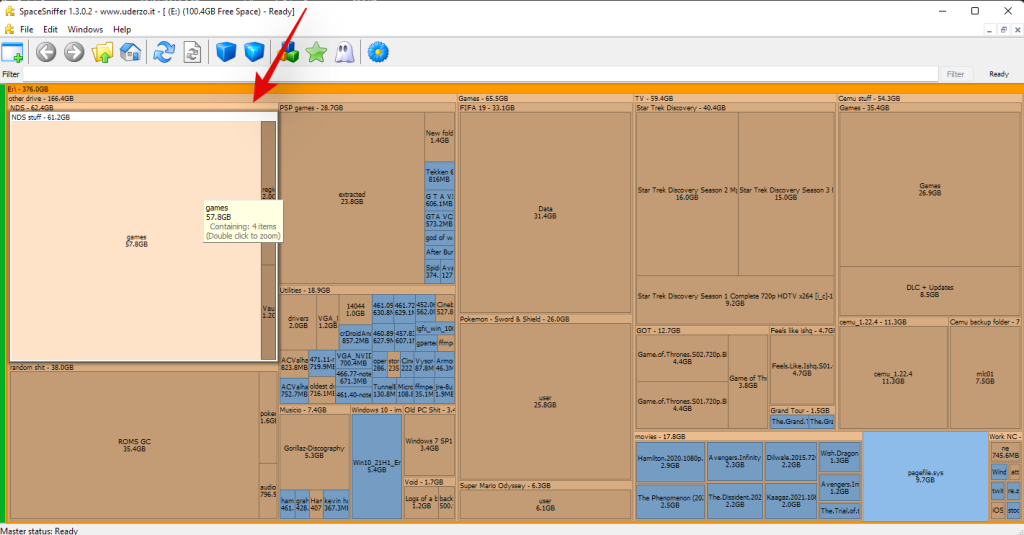
And that’s it! You can use SpaceSniffer this way to identify the largest files on your system by simply looking at the largest chunks on your screen.
Method #05: Using WinDirStat
WinDirStat is a popular open-source utility often used to generate a graphical representation of your local storage space in a user-friendly manner. This makes it easier to identify large chunks of your disk space occupied by a single file, folder, or archive, which in turn will make it easier for you to free up some space on your PC. Use the guide below to identify what is taking up space on your Windows 11 PC.
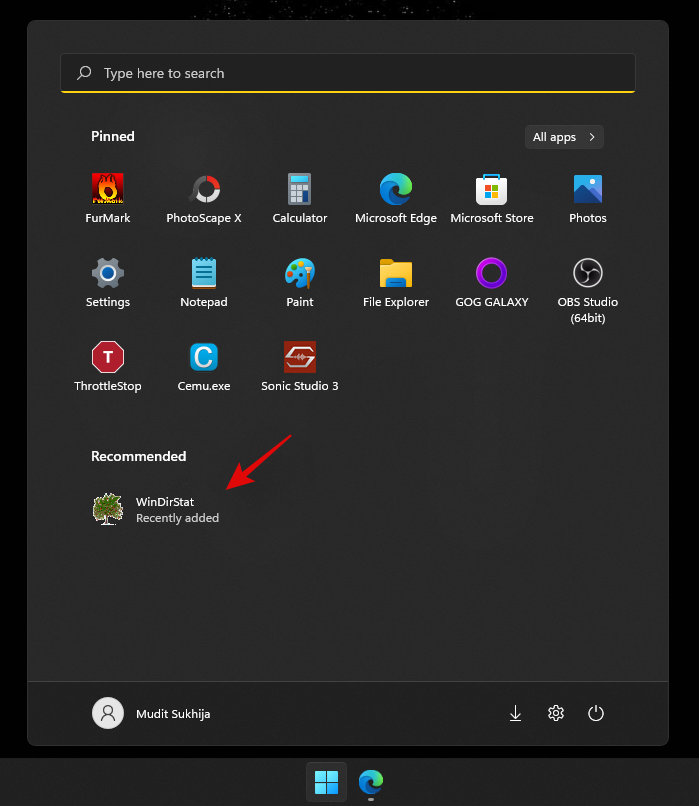
Download and install WinDirStat on your PC using the link above. Once installed, launch the app.
Now select one of the options that best suit your needs. If you only have a single drive installed on your system with a single partition, then you can skip this step. Click on ‘Ok’ once you are done.
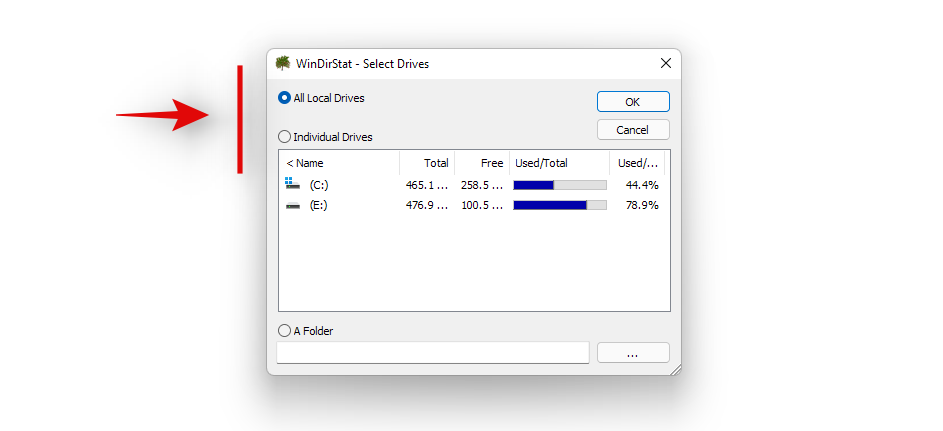
- All Local Drives: This will make WinDirStat analyze all your disks and display their data graphically.
- Individual Drives: Select one of your installed drives to be analyzed for disk space usage. You can select this option and then select the drive you wish to use.
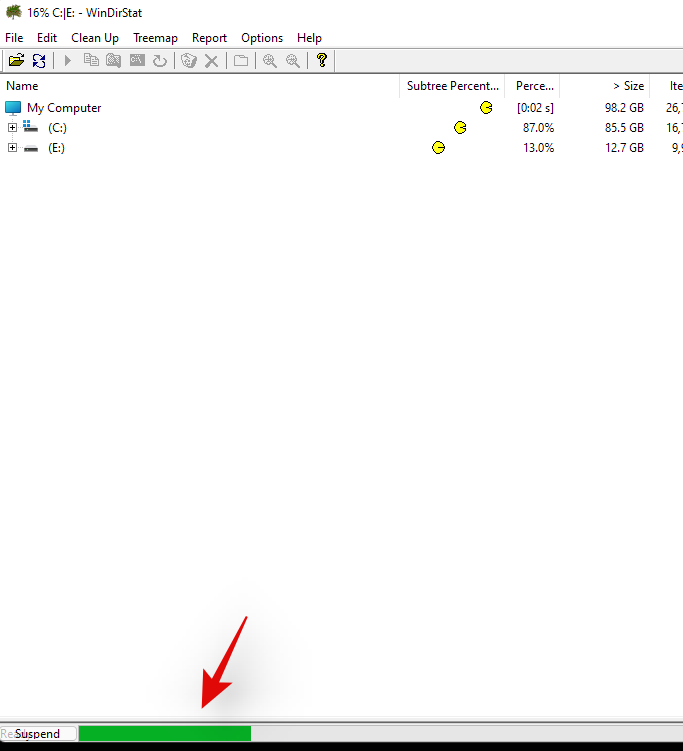
Your drives will now be analyzed and you can track the progress for the same at the bottom of the window.
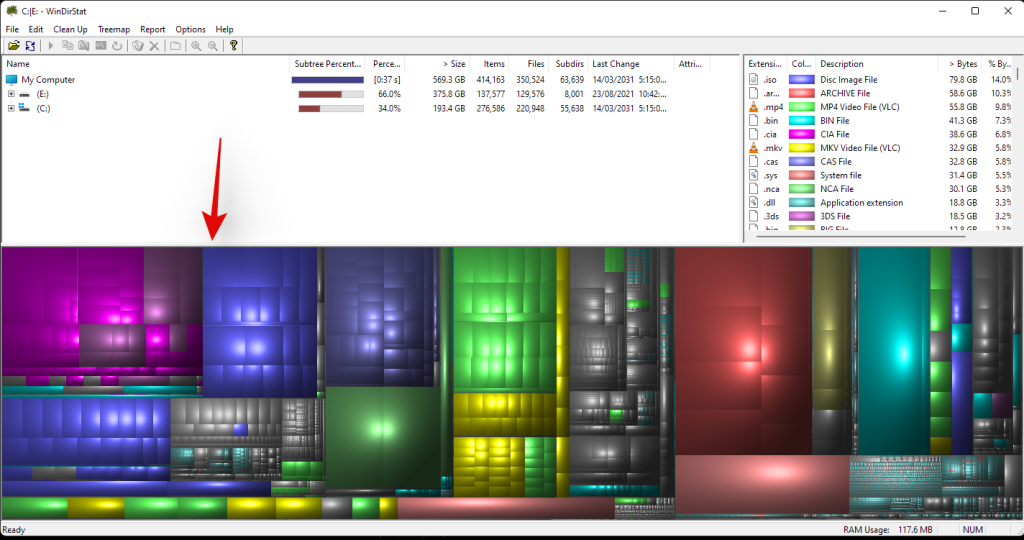
Once analyzed, a color-coded graphical representation of the disk space usage on the selected drive(s) will be shown on your screen. Simply click on the largest chunks to identify the largest files.
Press Del on your keyboard to delete the file. This will send it to your recycle bin and you can decide its fate when reviewing your recycle bin items. Alternatively, you can use Shift + Del to permanently delete the item from your system.
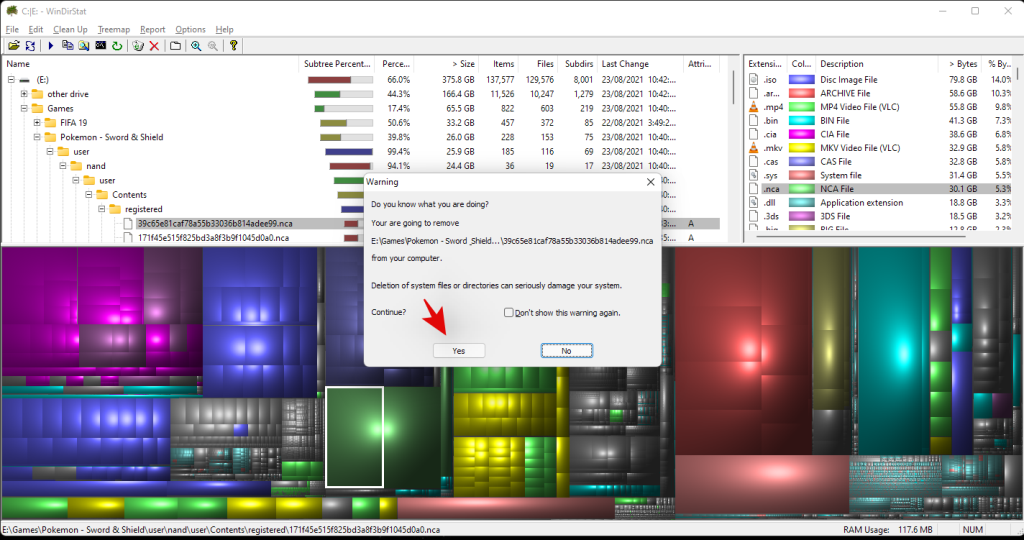
And that’s it! You can repeat the last steps to delete more of the largest files from your system.
Other Third-Party apps as alternative
The world of third-party alternatives is a huge one and thus, the above-mentioned tools are not the only ones that you can use to analyze your disk usage. Here are some alternatives with unique features that might be more suited for your current needs and requirements.
More ways to clear storage on Windows 11
If you’re looking to reclaim your storage space then there are tons of more things that you can do besides clearing or moving your largest files. You can clear caches, stop programs, reduce dedicated storage space, clear temporary files, remove leftover files, and much more. Refer to this dedicated guide by us that should help you clear space on Windows 11 in every way possible.
Should you use disk space analyzers?
Disk Space Analyzers have long been the ultimate utility to identify where exactly your disk space is being used. Most of them stem from long-standing communities while others have over decades of experience. If you’re divided on using disk space analyzers, then your best bet would be to opt for something that is open source.
The modern world of the internet is centered around data collection and like it or not, every service is gathering and collecting some type of data from your usage of their tool. Hence most disk analyzers nowadays, also have the option to share your usage data and more. Additionally, if you decide to opt for something new and untested then the risks are even higher.
Hence, we recommend you use disk space analyzers but do verify their origin and reputation before running them on your system. If you do not wish to go through the hassle of reading reviews, we recommend you simply try an open-source alternative from a trusted source.
We hope this guide helped you easily find the largest files using disk space on your system. If you face any issues or errors during the process, feel free to reach out to us using the comments section below.


