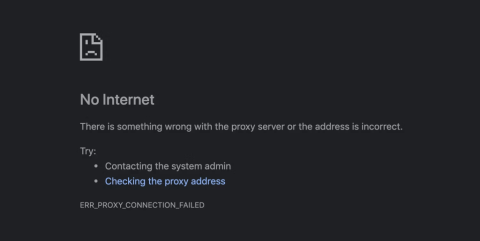
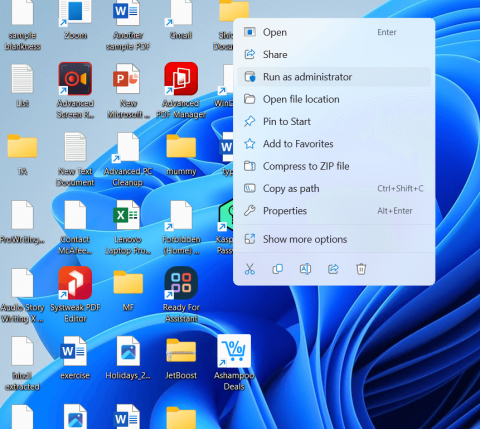
Besturingssystemen zijn de levensader van elke pc, omdat het zonder hen onmogelijk zou worden om e-mails te verzenden, kattenvideo's te bekijken of met onze vrienden te chatten. Maar af en toe komt elk besturingssysteem problemen tegen zoals trage opstart, app-crashes, glitchy weergave, wankel geluid en wat dan ook.
Als u vindt dat uw exemplaar van Windows 11 zich de laatste tijd ook vreemd gedraagt, denken we dat het tijd is om het heft in eigen handen te nemen en Windows 11 te repareren.
Laten we, voordat u zich naar de dichtstbijzijnde pc-reparatietechniek haast, eens kijken naar de vele beschikbare methoden die u kunnen helpen bij het repareren van een beschadigde installatie van Windows 11.
Inhoud
Methode #1: Gebruik een Windows-probleemoplosser
Windows-probleemoplossers hebben een lange weg afgelegd en ze kunnen nu de meeste van uw problemen met een simpele klik oplossen. De meeste probleemoplossingsopdrachten en -controles die normaal via CMD en PowerShell werden uitgevoerd, zijn nu gebundeld in Troubleshooters, waardoor ze veel bruikbaarder zijn bij problemen. Als u uw Windows 11-installatie nog steeds niet kunt repareren en repareren, is de probleemoplosser misschien het proberen waard. Gebruik de onderstaande gids om u op weg te helpen.
Druk Windows + iop op uw toetsenbord om de app Instellingen te openen. Zorg ervoor dat 'Systeem' aan uw linkerkant is geselecteerd en klik vervolgens op 'Problemen oplossen' aan uw rechterkant.
![Windows 11 repareren [15 manieren] Windows 11 repareren [15 manieren]](/resources8/images31/image-6439-0105182722076.png)
Klik op 'Andere probleemoplossers'.
![Windows 11 repareren [15 manieren] Windows 11 repareren [15 manieren]](/resources8/images31/image-405-0105182722143.png)
Zoek nu de betreffende probleemoplosser voor uw huidige probleem, afhankelijk van het probleem dat u ondervindt met uw installatie. Klik op 'Uitvoeren' naast de probleemoplosser.
![Windows 11 repareren [15 manieren] Windows 11 repareren [15 manieren]](/resources8/images31/image-9440-0105182722204.png)
De probleemoplosser zal nu zijn ding doen en eventuele problemen oplossen die hij vindt met de betreffende component of functie.
![Windows 11 repareren [15 manieren] Windows 11 repareren [15 manieren]](/resources8/images31/image-9235-0105182955896.png)
Methode #2: verwijder alle recente Windows-updates en installeer ze opnieuw
Als u na een recente Windows-update te maken krijgt met willekeurige crashes, trage prestaties, kriebels of bugs uit het niets, kunt u proberen recente updates te verwijderen om uw probleem op te lossen. Deze updates moeten worden teruggezet met een systeemherstel met behulp van de gids bovenaan, maar als u geen herstelpunt heeft, kunt u de onderstaande gids gebruiken om Windows Updates handmatig van uw Windows 11-systeem te verwijderen.
Druk Windows + iop op uw toetsenbord om de app Instellingen te openen. Klik nu op Windows Update aan uw linkerhand.
![Windows 11 repareren [15 manieren] Windows 11 repareren [15 manieren]](/resources8/images31/image-6752-0105182955965.png)
Klik op 'Geschiedenis bijwerken'.
![Windows 11 repareren [15 manieren] Windows 11 repareren [15 manieren]](/resources8/images31/image-9408-0105182722517.png)
Scroll naar beneden en klik op 'Updates verwijderen'.
![Windows 11 repareren [15 manieren] Windows 11 repareren [15 manieren]](/resources8/images31/image-1959-0105182722745.png)
U wordt nu naar het configuratiescherm geleid waar u een lijst krijgt met alle recente grote updates die op uw systeem zijn geïnstalleerd. U krijgt geen beveiligingsupdates die in deze lijst worden vermeld, omdat ze om veiligheidsredenen niet kunnen worden verwijderd. Klik en selecteer de update die u wilt verwijderen.
![Windows 11 repareren [15 manieren] Windows 11 repareren [15 manieren]](/resources8/images31/image-3028-0105182722836.png)
Klik nu bovenaan op 'Verwijderen'.
![Windows 11 repareren [15 manieren] Windows 11 repareren [15 manieren]](/resources8/images31/image-2165-0105182722899.png)
Opmerking: als u de optie Verwijderen niet krijgt, is dit waarschijnlijk omdat u een essentieel Windows-onderdeel probeert te verwijderen dat de functionaliteit van uw huidige installatie zou verbreken.
Klik op 'Ja' om uw keuze te bevestigen.
![Windows 11 repareren [15 manieren] Windows 11 repareren [15 manieren]](/resources8/images31/image-9581-0105182722985.png)
De geselecteerde update wordt nu van uw systeem verwijderd. We raden u aan uw systeem opnieuw op te starten en te controleren of het probleem waarmee u werd geconfronteerd, is opgelost. Als dit niet het geval is, gaat u door met het verwijderen van Windows Updates totdat u de boosdoener hebt gevonden.
Methode #3: Herstellen naar een ouder systeemherstelpunt
Opmerking: bij deze methode wordt ervan uitgegaan dat u een functionele kopie van Windows 11 hebt waarop u kunt opstarten.
U kunt systeemherstelpunten zien als paden om uw systeem te herstellen naar een eerdere staat van Windows (toen het herstelpunt werd gemaakt), samen met de apps en instellingen die uw pc toen had.
Windows 11 maakt met regelmatige tussenpozen automatisch systeemherstelpunten. Als u wilt, kunt u ook herstelpunten maken.
Ze worden ook gemaakt wanneer een nieuwe toepassing of een Windows-update wordt geïnstalleerd.
Hier leest u hoe u kunt proberen Windows 11 te repareren met behulp van herstelpunten.
Open het menu 'Start' en typ 'Maak een herstelpunt aan'. Klik dan op onderstaande optie.
![Windows 11 repareren [15 manieren] Windows 11 repareren [15 manieren]](/resources8/images31/image-7098-0105182723056.png)
Er zou nu een pop-upmenu moeten zijn geopend met de titel 'Systeemeigenschappen' en u zou de aan Systeemherstel gerelateerde opties moeten kunnen zien, zoals hieronder weergegeven.
![Windows 11 repareren [15 manieren] Windows 11 repareren [15 manieren]](/resources8/images31/image-1063-0105182723121.png)
Als uw pop-upmenu er identiek uitziet als het onze met 'Bescherming' uitgeschakeld voor al uw schijven, hebben we slecht nieuws voor u. Vanwege het ontbreken van eerdere systeemherstelpunten, heeft het geen zin om verder te gaan met deze methode omdat er geen herstelpunt is om naar terug te draaien.
Op dit punt raden we aan de volgende methode uit te proberen.
Tip: Als je dit leest om te zien hoe de dingen werken, raden we je aan om de beveiliging in te schakelen voor je systeemschijf (hieronder gemarkeerd), degene die Windows 11 bevat, en nu een herstelpunt te maken.
![Windows 11 repareren [15 manieren] Windows 11 repareren [15 manieren]](/resources8/images31/image-2132-0105182723214.png)
Hier leest u hoe u het kunt doen.
Selecteer de schijf met het label 'Systeem' en klik op 'Configureren'.
![Windows 11 repareren [15 manieren] Windows 11 repareren [15 manieren]](/resources8/images31/image-6753-0105182723323.png)
Klik vervolgens op de knop 'Systeembeveiliging inschakelen' en wijs wat ruimte toe voor systeemherstelpunten door de onderstaande schuifregelaar te verplaatsen. We hebben slechts 4% van onze systeemschijf toegewezen, wat bijna 4,5 GB is.
Als de herstelpunten in aantal of omvang toenemen, worden oudere automatisch verwijderd om plaats te maken voor nieuwe.
Klik op 'Toepassen' en vervolgens op 'OK'.
![Windows 11 repareren [15 manieren] Windows 11 repareren [15 manieren]](/resources8/images31/image-2650-0105182723417.png)
De schijf die je eerder hebt geselecteerd, zou nu 'Bescherming' moeten hebben ingeschakeld en je zou nu systeemherstelpunten moeten kunnen maken.
![Windows 11 repareren [15 manieren] Windows 11 repareren [15 manieren]](/resources8/images31/image-3719-0105182723520.png)
Terwijl u zich in hetzelfde pop-upmenu bevindt, klikt u op de knop 'Maken' om het allereerste systeemherstelpunt van uw pc te maken.
![Windows 11 repareren [15 manieren] Windows 11 repareren [15 manieren]](/resources8/images31/image-7789-0105182723725.png)
Er zou nu een pop-up moeten verschijnen waarin om de naam van uw herstelpunt wordt gevraagd, typ gerust wat u maar wilt. Voor uw gemak worden de huidige systeemtijd en gegevens van uw pc automatisch toegevoegd om dit herstelpunt te onderscheiden van andere. Voorlopig typen we "Fresh Install" omdat we onlangs Windows 11 opnieuw hebben geïnstalleerd.
Als je klaar bent, klik je op 'Maken'.
![Windows 11 repareren [15 manieren] Windows 11 repareren [15 manieren]](/resources8/images31/image-2823-0105182723892.png)
Na een korte tijd zou uw herstelpunt klaar moeten zijn. U zou het nu moeten kunnen controleren door op de knop 'Systeemherstel' te klikken.
![Windows 11 repareren [15 manieren] Windows 11 repareren [15 manieren]](/resources8/images31/image-7821-0105182956057.png)
Klik op Volgende.
![Windows 11 repareren [15 manieren] Windows 11 repareren [15 manieren]](/resources8/images31/image-7756-0105182724049.png)
En uw nieuw gemaakte systeemherstelpunt zou hier moeten zijn.
![Windows 11 repareren [15 manieren] Windows 11 repareren [15 manieren]](/resources8/images31/image-6893-0105182724113.png)
Als u het herstelpunt selecteert en op de (en vervolgens ingeschakelde) knop 'Volgende' klikt, moet u uw pc herstellen tot het moment waarop het herstelpunt is gemaakt.
Methode #4: SFC-opdrachtprompttool gebruiken
System File Checker (SFC) en Deployment Image Servicing and Management (DISM) zijn twee opdrachtregelprogramma's die vaker door IT-technici in bedrijven worden gebruikt om Windows-machines te onderhouden.
Als dit de eerste keer is dat u over deze gereedschappen hebt gehoord, hoeft u zich geen zorgen te maken, aangezien dit over het algemeen als elektrisch gereedschap wordt beschouwd en niet veel mensen ervan weten.
Laten we eerst beginnen met SFC en kijken hoe u Windows 11 kunt repareren.
SFC kan worden gebruikt om beveiligde bestanden (Windows-bestanden) te scannen en te verifiëren. Als het vaststelt dat een bestand beschadigd is en niet kan worden geverifieerd, probeert het een nieuwe kopie uit de onderstaande map op uw pc te herstellen.
C:\Windows
Hier leest u hoe u deze optie kunt proberen.
Klik op de knop 'Start', typ 'opdrachtprompt' en zorg ervoor dat u de app als beheerder uitvoert, zoals hieronder wordt aangegeven.
![Windows 11 repareren [15 manieren] Windows 11 repareren [15 manieren]](/resources8/images31/image-8890-0105182956148.png)
Typ in de opdrachtprompt de volgende opdracht of kopieer en plak deze. Druk vervolgens op 'Enter'.
sfc /scannow
De bovenstaande opdracht start onmiddellijk een scan, wat ongeveer een paar minuten duurt voor een volledige controle.
![Windows 11 repareren [15 manieren] Windows 11 repareren [15 manieren]](/resources8/images31/image-4377-0105182724504.png)
Als uit de scan blijkt dat al uw bestanden in goede staat zijn, wordt dit weergegeven zoals hieronder.
![Windows 11 repareren [15 manieren] Windows 11 repareren [15 manieren]](/resources8/images31/image-5446-0105182724592.png)
Maar als er enkele beschadigde Windows-bestanden op uw pc staan, zou SFC deze met een nieuwe kopie moeten kunnen repareren.
Methode #5: DISM-opdrachtprompttool gebruiken
DISM is een ander opdrachtregelprogramma dat veel krachtiger is dan SFC. Het kan werken met meerdere typen Windows 11-images in zowel .wim- als .esd-indeling, stuurprogramma's beheren voordat images op pc's worden geïmplementeerd en nog veel meer.
Laten we eens kijken hoe u DISM kunt gebruiken om Windows 11 te repareren.
Open de opdrachtprompt als beheerder met behulp van de stappen die we zojuist noemden voor SFC.
Plak vervolgens de onderstaande opdracht om uw Windows 11-installatie op fouten te scannen en druk op Enter.
Dism /Online /Cleanup-Image /ScanHealth
Je zou zoiets moeten zien.
![Windows 11 repareren [15 manieren] Windows 11 repareren [15 manieren]](/resources8/images31/image-5068-0105182725172.png)
Als de tool klaar is, moet hij zijn bevindingen rapporteren. Zo ziet ons scherm eruit.
![Windows 11 repareren [15 manieren] Windows 11 repareren [15 manieren]](/resources8/images31/image-9689-0105182725280.png)
Voer vervolgens deze opdracht uit om te zien of er problemen zijn gedetecteerd en hoe repareerbaar uw probleem is.
Dism /Online /Cleanup-Image /CheckHealth
Omdat onze pc goed werkte, rapporteerde de bovenstaande opdracht nul problemen. Die van jou kan anders zijn.
![Windows 11 repareren [15 manieren] Windows 11 repareren [15 manieren]](/resources8/images31/image-3654-0105182725335.png)
Als DISM problemen met uw pc heeft gemeld, wordt de volgende opdracht die u moet uitvoeren hieronder vermeld. Plak het en druk op 'Enter'.
DISM /Online /Cleanup-Image /RestoreHealth
De bovenstaande opdracht vraagt om geldige kopieën van beschadigde bestanden van Windows Update. Hier ziet u hoe de opdracht er in actie uitziet.
![Windows 11 repareren [15 manieren] Windows 11 repareren [15 manieren]](/resources8/images31/image-7724-0105182725565.png)
En zo ziet het eruit als het klaar is met verwerken.
![Windows 11 repareren [15 manieren] Windows 11 repareren [15 manieren]](/resources8/images31/image-9311-0105182725854.png)
Het enige dat u hoeft te doen, is uw pc opnieuw op te starten.
Als je jezelf beschouwt als iemand die de opdrachtregelprogramma's en hun parameters begrijpt, en meer wilt weten over SFC en DISM, samen met de reeks parameters die ermee kunnen worden gebruikt, dan is hier de volledige documentatie over SFC en hier is de volledige referentie voor DISM . Feest op de informatie!
Tip: Als uw Windows 11-processen vaak crashen, start u een paar seconden later opnieuw en toont u een waarschuwing met een aantal cijfers en alfabetten (ook wel foutcodes genoemd). We raden u ten zeerste aan ze in een zoekmachine zoals Google te plaatsen en te begrijpen wat ze betekenen. Deze methode van probleemoplossing is uiterst effectief tegen specifieke fouten en problemen, en kan vaak een redder in nood blijken te zijn.
Methode #6: Windows 11 Opstartherstel gebruiken
Windows 11 is uitgerust met een ingebouwde opstartreparatietool die is ontworpen om veelvoorkomende opstartproblemen op te sporen en te repareren. Laten we eens kijken hoe u Opstartherstel kunt gebruiken om Windows 11 te repareren.
Open het menu 'Start' en klik op de knop 'Power'.
![Windows 11 repareren [15 manieren] Windows 11 repareren [15 manieren]](/resources8/images31/image-3277-0105182725914.png)
Houd de 'Shift'-toets ingedrukt en klik op 'Opnieuw opstarten'.
![Windows 11 repareren [15 manieren] Windows 11 repareren [15 manieren]](/resources8/images31/image-794-0105182726004.png)
Uw pc zou moeten opstarten in een blauw scherm met een heleboel opties. Klik op 'Problemen oplossen'.
![Windows 11 repareren [15 manieren] Windows 11 repareren [15 manieren]](/resources8/images31/image-5932-0105182726311.jpg)
Klik op 'Geavanceerde opties'.
![Windows 11 repareren [15 manieren] Windows 11 repareren [15 manieren]](/resources8/images31/image-5382-0105182726417.jpg)
Klik op 'Opstartherstel'.
Kort daarna zou Windows nu uw pc moeten scannen en diagnosticeren op eventuele problemen waardoor deze mogelijk niet goed functioneert. Laat het zijn magie werken en na een tijdje zou uw exemplaar van Windows 11 vrij moeten zijn van alle problemen.
Tip: Als 'Opstartherstel' mislukt en je ziet het onderstaande scherm, dan kunnen daar twee mogelijke redenen voor zijn. Ofwel Windows 11 kon de problemen niet identificeren of er is gewoon geen probleem met uw pc.
![Windows 11 repareren [15 manieren] Windows 11 repareren [15 manieren]](/resources8/images31/image-4518-0105182726486.jpg)
Op dit punt zou u kunnen proberen om optie 2 van methode #3 te volgen om een reparatie van Windows 11 te starten. U kunt ook proberen Windows 11 opnieuw te installeren door de optie "Upgrade" in de installatie van Windows 11 te gebruiken, in plaats van een schone installatie en het wissen van uw schijf.
Deze installatiemethode zou Windows 11 opnieuw moeten installeren met behoud van al uw bestanden, apps en instellingen.
Methode #7: ISO-bestand van het Windows 11-installatieprogramma gebruiken
Wist je dat de bestanden die je hebt gebruikt om Windows 11 te installeren, ook kunnen worden gebruikt om een beschadigd exemplaar van Windows 11 te repareren?
Niet veel mensen weten dit, maar het kan gemakkelijk worden gedaan en duurt niet te lang.
Om deze methode te laten werken, hebt u toegang nodig tot de installatiebestanden van Windows 11 (ISO) of de USB-stick van het installatieprogramma die u mogelijk eerder hebt gebruikt om Windows 11 te installeren.
Optie 1: het installatiebestand van de Windows 11 ISO gebruiken
Kijk of je de Windows 11 ISO ergens op je pc hebt staan. Als je dat doet, perfect! U hoeft niets te downloaden.
Als je de Windows 11 ISO niet in de buurt hebt, raden we je aan deze handleiding te volgen om de nieuwste beschikbare ISO te downloaden .
Voordat u doorgaat, moet u ervoor zorgen dat u kunt opstarten in Windows 11 en toegang hebt tot de ISO. Als je kunt, gaan we naar de volgende stap.
Zoek de Windows 11 ISO en dubbelklik erop.
![Windows 11 repareren [15 manieren] Windows 11 repareren [15 manieren]](/resources8/images31/image-7519-0105182726601.png)
De ISO zou nu op een virtuele schijf op uw pc met Windows 11 moeten worden gemount en zou er ongeveer zo uit moeten zien
![Windows 11 repareren [15 manieren] Windows 11 repareren [15 manieren]](/resources8/images31/image-6969-0105182726712.png)
Dubbelklik op de virtuele schijf. Eenmaal binnen zou er een bestand met de naam 'setup' moeten zijn, dubbelklik erop.
![Windows 11 repareren [15 manieren] Windows 11 repareren [15 manieren]](/resources8/images31/image-4486-0105182726796.png)
Tip: Als alternatief kunt u de ISO ook ergens op uw pc uitpakken, wat natuurlijk wat tijd zou kosten, maar u hetzelfde resultaat zou moeten geven.
Wacht tot de installatie van Windows 11 is gestart. Als je klaar bent, zou je een scherm moeten zien dat lijkt op het onderstaande. Klik op 'Volgende'.
![Windows 11 repareren [15 manieren] Windows 11 repareren [15 manieren]](/resources8/images31/image-3622-0105182726853.png)
Accepteer de algemene voorwaarden.
![Windows 11 repareren [15 manieren] Windows 11 repareren [15 manieren]](/resources8/images31/image-4691-0105182726957.png)
Kies hier de optie die het beste bij je past en klik op 'Volgende'. We willen onze bestanden graag behouden, daarom hebben we gekozen voor 'Persoonlijke bestanden en apps behouden'.
![Windows 11 repareren [15 manieren] Windows 11 repareren [15 manieren]](/resources8/images31/image-4141-0105182727056.png)
Klik op 'Installeren' om de installatie te starten.
![Windows 11 repareren [15 manieren] Windows 11 repareren [15 manieren]](/resources8/images31/image-7142-0105182727192.png)
Na een paar seconden moet de installatie beginnen met het voorbereiden van uw pc voor een interne upgrade, die alle bestanden herstelt en ververst die nodig zijn om Windows 11 op uw pc uit te voeren.
![Windows 11 repareren [15 manieren] Windows 11 repareren [15 manieren]](/resources8/images31/image-4659-0105182727255.png)
Uw pc kan een paar keer opnieuw opstarten om de reparatie te voltooien.
Nadat de installatie is voltooid, moet uw exemplaar van Windows 11 volledig zijn gerepareerd en klaar voor gebruik.
Optie 2: Een opstartbare USB-drive gebruiken
Als uw pc om de een of andere reden niet opstart in Windows 11 of gewoon herhaaldelijk opnieuw opstart vanwege een beschadigd Windows-bestand, dan is deze optie perfect voor u.
Kijk voordat we beginnen of je de Windows 11 USB-installatiestick die je mogelijk hebt gebruikt om Windows 11 op je pc te installeren nog hebt. Als je dat doet, is er niets om je zorgen over te maken.
In case you don’t, here’s how you can create a Windows 11 USB installer within a couple of minutes. Do keep in mind that it requires another functional PC with internet to download Rufus and Windows 11 ISO. Simply connect the USB drive to your PC and restart your system. Press any key on your keyboard when prompted to boot from the recovery media and subsequently proceed to repair Windows with the on-screen instructions. You will have the option to reinstall Windows, fix missing files, fix boot order or even use CMD to perform your own checks. If you need any help, then you can this guide to reset Windows from within your recovery media setup and more.
Check this guide: How To Install Windows 11 From USB
Method #8: Repair or Fix Drivers
Many times you can face issues with your Windows installation due to incompatible, outdated, or conflicting drivers installed on your system. Drivers are essential programs that allow your components to communicate with your CPU and GPU for the proper functioning of your system. Having incompatible or conflicting drivers can cause issues with Windows and even take a significant impact on your performance. If some of your components seem to be misbehaving or you feel that your system is drastically slower than expected then it would be a good idea to check your drivers and perform any repairs if needed.
1. Check for conflicting or outdated drivers
Let’s check for conflicting or outdated drivers on your system. Windows automatically shows you a warning sign for misbehaving components or outdated drivers in Device Manager. Use the guide below to look for driver issues on your installation of Windows 11.
Press Windows + X on your keyboard and click on Device Manager.
![Windows 11 repareren [15 manieren] Windows 11 repareren [15 manieren]](/resources8/images31/image-5728-0105182727364.png)
Look for components in the list with a warning side beside them. If any are found, use the methods below to troubleshoot driver issues on your system. However, if none are found then let’s check for new components on your system to identify misbehaving components.
Click on the ‘Scan for hardware changes’ button at the top of your screen.
![Windows 11 repareren [15 manieren] Windows 11 repareren [15 manieren]](/resources8/images31/image-5177-0105182727469.png)
Windows will now scan for hardware changes and install any new components or drivers found on your PC.
![Windows 11 repareren [15 manieren] Windows 11 repareren [15 manieren]](/resources8/images31/image-6246-0105182727564.png)
2. Fix driver issues
If you wish to fix driver issues on your system then you will need to reinstall drivers for the concerned component on your system. This can be done through Windows and manually as well. We recommend manually force removing drivers only if you are unable to remove the driver through Device Manager in Windows. Force removing the wrong drivers can cause serious issues on your system and even force you to reinstall Windows altogether. Hence, ensure that you identify and properly force remove drivers from your system only for the malfunctioning component. Use one of the guides below depending on your current needs and requirements.
Note: If you are using a laptop or a pre-built system then we recommend you download specific drivers for the concerned component from your OEM support side beforehand. This will allow you to install the necessary drivers easily once you have removed the malfunctioning driver.
Read: 6 Ways to Update Drivers on Windows 11
Option 1: Remove and reinstall a component through Device Manager
Press Windows + X on your keyboard and click on ‘Device Manager’.
![Windows 11 repareren [15 manieren] Windows 11 repareren [15 manieren]](/resources8/images31/image-5728-0105182727364.png)
Right-click on the component for which you wish to remove the driver and select Properties.
![Windows 11 repareren [15 manieren] Windows 11 repareren [15 manieren]](/resources8/images31/image-5695-0105182727667.png)
Now click and switch to the Driver tab at the top.
![Windows 11 repareren [15 manieren] Windows 11 repareren [15 manieren]](/resources8/images31/image-3418-0105182727905.png)
Click on ‘Uninstall device’.
![Windows 11 repareren [15 manieren] Windows 11 repareren [15 manieren]](/resources8/images31/image-2867-0105182728010.png)
Check the box for ‘Attempt to remove the driver for this device’.
![Windows 11 repareren [15 manieren] Windows 11 repareren [15 manieren]](/resources8/images31/image-2316-0105182728120.png)
Finally, click on ‘Uninstall’.
![Windows 11 repareren [15 manieren] Windows 11 repareren [15 manieren]](/resources8/images31/image-902-0105182728296.png)
The device driver will now be removed and the device will be uninstalled from your system. You will now be prompted to restart your device. Restart your device as soon as possible and then reinstall the concerned drivers from your OEM’s support site. If you do not have the concerned drivers on your OEM site, then simply scan for hardware changes using the guide above and the necessary drivers will be automatically installed on your system.
Option 2: Manually force remove a driver and reinstall it
You can also manually force remove a driver using a third-party utility. This is not recommended as if Windows is not allowing you to remove a driver then it is probably an essential component that could cause issues on your system. We recommend you properly identify the concerned drivers before removing them from your system. Additionally, you should keep the latest replacement drivers handy so that you can reinstall them as soon as possible. Use the guide below to manually force delete concerned drivers from your system.
We will be using Driver Store Explorer to manually force remove the concerned drivers from your system. Driver Store Explorer is an open-source utility used to identify and remove all the drivers installed on your system. It is hosted on GitHub and can be compiled natively too in case privacy is a concern.
Download Driver Store Explorer to your local storage using the link above. Extract the archive to a convenient location and then launch the app using Rapr.exe.
![Windows 11 repareren [15 manieren] Windows 11 repareren [15 manieren]](/resources8/images31/image-3903-0105182728416.png)
The app will now launch and scan all the drivers installed on your system. Once the list shows up, you can sort it based on the various columns available to you. We recommend you sort your drivers by ‘Provider’ as this will make it easier for you to search the concerned driver based on the manufacturer. Click on Provider at the top to arrange all the drivers ascendingly based on their provider’s name.
![Windows 11 repareren [15 manieren] Windows 11 repareren [15 manieren]](/resources8/images31/image-1420-0105182728498.png)
Scroll the list and identify the concerned driver. Once found check the box beside it.
![Windows 11 repareren [15 manieren] Windows 11 repareren [15 manieren]](/resources8/images31/image-2489-0105182728594.png)
You can now also click on ‘Select oid drivers’ on your right to automatically identify and select other old drivers installed on your system. However, we wouldn’t recommend this on pre-built systems and laptops that can sometimes get faulty driver updates in the future as the device gets older which degrade overall performance in return.
![Windows 11 repareren [15 manieren] Windows 11 repareren [15 manieren]](/resources8/images31/image-3558-0105182728684.png)
Check the box for ‘Force Deletion’ on your right.
![Windows 11 repareren [15 manieren] Windows 11 repareren [15 manieren]](/resources8/images31/image-7422-0105182728754.png)
Finally, click on ‘Delete Driver(s)’. This will force delete all the selected drivers from your system. We highly recommend you restart your system after this and install the new updated drivers you downloaded as soon as possible.
![Windows 11 repareren [15 manieren] Windows 11 repareren [15 manieren]](/resources8/images31/image-212-0105182728819.png)
If faulty drivers were the cause of your issues with Windows 11, then a manual reinstall should help fix this in most cases.
Method #9: Resetting your PC
Like Windows 10, Windows 11 also comes with a nifty feature called ‘Reset this PC’. This can be a lifesaver if you need to clean your PC and start over with Windows 11. Once initiated, the process will roll back Windows 11 to its factory settings.
Here’s how you can proceed with it.
Open the ‘Start’ menu and type in “reset this pc”. You should get a result similar to what’s shown below. Click on ‘Reset this PC’.
![Windows 11 repareren [15 manieren] Windows 11 repareren [15 manieren]](/resources8/images31/image-3525-0105182728991.png)
You should now be in your PC’s Recovery section within the Settings app. To proceed with the reset, simply click on the ‘Reset PC’ button.
![Windows 11 repareren [15 manieren] Windows 11 repareren [15 manieren]](/resources8/images31/image-4594-0105182729090.png)
The next screen should ask you if you’d like to keep your files or remove them entirely. Pick the appropriate option to start resetting your Windows 11.
![Windows 11 repareren [15 manieren] Windows 11 repareren [15 manieren]](/resources8/images31/image-9527-0105182729253.png)
Your selection should be followed by a reboot or two and in a few minutes, your PC should boot into a refreshed Windows 11.
Method #10: Fix boot issues with Windows 11
If you are having boot issues with Windows 11 then we can use bootrec.exe tool to fix most boot issues. Use the guide below to run bootrec.exe on your system. You will need to boot into Windows Recovery and then use CMD to execute these commands though. Use one of the methods above to boot into recovery mode in Windows via Settings or a recovery media and then use the guide below to execute bootrec commands and fix boot issues with Windows 11.
When at the recovery screen press Shift + F10 to bring up the CMD at any point during the recovery process.
Type in the following command to run bootrec.exe and press Enter on your keyboard to execute it.
bootrec.exe
Enter the following command first and press Enter on your keyboard to execute it.
Bootrec /fixmbr
Now enter the one below and execute it.
Bootrec /fixboot
Finally, enter the command below to rebuild your boot device order.
Bootrec /rebuildbcd
And that’s it! We recommend you restart your system for good measure or exit the recovery screen and try booting into Windows again. If you were facing boot issues, then this will have most likely fixed the issue for you.
If you have been facing start menu issues within Windows 11 then there are many fixes that you can try. The new start menu seems to be a hit or miss with users and many have tried to customize it in their own way. This has been known to break start menu functionality with recent updates and if you are facing issues after a recent update then this is likely the cause for you as well.
You can use this comprehensive guide by us to fix all kinds of Start menu issues on your Windows 11 system. You will even find ways to restore the older start menu and new ways to get the start menu back up and running on your system in no time.
Related: How to Fix ‘Windows 11 Start Menu Not Working’ Issue? [17 Ways]
Method #12: Fix random app crashes
Random app crashes have been a known issue since Windows 11 was first announced and the first insider build hit the shelves. This is mainly due to some core changes to Windows that now break functionality for previously compatible programs with Windows 10. This might be heartbreaking for many users that are unable to get their favorite programs and apps back up and running within Windows 11. There are a couple of things you can do to fix this issue and the most prominent ones have been covered by us in this comprehensive guide. If you are facing random app crashes then this will most likely help you solve the majority of crashes on your system.
Read: How To Fix Software Crashing on Windows 11 Dev Build
Method #13: Fix corrupt registry
Registry changes, incorrect values, and deleted or missing registry entries can also cause a lot of issues with your system. Chances are that if you modified your registry with a registry hack or used a third-party tool to clean your registry then the values were messed up during this process.
Due to the core changes in Windows 11, the registry values, locations, and entries are different from the ones on Windows 10. Additionally, the ones that were okay to be deleted earlier might be vital to the functioning of Windows in the latest version.
Hence using a compatible cleaner or repair tool for the registry can remove vital values that could cause issues with your system. You can use the guide below to try and fix the registry on your Windows 11 installation. But as the OS is fairly new, this might not work for you and in case it doesn’t you will have to reset your Windows to restore your registry values to their default entries.
By this point, the registry should have been fixed on your system as you will have already run SFC and DISM scans on your system (as given above). However if your registry still seems to be corrupted, then you can use a third-party app to fix it.
We recommend you use CCleaner’s free utility which can be downloaded using the link above. Once downloaded, run the .exe file and install CCleaner on your system. Then launch the app and follow the on-screen instructions to fix your registry.
We recommend you do not clean your registry or temporary files using CCleaner until it has been officially updated to support Windows 11. As for fixing the registry, the app did not produce any issues on our end despite multiple tries so you should be safe to fix your registry using CCleaner.
Method #14: Fix lack of storage space
If you seem to be missing storage space to random files on your system and are unable to identify large files on your system then it is likely that temporary files have started to take a toll on your local storage. Windows 11 is designed to clear most temporary files by default but this can option can sometimes bug out which can cause a large number of temporary files to accumulate on your system.
You can use our guide to delete the temporary files from your system. Once deleted, you should be able to gain back some significant storage space especially after clearing previous Windows installation files and downloaded Windows Updates.
Method #15: Boot into safe mode to identify third party culprits
Lastly, it could also be that your issue is being caused by a third-party app. As Windows 11 is fairly new and most recent updates to popular apps are using compatibility layers to work, it is likely that you are facing a bug with a third-party app. Third-party apps can create huge conflicts and issues in the background depending on what they do and it can end up being quite tough to identify the culprit.
Thankfully, Windows comes with a safe mode to troubleshoot exactly this problem. Safe mode helps disable all third-party apps, services, and tasks in the background. You can then verify the functioning of Windows in safe mode and start removing the suspected culprits one by one.
Once you find the culprit, you can restore your previously removed apps and continue using the OS until a fix is released by the concerned developer.
Unfortunately, this is a tedious process and there is no way around it, but if a third-party app is causing issues on your system, safe mode can help you identify and remove the culprit easily. You can use this guide to help you navigate and activate safe mode in Windows 11.
You can also use this trick to directly restart your system in the advanced recovery options state. Click on the ‘Start’ menu icon in your taskbar.
Now click on the ‘Power’ icon.
![Windows 11 repareren [15 manieren] Windows 11 repareren [15 manieren]](/resources8/images31/image-4249-0105182729349.png)
Hold down the ‘Shift’ key on your keyboard and then click on ‘Restart’.
![Windows 11 repareren [15 manieren] Windows 11 repareren [15 manieren]](/resources8/images31/image-2835-0105182729531.png)
Your Windows 11 PC will now automatically reboot into the Advanced recovery options.
Click on ‘Troubleshoot’ to get started. Now, click Advanced options > See more recovery options > Startup Settings > Restart.
You will now get a list of all the ways your computer can start up with elevated settings or restricted services. You will have the following options for Safe modes.
- F4: Enable Safe mode
- F5: Enable Safe mode with networking
- F6: Enable Safe mode with command prompt
Press the desired key on your keyboard and your system will automatically restart in the desired Safe mode.
Well, these are all the proven methods that you can try to repair corrupted Windows 11. Some of these methods are fairly easy to use, while some may seem advanced for an average joe.
If you ever feel stuck at any point while following our methods, drop us a comment and we’d be happy to sort out the confusion.
Related:

![Windows 11 repareren [15 manieren] Windows 11 repareren [15 manieren]](/resources8/images31/image-6439-0105182722076.png)
![Windows 11 repareren [15 manieren] Windows 11 repareren [15 manieren]](/resources8/images31/image-405-0105182722143.png)
![Windows 11 repareren [15 manieren] Windows 11 repareren [15 manieren]](/resources8/images31/image-9440-0105182722204.png)
![Windows 11 repareren [15 manieren] Windows 11 repareren [15 manieren]](/resources8/images31/image-9235-0105182955896.png)
![Windows 11 repareren [15 manieren] Windows 11 repareren [15 manieren]](/resources8/images31/image-6752-0105182955965.png)
![Windows 11 repareren [15 manieren] Windows 11 repareren [15 manieren]](/resources8/images31/image-9408-0105182722517.png)
![Windows 11 repareren [15 manieren] Windows 11 repareren [15 manieren]](/resources8/images31/image-1959-0105182722745.png)
![Windows 11 repareren [15 manieren] Windows 11 repareren [15 manieren]](/resources8/images31/image-3028-0105182722836.png)
![Windows 11 repareren [15 manieren] Windows 11 repareren [15 manieren]](/resources8/images31/image-2165-0105182722899.png)
![Windows 11 repareren [15 manieren] Windows 11 repareren [15 manieren]](/resources8/images31/image-9581-0105182722985.png)
![Windows 11 repareren [15 manieren] Windows 11 repareren [15 manieren]](/resources8/images31/image-7098-0105182723056.png)
![Windows 11 repareren [15 manieren] Windows 11 repareren [15 manieren]](/resources8/images31/image-1063-0105182723121.png)
![Windows 11 repareren [15 manieren] Windows 11 repareren [15 manieren]](/resources8/images31/image-2132-0105182723214.png)
![Windows 11 repareren [15 manieren] Windows 11 repareren [15 manieren]](/resources8/images31/image-6753-0105182723323.png)
![Windows 11 repareren [15 manieren] Windows 11 repareren [15 manieren]](/resources8/images31/image-2650-0105182723417.png)
![Windows 11 repareren [15 manieren] Windows 11 repareren [15 manieren]](/resources8/images31/image-3719-0105182723520.png)
![Windows 11 repareren [15 manieren] Windows 11 repareren [15 manieren]](/resources8/images31/image-7789-0105182723725.png)
![Windows 11 repareren [15 manieren] Windows 11 repareren [15 manieren]](/resources8/images31/image-2823-0105182723892.png)
![Windows 11 repareren [15 manieren] Windows 11 repareren [15 manieren]](/resources8/images31/image-7821-0105182956057.png)
![Windows 11 repareren [15 manieren] Windows 11 repareren [15 manieren]](/resources8/images31/image-7756-0105182724049.png)
![Windows 11 repareren [15 manieren] Windows 11 repareren [15 manieren]](/resources8/images31/image-6893-0105182724113.png)
![Windows 11 repareren [15 manieren] Windows 11 repareren [15 manieren]](/resources8/images31/image-8890-0105182956148.png)
![Windows 11 repareren [15 manieren] Windows 11 repareren [15 manieren]](/resources8/images31/image-4377-0105182724504.png)
![Windows 11 repareren [15 manieren] Windows 11 repareren [15 manieren]](/resources8/images31/image-5446-0105182724592.png)
![Windows 11 repareren [15 manieren] Windows 11 repareren [15 manieren]](/resources8/images31/image-5068-0105182725172.png)
![Windows 11 repareren [15 manieren] Windows 11 repareren [15 manieren]](/resources8/images31/image-9689-0105182725280.png)
![Windows 11 repareren [15 manieren] Windows 11 repareren [15 manieren]](/resources8/images31/image-3654-0105182725335.png)
![Windows 11 repareren [15 manieren] Windows 11 repareren [15 manieren]](/resources8/images31/image-7724-0105182725565.png)
![Windows 11 repareren [15 manieren] Windows 11 repareren [15 manieren]](/resources8/images31/image-9311-0105182725854.png)
![Windows 11 repareren [15 manieren] Windows 11 repareren [15 manieren]](/resources8/images31/image-3277-0105182725914.png)
![Windows 11 repareren [15 manieren] Windows 11 repareren [15 manieren]](/resources8/images31/image-794-0105182726004.png)
![Windows 11 repareren [15 manieren] Windows 11 repareren [15 manieren]](/resources8/images31/image-5932-0105182726311.jpg)
![Windows 11 repareren [15 manieren] Windows 11 repareren [15 manieren]](/resources8/images31/image-5382-0105182726417.jpg)
![Windows 11 repareren [15 manieren] Windows 11 repareren [15 manieren]](/resources8/images31/image-4518-0105182726486.jpg)
![Windows 11 repareren [15 manieren] Windows 11 repareren [15 manieren]](/resources8/images31/image-7519-0105182726601.png)
![Windows 11 repareren [15 manieren] Windows 11 repareren [15 manieren]](/resources8/images31/image-6969-0105182726712.png)
![Windows 11 repareren [15 manieren] Windows 11 repareren [15 manieren]](/resources8/images31/image-4486-0105182726796.png)
![Windows 11 repareren [15 manieren] Windows 11 repareren [15 manieren]](/resources8/images31/image-3622-0105182726853.png)
![Windows 11 repareren [15 manieren] Windows 11 repareren [15 manieren]](/resources8/images31/image-4691-0105182726957.png)
![Windows 11 repareren [15 manieren] Windows 11 repareren [15 manieren]](/resources8/images31/image-4141-0105182727056.png)
![Windows 11 repareren [15 manieren] Windows 11 repareren [15 manieren]](/resources8/images31/image-7142-0105182727192.png)
![Windows 11 repareren [15 manieren] Windows 11 repareren [15 manieren]](/resources8/images31/image-4659-0105182727255.png)
![Windows 11 repareren [15 manieren] Windows 11 repareren [15 manieren]](/resources8/images31/image-5728-0105182727364.png)
![Windows 11 repareren [15 manieren] Windows 11 repareren [15 manieren]](/resources8/images31/image-5177-0105182727469.png)
![Windows 11 repareren [15 manieren] Windows 11 repareren [15 manieren]](/resources8/images31/image-6246-0105182727564.png)
![Windows 11 repareren [15 manieren] Windows 11 repareren [15 manieren]](/resources8/images31/image-5695-0105182727667.png)
![Windows 11 repareren [15 manieren] Windows 11 repareren [15 manieren]](/resources8/images31/image-3418-0105182727905.png)
![Windows 11 repareren [15 manieren] Windows 11 repareren [15 manieren]](/resources8/images31/image-2867-0105182728010.png)
![Windows 11 repareren [15 manieren] Windows 11 repareren [15 manieren]](/resources8/images31/image-2316-0105182728120.png)
![Windows 11 repareren [15 manieren] Windows 11 repareren [15 manieren]](/resources8/images31/image-902-0105182728296.png)
![Windows 11 repareren [15 manieren] Windows 11 repareren [15 manieren]](/resources8/images31/image-3903-0105182728416.png)
![Windows 11 repareren [15 manieren] Windows 11 repareren [15 manieren]](/resources8/images31/image-1420-0105182728498.png)
![Windows 11 repareren [15 manieren] Windows 11 repareren [15 manieren]](/resources8/images31/image-2489-0105182728594.png)
![Windows 11 repareren [15 manieren] Windows 11 repareren [15 manieren]](/resources8/images31/image-3558-0105182728684.png)
![Windows 11 repareren [15 manieren] Windows 11 repareren [15 manieren]](/resources8/images31/image-7422-0105182728754.png)
![Windows 11 repareren [15 manieren] Windows 11 repareren [15 manieren]](/resources8/images31/image-212-0105182728819.png)
![Windows 11 repareren [15 manieren] Windows 11 repareren [15 manieren]](/resources8/images31/image-3525-0105182728991.png)
![Windows 11 repareren [15 manieren] Windows 11 repareren [15 manieren]](/resources8/images31/image-4594-0105182729090.png)
![Windows 11 repareren [15 manieren] Windows 11 repareren [15 manieren]](/resources8/images31/image-9527-0105182729253.png)
![Windows 11 repareren [15 manieren] Windows 11 repareren [15 manieren]](/resources8/images31/image-4249-0105182729349.png)
![Windows 11 repareren [15 manieren] Windows 11 repareren [15 manieren]](/resources8/images31/image-2835-0105182729531.png)
