Como Avançar Automaticamente no PowerPoint 365

Um tutorial que mostra como fazer o Microsoft PowerPoint 365 reproduzir sua apresentação automaticamente definindo o tempo de Avançar Slides.

Este é um guia completo para realizar a migração de locatário para locatário do Office 365.
2 ou mais semanas antes da migração
1. Verifique a propriedade do domínio e capture as informações e salve.
2. Capture todos os registros DNS usando este link .
3. Identifique e capture os registros DNS relevantes para o Exchange (se estiver realizando uma transferência de domínio) – TXT , MX e SPF .
4. Em cada registro MX, anote o valor TTL
5. Verifique a disponibilidade do domínio usando este link .


6. Determine quais serviços do Microsoft 365 são necessários para o domínio.
7. Decisão Necessária – Discutir os requisitos de Domínio e DNS
Nome do domínio:
Registros DNS:
Cópia de TODOS os registros (não apenas do Exchange) para configurar os registros nos servidores DNS de destino.
8. Discuta com a equipe do projeto quais itens NÃO são migrados usando a ferramenta de migração BitTitan.
9. Solicite direitos de administrador de domínio para o Portal de administração do O365 na origem
Direitos de administrador são necessários como parte do processo que precisamos para remover o domínio do portal de administração na Origem e, em seguida, adicionar o domínio ao Destino.
10. Faça login no Portal de administração do O365 na origem e revise as regras e conectores do EXO Mail
11. Verifique se os domínios/endereços IP NÃO estão na lista negra usando as listas negras do mxtoolbox .
Importante : Se estiver na lista negra, quando colocarmos na lista branca os domínios/endereços IP.
12. Faça login no Portal de Administração do O365 na Origem e exporte Domínios, Grupos, Caixas de Correio, Recursos, Caixas de Correio Compartilhadas e Lista de Usuários Aceitos para o EXCEL.
13. Revise o tamanho de cada caixa de correio a ser migrada.
14. Revise a configuração de e-mail
15. Finalize a Lista de Usuários, Grupos e as caixas de correio compartilhadas a serem migradas
16. Crie todas as caixas de correio de usuário, caixas de correio compartilhadas, grupos de distribuição, grupos de segurança, contatos e recursos no destino.
17. Adicionar acesso de delegado a caixas de correio/calendários no destino
18. Crie comunicações do usuário
19. Crie 2 contas de teste na origem
20. Preencha as 2 contas de teste na origem com os seguintes dados
21. Crie 2 contas de teste no destino
22. Conceda acesso total à conta de administrador global às caixas de correio:
Get-Mailbox -ResultSize ilimitado | Add-MailboxPermission -User "conta de administrador" -AccessRights FullAccess -InheritanceType All -AutoMapping $false
23. O EWS deve estar funcionando no servidor Source Exchange
24. Teste o acesso à caixa de correio abrindo qualquer outra caixa de correio com a conta de administrador usando o OWA
25. Adicione a conta tenantname.onmicrosoft.com como um endereço de proxy para cada caixa de correio na Origem.
Precisamos fazer isso, removeremos os endereços de email de domínio de todas as caixas de correio antes de podermos remover o domínio do locatário.
26. Conecte-se ao EXO Powershell em SOURCE
27. Exporte e atualize endereços de proxy para incluir @tenantname.onmicrosoft.com
Get-Mailbox -ResultSize Unlimited -Filter “emailaddresses -notlike '*@tenantname.onmicrosoft.com'” | selecione alias,primarysmtpaddress,emailaddresses |export-csv -NoTypeInformation “C:\Temp\mailboxes_output.csv”
Import-csv C:\Temp\mailboxes_output.csv| ForEach-Object {
$ID = $_.PrimarySmtpAddress
$alias = $_.Alias
$365Email = $alias + “@tenantname.onmicrosoft.com”
Set-Mailbox -Identity $ID -EmailAddresses @{add = $365Email}
}
28. Confirme se todas as caixas de correio foram atualizadas. Os resultados devem ser zero.
Get-Mailbox -ResultSize Unlimited -Filter “emailaddresses -notlike '*@tenantname.onmicrosoft.com'” | selecione alias,primarysmtpaddress,endereços de e-mail
29. Conceda acesso total à conta de administrador às caixas de correio no Destino
30. Conecte-se ao EXO Powershell no destino
Conceda acesso total à caixa de correio à conta de serviço BitTitan em todas as caixas de correio de domínio adquiridas no destino.
Add-MailboxPermission -Identity "Caixa de correio de destino -Usuário "Conta de serviço BitTitan" -AccessRights FullAccess -InheritanceType All -AutoMapping $false
31. Teste o acesso à caixa de correio abrindo qualquer outra caixa de correio com a conta de administrador usando o OWA
32. Requisitos de licença BitTitan
Observação:
A license can be used up to 10 times per mailbox. This assumes the end point doesn’t change.
If you are testing BitTitan migration with test accounts, ensure you include the total number of test accounts needed in in the license count.
33. Redeem licenses
Note: Register for a BitTitan account if you don’t have an account, ensure your account is active by verifying your email address.
34. Create BitTitan project
35. At Source Settings:
36. At Destination Settings:
37. At Tenant to Tenant Migration
38. Migrate Test accounts to Destination using BitTitan – Pre-Stage Migration
39. Perform a Pre-Stage Migration
Important:
40. Resolve any BitTitan error messages
41. Use OWA to confirm the mailboxes contain the migrated data
42. At Source: Use OWA to send and receive additional email
43. Perform a full migration
44. Resolve any BitTitan error messages
45. Use OWA to confirm the mailboxes contain the migrated data
46. Liaise with the business and confirms date and time of migration. Confirm other resources are available for migration
47. If the decision was made to take ownership of the domain and DNS before migration, initiate the transfer
1 week before migration
Export Exchange objects from Source:
48. Log into EXO Powershell at Source
49. Mailboxes: Export UPN, Alias, SMTP and Proxy addresses
Get-Mailbox -ResultSize Unlimited | select userprincipalname,alias,primarysmtpaddress,emailaddresses | export-csv -NoTypeInformation “Backup_Source_Mailboxes.csv”
50. Groups: Export Alias, SMTP and Proxy addresses
Get-DistributionGroup -ResultSize Unlimited | select alias,primarysmtpaddress,emailaddresses | export-csv -NoTypeInformation “Backup_ Source_Groups.csv”
51. Calendar Delegation:
Get-Mailbox | foreach {
write-host -fore green “Processing $_”
Get-MailboxFolderPermission -Identity “$($_.alias):\Calendar” | where {$_.User -notlike “Anonymous” -and $_.User -notlike “Default”}} | select Identity,User,@{name=’AccessRights’;expression={$_.AccessRights -join ‘,’}} | Export-Csv -NoTypeInformation “Backup_ Source_Calendar_Delegation.csv”
Export Exchange objects from Destination:
52. Log into EXO Powershell at Destination
53. Contacts: Export Name and Email addresses
Get-Recipient -Filter {RecipientType -eq “MailContact” -and EmailAddresses -like ‘domainname‘} | select DisplayName,RecipientType,ExternalEmailAddress,EmailAddresses | export-csv -NoTypeInformation “Backup_Destination_Contacts.csv”
54. Mailboxes: Export Forwarding
For each MAILBOX:
get-Mailbox -Identity | select UserPrincipalName,DeliverToMailboxAndForward,ForwardingAddress,ForwardingSmtpAddress | export-csv -notypeinformation ‘Backup_Destination_Forwarding.csv’ -append
55. Pre-Stage Migration of all Mailboxes – email older than 10 days
Important: For the Source, use the onmicrosoft.com address
Select the Project Name
Click on the drop-down arrow beside “Add” and select “Bulk Add”
Click on “Select File”, locate the CSV file created in step 1 then click “Open”
The contents of the CSV will get imported and displayed on screen, click “Save”
Pre-stage migration:
Important:
Allow time for the migration to complete
The Pre-Stage migrates emails only
Calendars, contacts, journals, notes, and tasks will only migrate during a full migration
56. Resolve any BitTitan error messages
57. Add the domain then request a TXT record to verify we own the domain
58. Setup IM federation so you have chat communications during pre-cutover
Important: Cannot migrate any IM contacts to Microsoft Teams.
59. 1 day before migration
Migrate mailboxes – Full migration
Important: Allow time for the migration to complete.
60. Resolve any BitTitan error messages
61. Migration day
[Optional] Change the TTL value on each MX record
Remove domain dependencies from Source:
62. Log into Azure AD and EXO Powershell at Source
[Optional] Change FEDERATED domains to MANAGED, if applicable.
63. Run the following cmdlet to determine which domains are FEDERATED or MANAGED
Get-MsolDomain
If FEDERATED change to MANAGED:
Set-MsolADFSContext -Computer ADFS_Server_FQDN
Convert-MsolDomainToStandard -DomainName “Domain Name Here” -SkipUserConversion:$true -PasswordFile C:\passwords.txt
64. Run the following cmdlets to verify the domains are managed
Get-MsolDomain
[If Applicable] Disable the directory synchronization
Set-MsolDirSyncEnabled -EnableDirSync $false
[If Applicable] SharePoint Online public website
65. If you had also set up your domain with a SharePoint Online public website, then before you can remove the domain, you first have to set the website’s URL back to the initial domain.
[If Applicable] Skype for Business and Teams
Remove all Skype for Business and Teams licenses from the users in the source tenant. This will remove the SIP attribute from their proxy addresses.
66. Set the default domain in source tenant to domainname.onmicrosoft.com
67. Change all Mailboxes UPNs to domainname .onmicrosoft.com domain. Replace the domainname with your domain name.
Get-MsolUser -all | select-object UserPrincipalName,ObjectID | export-csv -NoTypeInformation “User.csv”
Import-csv User.csv| ForEach-Object {
$ID = $_.UserPrincipalName
$ObjectID = $_.ObjectID
$365Email = $ID.Split(“@”)[0] + “@ domainname.onmicrosoft.com”
Set-MsolUserPrincipalName -ObjectId $ObjectID -NewUserPrincipalName $365Email}
68. Confirm the UPNs have been updated
Get-MsolUser -all | select-object UserPrincipalName,ObjectID
69. Change all Distribution Groups Primary SMTP address to domainname.onmicrosoft.com domain. Replace the domainname with your domain name.
Get-DistributionGroup -ResultSize Unlimited | select-object PrimarySMTPAddress | export-csv -NoTypeInformation “DL.csv”
Import-csv DL.csv| ForEach-Object {
$ID = $_.PrimarySmtpAddress
$365Email = $ID.Split(“@”)[0] + “@domainname.onmicrosoft.com”
Set-DistributionGroup -Identity $ID -primarysmtpaddress $365Email}
70. Confirm the primary smtp’s have been updated
Get-DistributionGroup -ResultSize Unlimited | select-object PrimarySMTPAddress
71. As we changed every mailboxes UPN, the primary SMTP addresses has also been updated to domainname.onmicrosoft.com. Now remove all aliases from every mailbox using this script:
$users = Get-Mailbox -ResultSize Unlimited | Where {$_.Emailaddresses.count -gt 1}
foreach ($user in $users) {
foreach ($email in $user.emailaddresses){
if ($email -ne “SMTP:”+$user.PrimarySmtpAddress){
Set-Mailbox -Identity $user.name -EmailAddresses @{Remove=$email}
}
}
Write-host $user.primarysmtpaddress “has been processed”
}
72. Confirm the Primary and Alias addresses are both domainname.onmicrosoft.com ONLY
Get-Mailbox | select PrimarySmtpAddress,EmailAddresses
73. Remove all aliases from every distribution group
$groups = Get-DistributionGroup -ResultSize Unlimited | Where {$_.Emailaddresses.count -gt 1}
foreach ($group in $groups) {
foreach ($email in $group.emailaddresses){
if ($email -ne “SMTP:”+$group.PrimarySmtpAddress){
Set-DistributionGroup -Identity $group.name -EmailAddresses @{Remove=$email}
}
}
Write-host $group.primarysmtpaddress “has been processed”
}
74. Confirm the Primary and Alias addresses are both domainname.onmicrosoft.com ONLY
Get-DistributionGroup | select PrimarySmtpAddress,EmailAddresses
[If Required] O365 Groups: User the cmdlets below to remove the domain:
Get-UnifiedGroup -Identity “name” | select primarysmtpaddress,emailaddresses
Set-UnifiedGroup -Identity “name” -PrimarySMTPAddress [email protected]
Set-UnifiedGroup -Identity “name” -EmailAddresses @{remove=”smtp:[email protected]”}
75. Confirm all dependencies have been removed. Replace the domainname with your domain name.
Get-MsolUser -DomainName domainname.com -all
Important:
76. Remove the domain from the source Microsoft 365 tenant
Important:
77. Add Mail Rules and Connectors at Destination
[If required]
78. Verify the domain
79. Verify changes
80. Check Domain
To check everything is setup as it should be, wait around an hour for all updates to take effect then launch: https://centralops.net/co/
Type in the domain name and check all records are set as in ‘View DNS Settings’ above.
81. Remove Email Forwarding at Destination
Log into EXO Powershell at Destination and run the following cmdlets for each user:
Set-Mailbox -Identity “DestinationUserEmailAddress” -ForwardingAddress $null -DeliverToMailboxAndForward $false
82. Add aliases for each user at Destination:
Set-RemoteMailbox -Identity “[email protected]” -EmailAddresses @{Add=”smtp:name1@domain”,”smtp:name2@domain”}
83. For each GROUP:
Set-DistributionGroup -Identity “groupname” -EmailAddresses @{add=”[email protected]”}
84. Change the TTL value on each MX record back to the original setting eg 1 hour
85. Migrate Mailboxes – Final Migration
Important: Allow time for the migration to complete
86. Resolve any BitTitan error messages
87. Delete Contacts at Destination
Connect to EXO at Destination and run the following cmdlet:
Import-csv “Backup_Destination_Contacts.csv”| ForEach-Object {
$DisplayName = $_.DisplayName
Remove-MailContact -Identity $Displayname}
88. Confirm the Contact has been deleted:
Import-csv “Backup_Destination_Contacts.csv”| ForEach-Object {
$DisplayName = $_.DisplayName
Get-MailContact -Identity $Displayname}
89. Set the default email address at Destination
For each USER:
Set-RemoteMailbox “[email protected]” -PrimarySmtpAddress “[email protected]”
90. For each GROUP:
Set-DistributionGroup -Identity ‘DisplayName’ -PrimarySmtpAddress “[email protected]” -EmailAddressPolicyEnabled $false
91. For each SHARED MAILBOX:
Important: Allow time for all changes to sync to O365.
Post-Migration Activities
92. Verify delegates / aliases have been correctly populated
Migrate Mailboxes – Final Migration
Important: Allow time for the migration to complete.
93. Resolve any BitTitan error messages
Select the accounts that errored
Click on the down arrow beside “Start” and select “Retry Errors”
In the “Retry Errors” window, review the settings
Click “Retry Errors”
Click on the “Refresh list” icon to get a status of the migration or click on the dashboard on the left-hand side menu
94. Execute End User Test Plan
Launch Outlook at Destination and verify the contents of the following:
Email
Contacts
Calendar
Send and Receive emails INTERNALLY and verify emails have been received
Send and Receive emails EXTERNALLY and verify emails have been received
Verify the sender’s email address
Send and Receive emails form a SHARED MAILBOX and confirm emails have been received.
Verify the sender’s email address
Send a test Calendar invite to a colleague and confirm the invite was received
95. Log into EXO Powershell at Destination
For each mailbox, remove the service account
Remove-MailboxPermission -Identity “User1” -User “BitTitan service account” -AccessRights FullAccess -InheritanceType All
96. Take ownership of Domain and DNS records
[If not already actioned] – If the current owner made the required changes to DNS, take ownership of the domains and DNS records.
Back-out Plan
97. Change default email address back to old email address
Set-RemoteMailbox “[email protected]” -PrimarySmtpAddress “[email protected]”
98. For each USER:
Log into the on-premise Exchange server
Run Exchange powershell and execute the following cmdlets:
Set-RemoteMailbox “[email protected]” -EmailAddresses @{remove=”[email protected]”}
99. For each GROUP:
Log into the on-premise Exchange server
Run Exchange powershell and execute the following cmdlets:
Set-DistributionGroup -Identity “groupname” -EmailAddresses @{remove=”[email protected]”}
100. Verify attributes have been updated:
Get-RemoteMailbox -Identity | selecione userprincipalname,alias,primarysmtpaddress,emailaddresses
101. Recrie os contatos no destino:
Faça login no EXO Powershell em Destination e execute os seguintes cmdlets:
Import-csv “Backup_Destination_Contacts.csv”| ForEach-Object {
$DisplayName = $_.DisplayName
$Email = $_.EmailAddresses
New-MailContact -Name $Displayname -ExternalEmailAddress $Email}
102. Habilitando o encaminhamento do Destino para o CONTATO
Faça login no EXO Powershell no destino
Execute os seguintes cmdlets:
Set-Mailbox -Identity “[email protected]” -DeliverToMailboxAndForward $true -ForwardingAddress “[email protected]”
103. Alterações de DNS reverso
104. Confirme se todas as dependências foram removidas. Substitua o nome de domínio pelo seu nome de domínio.
Get-MsolUser -DomainName domainname.com -all
105. Remova o domínio do locatário de destino do Microsoft 365
Importante :
Aguarde até 60 minutos antes de adicionar os domínios ao locatário de destino
O365 ainda pode pensar que o domínio ainda está em uso
106. Adicione o domínio na Origem e solicite um registro TXT para verificar se somos proprietários do domínio
107. Verifique o domínio
108. Verifique as alterações
109. Verificar Domínio
Para verificar se tudo está configurado como deveria, aguarde cerca de uma hora para que todas as atualizações entrem em vigor e inicie: http://centralops.net/co/
Digite o nome do domínio e verifique se todos os registros estão definidos como em 'Exibir configurações de DNS ' acima de.
110. Se aplicável, adicione todas as licenças do Skype for Business e do Teams dos usuários no locatário de origem. Isso adicionará o atributo SIP aos seus endereços de proxy.
111. Restaure o endereço de proxy original para todos os usuários:
Set-Mailbox -Identity “alias” -EmailAddresses SMTP:[email protected],smtp:[email protected]
112. Restaure o UPN para todos os usuários:
Import-csv “Backup_Mailboxes.csv”| ForEach-Object {
$NewUPN = $_.PrimarySmtpAddress
$alias = $_.Alias
$OldUPN = $alias + “@vivacityhealth.onmicrosoft.com”
Set-MsolUserPrincipalName -UserPrincipalName $OldUPN -NewUserPrincipalName $Newupn
}
113. Verifique se o UPN, o endereço de e-mail e proxy foram atualizados:
Get-Mailbox -Identity | selecione userprincipalname,alias,primarysmtpaddress,emailaddresses
114. Altere o endereço SMTP de todos os Grupos de Distribuição para o domínio domainname.onmicrosoft.com. Substitua o nome de domínio pelo seu nome de domínio.
Get-DistributionGroup -ResultSize Ilimitado | select-object PrimarySMTPAddress | export-csv -NoTypeInformation “DL.csv”
Import-csv DL.csv| ForEach-Object {
$ID = $_.PrimarySmtpAddress
$365Email = $ID.Split(“@”)[0] + “@domainname.onmicrosoft.com”
Set-DistributionGroup -Identity $ID -primarysmtpaddress $365Email}
115. Remova todos os aliases de cada grupo de distribuição
$groups = Get-DistributionGroup -ResultSize Ilimitado | Onde {$_.Emailaddresses.count -gt 1}
foreach ($group in $groups) {
foreach ($email in $group.emailaddresses){
if ($email -ne “SMTP:”+$group.PrimarySmtpAddress){
Set -DistributionGroup -Identity $group.name -EmailAddresses @{Remove=$email}
}
}
Write-host $group.primarysmtpaddress “foi processado” $
}
É assim que funciona a migração de locatário para locatário do Office 365.
Um tutorial que mostra como fazer o Microsoft PowerPoint 365 reproduzir sua apresentação automaticamente definindo o tempo de Avançar Slides.
Os Conjuntos de Estilo podem dar instantaneamente ao seu documento inteiro uma aparência polida e consistente. Veja como usar os Conjuntos de Estilo no Word e onde encontrá-los.
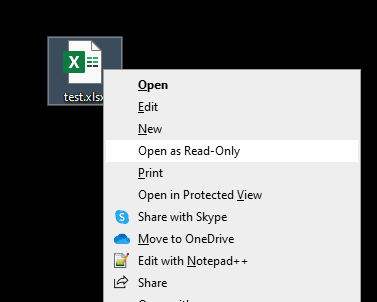
Force um prompt em seus arquivos do Microsoft Excel para Office 365 que diz Abrir como Somente Leitura com este guia.
Mostramos um truque que você pode usar para exportar facilmente todos os seus Contatos do Microsoft Outlook 365 para arquivos vCard.
Aprenda a ativar ou desativar a exibição de fórmulas em células no Microsoft Excel.
Aprenda como bloquear e desbloquear células no Microsoft Excel 365 com este tutorial.
É comum que a opção Junk esteja desativada no Microsoft Outlook. Este artigo mostra como lidar com isso.
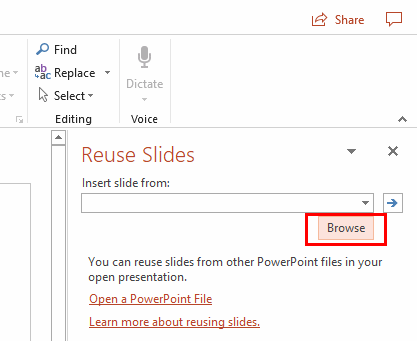
Um tutorial que mostra como importar slides de outro arquivo de apresentação do Microsoft PowerPoint 365.
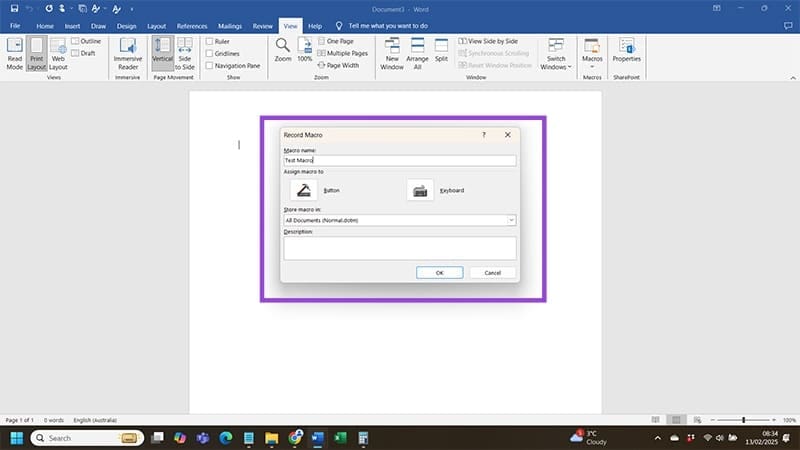
Descubra como criar uma Macro no Word para facilitar a execução de suas funções mais utilizadas em menos tempo.
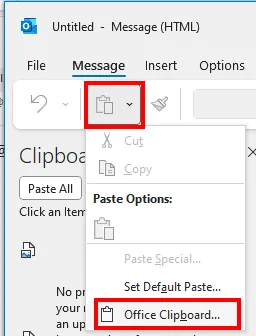
Mostramos como habilitar ou desabilitar as opções visíveis da área de transferência em aplicações do Microsoft Office 365.


