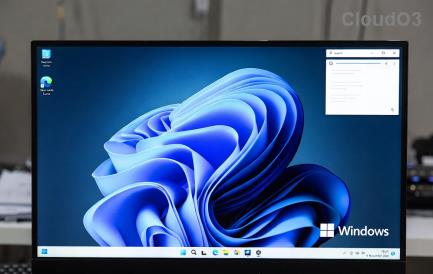
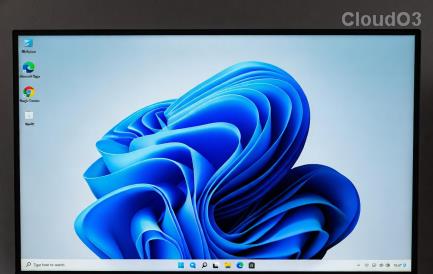
O Windows 11 introduziu uma nova aparência de vidro fosco minimalista que parece estar muito bem com todos. Cantos arredondados junto com elementos de IU espaçados dão ao Windows 11 uma aparência futurística que pode ser personalizada ainda mais , definindo um papel de parede personalizado e uma cor de destaque . Mas não seria bom se você pudesse mudar a cor da sua barra de tarefas ?
Talvez ele corresponda ao seu papel de parede ou seja da mesma cor de destaque? Bem, existem algumas maneiras de fazer isso no Windows 11 Aqui está tudo que você precisa saber sobre como personalizar a cor da barra de tarefas no Windows 11.
Conteúdo
Você pode alterar a cor da barra de tarefas nativamente no Windows 11?
Sim, você pode configurar sua barra de tarefas para usar sua cor de destaque atual com uma simples alternância. Dessa forma, sua barra de tarefas terá a mesma cor que a cor de destaque usada no painel de configurações rápidas, controle deslizante de volume e muito mais. Caso sua cor de destaque esteja sendo escolhida automaticamente no papel de parede, a cor da barra de tarefas também será escolhida automaticamente no papel de parede. Se desejar alterar a cor da barra de tarefas, você pode usar os guias abaixo para começar.
Como mudar a cor da barra de tarefas
Você pode alterar a cor da barra de tarefas usando o aplicativo Configurações, uma alteração no registro ou ferramentas de terceiros. Cada um desses métodos tem suas próprias vantagens e desvantagens. Encontre aquele que melhor se adapta às suas necessidades para começar e alterar a cor da barra de tarefas no Windows 11.
Método nº 01: usando configurações
O aplicativo Configurações permite que você colorir nativamente sua barra de tarefas no Windows 11. Isso usa sua cor de destaque, seja usando uma cor personalizada ou uma do seu papel de parede, a ser definida como a cor da barra de tarefas. Siga o guia abaixo para começar.
Pressione Windows + ino teclado para abrir o aplicativo Configurações. Clique em 'Personalização' à sua esquerda.

Clique em 'Cores'.

Clique no menu suspenso ao lado de 'Cor de destaque' e escolha uma opção de acordo com suas preferências.

- Automático: o Windows escolherá automaticamente uma cor de destaque do papel de parede atual.
- Manual: você pode selecionar manualmente uma cor de destaque para a IU do Windows a partir de uma das opções fornecidas a você.
Se desejar usar uma cor de destaque personalizada, clique em 'Exibir cores' ao lado de 'Cores personalizadas'.

Escolha uma cor de sua preferência na GUI da tela.

Clique em 'mais' se desejar usar valores RGB ou HEX para definir sua cor personalizada. Clique em 'Concluído' depois de selecionar a cor desejada.

Role até a parte inferior e ative a opção 'Mostrar cor de destaque na tela inicial e na barra de tarefas'.

O Explorer agora deve se atualizar e a nova cor de destaque agora deve ser refletida em sua barra de tarefas.

Caso contrário, você pode usar o guia abaixo para reiniciar o explorer em seu sistema, o que deve ajudar as alterações a entrarem em vigor imediatamente.
Como reiniciar o Explorador de arquivos do Windows:
Pressione Ctrl + Shift + Escno teclado e alterne para a guia 'Detalhes'.

Clique em 'explorer.exe' e pressione delete no teclado.

Clique em 'Finalizar processo' para confirmar sua escolha.

Agora clique em 'Arquivo' no canto superior esquerdo da tela e selecione 'Executar nova tarefa'.

Digite o seguinte nome e pressione Enter no teclado.
explorer.exe

O Explorer agora deve ser reiniciado em seu sistema e a nova cor de destaque agora deve ser refletida em sua barra de tarefas.
Como alterar a cor da barra de tarefas do Windows 11 usando ferramentas de terceiros:
Você também pode usar ferramentas de terceiros para personalizar sua barra de tarefas. Essas ferramentas vêm com recursos adicionais para ajudar a modificar sua barra de tarefas, mas a maioria delas usa código antigo que foi desenvolvido para o Windows 10. Isso pode criar problemas com os elementos existentes do Windows 11, portanto, recomendamos que você use as ferramentas abaixo apenas para alterar a cor de destaque da sua barra de tarefas.
Método # 02: Usando OpenShell
OpenShell é o projeto recém-reformulado que busca manter o ClassicShell vivo para os usuários modernos. ClassicShell é um utilitário de longa data usado por usuários em todo o mundo para personalizar o menu iniciar e a barra de tarefas. Podemos usar o OpenShell a nosso favor e colorir nossa barra de tarefas facilmente. Siga o guia abaixo para começar.
Clique no link acima para abrir a página de download. Clique e expanda 'Ativos'.

Agora clique no arquivo .exe para fazer o download para o seu PC. Depois de baixado, clique duas vezes nele e instale o aplicativo.

Uma vez instalado, abra OpenShell Menu Settings. Não se assuste se achar que o menu Iniciar é diferente. Estaremos revertendo as alterações em breve.

Clique e mude para a guia 'Configurações básicas'.

Agora altere os seguintes valores para restaurar o menu Iniciar e continue usando o novo menu Iniciar do Windows 11.

- O botão esquerdo abre: Menu Iniciar do Windows
- Shift + clique abre: Menu Iniciar do Windows
- A chave do Windows é aberta: Menu Iniciar do Windows
- Shift + Win abre: Menu Iniciar do Windows
Além disso, desmarque a caixa 'Iniciar automaticamente para este usuário' se desejar desativar a inicialização automática para OpenShell.

Agora mude para a guia 'Barra de tarefas' clicando nela.

Selecione uma das opções abaixo de acordo com suas preferências estéticas.

- Opaco: sem gradiente ou transparência na barra de tarefas. Em vez disso, você obtém uma barra de tarefas opaca de cor sólida.
- Transparente: barra de tarefas totalmente transparente e transparente denotada pela cor de destaque escolhida. O papel de parede é totalmente visível na barra de tarefas ao usar esta opção.
- Vidro: O vidro é semelhante à opção 'Transparente'. Isso torna a barra de tarefas transparente enquanto mantém a cor de destaque escolhida. Mas um valor de desfoque é aplicado à barra de tarefas para dar uma aparência de vidro ligeiramente fosco. Seu papel de parede não ficará totalmente visível na barra de tarefas.
Se você selecionou, transparente ou vidro, use 'Opacidade da barra de tarefas' para definir a transparência de sua barra de tarefas. Você pode alterar esses valores para ajustar a transparência da barra de tarefas com base em suas preferências e tema.

Agora clique em 'Cor da barra de tarefas' e selecione o ícone de menu '3 pontos' ao lado dele.

Escolha uma cor de sua preferência no seletor de cores. Você também pode usar uma cor personalizada clicando no espaço desejado à sua direita.

Depois de selecionar a cor preferida, clique em 'OK'.

A mudança de cor agora deve ser refletida automaticamente em sua barra de tarefas.

Clique em 'OK' mais uma vez.

E é isso! Agora você terá alterado a cor da barra de tarefas usando o OpenShell. Lembre-se de que, depois de definir a cor e o tipo por meio das configurações do OpenShell, sua barra de tarefas não será mais afetada pelas alterações de cor de destaque. Isso significa que, embora você possa usar a cor de destaque para personalizar a interface do usuário do Windows 11, você precisará alterar a cor da barra de tarefas para corresponder ao seu tema individualmente.
Método # 03: usando a barra de tarefasX
TaskbarX é outro utilitário antigo que era usado principalmente pelos usuários para centralizar sua barra de tarefas, ou seja, até o Windows 11 ser lançado com o mesmo recurso nativo. Ainda assim, há muitas coisas interessantes que o TaskbarX pode ajudá-lo a alcançar e uma delas é mudar a cor da sua barra de tarefas. Assim como o OpenShell, o TaskbarX mudará a cor da barra de tarefas individualmente e não será afetado pela cor de destaque geral escolhida por você no Windows 11. Você pode usar isso a seu favor e criar combinações de cores que de outra forma não seriam possíveis no Windows 11 Veja como você pode usar o TaskbarX a seu favor e alterar a cor da barra de tarefas.
Clique no link acima e baixe o TaskbarX para o seu PC. Extraia o arquivo para um local conveniente, clique duas vezes e inicie o 'TaskbarX Configurator'.

Note: Make sure you download the correct version based on your system. If you aren’t aware of your system’s compatibility, then you shoudl download ‘TaskbarX_1.7.2.0_x64.zip‘ for most modern PCs. Keep in mind that the version number could be different if you are downloading TaskbarX in the future.
Ensure that ‘Style’ is selected on your left and select one of the taskbar materials below.

These materials will define the texture, transparency, and behavior of your taskbar. You can use different materials and find the one that best fits your current needs and requirements.

- Default: The default Windows 11 taskbar texture and transparency are used.
- Transparent: The taskbar becomes completely see-through.
- Transparent Gradient: The taskbar is completely transparent with a slight gradient on it to help differentiate the taskbar from other elements on your desktop. This gradient can be changed by redefining the ‘Alpha’ value at the bottom.
- Opaque: The taskbar is completely opaque with no transparency effects applied to it.
- Blur: The taskbar gets a see-through blur texture applied to it. This makes the taskbar transparent enough to make out your wallpaper but blurred enough so that the details of your wallpaper do not interfere with taskbar elements.
- Acrylic: This is a new texture that emulates acrylic surfaces. Slightly transparent, slightly blurred, and a slight gradient help produce this texture. This is an experimental feature and can cause your taskbar to flicker especially if used in conjunction with other taskbar customization third-party apps.
Once you have selected the desired option, change the RGB sliders at the bottom to reflect the desired custom color you wish to use.

You can also click on the dropper icon to pick a color from your screen.

Additionally, if you have HEX values then you can enter them in the following text box as shown below.

Click on ‘Apply’ once you are done.

TaskbarX needs to be configured to auto-start on your PC for a seamless experience. Click on ‘Startup’ to get started.

If you have a 4 core or less CPU, then set the ‘Delay’ to 10s or higher. If you have a 6 core CPU or higher, then let the time be 6s. You can reduce the startup interval further if you wish TaskbarX to be launched immediately upon logging in to your user account.

Click on ‘Apply’.
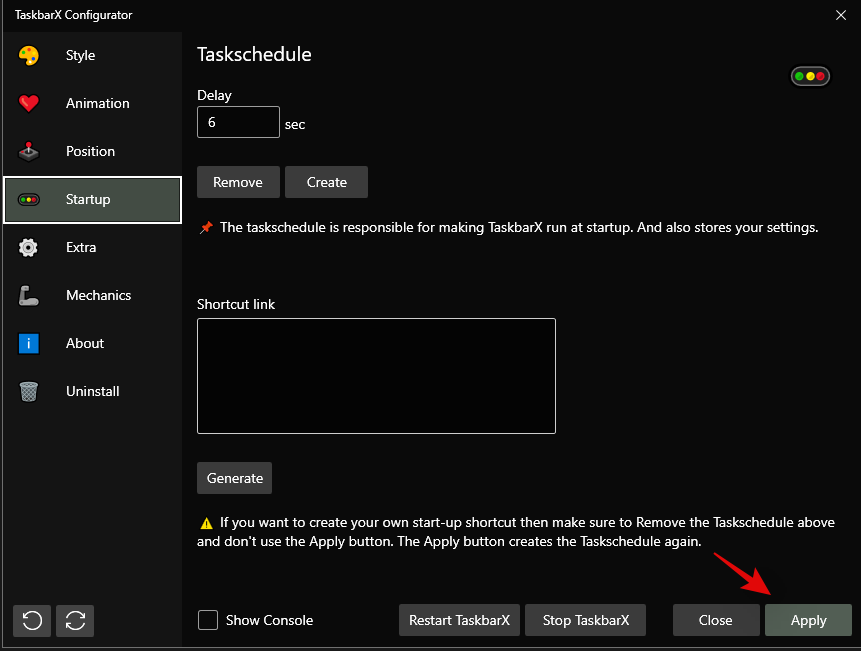
Now click on ‘Restart TaskbarX’ if changes are not reflected in your taskbar.

And that’s it! You will now have changed your taskbar color using TaskbarX in Windows 11.
Method #04: Using Windows 10 Color Control
Color Control is another popular utility that was developed to only change your DWM and accent color in Windows 10. However, the utility seems to work great on Windows 11 as well so you can use it to easily change the accent color of your taskbar in Windows 11. Use the guide below to get you started.
Download the archive using the link above to your local storage. Extract the archive and launch the .exe file by double-clicking on it.

Click on ‘Pick new color’ beside ‘Accent color’.

Choose a new color for your taskbar now. The same color will be used for your Start menu as well.

Check the box for ‘Disable new auto-color accent algorithm’.

Click on ‘Apply’.

The newly selected color should now be reflected in your taskbar.

You can use the steps above to set a custom color for desktop windows manager as well. And that’s it! You will now have chosen a custom color for your taskbar using Windows 10 Color Control.
Can you set an accent color only for your taskbar?
Yes, you can set a custom accent color only for your taskbar provided that you are using one of the third-party utilities mentioned above. Either one of them can help you easily set a custom color for your taskbar. However, if you are looking to do the same natively in Windows 11, then sadly it is not possible. You will need to use one of the third-party utilities listed above. We would suggest you use TaskbarX as you won’t have to manage other tweaks in the third-party utility that can’t be disabled.
Unable to change Windows 11 taskbar color? How to fix
Have you been unable to change your Windows 11 taskbar color? Then there could be a couple of reasons for this issue. Use the troubleshooting guide below to fix this issue on your system.
- Ensure that you aren’t using a deactivated version or trial version of Windows 11. These versions do not allow you to customize and personalize Windows 11 which could be the reason why you are unable to change the taskbar color on your PC.
- Restart explorer.exe to refresh DWM which should help reflect the changes in the overall Windows 11 UI. Explorer.exe can sometimes fail to reflect changes recently made in Windows 11. You can manually restart the application from your task manager to have explorer reflect the changes immediately.
- Uninstall any third-party apps that customize your taskbar and try changing your accent color natively in Windows 11.
- Use Windows 10 Color Control to change your taskbar. This GUI uses the same Windows Settings options to change your accent and DWM colors in Windows 11. If the app can change the taskbar color on your PC then it is likely that the Settings app is facing issues on your system. In such cases, you can try restart explroer.exe to fix your issue.
- Install latest Windows Updates: Windows 11 is fairly new and it could be that your system is facing a known bug or conflict in the background. Installing the latest updates will help fix this issue on your system and fix any background service conflicts as well.
- Ensure that Windows is not automatically picking a custom accent color from your wallpaper. If this option is enabled then a custom accent color will be automatically selected by Windows 11 regardless of your choice and changes in the custom color section in the Settings app.
- Lastly, if nothing works for you then we recommend you check Windows for corrupted and missing files. This can be done by using SFC and DISM commands on your machine. You can use this detailed guide by us to run these commands on your PC and fix your Windows 11 installation.
Can you make the taskbar on Windows 11 transparent?
Yes, you can easily make Windows 11 taskbar transparent on your PC using a third-party utility. You can use the following apps to get a transparent taskbar on your PC.
Use the detailed guides above at the top of this post to help you choose a transparent taskbar on your PC. You can even add gradients and blur to your transparent taskbar to further customize it to match the look of your PC.
Can you further customize your taskbar?
Yes, you can use TaskbarX to further customize your taskbar on your PC. You can use the following options to further customize your taskbar in Windows 11.

- Animation: Change your animation, type, and duration using this option. These changes are applied to taskbar animations and taskbar window animations.
- Position: Windows 11 no longer allows you to reposition your taskbar but you can use this option to move your taskbar around on your desktop. You can also use the options in this section to offset taskbar elements and create a completely new look on your PC.
- Extra: You can use options in this section to customize your taskbar behavior depending on your current setup and what you are currently doing on your PC.
- Mechanics: This section will allow you to change the refresh rate of your taskbar elements when using TaskbarX.
You can also use OpenShell to further customize your taskbar in Windows 11. OpenShell was recently updated for Windows 11 and hence comes with a few dedicated tweaks for the new OS. It offers similar options to TaskbarX to customize your taskbar. Simply switch to the ‘Tasksbar’ tab at the top and make the desired changes to customize your taskbar.
Apart from the above-discussed apps, you can also use Winaero Tweaker on your PC to customize your taskbar in Windows 11. Use the guide below to get familiar with Winaero Tweaker in Windows 11.
How to use Winaero Tweaker to customize the taskbar
Winaero Tweaker is a long-standing utility that has been used to customize Windows UI for a long time. The app was recently updated with some dedicated options to customize Windows 11 and here’s how you can use them to your advantage.
Download and install Winaero Tweaker to your PC using the link above. You can also extract a portable to your local storage if needed. Once installed/extracted, launch the .exe file on your system.

Click and expand Windows 11 on your left.

Now enable the following tweaks depending on your preferences.

- Classic Taskbar: Use this option to get the old classic taskbar back on your PC. Check the box for ‘Enable Classic Taskbar’ and then follow the subsequent guides to set up the old taskbar on your system.

- Disable Background apps: Windows 11 has reduced the capability to disable background applications. You can use this option to disable most background apps in Windows 11.
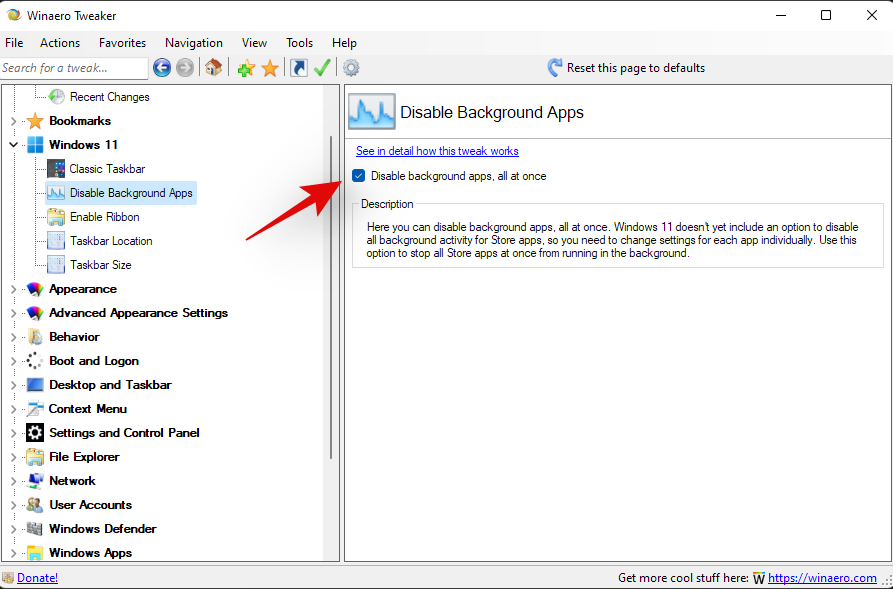
- Enable Ribbon: This will enable the old File Explorer ribbon in the new Windows 11 file explorer. Enabling this option will break the functionality of the ‘Share’ menu in the file explorer.

- Taskbar Location: This option can be used to reposition the taskbar on your desktop. Repositioning your taskbar to the left or right is known to cause compatibility issues. A fix is expected for the same in future updates to Winaero Tweaker.

- Taskbar Size: You can change your taskbar’s size using this option. Changing the size of your taskbar will also change the size of your taskbar icons. Additionally, on some systems, you might find that the taskbar overflow is not properly displayed on your screen. This is a known issue and a fix is expected in subsequent updates to the Winaero tweaker.

Click on ‘Restart explorer’ at the bottom of your screen, if prompted, after enabling any one of the options above.

Note: You could also be prompted to sign out and sign back in to your account depending on the changes you decide to make on your PC.
And that’s it! You will now have customized your Windows 11 taskbar using Winaero tweaker.
Should you use third-party utilities to customize the taskbar?
As long as the third-party utility is trusted and compatible with Windows 11, you should have no problems using a third-party utility to customize your taskbar. However, if a utility is developed for Windows 10 then we recommend you avoid using it until it has been verified to work on Windows 11. The new OS comes with additional background services and changes to the registry that could get messed up if using incompatible applications. This could break the functionality of DWM in Windows and introduce glitches that might force you to reset your PC. Hence we recommend you verify the functionality of the concerned utility before using it on your system.
We hope this guide helped you easily change the color of your taskbar in Windows 11. If you face any issues or have any questions for us, feel free to reach out using the comments section below.
