Windows è il sistema operativo consumer più popolare nell'era di oggi. Ma potrebbero esserci delle volte in cui è necessario passare da un sistema operativo all'altro per utilizzare una determinata funzionalità o semplicemente provare altre alternative. Pulire l'unità di avvio e installare un nuovo sistema operativo può essere ingombrante, controproducente e richiede molto tempo.
Sapevi che non è l'unico modo per ottenere un nuovo sistema operativo installato sul tuo sistema? La virtualizzazione in Windows 11 tramite Hyper-V di Microsoft consente di installare sistemi operativi guest sulla macchina e di passare da uno all'altro all'istante per un facile accesso. Puoi testare nuovi sistemi operativi in questo modo e finalizzare quello che meglio si adatta alle tue esigenze attuali.
Diamo un breve sguardo alla virtualizzazione e come puoi abilitarla dal tuo BIOS se sei su Windows 11.
Contenuti
Che cos'è la virtualizzazione nel BIOS?
La virtualizzazione è una funzionalità di Windows di Microsoft che utilizza un hypervisor interno, Hyper-V, per consentire l'installazione di più sistemi operativi guest sul PC. È quindi possibile passare facilmente da un sistema operativo all'altro senza la necessità di cancellare un'unità o creare partizioni separate.
Puoi utilizzare strumenti come VirtualBox per gestire i tuoi sistemi operativi ed emulare l'ambiente corrispondente per far funzionare quasi tutti i sistemi operativi sul tuo PC. Puoi quindi spostarti facilmente tra le tue macchine virtuali e gli host e persino trasferire i dati tra di loro a seconda dello strumento che stai utilizzando.
Correlati: Come aggiornare i driver su Windows 11
Perché hai bisogno della virtualizzazione?
Ci possono essere molte ragioni per cui hai bisogno della virtualizzazione. Potresti essere uno sviluppatore che cerca di codificare un'app per più sistemi operativi o un giocatore che cerca di eseguire vecchi giochi. Le possibilità sono infinite, ma ecco alcuni modi in cui puoi utilizzare la virtualizzazione a tuo vantaggio a seconda dei tuoi interessi.
- Codice in ambienti diversi sulla stessa macchina
- Esegui programmi e giochi legacy
- Naviga in modo anonimo
- Usa le istantanee per accedere ai dati infetti
- Usa la tua macchina virtuale come server privato
Le possibilità sono infinite. Se desideri abilitare la virtualizzazione sul tuo sistema, puoi utilizzare la guida di seguito per verificare e abilitare la virtualizzazione sul tuo PC, se disponibile.
Come verificare se il tuo PC supporta la virtualizzazione
Il tuo PC deve supportare la virtualizzazione in modo che tu possa attivarlo. Se il tuo sistema è stato prodotto negli ultimi 5 anni, probabilmente supporta la virtualizzazione. Ecco come puoi verificare se il tuo PC supporta la virtualizzazione.
Metodo n. 01: utilizzo di Task Manager
Premi Ctrl + Shift + Escsulla tastiera per avviare il task manager e passa alla scheda "Prestazioni".

Ora cerca la virtualizzazione alla tua destra.

Se la virtualizzazione è disponibile, l'opzione verrà visualizzata qui con il suo stato attuale accanto.
Ed è così che puoi usare il task manager per controllare la virtualizzazione.
Metodo n. 02: utilizzo di CMD
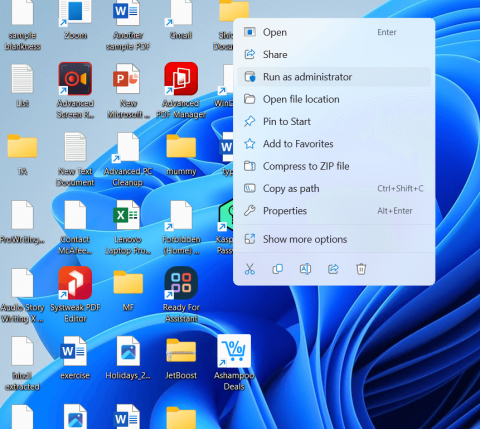
Premi Windows + Ssulla tastiera e cerca CMD. Fare clic su "Esegui come amministratore".

Ora digita il seguente comando una volta che CMD viene visualizzato sullo schermo.
systeminfo

Ora riceverai un report del tuo sistema. Se la virtualizzazione è abilitata, troverai una sezione dedicata per Hyper-V con tutti i suoi dettagli attuali.

Tuttavia, nel caso in cui la virtualizzazione sia disabilitata, troverai un'opzione che afferma la stessa in fondo.
Correlati: Come risolvere lo schermo nero della morte di Windows 11 | Schermo nero verde della morte
Come abilitare la virtualizzazione dal BIOS
La virtualizzazione può essere abilitata dal BIOS utilizzando la sezione sicurezza. Il controllo della funzionalità di virtualizzazione tramite il BIOS è il modo ideale per evitare che utenti malintenzionati installino sistemi operativi guest sul tuo PC o laptop. Usa la guida qui sotto per abilitare la virtualizzazione nel tuo BIOS.
Entra nel BIOS e abilita la virtualizzazione
Usa la guida qui sotto per accedere al BIOS sul tuo sistema a seconda del produttore del tuo laptop o del produttore della tua scheda madre. Assicurati di eseguire il BIOS più recente disponibile dal tuo OEM per evitare problemi durante l'installazione dei sistemi operativi guest.
Su Acer
- Tasto per i sistemi più recenti: F2 o Elimina
- Tasto per i sistemi più vecchi: F1 o Ctrl + Alt + Esc
Accendi il tuo sistema e premi uno dei tasti corrispondenti sopra per accedere al BIOS a seconda del tuo sistema. Se la tua unità è stata prodotta negli ultimi 5 anni, F2 è la chiave per te. I sistemi più vecchi dovranno provare entrambe le combinazioni di tasti per scoprire quale funziona meglio per te.
Utilizzare i tasti freccia e accedere a "Configurazione di sistema".
Seleziona 'Tecnologia di virtualizzazione.
Evidenzia "Abilitato" e premi Invio sulla tastiera.
Premi F10 e fai clic/seleziona "Sì". Questa opzione salverà tutte le modifiche e uscirà dal BIOS.
Il BIOS verrà ora chiuso e il sistema si riavvierà normalmente in Windows. La virtualizzazione dovrebbe ora essere abilitata sul tuo sistema e puoi scoprirlo usando la nostra guida in alto.
Su Dell
- Tasto per i sistemi più recenti: F2 quando viene visualizzato il logo Dell durante l'avvio.
- Tasto per i sistemi meno recenti: Ctrl + Alt + Invio o Canc o Fn + Esc o Fn + F1
- Tasti alternativi: F1, F3, F12 o Elimina
Accendi l'unità Dell e premi uno dei tasti corrispondenti sopra a seconda dell'unità per accedere al BIOS. Una volta entrato nel BIOS, fai doppio clic su "Supporto per la virtualizzazione" alla tua sinistra.
Seleziona la casella "Abilita tecnologia di virtualizzazione" sulla destra.
Fai clic su "Applica" nell'angolo in basso a destra dello schermo.
Il tuo sistema si riavvierà ora con la virtualizzazione abilitata nel BIOS. Ora puoi installare facilmente i sistemi operativi guest e non dovresti affrontare alcun problema durante il processo.
Su Asus
- Tasto per i sistemi più recenti: F2
- Tasto per i sistemi più vecchi: Elimina o Inserisci
- Tasti alternativi: F10
Riavvia il sistema e premi uno dei tasti corrispondenti sopra per accedere al BIOS. Passa alla "Modalità avanzata" per accedere alle impostazioni aggiuntive del BIOS. Puoi usare il tasto F7 per farlo sulla maggior parte dei sistemi Asus. Ora vai alla sezione "Avanzate" del menu del BIOS.

Trova e abilita i seguenti elenchi nel menu "Avanzate".

- Tecnologia di virtualizzazione Intel o equivalente AMD
- VT-d
Una volta abilitato, passa alla scheda "Salva ed esci" e salva tutte le modifiche prima di uscire dal menu del BIOS.

La virtualizzazione dovrebbe essere abilitata nel menu di avvio del sistema Asus.
Su HP
- Tasto per i sistemi più recenti: F10 o Esc
- Tasto per i sistemi più vecchi: F1, F2, F6 o F11
- Tasti alternativi: F10 o F12
Riavvia il sistema e usa uno dei tasti sopra per accedere al BIOS sul tuo sistema HP. Passa alla scheda "Avanzate" una volta che sei nel menu del BIOS.
Utilizzare i tasti freccia e selezionare "Configurazione dispositivo".
Scorri fino in fondo e seleziona la casella Tecnologia di virtualizzazione (VT-d o VT-x).
Fare clic su "Salva" nell'angolo in basso a destra.
Seleziona "Sì" per confermare la tua scelta.
Ora puoi uscire dal menu del BIOS e avviare Windows normalmente. La virtualizzazione dovrebbe ora essere abilitata sul tuo sistema.
Su Lenovo
- Tasto per i sistemi più recenti: F1 o F2
- Key for older systems: Ctrl + Alt + F3, Ctrl + Alt + Ins, or Fn + F1
- Alternate Keys: n/a
On Thinkpads
Restart your Lenovo Thinkpad and use one of the corresponding keys above to enter the BIOS menu.
Once in the BIOS, use the arrow keys to navigate to the ‘Security’ tab and select ‘Virtualization’.
Press Enter with ‘Disabled’ highlighted and select ‘Enabled’ instead.
Press F10 on your keyboard and confirm your choice by selecting ‘Yes’. This will save all the changes you made and exit the BIOS.
You will now have enabled virtualization on your Lenovo Thinkpad.
On other Lenovo products
Power on your system and use one of the keys above to access the boot menu. Once you are in the boot menu, switch to the ‘Configuration’ tab at the top.
Now select ‘Intel Virtualization Technology’ or AMD equivalent by pressing Enter on your keyboard. Select ‘Enabled’ once prompted.
Press F10 on your keyboard and confirm your choice by selecting ‘Yes’.
Virtualization should now be enabled on your Lenovo system.
Related: How to Fix 100% Disk Usage issue on Windows 11
In case you are unable to access the BIOS menu on your system, then you can use the guide below to trigger it from within Windows 11 itself. Fast startup or Fast boot technology from OEMs will sometimes prevent key inputs from being detected at the splash screen. This in turn prevents you from accessing the BIOS menu when the system is booting. Use the guide below instead to access the BIOS menu from Windows 11 on any system.
Press Windows + i on your keyboard and select ‘Windows Update’ from your left.

Click on ‘Advanced options’.

Click on ‘Recovery’.

Click on ‘Restart now’ beside Advanced startup.

Windows will now restart and boot into the recovery environment. Select ‘Troubleshoot’.
Select ‘Advanced options’.
Select ‘UEFI Firmware Settings’.
Click on ‘Restart’.
Your PC will now restart and automatically boot into the BIOS menu. You can now use the corresponding guide above to activate virtualization on your system.
What can I do If I don’t have virtualization?
In case virtualization is missing from your system then chances are that your unit has already exceeded its intended lifespan. Most modern CPUs nowadays come with in-built virtualization technology to help run virtual machines and systems on any laptop or desktop. However, if your CPU does not have the option for virtualization then there isn’t much you can do about it.
Virtualization is a hardware feature that depends on your CPUs architecture and core count as well. In such cases, you will need to upgrade your CPU and motherboard to get virtualization on your system.
Other ways to enable virtualization
There are other ways to enable virtualization on Windows 11 as well. In case the BIOS menu method does not work for you, you can use one of the guides below to enable virtualization on your system.
Method #01: Using CMD
Press Windows + S on your keyboard and search for CMD. Click on ‘Run as administrator’ once it shows up in the search results.

Type in the command below in CMD and press Enter on your keyboard to execute it. Once executed, the command will download and install all Hyper-V features to your PC.
Dism /online /Enable-Feature /FeatureName:HypervisorPlatform

DISM will now do its thing and install all the necessary features to your system. Now use the command below to install another virtualization-related feature to your PC.
Dism /online /Enable-Feature /FeatureName:VirtualMachinePlatform

Once installed, you will be prompted to restart your system. Type in ‘Y’ and press Enter on your keyboard to restart your system.

Once your system restarts, virtualization should be enabled and ready to use.
Method #02: Using Windows Features
Press Windows + i on your keyboard and click on ‘Apps’ on your left.

Click and select ‘Optional features’.

Scroll to the bottom and click on ‘More Windows features’.

You will now get a list of features that can be and are already installed on your system. Check the boxes for the following listings.

- Virtual Machiene Platform
- Windows Hypervisor Platform
Click on ‘Ok’ and the features will now be downloaded and installed on your system.

Once installed, click on ‘Restart’ to restart your system.

And that’s it! Virtualization should now be enabled on your system once it has restarted.
Method #03: Using PowerShell
Press Windows + S on your keyboard and search for PowerShell. Click on ‘Run as administrator’ once it shows up in your search results.

Type in the following command and press Enter.
Enable-WindowsOptionalFeature -Online -FeatureName HypervisorPlatform

PowerShell will now install the necessary virtualization files on your system.

Once installed, you will be prompted for a restart. Type in ‘N’ and press Enter on your keyboard.

Now enter the following command and execute it.
Enable-WindowsOptionalFeature -Online -FeatureName VirtualMachinePlatform

You will now be prompted to restart your system. This time, type in ‘Y’ to restart your system.

Once your system restarts, virtualization should now be enabled within Windows.
Should you keep virtualization enabled when not in use?
No, keeping virtualization turned on is not a good idea especially when using work systems. Virtualization allows you to install multiple guest operating systems on your PC which can be used by a malicious user to their advantage in case virtualization is always enabled on your system.
However, in case you need to have virtualization always enabled, then we recommend locking down your USB ports and other peripherals in the BIOS so that malicious users can not take advantage of virtualization always being enabled on your system.
We hope this guide helped you easily enable virtualization within the BIOS of your system. If you face any issues or have any more questions for us, feel free to reach out using the comments below.
RELATED
