Tutti abbiamo momenti in cui vorremmo poter tornare a un momento precedente e ripristinare come erano le cose allora. Sebbene improbabile nella vita reale, è una realtà facile su Windows 11 (proprio come nelle precedenti iterazioni di Windows) in quanto ci dà la possibilità di tornare al modo in cui il sistema era in un momento precedente.
Tuttavia, per fare ciò, è necessario creare manualmente un punto di ripristino o almeno configurare Windows in modo che questi punti vengano creati automaticamente. Ecco tutto ciò che devi sapere per creare punti di ripristino in Windows 11 e a cosa servono.
Contenuti
Come creare manualmente un punto di ripristino in Windows 11
Per qualsiasi motivo, se desideri creare tu stesso un punto di ripristino, ci sono alcuni modi per farlo. Diamo un'occhiata a loro e creiamo manualmente il ripristino.
Metodo n. 01: utilizzo delle proprietà di sistema
Premi Start, digita "Crea un punto di ripristino" e seleziona l'opzione come mostrato di seguito.

Questo aprirà la finestra Proprietà del sistema. Fare clic sul pulsante Crea in basso.

Se questo è disattivato, dovrai prima attivare la protezione del sistema (vedi la sezione precedente per questo).
Assegna un nome a questo punto di ripristino e fai clic su Crea .

La creazione di questo punto di ripristino potrebbe richiedere del tempo, quindi sii paziente.
Metodo #02: utilizzo del prompt dei comandi
Un altro modo per creare un punto di ripristino è farlo dal prompt dei comandi. Ecco come farlo:
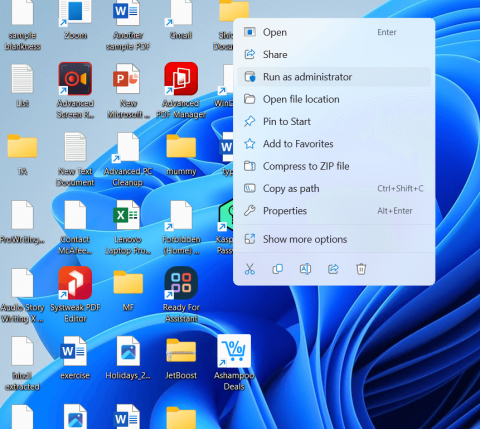
Premi Start, digita cmd e fai clic su Esegui come amministratore .

Ora digita il seguente comando e premi Invio:
wmic.exe /Namespace:\\root\default Path SystemRestore Call CreateRestorePoint "Restore Point Name", 100, 7

Sostituisci Restore Point Namenel comando precedente con quello che desideri chiamare il punto di ripristino. Il tuo punto di ripristino del sistema viene creato correttamente quando ricevi i messaggi "Esecuzione metodo riuscita" e "ReturnValue=0".

Metodo #03: utilizzo di PowerShell
Gli utenti esperti possono creare punti di ripristino anche utilizzando PowerShell. Ecco come farlo:
Premi Start, digita PowerShell e seleziona Esegui come amministratore .

Ora digita il seguente comando e premi Invio:
powershell.exe -ExecutionPolicy Bypass -NoExit -Command "Checkpoint-Computer -Description 'Restore Point Name' -RestorePointType 'MODIFY_SETTINGS'"

Sostituisci Restore Point Namenel comando precedente con quello che desideri chiamare il punto di ripristino. Dovresti vedere il rapporto sullo stato di avanzamento della creazione del punto di ripristino.

Se PowerShell visualizza un messaggio (come mostrato di seguito) che dice che non è possibile creare più di un punto di ripristino del sistema in 24 ore, sarà necessario modificare il registro per esso.

Fare riferimento alle correzioni fornite in seguito per aggirare il problema.
Come creare automaticamente un punto di ripristino
Windows crea automaticamente punti di ripristino da solo in alcuni casi, ma puoi anche impostarlo per crearlo ad ogni riavvio. Vediamo prima entrambi questi argomenti.
Controlla i punti di ripristino già creati automaticamente dal sistema
Se le configurazioni del punto di ripristino del sistema sono impostate correttamente, Windows 11 creerà automaticamente punti di ripristino a cui tornare. Ecco come assicurarti che Windows si prenda cura della capsula del tempo del tuo PC per te:
Premi Start, digita "Crea un punto di ripristino" e scegli l'opzione come mostrato di seguito.

Questo aprirà la finestra Proprietà del sistema. Selezionare l'unità di sistema e fare clic su Configura .
Ora seleziona Attiva protezione sistema .

Windows allocherà automaticamente lo spazio su disco per i punti di ripristino del sistema. Ma puoi modificare la quantità di spazio su disco che la protezione del sistema può utilizzare. Per fare ciò, sposta il dispositivo di scorrimento sotto "Utilizzo dello spazio su disco" per allocare tu stesso lo spazio su disco.

C'è anche un pulsante Elimina per rimuovere i punti di ripristino precedenti. Al termine, fai clic su "Applica".

Windows 11 creerà punti di ripristino del sistema ogni volta che vengono apportate modifiche importanti, ad esempio quando vengono applicati nuovi aggiornamenti.
Come creare automaticamente un punto di ripristino del sistema all'avvio
Se non vuoi affrontare il problema di creare punti di ripristino del sistema ogni volta che apporti una modifica che potrebbe potenzialmente interrompere il funzionamento del sistema, puoi impostare i punti di ripristino in modo che vengano creati automaticamente all'avvio. Ecco come farlo:
La prima cosa che dovrai fare è modificare la frequenza di creazione del punto di ripristino. Per impostazione predefinita, Windows non creerà un punto di ripristino se ne è stato creato uno nelle ultime 24 ore. Per cambiarlo, segui i passaggi seguenti:
Premi Win + Rper aprire la casella ESEGUI, digita regedit e premi Invio.

Ora, vai al seguente indirizzo (o copialo e incollalo nella barra degli indirizzi del registro):
Computer\HKEY_LOCAL_MACHINE\SOFTWARE\Microsoft\Windows NT\CurrentVersion\SystemRestore

Fare clic con il pulsante destro del mouse nello spazio vuoto a destra e selezionare Nuovo , quindi Valore DWORD (32 bit) .

Nome esso SystemRestorePointCreationFrequency .

Per impostazione predefinita, il suo valore è impostato su 0. Lascia che sia così e chiudi l'editor del registro.
Ora, il passaggio successivo consiste nel creare un'attività nell'Utilità di pianificazione di Windows in modo che venga creato un punto di ripristino all'avvio di Windows. Per farlo, premi Start, digita Utilità di pianificazione e premi Invio.

Nel pannello di destra, fai clic su Crea attività .

Ora, nella scheda "Generale", assegna un nome a questa attività e seleziona Esegui indipendentemente dal fatto che l'utente sia connesso o meno e Esegui con i privilegi più elevati .

Inoltre, in basso, fai clic sul pulsante di opzione accanto a "Configura per" e seleziona Windows 10 .

Non preoccuparti se Windows 11 non è tra le opzioni. Poiché non esiste ancora una build stabile per Windows 11, potresti non vedere ancora Windows 11. Ma stai tranquillo, l'opzione Windows 10 funzionerà ancora.
Ora fai clic sulla scheda "Trigger" per passare ad essa.

Quindi fare clic su Nuovo in basso.

Ora, fai clic sul menu a discesa accanto a "Inizia questa attività" e seleziona All'avvio .
Quindi fare clic su OK

Quindi, fai clic sulla scheda "Azioni" e passa ad essa.

Fare clic su Nuovo in basso.

Here, we will use a few arguments to run Windows Management Instrumentation Control Program and to let it know which action needs to be taken. In the “New Action” window, ensure that the Action is to “Start a program” (default).

In the Program/script field, type wmic.exe.

Then, next to “Add arguments (optional)”, type the following command:
/Namespace:\\root\default Path SystemRestore Call CreateRestorePoint "Startup Restore Point", 100, 7

Then click OK.

Now, switch to the “Conditions tab”.

If you’re using a laptop, uncheck the option under “Power” that says Start the task only if the computer is on AC power. Then click OK.

Task Scheduler will prompt you to enter your password to complete setting up the task. Do so and click OK.

And that’s it. Now, every time you start your computer, a system restore point will be created.
How to restore Windows 11 back to a restore point
If your system runs into any trouble, you can use your restore points, whether they be created automatically or manually, to get your system back to how it was before.
There are a few ways you can restore your system. Depending on how bad a trouble your system has run into, you can use a different way to restore it.
Method #01: Using System Properties
This is the simplest way to restore your system, but it also requires you to be able to at least access the desktop and the start menu.
Press Start, type ‘Create a restore point’, and choose the option as shown below.

This will open up the System Properties window. Here, click on System Restore.

This will lead you to the System Restore window. Click Next.

Select a system restore point and click Next.

Click Finish.

Your system will now be restored.
Method #02: Using Advanced Startup
If you are not able to boot up your system, you may have to access the Advanced Startup settings and restore your system through it. There are a couple of ways you can access the Advanced Startup screen.
The first way is to turn off the device and pressing F8 before you see the Windows logo. This will boot your PC into recovery.
An alternate way is to access recovery using Windows installation media. In the Windows Setup, click Next…

and then click on Repair your computer in the bottom left corner.

Both these ways will get you to Advanced Startup.
Select Troubleshoot.

Then Advanced options.

Now click on System Restore.

Click Next.

Choose your system restore point and hit Continue.

Click Finish to have your system restored.

Can’t create a system restore point? How to fix
There can be times when, for one reason or another, you may not be able to create a system restore point. But there are a few easy fixes that you can implement to get around the issue.
Method #01: Change system restore frequency using Registry Editor
As mentioned before, by default, Windows only lets you create one system restore point if one has already been created in the last 24 hours. This can be problematic, especially if you’re looking to edit the registry or other system settings but want to ensure that there’s a restore point in case things go south. To allow the creation of system restore points at any time, you will have to change the frequency of system restore points.
Press Win + R to open the RUN box, type regedit, and hit Enter.

Now, navigate to the following address (or copy and paste it in the registry address bar):
Computer\HKEY_LOCAL_MACHINE\SOFTWARE\Microsoft\Windows NT\CurrentVersion\SystemRestore

Right-click in the empty space to the right and select New, then DWORD (32-bit) Value.

Name it SystemRestorePointCreationFrequency.

By default, its value is set to 0. Let it be that way and close the registry editor. You should now be able to create a system restore point manually without having to worry about any frequency limitations.
Method #02: Enable system restore via Group Policy Editor
Press Win + R to open the RUN box, type gpedit.msc and hit Enter.

This will open up the Group Policy Editor. In the left panel, navigate to Administrative Templated > System > System Restore.

On the right, check the state of the two Settings. They should both be set to Not configured.

If either of them is enabled, double-click on it and set it to Not configured.

You should be able to create a system restore point as shown before.
Method #03: Turn on Volume Shadow Copy service
When you’re not able to create a system restore point, another fix that you may want to implement is to turn or (or reset) the Volume Shadow Copy service. Here’s how to do so:
Press Win + R to open the RUN box, type services.msc and hit Enter.

Scroll down and look for Volume Shadow Copy. Double-click on it.

Click on Start if the service isn’t already running.

If it running, restart it by clicking on Stop…

And then on Start again.

Creating a restore point in Windows 11: FAQs
So these were all the ways that you can create a restore point and some fixes if you’re not able to create one. Now, let’s consider the most commonly asked questions about system restore points and why it’s crucial that you create them from time to time, or at least have your system set up to create them automatically.
Are restore points created automatically on Windows 11?
Yes, Windows 11 by default has its System Properties set to create system restore points automatically from time to time, such as when you apply an update or make important changes to your system.
Why should you manually create a restore point?
As mentioned earlier, by default, Windows 11 will create restore points for your system to revert to should it run into a problem. But there can be instances when, for one reason or another, Windows might not be able to do so itself.
Although there are fixes that can resolve this issue (mentioned earlier), you should look to manually create a system restore point in case they don’t work out. It is even more crucial that you do so if you’re messing around with the registry or making other drastic changes to your system. You never know when they might come in to save your system from becoming unusable.
What happens when you create a restore point?
When a system restore point is created, Windows takes a snapshot of your system data as it is at a particular time. The state of the operating system is thus saved so that you can revert back to it in case things go wrong.
How long does it take to create a restore point?
A seconda della quantità di dati da salvare, la creazione di un punto di ripristino può richiedere da pochi minuti ad alcune ore. Tuttavia, se dopo quattro o cinque ore si scopre che è ancora in corso la creazione di un punto di ripristino, è probabile che Windows abbia riscontrato alcuni problemi. In uno scenario del genere, potresti voler annullare l'intero processo e ricominciare.
Ci auguriamo che tu sia stato in grado di creare punti di ripristino del sistema con l'aiuto di questa guida.
