Windows 11 ha fatto molta strada da quando è stato annunciato e le versioni beta sembrano ricevere sempre più tester ogni giorno. Windows è passato alle app UWP per il suo sistema e
Windows Store quando è stato rilasciato Windows 10. Questa è stata per la maggior parte una transizione molto gradita, ma le app UWP portano con sé i propri errori. Un problema importante che sembra apparire occasionalmente con un aggiornamento di Windows è l'errore "ms-resource: AppName". Stai affrontando lo stesso problema? Ecco tutto ciò che devi sapere al riguardo.
Contenuti
Che cos'è l'errore "ms-resource: AppName"?
L'errore "ms-resource:AppName" si riferisce a un problema con Explorer.exe e ShellExperienceHost.exe sul sistema nella maggior parte dei casi. A volte questo errore è causato anche da un'app UWP che si comporta in modo anomalo. Questo errore si verifica quando l'app non si avvia quando previsto o Windows è costretto a utilizzare una cache danneggiata quando elenca le tue app.
Se l'app si comporta in modo anomalo, troverai che l'app ha "ms-resource: AppName" come nome nella maggior parte delle posizioni, inclusi il menu Start, la barra delle applicazioni, l'elenco delle app e altro. Tuttavia, se i tuoi processi explorer.exe e shellexperiencehost.exe si comportano male, nella maggior parte dei casi dovrai affrontare questo errore solo nel menu Start.
Ecco come identificare il problema e risolverlo di conseguenza.
Correlati: scorciatoie di Windows 11: il nostro elenco completo
Identifica il tuo problema
Inizia identificando l'app interessata e bloccandola nel menu Start. Se l'app è già bloccata, puoi saltare questo passaggio. Assicurati che l'app mostri "ms-resource:AppName" come nome nel menu Start.
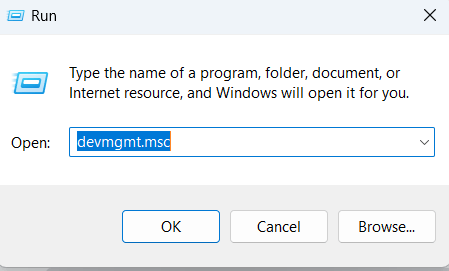
Ora premi Windows + Rsulla tastiera per avviare la finestra di dialogo Esegui. Digita il seguente comando e premi Invio sulla tastiera.
shell:appsfolder

Controlla il nome dell'app UWP interessata in questa cartella. Se ottieni "ms-resource:AppName" come nome dell'app, stai riscontrando questo errore ovunque e puoi seguire le correzioni successive in questa guida per il tuo problema.

Tuttavia, se l'app mostra il nome corretto in questa cartella, ciò indica un problema con Explorer.exe e ShellExperienceHost.exe sul tuo sistema. Puoi usare la prima guida in questi casi. Iniziamo.
Come correggere l'errore "ms-resource:AppName"
Puoi correggere questo errore aggiornando la cache, riavviando il processo interessato o riparando l'app interessata e il Microsoft Store. Segui una delle guide di seguito a seconda della tua analisi dell'app interessata.
Nota: sebbene questo problema possa essere replicato, non possiamo testare ogni situazione. Quindi è consigliabile che se tutte le tue app mostrano questo errore in Esplora risorse, puoi provare la prima correzione nella sezione "Se riscontri l'errore solo nel menu Start".
Se stai riscontrando questo errore solo nel menu Start, segui la guida di seguito.
Premi Windows + Ssulla tastiera e cerca PowerShell. Premi Ctrl + Shift + Entersulla tastiera una volta che appare nei risultati di ricerca.

PowerShell verrà ora avviato come amministratore sul tuo sistema. Digita il seguente comando e premi Invio sulla tastiera.
Get-AppxPackage -all *HolographicFirstRun* | Remove-AppPackage -AllUsers

Una volta eseguito, ti consigliamo di salvare tutto il lavoro e riavviare il sistema. Una volta riavviato, premi Ctrl + Shift + Escsulla tastiera per avviare il Task Manager. Fare clic e passare alla scheda "Dettagli" in alto.

Trova "ShellExperienceHost.exe", fai clic su di esso e premi Delsulla tastiera. Se non hai il processo attualmente in esecuzione, puoi invece selezionare "StartMenuExperienceHost.exe".

Fare clic su "Termina processo" per confermare la scelta.

Ora ripeti il passaggio precedente per terminare anche i seguenti processi.
- StartMenuExperienceHost.exe
- Explorer.exe
Al termine, fai clic su "File" nell'angolo in alto a sinistra.

Seleziona "Esegui nuova attività".

Fare clic su "Sfoglia".

Passare alla seguente directory. Puoi anche copiare e incollare lo stesso nella barra degli indirizzi nella parte superiore della finestra "Sfoglia".
%localappdata%\Packages\Microsoft.Windows.StartMenuExperienceHost_cw5n1h2txyewy

Seleziona la cartella denominata 'TempState' ed eliminala definitivamente dal tuo sistema.

Conferma la tua scelta cliccando su 'Sì'.

Fare nuovamente clic su "File" e selezionare "Esegui nuova attività". Digita il seguente termine e premi Invio sulla tastiera.
explorer.exe

Explorer dovrebbe ora riavviarsi sul sistema insieme al processo StartMenuExperienceHost.exe. Ti consigliamo ora di riavviare il sistema. Al riavvio, "ms-resource:AppName" dovrebbe ora essere corretto sul tuo sistema.
Caso 2: se ricevi l'errore ovunque
Se stai affrontando ms-resource: AppName ovunque, puoi provare le correzioni menzionate di seguito. Idealmente, una riparazione o una reinstallazione dell'app interessata dovrebbe risolvere questo problema per te, ma in caso contrario, puoi optare per le correzioni più serie menzionate di seguito. Iniziamo.
Metodo n. 01: ripara l'app
Premi Windows + isulla tastiera e fai clic su "App" alla tua sinistra.

Ora fai clic su "App e funzionalità".

Scorri l'elenco e trova l'app attualmente interessata. Fare clic sul menu "3 punti" accanto ad esso.

Nota: se stai cercando un'app di sistema interessata da questo errore, sfortunatamente non verrà visualizzata nell'elenco delle app. In questi casi, puoi semplicemente reinstallare l'app di sistema utilizzando la guida di seguito.
Seleziona "Opzioni avanzate".

Fare clic su "Termina".

Ora fai clic su "Ripara".

Windows ora farà del suo meglio per riparare l'app interessata in background.

Vai alla pagina precedente e ripeti i passaggi precedenti per riparare l'app Microsoft Store come mostrato di seguito.

Una volta che entrambe le app sono state riparate, prova ad accedere nuovamente all'app interessata. Il problema dovrebbe ora essere risolto per te.
Metodo #02: reimposta l'app
Se la riparazione dell'app non ha funzionato per te, puoi ripristinare l'app utilizzando la guida di seguito.
Premi Windows + isulla tastiera e seleziona "App" dalla barra laterale sinistra.

Fai clic su "App e funzionalità".

Fai clic sul menu "3 punti" accanto all'app interessata.

Seleziona "Opzioni avanzate".

Fare clic su "Termina" e quindi su "Ripristina".

Fare nuovamente clic su "Ripristina" per confermare la scelta.

Ripristina anche l'app Microsoft Store utilizzando i passaggi precedenti.

Ora puoi provare ad accedere all'app interessata, che ora dovrebbe essere risolta nella maggior parte dei casi.
Metodo #03: disinstallare e reinstallare l'app interessata
Se un ripristino e riparazione non ha funzionato per te, puoi provare a reinstallare l'app sul tuo sistema. Questo metodo funziona sia per le app di sistema che per quelle di terze parti. Segui i passaggi seguenti per iniziare.
Premi Windows + Ssulla tastiera e cerca PowerShell. Premi Ctrl + Shift + Entersulla tastiera una volta che appare nei risultati di ricerca.

PowerShell verrà ora avviato come amministratore sul tuo sistema. Digita il seguente comando e premi Invio sulla tastiera.
Get-AppxPackage | Select Name, PackageFullName

Ora otterrai un elenco di tutte le app sul tuo sistema. Trova l'app interessata nell'elenco e copia il suo nome intero.

Open notepad and paste the package name in your clipboard and save the text file to a convenient location on your local storage for later reference. Type in the following command and press Enter on your keyboard. Replace NAME with the package name you copied to your clipboard earlier.
Get-AppxPackage NAME | Remove-AppxPackage

The selected app will now be uninstalled from your system. We recommend you restart your system at this point before reinstalling the app using the steps below. Once your system restarts, open the Notepad file we saved earlier and copy the Package Name to your clipboard.
Now launch PowerShell as an administrator using the steps above. Once launched, type in the command below and press Enter on your keyboard to execute it. Replace NAME with the package name we copied to your clipboard.
Add-AppxPackage -register "C:\Program Files\WindowsApps\NAME\appxmanifest.xml" -DisableDevelopmentMode

The selected app will now be reinstalled on your system. We will now need to refresh Windows UI to detect the new app properly. The best way to do this is by restarting your system.
Restart your system and the ms-resource:AppName error should now be fixed on your system.
Method #04: Reinstall all missing system apps
If the error persists on your system then let’s try uninstalling and reinstalling all missing system apps on your system. If you recently used a cleaner or uninstaller on your system then it is likely that a critical system app was also removed during this process which is causing this issue. We can fix such errors by checking and reinstalling any missing system apps on your system. Follow the guide below to get you started.
Press Windows + S on your keyboard and search for PowerShell on your system. Hit Ctrl + Shift + Enter on your keyboard once it shows up in your results.

PowerShell will now run as administrator on your system. Type in the following command on your system and hit Enter to execute it.
Get-AppXPackage -allusers | Foreach {Add-AppxPackage -DisableDevelopmentMode -Register "$($_.InstallLocation)\AppXManifest.xml"}

Windows will now check all your system apps and reinstall any missing apps. Apps that already exist will show up as a red text error in PowerShell which can be ignored.
Restart your system and the ms-resource:AppName should now be fixed on your system.
Method #05: Run SFC & DISM commands
SFC and DISM commands can help fix issues with your disks and Windows image. If a corrupted file or a disk error is causing this issue on your system then these commands can help fix such errors. Follow the guides below to get you started.
Check and fix Disk errors
An SFC scan can help you scan and fix errors with your disk. Follow the guide below to get you started.
Press Windows + R on your keyboard and type in CMD. Press Ctrl + Shift + Enter on your keyboard to run CMD as an administrator on your system.

Now type in the following command and press Enter on your keyboard.
sfc /scannow

Windows will now do its thing, scan your disk and fix any errors it finds.
Check for corrupted system files and replace them
DISM can help you scan for corrupted system files on your system and replace them if needed. This DISM command will also help you repair your system image if it has been corrupted. Follow the guide below to get you started.
Press Windows + S on your keyboard, search for CMD and click on ‘Run as administrator’.

CMD will now launch as administrator on your system. Type in the following command and press Enter on your keyboard.
DISM /Online /Cleanup-Image /RestoreHealth

Once the process finishes, restart your system and the error should be fixed on your system.
Still facing ‘ms-resource:AppName’ error? Last Resort you can try
If you are still facing the ms-resource:AppName error on your system then this indicates a more serious issue with your Windows image. You will now have to repair your Windows installation to fix this issue. We recommend you first try to Reset your PC while retaining your data.
Related: How to Repair Windows 11 [15 Ways]
The above will help fix your issue in most cases. However, if the error persists then we recommend proceeding with a fresh installation of Windows 11 on your system. Your error will be definitely solved after a fresh installation of Windows 11. You can use this comprehensive guide from us to reset your Windows 11 PC in multiple ways.
Related: How to Reset Windows 11
We hope you were able to fix ms-resource:AppName error on your system using the guide above. If you have any more questions, feel free to reach out to us using the comments section below.
Related:
