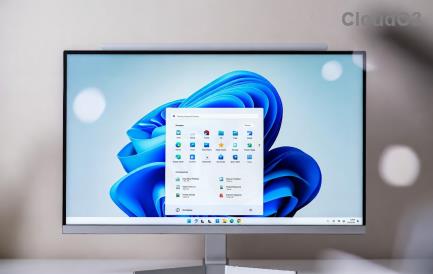
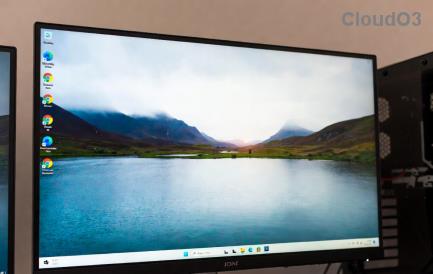
Windows 11 ha apportato alcune modifiche UX molto gradite con il suo nuovo aspetto in vetro smerigliato e la barra delle applicazioni centrata . Se sei una persona a cui piace sfruttare al meglio il proprio spazio sullo schermo, avere il lato sinistro dello schermo vuoto per la maggior parte del tempo può essere piuttosto frustrante.
Quindi cosa puoi fare per lo spazio vuoto inutilizzato nella barra delle applicazioni, in particolare quello sul lato sinistro? Puoi recuperarlo? Scopriamo 2 dei modi più cool per fare buon uso di quello spazio!
Contenuti
Cosa puoi fare con lo spazio nella barra delle applicazioni?
Puoi fare più cose con lo spazio nella barra delle applicazioni, ma la cosa più semplice da fare è visualizzare le statistiche delle prestazioni nella stessa posizione. Puoi usare un trucco accurato offerto dai widget della Xbox Game Bar per farlo funzionare sul tuo sistema.
Se ti senti più avventuroso, puoi utilizzare uno strumento di terze parti per nascondere la barra delle applicazioni e successivamente utilizzare le skin Rainmeter per visualizzare i dati richiesti nell'angolo in basso a destra dello schermo. Puoi anche fare lo stesso con la barra delle applicazioni abilitata e Rainmeter offre una vasta selezione di skin tra cui scegliere. La parte migliore è che puoi codificare e modificare le tue skin per ottenere il posizionamento e l'estetica giusti in base alle tue preferenze. Usa la guida qui sotto per recuperare lo spazio nella barra delle applicazioni.
Correlati: Come rendere la barra delle applicazioni più piccola o più grande in Windows 11
Come utilizzare lo spazio vuoto nella barra delle applicazioni su Windows 11
Usa uno dei due metodi menzionati di seguito per recuperare lo spazio nella barra delle applicazioni a seconda delle tue preferenze e della quantità di armeggiare che desideri fare, per far funzionare tutto sul tuo sistema.
Metodo n. 01: utilizza Xbox Game Bar per ottenere statistiche sulle prestazioni nella barra delle applicazioni
Assicurati di avere Game Bar installato sul tuo PC. In caso contrario, puoi scaricarlo utilizzando il link sottostante.
Una volta installato, premi Windows + isulla tastiera e fai clic su "Giochi" alla tua sinistra.

Seleziona Barra di gioco Xbox.

Ora abilita l'interruttore per "Barra di gioco" alla tua destra.

Una volta fatto, premi Windows + Gsulla tastiera per attivare la barra di gioco. Una volta attivato, dovresti avere il widget delle prestazioni alla tua sinistra insieme ad altri widget aperti per impostazione predefinita.

Se invece il widget non è disponibile, clicca sull'icona 'Prestazioni' in alto per attivarlo.

Ora fai clic su "Opzioni prestazioni" in alto.

Fare clic sulla freccia a discesa in alto e selezionare "In basso".

Seleziona la casella "Ignora trasparenza" e trascina il dispositivo di scorrimento al 100%.

Ora scegli un colore di accento a tua scelta.

Infine, deseleziona le caselle per le statistiche che non desideri visualizzare nella barra delle applicazioni.

Ora hai configurato il widget. Passa il mouse nell'angolo in basso a destra del grafico e fai clic sulla freccia a discesa visualizzata. Questo nasconderà il grafico dal tuo widget.

Ora trascina e sposta il widget sulla barra delle applicazioni e posizionalo di conseguenza. A seconda della mia risoluzione attuale, una leggera imbottitura a sinistra e in basso sembrava fare il trucco.

Una volta riposizionato, fai clic sull'icona 'Pin' in alto.

Ora fai clic in un punto qualsiasi per chiudere la barra di gioco Xbox.

Le statistiche sulle prestazioni rimarranno ora nella barra delle applicazioni e il resto sarà nascosto dal display.
Correlati: Come spostare la barra delle applicazioni in alto in Windows 11
Metodo #02: usa Rainmeter
Rainmeter è un'utilità di vecchia data che è stata lo strumento predefinito per la personalizzazione dei widget in Windows poiché erano una funzionalità nativa. Sebbene sia passato un po' di tempo dall'aggiornamento di Rainmeter, lo strumento funziona ancora bene in Windows 11. L'utilizzo delle risorse è minimo, tuttavia il problema dell'equalizzazione audio persiste. L'utilizzo di skin Rainmeter che utilizzano la nuova API EQ può causare un elevato utilizzo della CPU su sistemi meno recenti con 4 core o meno, motivo per cui ti consigliamo di stare lontano da tali skin se riscontri problemi di utilizzo elevato della CPU. Puoi usare la guida qui sotto per configurare Rainmeter e iniziare a usarlo sul tuo sistema.
2.1 Ottieni una skin
Per prima cosa dobbiamo procurarci una skin Rainmeter che desideri utilizzare con il tuo PC. Ti consigliamo di acquistarne uno da DeviantArt, ma puoi anche utilizzare qualsiasi altro sito Web affidabile. Tieni presente che mentre la maggior parte delle impostazioni della skin avrà più elementi come un orologio, il meteo, il calendario, la data e altro, puoi sceglierne uno e personalizzarlo in base alle tue esigenze. Quindi, puoi combinare i tuoi download per trovare un'estetica che si adatti perfettamente alle tue esigenze. Useremo una skin chiamata Urban per questa guida, ma puoi usare qualsiasi altra skin che ritieni sia la migliore per le tue esigenze estetiche.
2.2 Configurazione del pluviometro
Ora è il momento di configurare Rainmeter sul tuo sistema. Utilizza i passaggi seguenti per iniziare.
Visita questo collegamento e fai clic su "Download" per scaricare l'ultima versione di Rainmeter sul tuo PC.

Una volta scaricata la configurazione nella memoria locale, fai doppio clic e avviala sul tuo PC. Fare clic su "Esegui" quando richiesto.

Seleziona la lingua desiderata e fai clic su "Ok".

Ora fai clic e seleziona "Installazione portatile".

Nota: l' installazione di una versione portatile riduce al minimo le risorse utilizzate da Rainmeter, ma puoi anche scegliere l'"Installazione classica" sul tuo sistema.
Fare clic su "Avanti".

Seleziona una directory di installazione per Rainmeter. Ti consigliamo di archiviarlo in un'unità o partizione diversa rispetto all'unità di avvio.

Una volta selezionato, seleziona la casella "Installa versione a 64 bit".

Ora fai clic su "Installa".

Una volta terminato il processo, chiudi la finestra.
Ora sei pronto per utilizzare Rainmeter sul tuo sistema. Se desideri avviare automaticamente Rainmeter ogni volta che accendi il sistema, usa la guida di seguito per creare un'attività di avvio automatico per Rainmeter.
2.3 Avvio automatico del pluviometro
Avvia il menu Start, cerca "Utilità di pianificazione" e avvia lo stesso dai risultati della ricerca.

Fai clic su "Crea attività di base" alla tua destra.

Inserisci un nome e una descrizione per la tua attività come mostrato di seguito.

Fare clic su "Avanti" una volta terminato.

Fare clic su "Quando effettuo l'accesso".

Fare clic su "Avanti".

Seleziona "Avvia un programma".

Fare clic su "Avanti".

Ora fai clic su "Sfoglia" e seleziona "Rainmeter.exe" dalla memoria locale.

Fare clic su "Avanti".

Infine, fai clic su "Fine".

L'attività verrà ora creata e Rainmeter si avvierà automaticamente ogni volta che accedi al tuo account utente sul PC corrente.
2.4 Aggiungi e configura la tua skin
We will now add and set up your skin in Rainmeter. Use the guide below to get you started.
Download the desired Rainmeter skin you wish to use from this link. Once downloaded, navigate to the Rainmeter installation on your local storage and launch Skininstaller.exe.

Select the skin you downloaded to your local storage earlier. Select the file with ‘.rmskin’ extension. If you downloaded an archive, then you will need to extract it first to find this file for your screen.

Once selected, leave everything at default and simply uncheck the box for ‘Apply included layout’.

Click on ‘Install’ once you are done.

The selected skin will now be installed on your PC, we can now configure it and place it in your taskbar. Use the guide below to get you started.
2.5 Finally, customize your taskbar with Rainmeter
At this point, I recommend that you find and install any other skins that you wish to use to mix and match for the perfect setup. Once installed, follow the guide below to customize your skins and place the necessary elements in your taskbar.
Launch Rainmeter.exe on your local storage if it isn’t already running. Once launched, click on the tray icon for the same in your taskbar.

You will now have the Rainmeter window open on your screen. Click and select the theme you wish to use from your left and subsequently the .ini file for the configuration. For example, as we are using the stats from the Urban theme, we have navigated to Urban > CPU. The names can vary and be anything depending on the developer of your screen so feel free to try each one to find the one that you are looking for. Once found, double click on the concerned .ini file. This will automatically load the skin and it should now be visible on your desktop.

Click on the drop-down menu for Position and select ‘Stay topmost’. Now simply click and drag the skin to the desired position in your taskbar.

Once you are happy with the position, uncheck ‘Draggable’ for the selected skin.

Click and enable ‘Click through’.

You can also uncheck ‘Snap to edges’ to manually position the skin on your skin.

Note: If you are using a skin that uses clickable buttons like Settings links, Wi-Fi, and more, then we recommend you do not enable ‘Click through’.
Once done, click on ‘Refresh all’ just to be safe. This will refresh all your skins in the background ensuring that everything is working as intended. And that’s it! You should now have reclaimed the space in your taskbar.
2.6 Resize Skins
Re-sizing skins has come a long way in Rainmeter as most modern skins allow you to use the right-click and drag gesture to resize them. We recommend you give this a shot, right-click on your screen, keep holding down the right mouse click, and drag your mouse up and down. If your skin supports this feature then it should now be resized on your PC. If however, your skin does not respond to this gesture then you can manually edit the .ini file to resize it instead. Use the steps below to get you started.
Click on the ‘Rainmeter’ icon in your system tray to launch the Settings for the same.

Now click and select the concerned skin from your left.

Once selected, click on ‘Edit’ in the top right corner.

Now look for values related to size in this file. Ideally, you’re looking for a size variable in the code at the top as it controls the entire screen and not the individual elements of your screen. Once found, simply modify this value to change the size of your skin.

Hit Ctrl + S to save your changes without closing the text file. Now switch back to Rainmeter settings and hit ‘Refresh’ at the top.

The changes will now be reflected in the skin on your screen. If however, you do not have a size value at the top or the changes do not reflect, then you will have to edit each meter size manually in the subsequent code below. This can be quite tedious depending on the elements contained in the skin. However, in our case, this was a simple modification which could also be the case for you.
However, if you are having to sift through tons of code, then we recommend you simply opt for a different skin instead. Rainmeter has been supported for a long time and thus has a huge library of skins. You should be able to find easily adjustable skin for your system. Use the Rainmeter skin options at the end of this guide to help you find a new one based on your aesthetic needs.
FAQs
With so many ways to customize your taskbar and so many options at your disposal, you are bound to have a few questions. Here are some commonly asked ones that should help you get up to speed on your system.
How much resources does Xbox Game Bar use?
Unlike Microsoft’s reputation, Xbox Game Bar is quite efficient with resources. It uses the Windows Kernal to directly tie into the Task Manager service and source all hardware info reading for your systems. This makes it highly efficient and you shouldn’t notice any difference in your system’s performance as the Game Bar is usually always running in the background.
How much resources does Rainmeter use?
Rainmeter does use CPU and RAM and can increase your resource usage if you use tons of skins. However, each skin is supposed to be a hit of around 0.4% to 0.6% on your CPU in the task manager at maximum. If you notice Rainmeter using large amounts of CPU resources on your system then you likely have a bugged or incompatible skin that is trying to use a service or API that is currently unsupported by Rainmeter. This usually happens with Visualizers, Calendars, and Weather widgets that tend to regularly sync with online servers to provide the necessary updated data. In the case of visualizers, the service used to measure your Audio frequencies conflicts with newer drivers and APIs in the background which is why most visualizers are known to cause high CPU usage on most systems.
This doesn’t mean you should give up on Visualizers, you should simply opt for one that was recently released for the latest version of Rainmeter.
My Xbox game bar stats don’t update in the taskbar: Fix
This is an issue that occurs when the Xbox Game Bar is facing a conflict in the background. You can use the following fixes to get this sorted on your system.
- Launch and close Task Manager: Launching and closing the task manager seems to fix the Performance Widget in the Xbox Game Bar. Simply hit Ctrl + Shift + Esc on your keyboard to launch the Task Manager and then switch to the ‘Performance’ tab. Wait a few seconds and then simply close the task manager. Try loading the widget again now, and it should now correctly display the stats as intended.
- Close any monitoring services: If you are using any other monitoring services like HWinfo, Throttlestop, Intel XTU, or more, then we recommend you quit them first to fix any background conflicts. If however, the correct stats still fail to show up, then we recommend you restart your PC using the next step.
- Restart your PC: A restart will help restart Xbox Game Bar services as well as monitoring services in the background. This will ensure that the correct performance stats are displayed in the Xbox Game Bar performance widget.
A restart in the worst cases will help fix the Performance widget on your system.
Rainmeter skins won’t update: Fix
If skins won’t update or display the correct data then you simply need to refresh them all. If that does not work, you can load and unload the concerned skin which should get everything back up and running on your system again. Use the guide below to get you started.
Click on the Rainmeter icon in your system tray to launch the Rainmeter Settings.

Once launched, click on the drop-down menu in the top left and select all your Active skins one by one.

Click on ‘Unload’ and ‘Load’ subsequently, for each active skin.

This should help the stats correctly display in all skins on most systems. If however, you still face issues, then we recommend you restart your system and check for any new updates available for Rainmeter.
Can I hide my taskbar?
Unfortunately hiding the taskbar seems to be a pipedream for now in Windows 11. However, you can use RoundedTB and its Dynamic Taskbar feature to have a virtually non-existent taskbar on your system. You will then be able to place the necessary skins natively in the taskbar space without having to worry about the color or aesthetic of your taskbar. You can download RoundedTB on your system using the guide below.
We hope this post helped you easily reclaim the space in your taskbar. If you face any issues or have any more questions for us, feel free to reach out using the comments section below.
RELATED:
