PowerPoint 365を自動で進める方法

Microsoft PowerPoint 365でスライドショーを自動的に再生する方法を示すチュートリアルです。

これは、Office365へのテナントからテナントへの移行を実行するための完全なガイドです。
移行の2週間以上前
1.ドメインの所有権を確認し、情報を取得して保存します。2.このリンク
を使用してすべてのDNSレコードをキャプチャします。
3. Exchangeに関連するDNSレコードを特定してキャプチャします(ドメイン転送を実行する場合)– TXT、MX、およびSPF。
4.各MXレコードで、TTL値をメモします
5.このリンクを使用してドメインの可用性を確認します。


6.ドメインに必要なMicrosoft365サービスを決定します。
7.必要な決定–ドメインとDNSの要件について話し合う
ドメイン名:
DNSレコード:
すべての(Exchangeだけでなく)レコードをコピーして、宛先DNSサーバーにレコードをセットアップします。
8. BitTitan移行ツールを使用して移行されないアイテムについて、プロジェクトチームと話し合います。
9.ソースでO365管理者ポータルにドメイン管理者権限を要求します
ソースの管理者ポータルからドメインを削除してから、ドメインを宛先に追加する必要があるプロセスの一部として、管理者権限が必要です。
10.ソースでO365管理ポータルにログインし、EXOメールルールとコネクタを確認します
11.mxtoolboxブラックリストを使用してドメイン/IPアドレスがブラックリストに登録されていないことを確認します。
重要:ブラックリストに登録されている場合、ドメイン/IPアドレスをホワイトリストに登録するとき。
12.ソースでO365管理ポータルにログインし、承認済みドメイン、グループ、メールボックス、リソース、共有メールボックス、およびユーザーのリストをEXCELにエクスポートします。
13.移行する各メールボックスのサイズを確認します。
14.メール設定を確認します
15.移行するユーザー、グループ、および共有メールボックスのリストを完成させます
16.宛先にすべてのユーザーメールボックス、共有メールボックス、配布グループ、セキュリティグループ、連絡先、およびリソースを作成します。
17.宛先のメールボックス/カレンダーへの委任アクセスを追加します
18.ユーザーコミュニケーションを作成する
19.ソースで2つのテストアカウントを作成する
20.ソースの2つのテストアカウントに次のデータを入力します
21.宛先に2つのテストアカウントを作成します
22.グローバル管理者アカウントにメールボックスへのフルアクセスを許可します。
Get-Mailbox-ResultSize無制限| Add-MailboxPermission -User“ admin account” -AccessRights FullAccess -InheritanceType All -AutoMapping $ false
23.EWSはソースExchangeサーバーで動作している必要があります
24. OWAを使用して管理者アカウントで他のメールボックスを開くことにより、メールボックスアクセスをテストします
25.ソースの各メールボックスにプロキシアドレスとしてtenantname.onmicrosoft.comアカウントを追加します。
これを実行する必要があります。テナントからドメインを削除する前に、すべてのメールボックスからドメインの電子メールアドレスを削除します。
26.SOURCEでEXOPowershellに接続します
27.プロキシアドレスをエクスポートおよび更新して、@tenantname.onmicrosoft.comを含めます
Get-Mailbox -ResultSize Unlimited -Filter“ emailaddresses -notlike'*@tenantname.onmicrosoft.com'” | エイリアス、primarysmtpaddress、emailaddresses | export-csv -NoTypeInformation「C:\ Temp\mailboxes_output.csv」を選択します
Import-csv C:\ Temp \ mailboxes_output.csv | ForEach-Object {
$ ID =$_。PrimarySmtpAddress
$alias =$_。Alias
$365Email = $ alias +“ @ Tenantname.onmicrosoft.com”
Set-Mailbox -Identity $ ID -EmailAddresses @ {add = $ 365Email}
}
28.すべてのメールボックスが更新されたことを確認します。結果はゼロになるはずです。
Get-Mailbox -ResultSize Unlimited -Filter“ emailaddresses -notlike'*@tenantname.onmicrosoft.com'” | エイリアス、primarysmtpaddress、emailaddressesを選択します
29.管理者アカウントに宛先のメールボックスへのフルアクセスを許可します
30.宛先でEXOPowershellに接続します
宛先で取得したすべてのドメインメールボックスに対して、BitTitanサービスアカウントへの完全なメールボックスアクセスを許可します。
Add-MailboxPermission-Identity「宛先メールボックス-ユーザー「BitTitanサービスアカウント」-AccessRightsFullAccess-InheritanceType All -AutoMapping $ false
31. OWAを使用して管理者アカウントで他のメールボックスを開くことにより、メールボックスアクセスをテストします
32.BitTitanライセンス要件
ノート:
ライセンスは、メールボックスごとに最大10回使用できます。これは、エンドポイントが変更されないことを前提としています。
テストアカウントを使用してBitTitanの移行をテストする場合は、必要なテストアカウントの総数がライセンス数に含まれていることを確認してください。
33.ライセンスを引き換える
注:アカウントをお持ちでない場合は、BitTitanアカウントに登録してください。メールアドレスを確認して、アカウントがアクティブであることを確認してください。
34.BitTitanプロジェクトを作成します
35.ソース設定で:
36.宛先設定で:
37.テナントからテナントへの移行時
38. BitTitanを使用してテストアカウントを移行先に移行する–ステージ前の移行
39.ステージ前の移行を実行する
重要:
40.BitTitanエラーメッセージを解決します
41. OWAを使用して、メールボックスに移行されたデータが含まれていることを確認します
42.ソース:OWAを使用して、追加の電子メールを送受信します
43.完全な移行を実行します
44.BitTitanエラーメッセージを解決します
45. OWAを使用して、メールボックスに移行されたデータが含まれていることを確認します
46. Liaise with the business and confirms date and time of migration. Confirm other resources are available for migration
47. If the decision was made to take ownership of the domain and DNS before migration, initiate the transfer
1 week before migration
Export Exchange objects from Source:
48. Log into EXO Powershell at Source
49. Mailboxes: Export UPN, Alias, SMTP and Proxy addresses
Get-Mailbox -ResultSize Unlimited | select userprincipalname,alias,primarysmtpaddress,emailaddresses | export-csv -NoTypeInformation “Backup_Source_Mailboxes.csv”
50. Groups: Export Alias, SMTP and Proxy addresses
Get-DistributionGroup -ResultSize Unlimited | select alias,primarysmtpaddress,emailaddresses | export-csv -NoTypeInformation “Backup_ Source_Groups.csv”
51. Calendar Delegation:
Get-Mailbox | foreach {
write-host -fore green “Processing $_”
Get-MailboxFolderPermission -Identity “$($_.alias):\Calendar” | where {$_.User -notlike “Anonymous” -and $_.User -notlike “Default”}} | select Identity,User,@{name=’AccessRights’;expression={$_.AccessRights -join ‘,’}} | Export-Csv -NoTypeInformation “Backup_ Source_Calendar_Delegation.csv”
Export Exchange objects from Destination:
52. Log into EXO Powershell at Destination
53. Contacts: Export Name and Email addresses
Get-Recipient -Filter {RecipientType -eq “MailContact” -and EmailAddresses -like ‘domainname‘} | select DisplayName,RecipientType,ExternalEmailAddress,EmailAddresses | export-csv -NoTypeInformation “Backup_Destination_Contacts.csv”
54. Mailboxes: Export Forwarding
For each MAILBOX:
get-Mailbox -Identity | select UserPrincipalName,DeliverToMailboxAndForward,ForwardingAddress,ForwardingSmtpAddress | export-csv -notypeinformation ‘Backup_Destination_Forwarding.csv’ -append
55. Pre-Stage Migration of all Mailboxes – email older than 10 days
Important: For the Source, use the onmicrosoft.com address
Select the Project Name
Click on the drop-down arrow beside “Add” and select “Bulk Add”
Click on “Select File”, locate the CSV file created in step 1 then click “Open”
The contents of the CSV will get imported and displayed on screen, click “Save”
Pre-stage migration:
Important:
Allow time for the migration to complete
The Pre-Stage migrates emails only
Calendars, contacts, journals, notes, and tasks will only migrate during a full migration
56. Resolve any BitTitan error messages
57. Add the domain then request a TXT record to verify we own the domain
58. Setup IM federation so you have chat communications during pre-cutover
Important: Cannot migrate any IM contacts to Microsoft Teams.
59. 1 day before migration
Migrate mailboxes – Full migration
Important: Allow time for the migration to complete.
60. Resolve any BitTitan error messages
61. Migration day
[Optional] Change the TTL value on each MX record
Remove domain dependencies from Source:
62. Log into Azure AD and EXO Powershell at Source
[Optional] Change FEDERATED domains to MANAGED, if applicable.
63. Run the following cmdlet to determine which domains are FEDERATED or MANAGED
Get-MsolDomain
If FEDERATED change to MANAGED:
Set-MsolADFSContext -Computer ADFS_Server_FQDN
Convert-MsolDomainToStandard -DomainName “Domain Name Here” -SkipUserConversion:$true -PasswordFile C:\passwords.txt
64. Run the following cmdlets to verify the domains are managed
Get-MsolDomain
[If Applicable] Disable the directory synchronization
Set-MsolDirSyncEnabled -EnableDirSync $false
[If Applicable] SharePoint Online public website
65. If you had also set up your domain with a SharePoint Online public website, then before you can remove the domain, you first have to set the website’s URL back to the initial domain.
[If Applicable] Skype for Business and Teams
Remove all Skype for Business and Teams licenses from the users in the source tenant. This will remove the SIP attribute from their proxy addresses.
66. Set the default domain in source tenant to domainname.onmicrosoft.com
67. Change all Mailboxes UPNs to domainname .onmicrosoft.com domain. Replace the domainname with your domain name.
Get-MsolUser -all | select-object UserPrincipalName,ObjectID | export-csv -NoTypeInformation “User.csv”
Import-csv User.csv| ForEach-Object {
$ID = $_.UserPrincipalName
$ObjectID = $_.ObjectID
$365Email = $ID.Split(“@”)[0] + “@ domainname.onmicrosoft.com”
Set-MsolUserPrincipalName -ObjectId $ObjectID -NewUserPrincipalName $365Email}
68. Confirm the UPNs have been updated
Get-MsolUser -all | select-object UserPrincipalName,ObjectID
69. Change all Distribution Groups Primary SMTP address to domainname.onmicrosoft.com domain. Replace the domainname with your domain name.
Get-DistributionGroup -ResultSize Unlimited | select-object PrimarySMTPAddress | export-csv -NoTypeInformation “DL.csv”
Import-csv DL.csv| ForEach-Object {
$ID = $_.PrimarySmtpAddress
$365Email = $ID.Split(“@”)[0] + “@domainname.onmicrosoft.com”
Set-DistributionGroup -Identity $ID -primarysmtpaddress $365Email}
70. Confirm the primary smtp’s have been updated
Get-DistributionGroup -ResultSize Unlimited | select-object PrimarySMTPAddress
71. As we changed every mailboxes UPN, the primary SMTP addresses has also been updated to domainname.onmicrosoft.com. Now remove all aliases from every mailbox using this script:
$users = Get-Mailbox -ResultSize Unlimited | Where {$_.Emailaddresses.count -gt 1}
foreach ($user in $users) {
foreach ($email in $user.emailaddresses){
if ($email -ne “SMTP:”+$user.PrimarySmtpAddress){
Set-Mailbox -Identity $user.name -EmailAddresses @{Remove=$email}
}
}
Write-host $user.primarysmtpaddress “has been processed”
}
72. Confirm the Primary and Alias addresses are both domainname.onmicrosoft.com ONLY
Get-Mailbox | select PrimarySmtpAddress,EmailAddresses
73. Remove all aliases from every distribution group
$groups = Get-DistributionGroup -ResultSize Unlimited | Where {$_.Emailaddresses.count -gt 1}
foreach ($group in $groups) {
foreach ($email in $group.emailaddresses){
if ($email -ne “SMTP:”+$group.PrimarySmtpAddress){
Set-DistributionGroup -Identity $group.name -EmailAddresses @{Remove=$email}
}
}
Write-host $group.primarysmtpaddress “has been processed”
}
74. Confirm the Primary and Alias addresses are both domainname.onmicrosoft.com ONLY
Get-DistributionGroup | select PrimarySmtpAddress,EmailAddresses
[If Required] O365 Groups: User the cmdlets below to remove the domain:
Get-UnifiedGroup -Identity “name” | select primarysmtpaddress,emailaddresses
Set-UnifiedGroup -Identity “name” -PrimarySMTPAddress [email protected]
Set-UnifiedGroup -Identity “name” -EmailAddresses @{remove=”smtp:[email protected]”}
75. Confirm all dependencies have been removed. Replace the domainname with your domain name.
Get-MsolUser -DomainName domainname.com -all
Important:
76. Remove the domain from the source Microsoft 365 tenant
Important:
77. Add Mail Rules and Connectors at Destination
[If required]
78. Verify the domain
79. Verify changes
80. Check Domain
To check everything is setup as it should be, wait around an hour for all updates to take effect then launch: https://centralops.net/co/
Type in the domain name and check all records are set as in ‘View DNS Settings’ above.
81. Remove Email Forwarding at Destination
Log into EXO Powershell at Destination and run the following cmdlets for each user:
Set-Mailbox -Identity “DestinationUserEmailAddress” -ForwardingAddress $null -DeliverToMailboxAndForward $false
82. Add aliases for each user at Destination:
Set-RemoteMailbox -Identity “[email protected]” -EmailAddresses @{Add=”smtp:name1@domain”,”smtp:name2@domain”}
83. For each GROUP:
Set-DistributionGroup -Identity “groupname” -EmailAddresses @{add=”[email protected]”}
84. Change the TTL value on each MX record back to the original setting eg 1 hour
85. Migrate Mailboxes – Final Migration
Important: Allow time for the migration to complete
86. Resolve any BitTitan error messages
87. Delete Contacts at Destination
Connect to EXO at Destination and run the following cmdlet:
Import-csv “Backup_Destination_Contacts.csv”| ForEach-Object {
$DisplayName = $_.DisplayName
Remove-MailContact -Identity $Displayname}
88. Confirm the Contact has been deleted:
Import-csv “Backup_Destination_Contacts.csv”| ForEach-Object {
$DisplayName = $_.DisplayName
Get-MailContact -Identity $Displayname}
89. Set the default email address at Destination
For each USER:
Set-RemoteMailbox “[email protected]” -PrimarySmtpAddress “[email protected]”
90. For each GROUP:
Set-DistributionGroup -Identity ‘DisplayName’ -PrimarySmtpAddress “[email protected]” -EmailAddressPolicyEnabled $false
91.共有メールボックスごとに:
重要:すべての変更がO365に同期されるまでしばらくお待ちください。
移行後のアクティビティ
92.デリゲート/エイリアスが正しく入力されていることを確認します
メールボックスの移行–最終的な移行
Important: Allow time for the migration to complete.
93. Resolve any BitTitan error messages
Select the accounts that errored
Click on the down arrow beside “Start” and select “Retry Errors”
In the “Retry Errors” window, review the settings
Click “Retry Errors”
Click on the “Refresh list” icon to get a status of the migration or click on the dashboard on the left-hand side menu
94. Execute End User Test Plan
Launch Outlook at Destination and verify the contents of the following:
メール
連絡先
カレンダー
メールを内部で送受信し、メールが受信されたことを確認し
ますメールを外部で送受信し、メールが受信されたことを
確認します送信者のメールアドレスを確認し
ます共有メールボックスからメールを送受信し、メールが受信されたことを確認します。
送信者の電子メールアドレスを確認
するテストカレンダーの招待状を同僚に送信し、招待状が受信されたことを確認します
95.宛先でEXOPowershellにログインします
メールボックスごとに、サービスアカウントを削除します
Remove-MailboxPermission -Identity“ User1” -User“ BitTitan service account” -AccessRights FullAccess -InheritanceType All
96.ドメインおよびDNSレコードの所有権を取得します
[If not already actioned] – If the current owner made the required changes to DNS, take ownership of the domains and DNS records.
Back-out Plan
97. Change default email address back to old email address
Set-RemoteMailbox “[email protected]” -PrimarySmtpAddress “[email protected]”
98. For each USER:
Log into the on-premise Exchange server
Run Exchange powershell and execute the following cmdlets:
Set-RemoteMailbox “[email protected]” -EmailAddresses @{remove=”[email protected]”}
99. For each GROUP:
Log into the on-premise Exchange server
Run Exchange powershell and execute the following cmdlets:
Set-DistributionGroup -Identity “groupname” -EmailAddresses @{remove=”[email protected]”}
100. Verify attributes have been updated:
Get-RemoteMailbox -Identity | select userprincipalname,alias,primarysmtpaddress,emailaddresses
101. Re-create Contacts at Destination:
Log into EXO Powershell at Destination and run the following cmdlets:
Import-csv “Backup_Destination_Contacts.csv”| ForEach-Object {
$DisplayName = $_.DisplayName
$Email = $_.EmailAddresses
New-MailContact -Name $Displayname -ExternalEmailAddress $Email}
102. Enabling forwarding from Destination to CONTACT
Log into EXO Powershell at Destination
Run the following cmdlets:
Set-Mailbox -Identity “[email protected]” -DeliverToMailboxAndForward $true -ForwardingAddress “[email protected]”
103. Reverse DNS changes
104. Confirm all dependencies have been removed. Replace the domainname with your domain name.
Get-MsolUser -DomainName domainname.com -all
105. Remove the domain from the destination Microsoft 365 tenant
Important:
Allow up to 60 minutes before adding the domains into the destination tenant
O365 may still think the domain is still in use
106. Add the domain at Source then request a TXT record to verify we own the domain
107. Verify the domain
108.変更を確認する
109.ドメインを確認する
To check everything is setup as it should be, wait around an hour for all updates to take effect then launch: http://centralops.net/co/
Type in the domain name and check all records are set as in ‘View DNS Settings’ above.
110. If applicable, add all Skype for Business and Teams licenses from the users in the Source tenant. This will add the SIP attribute to their proxy addresses.
111. Restore original proxy address for all users:
Set-Mailbox -Identity “alias” -EmailAddresses SMTP:[email protected],smtp:[email protected]
112.すべてのユーザーのUPNを復元します。
Import-csv「Backup_Mailboxes.csv」| ForEach-Object {
$ NewUPN =$_。PrimarySmtpAddress
$alias =$_。Alias
$OldUPN = $ alias +“ @ vivacityhealth.onmicrosoft.com”
Set-MsolUserPrincipalName -UserPrincipalName $ OldUPN -NewUserPrincipalName $ Newupn
}
113. UPN、電子メール、およびプロキシアドレスが更新されていることを確認します。
Get-Mailbox -Identity | userprincipalname、alias、primarysmtpaddress、emailaddressesを選択します
114.すべての配布グループのSMTPアドレスをdomainname.onmicrosoft.comドメインに変更します。ドメイン名を自分のドメイン名に置き換えます。
Get-DistributionGroup -ResultSize Unlimited | select-object PrimarySMTPAddress | export-csv -NoTypeInformation“ DL.csv”
Import-csv DL.csv| ForEach-Object {
$ID = $_.PrimarySmtpAddress
$365Email = $ID.Split(“@”)[0] + “@domainname.onmicrosoft.com”
Set-DistributionGroup -Identity $ID -primarysmtpaddress $365Email}
115. Remove all aliases from every distribution group
$groups = Get-DistributionGroup -ResultSize Unlimited | Where {$_.Emailaddresses.count -gt 1}
foreach ($group in $groups) {
foreach ($email in $group.emailaddresses){
if ($email -ne “SMTP:”+$group.PrimarySmtpAddress){
Set-DistributionGroup -Identity $group.name -EmailAddresses @{Remove=$email}
}
}
Write-host $group.primarysmtpaddress “has been processed” $
}
That’s how tenant to tenant migration Office 365 works.
Microsoft PowerPoint 365でスライドショーを自動的に再生する方法を示すチュートリアルです。
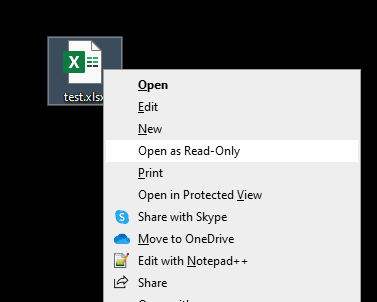
このガイドを使用して、Microsoft Excel for Office 365ファイルに「読み取り専用で開く」と表示されるプロンプトを強制します。
Microsoft Outlook 365の連絡先を簡単にvCardファイルにエクスポートする方法をご紹介します。
Microsoft Excelでセル内の数式の表示を有効または無効にする方法を学びます。
このチュートリアルでは、Microsoft Excel 365でセルをロックおよびロック解除する方法を学びます。
Microsoft Outlookで迷惑メールオプションがグレーアウトすることは一般的です。この記事では、その対処方法を説明します。
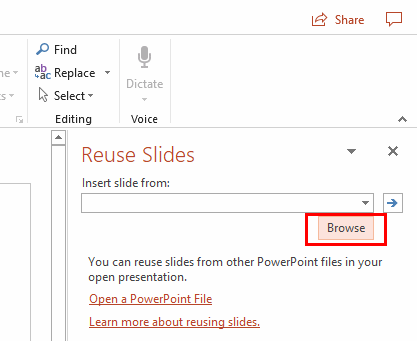
Microsoft PowerPoint 365の別のプレゼンテーションファイルからスライドをインポートする方法を示すチュートリアルです。
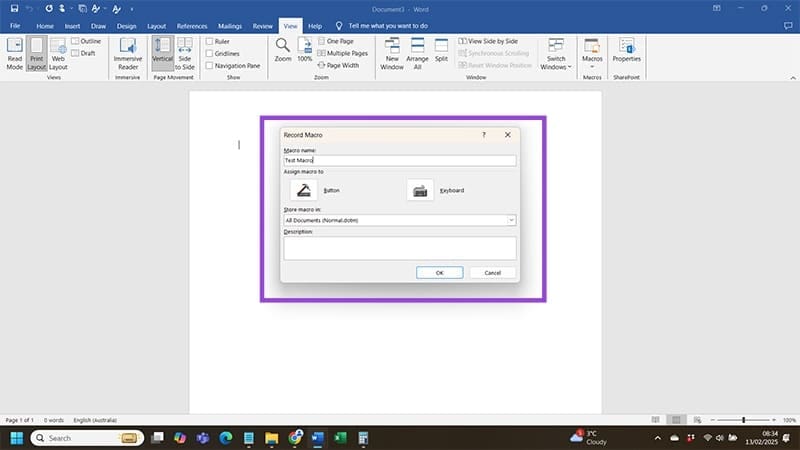
最もよく使用する機能を短時間で実行するために、Wordでマクロを作成する方法を見つけてください。
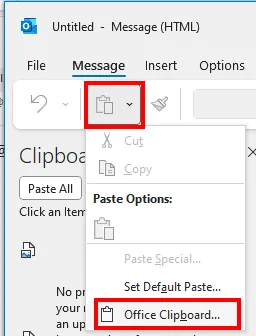
Microsoft Office 365アプリケーションでのクリップボードオプションの表示/非表示を有効にする方法を説明します。
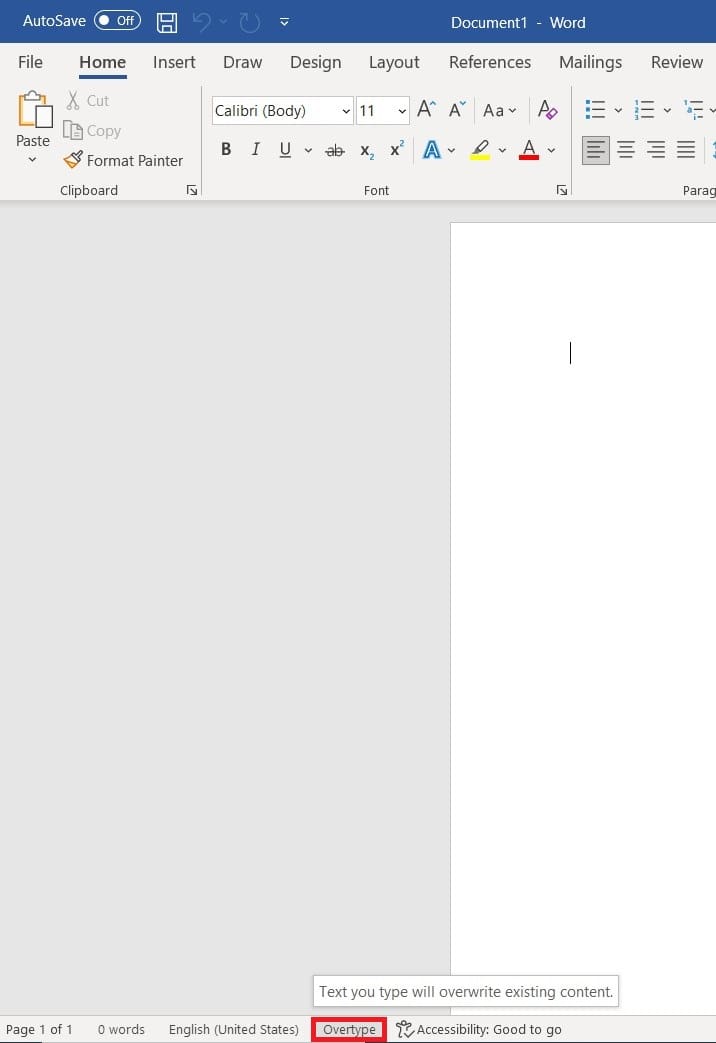
Microsoft Word 2016が既存のテキストに上書きされている場合は、テキストが上書きされる問題を解決するための簡単な手順を学びましょう。
