วิธีตั้งค่าการเปลี่ยนสไลด์อัตโนมัติใน PowerPoint 365

คู่มือแสดงวิธีการทำให้ Microsoft PowerPoint 365 เล่นงานนำเสนอของคุณโดยอัตโนมัติด้วยการตั้งค่าเวลาในการเปลี่ยนสไลด์.

นี่คือคู่มือฉบับสมบูรณ์เพื่อดำเนินการย้ายผู้เช่าไปยังผู้เช่า Office 365
2 สัปดาห์ขึ้นไปก่อนการย้ายถิ่นฐาน
1. ตรวจสอบความเป็นเจ้าของโดเมนและบันทึกข้อมูลและบันทึก
2. บันทึกระเบียน DNS ทั้งหมดโดยใช้ลิงก์นี้
3. ระบุและบันทึกระเบียน DNS ที่เกี่ยวข้องกับ Exchange (หากทำการโอนย้ายโดเมน) – TXT , MXและSPF
4. ในแต่ละระเบียน MX ให้จดบันทึกค่า TTL
5. ตรวจสอบความพร้อมใช้งานของโดเมนโดยใช้ลิงก์นี้


6. กำหนดว่าบริการใดของ Microsoft 365 ที่จำเป็นสำหรับโดเมน
7. การตัดสินใจที่จำเป็น – หารือเกี่ยวกับข้อกำหนดของโดเมนและ DNS
ชื่อโดเมน:
ระเบียน DNS:
สำเนาของ ระเบียน ALL (ไม่ใช่แค่ Exchange) เพื่อตั้งค่าระเบียนบนเซิร์ฟเวอร์ DNS ปลายทาง
8. หารือกับทีมงานโครงการว่ารายการใดบ้างที่ไม่ได้รับการโยกย้ายโดยใช้เครื่องมือการย้าย BitTitan
9. ขอสิทธิ์ผู้ดูแลระบบโดเมนของ O365 Admin Portal ที่ Source
จำเป็นต้องมีสิทธิ์ของผู้ดูแลระบบเป็นส่วนหนึ่งของกระบวนการที่เราจำเป็นต้องลบโดเมนออกจากพอร์ทัลผู้ดูแลระบบที่ต้นทางแล้วเพิ่มโดเมนไปยังปลายทาง
10. ลงชื่อเข้าใช้ O365 Admin Portal ที่ Source และตรวจสอบ EXO Mail Rules and Connectors
11. ตรวจสอบว่าโดเมน / ที่อยู่ IP ไม่ถูกขึ้นบัญชีดำโดยใช้ บัญชี ดำmxtoolbox
สำคัญ : หากขึ้นบัญชีดำ เมื่อเราอนุญาตโดเมน / ที่อยู่ IP
12. เข้าสู่ระบบพอร์ทัลผู้ดูแลระบบ O365 ที่ต้นทางและส่งออกโดเมนที่ยอมรับ กลุ่ม กล่องจดหมาย ทรัพยากรกล่องจดหมายที่ใช้ร่วมกันและรายชื่อผู้ใช้ใน EXCEL
13. ตรวจสอบขนาดของแต่ละเมลบ็อกซ์ที่จะย้าย
14. ตรวจสอบการตั้งค่าเมล
15. เสร็จสิ้นรายการผู้ใช้ กลุ่ม และกล่องจดหมายที่ใช้ร่วมกันที่จะย้าย
16. สร้างกล่องจดหมายของผู้ใช้ กล่องจดหมายที่ใช้ร่วมกัน กลุ่มการแจกจ่าย กลุ่มความปลอดภัย ผู้ติดต่อ และทรัพยากรที่ปลายทาง
17. เพิ่มการเข้าถึงผู้รับมอบสิทธิ์ไปยังกล่องจดหมาย / ปฏิทินที่ปลายทาง
18. สร้างการสื่อสารของผู้ใช้
19. สร้าง 2 บัญชีทดสอบที่ Source
20. เติม 2 บัญชีทดสอบที่ต้นทางด้วยข้อมูลต่อไปนี้
21. สร้างบัญชีทดสอบ 2 บัญชีที่ปลายทาง
22. ให้สิทธิ์การเข้าถึงบัญชี Global Admin แบบเต็มไปยังกล่องจดหมาย:
Get-Mailbox -ResultSize unlimited | Add-MailboxPermission - ผู้ใช้ "บัญชีผู้ดูแลระบบ" -AccessRights FullAccess -InheritanceType All -AutoMapping $false
23. EWS ต้องทำงานบนเซิร์ฟเวอร์ Source Exchange
24. ทดสอบการเข้าถึงกล่องจดหมายโดยเปิดกล่องจดหมายอื่นด้วยบัญชีผู้ดูแลระบบโดยใช้ OWA
25. เพิ่มบัญชี tenantname.onmicrosoft.com เป็นที่อยู่พร็อกซีให้กับแต่ละกล่องจดหมายที่ต้นทาง
เราจำเป็นต้องดำเนินการนี้ เราจะลบที่อยู่อีเมลของโดเมนออกจากกล่องจดหมายทั้งหมดก่อนที่เราจะสามารถลบโดเมนออกจากผู้เช่าได้
26. เชื่อมต่อกับ EXO Powershell ที่ SOURCE
27. ส่งออกและอัปเดตที่อยู่พร็อกซีเพื่อรวม @tenantname.onmicrosoft.com
รับกล่องจดหมาย -ResultSize Unlimited -Filter “emailaddresses -notlike '*@tenantname.onmicrosoft.com'” | เลือกนามแฝง,primarysmtpaddress,emailaddresses |export-csv -NoTypeInformation “C:\Temp\mailboxes_output.csv”
นำเข้า-csv C:\Temp\mailboxes_output.csv| ForEach-Object {
$ID = $_.PrimarySmtpAddress
$alias = $_.Alias
$365Email = $alias + “@tenantname.onmicrosoft.com”
ชุดกล่องจดหมาย -Identity $ID -EmailAddresses @{add = $365Email}
}
28. ยืนยันว่าได้อัปเดตกล่องจดหมายทั้งหมดแล้ว ผลลัพธ์ควรเป็นศูนย์
รับกล่องจดหมาย -ResultSize Unlimited -Filter “emailaddresses -notlike '*@tenantname.onmicrosoft.com'” | เลือกนามแฝง,primarysmtpaddress,emailaddresses
29. ให้สิทธิ์บัญชีผู้ดูแลระบบแบบเต็มในการเข้าถึงกล่องจดหมายที่ปลายทาง
30. เชื่อมต่อกับ EXO Powershell ที่ปลายทาง
ให้สิทธิ์การเข้าถึงกล่องจดหมายแบบเต็มไปยังบัญชีบริการ BitTitan เหนือกล่องจดหมายโดเมนที่ได้รับทั้งหมดที่ปลายทาง
Add-MailboxPermission - ระบุ "กล่องจดหมายปลายทาง - ผู้ใช้" บัญชีบริการ BitTitan " -AccessRights FullAccess - InheritanceType All - การทำแผนที่อัตโนมัติ $ เท็จ
31. ทดสอบการเข้าถึงกล่องจดหมายโดยเปิดกล่องจดหมายอื่นด้วยบัญชีผู้ดูแลระบบโดยใช้ OWA
32. ข้อกำหนดใบอนุญาต BitTitan
บันทึก:
ใบอนุญาตสามารถใช้ได้สูงสุด 10 ครั้งต่อกล่องจดหมาย ถือว่าจุดสิ้นสุดไม่เปลี่ยนแปลง
หากคุณกำลังทดสอบการโยกย้าย BitTitan ด้วยบัญชีทดสอบ ตรวจสอบให้แน่ใจว่าคุณได้รวมจำนวนบัญชีทดสอบที่จำเป็นในการนับใบอนุญาตแล้ว
33. แลกใบอนุญาต
หมายเหตุ : ลงทะเบียนสำหรับบัญชี BitTitan หากคุณไม่มีบัญชี ตรวจสอบให้แน่ใจว่าบัญชีของคุณใช้งานได้โดยยืนยันที่อยู่อีเมลของคุณ
34. สร้างโครงการ BitTitan
35. ที่การตั้งค่าแหล่งที่มา:
36. ที่การตั้งค่าปลายทาง:
37. การย้ายผู้เช่าไปยังผู้เช่า
38. ย้ายบัญชีทดสอบไปยังปลายทางโดยใช้ BitTitan – Pre-Stage Migration
39. ทำการโยกย้ายก่อนเวที
สำคัญ :
40. แก้ไขข้อความแสดงข้อผิดพลาด BitTitan
41. ใช้ OWA เพื่อยืนยันเมลบ็อกซ์ที่มีข้อมูลที่ย้ายมา
42. ที่มา: ใช้ OWA เพื่อส่งและรับอีเมลเพิ่มเติม
43. ทำการโยกย้ายเต็มรูปแบบ
44. Resolve any BitTitan error messages
45. Use OWA to confirm the mailboxes contain the migrated data
46. Liaise with the business and confirms date and time of migration. Confirm other resources are available for migration
47. If the decision was made to take ownership of the domain and DNS before migration, initiate the transfer
1 week before migration
Export Exchange objects from Source:
48. Log into EXO Powershell at Source
49. Mailboxes: Export UPN, Alias, SMTP and Proxy addresses
Get-Mailbox -ResultSize Unlimited | select userprincipalname,alias,primarysmtpaddress,emailaddresses | export-csv -NoTypeInformation “Backup_Source_Mailboxes.csv”
50. Groups: Export Alias, SMTP and Proxy addresses
Get-DistributionGroup -ResultSize Unlimited | select alias,primarysmtpaddress,emailaddresses | export-csv -NoTypeInformation “Backup_ Source_Groups.csv”
51. Calendar Delegation:
Get-Mailbox | foreach {
write-host -fore green “Processing $_”
Get-MailboxFolderPermission -Identity “$($_.alias):\Calendar” | where {$_.User -notlike “Anonymous” -and $_.User -notlike “Default”}} | select Identity,User,@{name=’AccessRights’;expression={$_.AccessRights -join ‘,’}} | Export-Csv -NoTypeInformation “Backup_ Source_Calendar_Delegation.csv”
Export Exchange objects from Destination:
52. Log into EXO Powershell at Destination
53. Contacts: Export Name and Email addresses
Get-Recipient -Filter {RecipientType -eq “MailContact” -and EmailAddresses -like ‘domainname‘} | select DisplayName,RecipientType,ExternalEmailAddress,EmailAddresses | export-csv -NoTypeInformation “Backup_Destination_Contacts.csv”
54. Mailboxes: Export Forwarding
For each MAILBOX:
get-Mailbox -Identity | select UserPrincipalName,DeliverToMailboxAndForward,ForwardingAddress,ForwardingSmtpAddress | export-csv -notypeinformation ‘Backup_Destination_Forwarding.csv’ -append
55. Pre-Stage Migration of all Mailboxes – email older than 10 days
Important: For the Source, use the onmicrosoft.com address
Select the Project Name
Click on the drop-down arrow beside “Add” and select “Bulk Add”
Click on “Select File”, locate the CSV file created in step 1 then click “Open”
The contents of the CSV will get imported and displayed on screen, click “Save”
Pre-stage migration:
Important:
Allow time for the migration to complete
The Pre-Stage migrates emails only
Calendars, contacts, journals, notes, and tasks will only migrate during a full migration
56. Resolve any BitTitan error messages
57. Add the domain then request a TXT record to verify we own the domain
58. Setup IM federation so you have chat communications during pre-cutover
Important: Cannot migrate any IM contacts to Microsoft Teams.
59. 1 day before migration
Migrate mailboxes – Full migration
Important: Allow time for the migration to complete.
60. Resolve any BitTitan error messages
61. Migration day
[Optional] Change the TTL value on each MX record
Remove domain dependencies from Source:
62. Log into Azure AD and EXO Powershell at Source
[Optional] Change FEDERATED domains to MANAGED, if applicable.
63. Run the following cmdlet to determine which domains are FEDERATED or MANAGED
Get-MsolDomain
If FEDERATED change to MANAGED:
Set-MsolADFSContext -Computer ADFS_Server_FQDN
Convert-MsolDomainToStandard -DomainName “Domain Name Here” -SkipUserConversion:$true -PasswordFile C:\passwords.txt
64. Run the following cmdlets to verify the domains are managed
Get-MsolDomain
[If Applicable] Disable the directory synchronization
Set-MsolDirSyncEnabled -EnableDirSync $false
[If Applicable] SharePoint Online public website
65. If you had also set up your domain with a SharePoint Online public website, then before you can remove the domain, you first have to set the website’s URL back to the initial domain.
[If Applicable] Skype for Business and Teams
Remove all Skype for Business and Teams licenses from the users in the source tenant. This will remove the SIP attribute from their proxy addresses.
66. Set the default domain in source tenant to domainname.onmicrosoft.com
67. Change all Mailboxes UPNs to domainname .onmicrosoft.com domain. Replace the domainname with your domain name.
Get-MsolUser -all | select-object UserPrincipalName,ObjectID | export-csv -NoTypeInformation “User.csv”
Import-csv User.csv| ForEach-Object {
$ID = $_.UserPrincipalName
$ObjectID = $_.ObjectID
$365Email = $ID.Split(“@”)[0] + “@ domainname.onmicrosoft.com”
Set-MsolUserPrincipalName -ObjectId $ObjectID -NewUserPrincipalName $365Email}
68. Confirm the UPNs have been updated
Get-MsolUser -all | select-object UserPrincipalName,ObjectID
69. Change all Distribution Groups Primary SMTP address to domainname.onmicrosoft.com domain. Replace the domainname with your domain name.
Get-DistributionGroup -ResultSize Unlimited | select-object PrimarySMTPAddress | export-csv -NoTypeInformation “DL.csv”
Import-csv DL.csv| ForEach-Object {
$ID = $_.PrimarySmtpAddress
$365Email = $ID.Split(“@”)[0] + “@domainname.onmicrosoft.com”
Set-DistributionGroup -Identity $ID -primarysmtpaddress $365Email}
70. Confirm the primary smtp’s have been updated
Get-DistributionGroup -ResultSize Unlimited | select-object PrimarySMTPAddress
71. As we changed every mailboxes UPN, the primary SMTP addresses has also been updated to domainname.onmicrosoft.com. Now remove all aliases from every mailbox using this script:
$users = Get-Mailbox -ResultSize Unlimited | Where {$_.Emailaddresses.count -gt 1}
foreach ($user in $users) {
foreach ($email in $user.emailaddresses){
if ($email -ne “SMTP:”+$user.PrimarySmtpAddress){
Set-Mailbox -Identity $user.name -EmailAddresses @{Remove=$email}
}
}
Write-host $user.primarysmtpaddress “has been processed”
}
72. Confirm the Primary and Alias addresses are both domainname.onmicrosoft.com ONLY
Get-Mailbox | select PrimarySmtpAddress,EmailAddresses
73. Remove all aliases from every distribution group
$groups = Get-DistributionGroup -ResultSize Unlimited | Where {$_.Emailaddresses.count -gt 1}
foreach ($group in $groups) {
foreach ($email in $group.emailaddresses){
if ($email -ne “SMTP:”+$group.PrimarySmtpAddress){
Set-DistributionGroup -Identity $group.name -EmailAddresses @{Remove=$email}
}
}
Write-host $group.primarysmtpaddress “has been processed”
}
74. Confirm the Primary and Alias addresses are both domainname.onmicrosoft.com ONLY
Get-DistributionGroup | select PrimarySmtpAddress,EmailAddresses
[If Required] O365 Groups: User the cmdlets below to remove the domain:
Get-UnifiedGroup -Identity “name” | select primarysmtpaddress,emailaddresses
Set-UnifiedGroup -Identity “name” -PrimarySMTPAddress [email protected]
Set-UnifiedGroup -Identity “name” -EmailAddresses @{remove=”smtp:[email protected]”}
75. Confirm all dependencies have been removed. Replace the domainname with your domain name.
Get-MsolUser -DomainName domainname.com -all
Important:
76. Remove the domain from the source Microsoft 365 tenant
Important:
77. Add Mail Rules and Connectors at Destination
[If required]
78. Verify the domain
79. Verify changes
80. Check Domain
To check everything is setup as it should be, wait around an hour for all updates to take effect then launch: https://centralops.net/co/
Type in the domain name and check all records are set as in ‘View DNS Settings’ above.
81. Remove Email Forwarding at Destination
Log into EXO Powershell at Destination and run the following cmdlets for each user:
Set-Mailbox -Identity “DestinationUserEmailAddress” -ForwardingAddress $null -DeliverToMailboxAndForward $false
82. Add aliases for each user at Destination:
Set-RemoteMailbox -Identity “[email protected]” -EmailAddresses @{Add=”smtp:name1@domain”,”smtp:name2@domain”}
83. For each GROUP:
Set-DistributionGroup -Identity “groupname” -EmailAddresses @{add=”[email protected]”}
84. Change the TTL value on each MX record back to the original setting eg 1 hour
85. Migrate Mailboxes – Final Migration
Important: Allow time for the migration to complete
86. Resolve any BitTitan error messages
87. Delete Contacts at Destination
Connect to EXO at Destination and run the following cmdlet:
นำเข้า-csv “Backup_Destination_Contacts.csv”| สำหรับแต่ละวัตถุ {
$DisplayName = $_.DisplayName
Remove-MailContact -Identity $Displayname}
88. ยืนยันว่าผู้ติดต่อถูกลบ:
นำเข้า-csv “Backup_Destination_Contacts.csv”| สำหรับแต่ละวัตถุ {
$DisplayName = $_.DisplayName
Get-MailContact -Identity $Displayname}
89. ตั้งค่าที่อยู่อีเมลเริ่มต้นที่ Destination
สำหรับผู้ใช้แต่ละคน :
ชุด RemoteMailbox “[email protected]” -PrimarySmtpAddress “[email protected]”
90. สำหรับแต่ละกลุ่ม:
Set-DistributionGroup -Identity 'DisplayName' -PrimarySmtpAddress “[email protected]” -EmailAddressPolicyEnabled $false
91. สำหรับแต่ละกล่องจดหมายที่แบ่งปัน :
สำคัญ : ให้เวลาสำหรับการเปลี่ยนแปลงทั้งหมดเพื่อซิงค์กับ O365
กิจกรรมหลังการย้ายถิ่นฐาน
92. ตรวจสอบว่าตัวแทน / นามแฝงได้รับการเติมอย่างถูกต้อง
ย้ายกล่องจดหมาย – การย้ายครั้งสุดท้าย
สำคัญ : ให้เวลาสำหรับการย้ายข้อมูลให้เสร็จสมบูรณ์
93. แก้ไขข้อความแสดงข้อผิดพลาด BitTitan
เลือกบัญชีที่ผิดพลาด
คลิกลูกศรลงข้าง "เริ่ม" และเลือก "ลองข้อผิดพลาดอีกครั้ง"
ในหน้าต่าง "ข้อผิดพลาดลองใหม่" ตรวจสอบการตั้งค่า
คลิก "ลองข้อผิดพลาดอีกครั้ง"
คลิกที่ไอคอน "รีเฟรชรายการ" เพื่อรับสถานะของ การย้ายข้อมูลหรือคลิกที่แดชบอร์ดที่เมนูด้านซ้ายมือ
94. ดำเนินการแผนการทดสอบผู้ใช้ปลายทาง
เปิด Outlook at Destination และตรวจสอบเนื้อหาดังต่อไปนี้:
อีเมล
รายชื่อผู้ติดต่อ
ปฏิทิน
ส่งและรับอีเมลภายในและยืนยันว่าได้รับอีเมลแล้ว
ส่งและรับอีเมลจากภายนอกและยืนยันว่าได้รับอีเมลแล้ว
ตรวจสอบที่อยู่อีเมลของผู้ส่ง
ส่งและรับอีเมลจาก SHARED MAILBOX และยืนยันว่าได้รับอีเมลแล้ว
ยืนยันที่อยู่อีเมลของผู้ส่ง
ส่งการทดสอบคำเชิญในปฏิทินให้เพื่อนร่วมงานและยืนยันว่าได้รับคำเชิญแล้ว
95. ล็อกอิน EXO Powershell ที่ปลายทาง
สำหรับแต่ละเมลบ็อกซ์ ให้ลบบัญชีบริการ
Remove-MailboxPermission - ข้อมูลระบุตัวตน "User1" - ผู้ใช้ "บัญชีบริการ BitTitan" -AccessRights FullAccess -InheritanceType All
96. เป็นเจ้าของโดเมนและระเบียน DNS
[หากยังไม่ได้ดำเนินการ] – หากเจ้าของปัจจุบันทำการเปลี่ยนแปลงที่จำเป็นใน DNS ให้เป็นเจ้าของโดเมนและระเบียน DNS
แผนสำรอง
97. เปลี่ยนที่อยู่อีเมลเริ่มต้นกลับไปเป็นที่อยู่อีเมลเก่า
ชุด RemoteMailbox “[email protected]” -PrimarySmtpAddress “[email protected]”
98. สำหรับผู้ใช้แต่ละคน:
ล็อกอินเข้าสู่เซิร์ฟเวอร์ Exchange ภายในองค์กร
เรียกใช้ Exchange powershell และดำเนินการ cmdlet ต่อไปนี้:
Set-RemoteMailbox “[email protected]” -EmailAddresses @{remove=”[email protected]”}
99. สำหรับแต่ละกลุ่ม:
ล็อกอินเข้าสู่เซิร์ฟเวอร์ Exchange ภายในองค์กร
เรียกใช้ Exchange powershell และดำเนินการ cmdlet ต่อไปนี้:
Set-DistributionGroup -Identity “groupname” -EmailAddresses @{remove=”[email protected]”}
100. ตรวจสอบคุณสมบัติได้รับการปรับปรุง:
รับ-RemoteMailbox -Identity | เลือกชื่อผู้ใช้หลัก,นามแฝง,primarysmtpaddress,emailaddresses
101. สร้างผู้ติดต่อใหม่ที่ปลายทาง:
เข้าสู่ระบบ EXO Powershell ที่ปลายทางและเรียกใช้ cmdlets ต่อไปนี้:
นำเข้า-csv “Backup_Destination_Contacts.csv”| สำหรับแต่ละวัตถุ {
$DisplayName = $_.DisplayName
$Email = $_.EmailAddresses
New-MailContact -Name $Displayname -ExternalEmailAddress $Email}
102. การเปิดใช้งานการส่งต่อจากปลายทางไปยัง CONTACT
เข้าสู่ระบบ EXO Powershell ที่ปลายทาง
เรียกใช้ cmdlets ต่อไปนี้:
Set-Mailbox -Identity “[email protected]” -DeliverToMailboxAndForward $true -ForwardingAddress “[email protected]”
103. ย้อนกลับการเปลี่ยนแปลง DNS
104. ยืนยันว่าได้ลบการพึ่งพาทั้งหมดแล้ว แทนที่ชื่อโดเมนด้วยชื่อโดเมนของคุณ
รับ-MsolUser -ชื่อโดเมน domainname.com -all
105. ลบโดเมนจากปลายทาง ผู้เช่า Microsoft 365
สำคัญ :
เผื่อเวลาไว้ 60 นาทีก่อนที่จะเพิ่มโดเมนลงในผู้เช่าปลายทาง
O365 อาจยังคิดว่าโดเมนยังใช้งานอยู่
106. เพิ่มโดเมนที่ Source จากนั้นขอบันทึก TXT เพื่อยืนยันว่าเราเป็นเจ้าของโดเมน
107. ตรวจสอบโดเมน
108. ตรวจสอบการเปลี่ยนแปลง
109. ตรวจสอบโดเมน
ในการตรวจสอบว่าตั้งค่าทุกอย่างตามที่ควรจะเป็น ให้รอประมาณหนึ่งชั่วโมงเพื่อให้การอัปเดตทั้งหมดมีผล จากนั้นเปิด: http://centralops.net/co/
พิมพ์ชื่อโดเมนและตรวจสอบว่าตั้งค่าระเบียนทั้งหมดเป็น 'ดูการตั้งค่า DNS ' ข้างบน.
110. ถ้ามี ให้เพิ่มสิทธิ์การใช้งาน Skype for Business และ Teams ทั้งหมดจากผู้ใช้ในผู้เช่าต้นทาง สิ่งนี้จะเพิ่มแอตทริบิวต์ SIP ไปยังที่อยู่พร็อกซี
111. กู้คืนที่อยู่พร็อกซีเดิมสำหรับผู้ใช้ทั้งหมด:
ชุดกล่องจดหมาย - ระบุ "นามแฝง" - ที่อยู่อีเมล SMTP:[email protected],smtp:[email protected]
112. กู้คืน UPN สำหรับผู้ใช้ทั้งหมด:
นำเข้า-csv “Backup_Mailboxes.csv”| ForEach-Object {
$NewUPN = $_.PrimarySmtpAddress
$alias = $_.Alias
$OldUPN = $alias + “@vivacityhealth.onmicrosoft.com”
Set-MsolUserPrincipalName -UserPrincipalName $OldUPN - NewUserPrincipalName $Newupn
}
113. ตรวจสอบว่า UPN, อีเมล และที่อยู่พร็อกซีได้รับการอัปเดตแล้ว:
รับกล่องจดหมาย -Identity | เลือกชื่อผู้ใช้หลัก,นามแฝง,primarysmtpaddress,emailaddresses
114. เปลี่ยนที่อยู่ SMTP ของกลุ่มการแจกจ่ายทั้งหมดเป็นโดเมน domainname.onmicrosoft.com แทนที่ชื่อโดเมนด้วยชื่อโดเมนของคุณ
Get-DistributionGroup -ResultSize Unlimited | เลือกวัตถุ PrimarySMTPAddress | ส่งออก-csv -NoTypeInformation “DL.csv”
นำเข้า-csv DL.csv| ForEach-Object {
$ID = $_.PrimarySmtpAddress
$365Email = $ID.Split(“@”)[0] + “@domainname.onmicrosoft.com”
Set-DistributionGroup -Identity $ID -primarysmtpaddress $365Email}
115. ลบนามแฝงทั้งหมดออกจากทุกกลุ่มการแจกจ่าย
$groups = Get-DistributionGroup -ResultSize Unlimited | โดยที่ {$_.Emailaddresses.count -gt 1}
foreach ($group in $groups) {
foreach ($email in $group.emailaddresses){
if ($email -ne “SMTP:”+$group.PrimarySmtpAddress){
Set -DistributionGroup -Identity $group.name -EmailAddresses @{Remove=$email}
}
}
เขียนโฮสต์ $group.primarysmtpaddress "ได้รับการประมวลผล" $
}
นั่นคือวิธีการทำงานของการย้ายผู้เช่าไปยังผู้เช่า Office 365
คู่มือแสดงวิธีการทำให้ Microsoft PowerPoint 365 เล่นงานนำเสนอของคุณโดยอัตโนมัติด้วยการตั้งค่าเวลาในการเปลี่ยนสไลด์.
ชุดสไตล์สามารถให้รูปลักษณ์ที่ปราณีตและสอดคล้องกันแก่เอกสารของคุณทันที นี่คือวิธีการใช้ชุดสไตล์ใน Word และที่ที่คุณสามารถหาได้
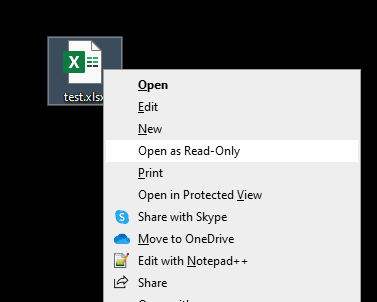
บังคับให้แสดงข้อความในไฟล์ Microsoft Excel สำหรับ Office 365 ของคุณที่ระบุว่าเปิดในโหมดอ่านเท่านั้นด้วยคู่มือนี้.
เราจะแสดงเคล็ดลับที่คุณสามารถใช้เพื่อส่งออกข้อมูลติดต่อทั้งหมดใน Microsoft Outlook 365 ไปยังไฟล์ vCard ได้อย่างง่ายดาย.
เรียนรู้วิธีการเปิดหรือปิดการแสดงสูตรในเซลล์ใน Microsoft Excel.
เรียนรู้วิธีล็อกและปลดล็อกเซลล์ใน Microsoft Excel 365 ด้วยบทช่วยสอนนี้.
มันเป็นเรื่องธรรมดาที่ตัวเลือก Junk จะถูกทำให้มืดใน Microsoft Outlook. บทความนี้จะสอนวิธีจัดการกับมัน.
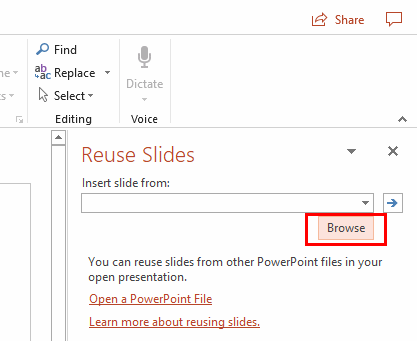
บทเรียนเกี่ยวกับวิธีการนำเข้าหล slides จากไฟล์นำเสนออื่นใน Microsoft PowerPoint 365.
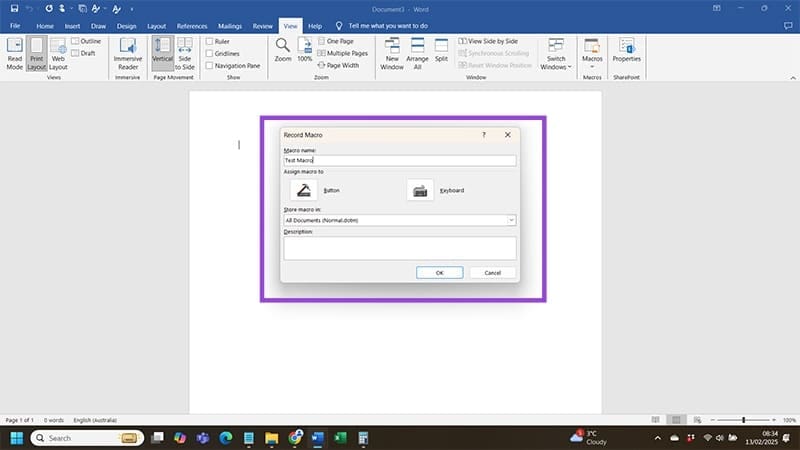
เรียนรู้วิธีสร้างมาโครใน Word เพื่อให้คุณดำเนินการฟังก์ชันที่ใช้บ่อยที่สุดได้อย่างรวดเร็วในเวลาที่น้อยลง.
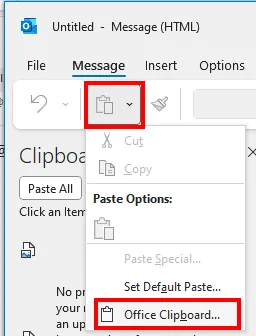
เราจะแสดงวิธีการเปิดหรือปิดตัวเลือก Clipboard ที่เห็นได้ในแอปพลิเคชัน Microsoft Office 365.


