如何在 Windows 11 上啟用新的 Spotlight 儀表板
Windows 11 引入了新的 Stoplight 桌面儀表板,但目前它是一個隱藏功能。您可以通過以下步驟啟用它。
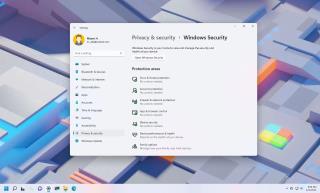
Windows 11 可能是 Microsoft 發布的最安全的版本,但您始終可以做更多的事情來進一步保護您的計算機和文件免受病毒和黑客的侵害。確保您的計算機安全將有助於最大程度地減少直接黑客攻擊和幾乎任何類型的惡意軟件(例如病毒、間諜軟件、勒索軟件和 rootkit)竊取您的個人信息。
您有許多功能可以在Windows 11上免費保護您的計算機。例如,您可以使用 Microsoft Defender 防火牆保護您的設備免受未經授權的網絡訪問,並添加兩步驗證和生物特徵身份驗證以加強帳戶登錄過程。
還可以使用 BitLocker 啟用數據加密,以使您的文件對其他人不可讀。Microsoft Defender 防病毒軟件是可用於阻止病毒、間諜軟件、rootkit 和勒索軟件入侵的最佳防病毒軟件之一。
您可以創建定期備份以保護設備和文件免受任何形式的攻擊和硬件故障。更新您的應用程序和 Windows 還可以幫助確保計算機的安全,因為它們提供了安全補丁和改進。並且您可以使用常識習慣來保持安全,例如不要單擊電子郵件中的未知鏈接、不要下載未經許可的軟件以及不要使用您不擁有的 USB 或外部驅動器。
在本指南中,您將了解在 Windows 11 上保護您的設備和文件免受惡意軟件和黑客攻擊的最佳方法。
在 Windows 11 上保護您的計算機安全帳戶
在 Windows 11 上,您可以通過多種方式保護您的帳戶。如果您使用本地帳戶,則可以通過切換到 Microsoft 帳戶來提高安全性。您可以啟用兩步驗證以添加物理登錄安全層。您只需使用 Microsoft 身份驗證應用程序即可啟用現代無密碼選項登錄。並且您可以設置 Windows Hello 以使用生物特徵身份驗證(例如您的面部)來保護對您帳戶的訪問。
保護帳戶的另一種方法是切換到標準帳戶以限制系統訪問,以防止配置錯誤或以管理員模式運行的應用程序可能導致問題。您仍將擁有管理員帳戶,但僅用於執行管理任務。
最後,如果您處於人多的環境中,您還可以配置“動態鎖定”,該功能使用藍牙設備(例如您的手機或手錶)在您離開設備時自動鎖定計算機。
從本地帳戶切換到 Microsoft 帳戶
雖然聽起來不合邏輯,但切換到 Microsoft 帳戶可以提高安全性,因為您可以實施其他安全功能,例如兩步驗證和無密碼登錄。此外,如果丟失或受到破壞,它可以更輕鬆地重置登錄密碼。
要將 Windows 11 本地帳戶與 Microsoft 帳戶關聯,請使用以下步驟:
在 Windows 11 上打開設置。
單擊帳戶。
單擊右側的“您的信息”頁面。
在“帳戶設置”部分下,單擊“本地帳戶”設置的“改為登錄 Microsoft 帳戶”選項。

確認您的 Microsoft 帳戶電子郵件地址。
單擊下一步按鈕。
確認帳戶密碼。

單擊登錄按鈕。
確認本地帳號密碼。

快速提示:如果帳戶沒有密碼,請將選項留空,然後單擊下一步按鈕。
(可選)單擊“現在跳過”選項以跳過 Windows Hello 設置。
單擊下一步按鈕以創建 PIN。
創建新 PIN 以登錄您的 Windows 11 帳戶。

單擊確定按鈕。
單擊驗證按鈕。

選擇驗證帳戶的選項。
確認電子郵件地址以驗證帳戶。

單擊發送代碼按鈕。
確認將代碼發送到您的輔助郵箱地址。
單擊驗證按鈕。

完成這些步驟後,本地帳戶將鏈接到您的 Microsoft 帳戶。
啟用兩步驗證身份驗證
兩步驗證(或“雙因素身份驗證”(2FA))功能使用手機上的 Microsoft Authenticator 應用程序添加了第二種身份驗證形式,以在 Windows 11 上登錄您的帳戶,使其他人幾乎不可能未經授權訪問您的計算機。
要在您的 Microsoft 帳戶上設置兩步驗證,請使用以下步驟:
登錄帳戶(如果適用)。
單擊安全選項卡。
在“安全基礎”部分下,單擊高級安全選項鍊接。
在“附加安全”部分下,單擊兩步驗證選項的“打開”鏈接。

單擊下一步按鈕。

單擊立即獲取按鈕下載適用於Android或iPhone的 Microsoft Authenticator 應用程序。(您可以使用提供的鏈接。)

使用您的 Microsoft 帳戶登錄手機上的Microsoft Authenticator應用程序。
在Microsoft 帳戶頁面上,單擊下一步按鈕。

單擊完成按鈕。
單擊下一步按鈕。

單擊完成按鈕。
完成這些步驟後,下次嘗試使用密碼登錄 Windows 11 時,您將需要使用手機上的 Microsoft Authenticator 應用進行身份驗證。
啟用無密碼選項
如果您使用 Microsoft 帳戶登錄 Windows 11,您還可以從帳戶中刪除密碼以啟用無密碼體驗。這意味著您將使用 Microsoft Authenticator 應用、Windows Hello、安全密鑰設備、通過電話發送短信或電子郵件驗證來登錄您的帳戶而無需密碼。
此功能與兩步驗證結合使用。如果您沒有啟用該功能,請打開兩步驗證並繼續執行以下步驟。
要使用您的 Microsoft 帳戶在 Windows 11 上啟用無密碼體驗,請使用以下步驟:
登錄帳戶(如果適用)。
單擊安全選項卡。
在“安全基礎”部分下,單擊高級安全選項鍊接。
在“附加安全”部分下,單擊無密碼帳戶選項的“打開”鏈接。

單擊下一步按鈕。

打開你的手機。
確認來自身份驗證器應用的請求。
單擊完成按鈕。
完成這些步驟後,您可以開始在沒有密碼的情況下登錄您的帳戶。
啟用 Windows Hello 身份驗證
若要配置 Windows Hello 面部識別以使用您的面部解鎖計算機,請使用以下步驟:
打開設置。
單擊帳戶。
單擊右側的登錄選項頁面。
在“登錄方式”部分下,選擇面部識別 (Windows Hello)設置。
單擊設置按鈕。

單擊開始按鈕。

確認您當前的密碼或 PIN。
直視 Windows 11 的攝像頭,以創建您臉部的面部識別配置文件。

單擊關閉按鈕。
完成這些步驟後,您可以鎖定您的設備(Windows 鍵 + L),然後查看攝像頭進行登錄。
如果登錄體驗未按預期工作,則在“面部識別 (Windows Hello)”設置下,您現在將找到一個“改進識別”選項,您可以使用該選項繼續訓練系統以更好地檢測您的面部。
或者,如果您沒有支持 Windows Hello 的攝像頭,您也可以設置指紋讀取器。
切換到標準帳戶並僅使用管理員進行管理
Windows 11 提供兩種類型的帳戶,包括“管理員”和“標準用戶”,具有不同級別的權限來管理應用程序和系統。管理員帳戶具有無限制的訪問權限,使用戶能夠更改系統設置、運行提升的任務以及其他一切。
標準用戶帳戶提供了更嚴格的環境。具有此權限級別的用戶可以使用應用程序,但不能安裝其他任何東西。此外,他們可以更改設置,但不能更改系統設置或會影響所有用戶的設置。
由於使用無限制帳戶可能存在安全風險,因此建議切換到標準帳戶以提高安全性。您可以創建一個僅用於管理的新“管理員”帳戶,然後將您的帳戶類型更改為“標準用戶”。
創建本地管理員帳戶
要通過設置應用程序創建管理員本地帳戶,請使用以下步驟:
在 Windows 11 上打開“開始”。
搜索設置並單擊頂部結果以打開應用程序。
單擊帳戶。
單擊右側的家庭和其他用戶頁面。
在“其他用戶”部分下,單擊添加帳戶按鈕。

單擊“我沒有此人的登錄信息”選項。

單擊“添加沒有 Microsoft 帳戶的用戶”選項。

通過確認名稱和密碼來創建 Windows 11 管理員帳戶。

創建安全問題和答案以在密碼丟失時恢復帳戶。
單擊下一步按鈕。
選擇新創建的帳戶,然後單擊更改帳戶類型按鈕。

使用“帳戶類型”下拉菜單並選擇管理員選項。

單擊確定按鈕。
完成這些步驟後,新帳戶將出現在 Windows 11 上。
切換到標準帳戶
要將管理員帳戶更改為 Windows 11 上的標準用戶帳戶,請使用以下步驟:
退出您當前的帳戶。
登錄新創建的管理員帳戶。
打開設置。
單擊帳戶。
單擊家庭和其他用戶選項卡。
在“其他用戶”部分下,選擇您的主要帳戶。
單擊更改帳戶類型按鈕。

使用“帳戶類型”下拉菜單選擇標準用戶選項。

單擊確定按鈕。
完成這些步驟後,原始帳戶的類型將從“管理員”切換到“標準用戶”。如果您需要進行系統更改或安裝新應用程序,系統將提示您確認管理員憑據。或者您也可以登錄管理員帳戶來執行系統更改。
啟用動態鎖定
動態鎖定功能可在您離開辦公桌時根據藍牙配對設備(例如您的手機或可穿戴設備)的接近程度來鎖定您的設備,從而增加另一層安全性。
此安全功能有兩個部分。您首先需要將藍牙設備(例如您的 iPhone 或 Android 手機)與計算機配對,然後您必須在設置應用程序中啟用動態鎖定。
要將支持的藍牙(如 Android 或 iPhone)連接到 Windows 11,請使用以下步驟:
打開藍牙設備。
打開設備的藍牙配對選項以使其可被發現。
在 Windows 11 上打開設置。
點擊藍牙和設備。
打開藍牙切換開關以啟用無線電(如果適用)。
單擊添加設備按鈕。

選擇藍牙選項。

從列表中選擇藍牙設備。

繼續屏幕上的說明(如果適用)。
單擊帳戶。
單擊登錄選項選項卡。
選擇動態鎖定設置。
選中“允許 Windows 在您離開時自動鎖定您的設備”選項。
完成這些步驟後,如果您的藍牙設備不在計算機附近,Windows 11 將等待 30 秒,然後關閉屏幕並鎖定帳戶以保護您的計算機。
在 Windows 11 上保護網絡中的計算機
在 Windows 11 上,黑客通常通過利用軟件漏洞和糟糕的安全配置來訪問設備。
To keep your computer secure, you want to ensure that the default Microsoft Defender Firewall is turned on. You want to change the network profile to “Public” mode when in a public place or untrusted environment. Also, if you are not using Bluetooth, you should keep it disabled as it could be another backdoor that nearly malicious individuals can exploit to steal information or gain unauthorized access to your computer. (It’s rare, but it could happen.)
Enable firewall to block ports
On Windows 11, the Microsoft Defender Firewall is a feature that checks incoming and outgoing network traffic to allow or block traffic depending on predefined rules to protect your device from unauthorized access. The feature is enabled by default, but it’s always a good idea to check and enable it as necessary.
To enable the firewall on Windows 11, use these steps:
Open Windows Security.
Click on Firewall & network protection.
Click the “Turn on” button from the network profile to enable the Windows 10 firewall. (Or click the Restore settings button.)

After you complete the steps, the Windows 10 firewall will enable again on your device.
Change network profile type to Public mode
On Windows 11, you can use different network profile types with specific settings to improve security or share files, printers, and other resources in the network.
The feature provides three network profiles, including Private, Public, and Domain. The Private and Public are available for all computers, and the Domain is only available when a device is joined to the domain.
The Private profile is tailored for trusted networks like your home or work. This profile makes the computer discoverable for file sharing, network printing, and sharing other resources with people you trust.
The Public profile makes the device invisible in the local network. This option is recommended for most locations, including public places, work, and home.
If you want to add an extra layer of security, you should always set the profile type to Public. Unless you need to share resources in the network with people you trust.
Change network profile type for Ethernet
To change the Windows 11 network profile type to protect your computer, use these steps:
Open Settings.
Click on Network & internet.
Click the Ethernet page on the right side.

Under the “Network profile type” section, select the profile type:

Change network profile type for Wi-Fi
To change the network profile type for a wireless connection, use these steps:
Open Settings.
Click on Network & internet.
Click the Wi-Fi page on the right side.

Click the Manage known networks setting.

Click the active wireless connection.

Under the “Network profile type” section, select the profile type, including Public or Private.

Once you complete the steps, the connection will apply the profile type you select.
You can only change profile type per network. If you have an Ethernet and Wi-Fi connection connected to the same network, the new setting will not apply to all network adapters when changing the profile type.
On Windows 11, it’s also possible to change the network profile type using the Registry and PowerShell.
Turn off Bluetooth and Wi-Fi when not needed
Any available wireless connection can be used to attack a device. If you are in a public place like a coffee shop or airport, and you only need to use an application without internet, you can always turn off Bluetooth and Wi-Fi to work more securely. Once you are in a secure environment, you can turn the wireless radios back on.
Disable Bluetooth on Windows 11
To turn off Bluetooth to protect your computer, use these steps:
Open Settings.
Click on Bluetooth & devices.
Turn off the Bluetooth toggle switch on the right side.

(Optional) Turn off the Bluetooth toggle switch to disable the feature.
Alternatively, you can open the Quick Settings flyout using the Windows key + A keyboard shortcut and click the Bluetooth button to disable it. You can click the button to enable the feature again.
Disconnect Wi-Fi on Windows 11
On Windows 11, you can disconnect from a wireless network in several ways. You can turn off the wireless adapter using the dedicated button on a laptop (if available). You can disable the adapter from the “Network & Internet” settings. Or you can disconnect from the Settings app or “Quick Settings” flyout.
To disconnect from a Wi-Fi network on Windows 11, use these steps:
Open Settings.
Click on Network & internet.
Turn off the Wi-Fi toggle switch.

Alternatively, you can open the Quick Settings flyout using the Windows key + A keyboard shortcut and click the Wi-Fi button to disconnect. You can click the button again to enable the feature again.
Protect your computer with data encryption on Windows 11
BitLocker is a security feature that allows you to use encryption on a drive to protect your data from unauthorized access to your documents, pictures, and any data you may have on the computer.
On Windows 11, the feature is only available in the Pro, Enterprise, and Education edition. However, on Windows 11 Home, you can use device encryption on some devices like Surface Pro 8, Laptop 4, and others.
Enable device encryption on Windows 11 Pro
To configure BitLocker on a Windows 11 drive, use these steps:
Open Settings.
Click on Storage.
Under the “Storage management” section, click on Advanced storage settings.
Click on Disks & volumes.

Select the drive with the volume to encrypt.
Choose the volume to enable BitLocker encryption and click the Properties button.

Click the “Turn on BitLocker” option.

Under the “Operating system drive” section, click the “Turn on BitLocker” option.

Select the option to backup the recovery key – for example, Save to your Microsoft account.

Click the Next button.
Select the “Encrypt used disk space only” option.

Click the Next button.
Select the New encryption mode option.

Quick note: If you intend to encrypt a drive that you will end up using on an older version of Windows, you should choose the Compatible mode option.
Click the Next button.
Check the Run BitLocker system check option.

Click the Restart now button.
After you complete the steps, the computer will restart to apply the settings and enable BitLocker.
You can also enable encryption for secondary and external drives. And using BitLocker To Go, you can protect your data on USB flash drives.
Enable device encryption on Windows 11 Home
To configure BitLocker encryption on Windows 11 Home, use these steps:
Open Settings.
Click on Privacy & Security.
Under the “Security” section, click the Device encryption page.

Turn on Device encryption to enable BitLocker on Windows 11 Home.

Once you complete the steps, the feature will encrypt the entire system drive.
If you no longer need encryption, it’s possible to decrypt the drive with the same instructions.
Protect your computer against viruses and ransomware on Windows 11
Viruses are still among the biggest security threats on Windows 11, Windows 10, and other versions. As a result, it’s always recommended to have an antivirus solution installed and updated on your computer.
Although almost every third-party antivirus is now capable of protecting your device from threats (such as viruses, spyware, ransomware, rootkits, and other types of malware and hackers), Windows 11 comes with the Microsoft Defender Antivirus, which is considered one of the best antivirus applications for home and commercial users.
Install an antivirus
On Windows 11, you technically don’t need to spend money on an antivirus, but you can always opt for a third-party solution that may include other features to up the security of your device. For example, Symantec’s Norton Antivirus, AVG, Avira, BitDefender, and McAfee.
If you choose to use a third-party solution, you can also enable the “Periodic Scanning” feature from Microsoft Defender Antivirus. When you enable the feature, the default antivirus will remain disabled. However, the system will periodically scan the system to add a second line of defense to detect threats that your current solution may not be able to detect.
To enable “periodic scanning” on Microsoft Defender Antivirus for Windows 11, use these steps:
Open Windows Security.
點擊病毒和威脅防護。
單擊Microsoft Defender 防病毒選項設置。
打開定期掃描切換開關。

完成這些步驟後,Windows 11 防病毒軟件將使用“自動維護”功能在最佳時間運行掃描,以盡量減少對性能和電池壽命的影響。
執行完整的防病毒掃描
如果你選擇繼續使用 Microsoft Defender 防病毒軟件,反惡意軟件將主動監控並保護你的計算機和文件免受幾乎任何類型的惡意軟件的侵害。但是,有時可能仍然需要對設備執行完整掃描,以確保安裝沒有受到損害。
要在 Windows 11 上執行全面病毒掃描,請使用以下步驟:
在 Windows 11 上打開“開始”。
搜索Windows 安全並單擊頂部結果以打開該應用程序。
點擊病毒和威脅防護。
在“當前威脅”部分下,單擊掃描選項。

選擇完整掃描選項以檢查整個系統是否存在病毒和任何其他類型的惡意軟件。

單擊立即掃描按鈕。
完成這些步驟後,防病毒軟件將掃描計算機以查找病毒和其他類型的惡意軟件。如果檢測到任何內容,Microsoft Defender 防病毒軟件將自動刪除(或隔離)威脅。
如果計算機已被感染,您可以使用Microsoft Defender 脫機掃描來檢測和刪除在 Windows 11 完全加載時防病毒可能無法刪除的病毒。
啟用基於信譽的保護
Windows 安全中心還包括一項功能,可保護您的計算機免受不需要的惡意應用程序的侵害。該功能被稱為“基於信譽的保護”,可以檢測並阻止可能在 Windows 11 上導致意外行為的低信譽應用程序,例如設計不佳的應用程序或造成傷害的應用程序。
要在 Windows 11 上為不需要的應用啟用基於信譽的保護,請使用以下步驟:
打開Windows 安全。
單擊應用和瀏覽控件。
在“基於信譽的保護”部分下,單擊基於信譽的保護設置 選項。

打開“可能不需要的應用程序阻止”切換開關以保護設備免受 Windows 11 上不需要的應用程序的影響。

檢查阻止應用程序選項。
檢查阻止下載選項。
完成這些步驟後,Windows 11 將能夠檢測並阻止可能導致問題的低信譽應用。
啟用勒索軟件保護
Windows 11 還具有“受控文件夾訪問”功能,可保護您的文件免受勒索軟件的侵害。
勒索軟件是一種相當新的惡意軟件形式,它會加密計算機上的文件,使數據無法訪問和讀取。一旦攻擊成功,惡意個人將要求贖金以解鎖設備和文件。
受控文件夾訪問監控應用程序對 Windows 11 上文件所做的更改。如果應用程序嘗試修改受保護文件夾內的文件並且該應用程序被列入黑名單,您將收到有關可疑活動的警報。
要在 Windows 11 上啟用勒索軟件保護,請使用以下步驟:
打開Windows 安全。
點擊病毒和威脅防護。
在“勒索軟件保護”部分下,單擊“管理勒索軟件保護”選項。

打開受控文件夾訪問切換開關以啟用勒索軟件保護。

完成這些步驟後,Microsoft Defender 防病毒軟件將在應用程序嘗試修改您的文件時監控受保護的文件夾。如果發生可疑活動,您將收到有關威脅的通知。
您還可以配置各個方面的功能。您還可以允許您信任系統錯誤阻止的應用程序,將更多文件夾位置和驅動器添加到保護列表中,如果該功能未按預期工作,則可以禁用該功能。
啟用核心隔離保護
作為設備安全的一部分,Windows 11 還附帶了“核心隔離”,這是一種基於虛擬化的安全功能,可將內存中的核心進程與惡意代碼隔離開來,以保護內存完整性。
在 Windows 11 上,默認情況下應啟用核心隔離,但並非總是如此。但是,如果您無法啟用該功能,則問題可能是驅動程序的兼容性問題。
要在 Windows 11 上啟用核心隔離,請使用以下步驟:
打開Windows 安全。
點擊病毒和威脅防護。
點擊設備安全。
在“核心隔離”部分下,單擊核心隔離詳細信息選項。

打開內存完整性切換開關。

重新啟動計算機。
完成這些步驟後,設備將具有額外的保護層,以防止攻擊將惡意代碼添加到高安全性進程中。
通過安裝應用程序和 Windows 11 的更新來保護您的計算機
保護您的計算機的最佳方法之一是確保 Windows 11 和應用程序始終具有最新的安全和維護更新。原因是累積更新對於修復錯誤、修補安全漏洞和提高系統性能至關重要。Windows Update 通常會在 Windows 11 上自動應用更新,但您可能仍需要手動檢查和安裝它們。
在 Windows 11 上安裝更新
要在 Windows 11 上安裝安全和維護更新,請使用以下步驟:
打開設置。
單擊Windows 更新。
單擊檢查更新按鈕。

單擊立即重新啟動按鈕。
完成這些步驟後,如果有可用更新,它將自動下載並安裝在您的計算機上。
為 Microsoft Store 和其他應用安裝更新
更新對於應用程序也是必不可少的,因為它們可以提高安全性、修復錯誤、提高性能並引入新功能。如果您使用 Microsoft Store 中的應用程序,它們將自動更新。根據應用程序,如果您有桌面應用程序,它們也會自動接收更新。但是,在某些情況下,您可能需要自動下載並安裝它們。
要檢查和下載 Microsoft Store 應用的更新,請使用以下步驟:
打開微軟商店。
單擊左下角的庫按鈕。
單擊獲取更新按鈕。

完成這些步驟後,Microsoft Store 應用程序將檢查並下載應用程序的任何可用更新。
如果您有經典桌面應用程序,您可能會收到手動更新軟件的通知。但是,您通常可以從“幫助”或“關於”菜單中檢查更新。如果您找不到該選項,您可以隨時查看製造商文檔網站以獲取更多信息。
通過在 Windows 11 上創建定期備份來保護您的計算機
在 Windows 11 上,完整備份會創建整個系統的副本,以便您在出現嚴重系統問題、勒索軟件等惡意軟件攻擊、硬件故障或升級主驅動器時進行恢復。此外,備份可以幫助您在升級到新功能更新或全新版本後回滾到以前的安裝。
您始終可以選擇第三方解決方案(例如Macrium Reflect或 Veam),但您仍然可以使用(已棄用的)舊版“系統映像備份”工具將完整備份保存到 USB 硬盤驅動器。
要為運行 Windows 11 的計算機創建完整備份,請使用以下步驟:
打開開始。
搜索控制面板並單擊頂部結果以打開應用程序。
點擊系統和安全。
單擊文件歷史記錄。
單擊左側窗格中的系統映像備份選項。

單擊左側窗格中的創建系統映像選項。

選擇外部驅動器以保存 Windows 11 備份。

單擊下一步按鈕。
單擊開始備份按鈕。

單擊否按鈕。
單擊關閉按鈕。
完成這些步驟後,將使用安裝文件、設置、應用程序和個人文件創建 Windows 11 設備的完整備份。
您還將收到創建修復磁盤的選項,但您可以忽略它,因為您可以使用Windows 11 可啟動媒體訪問恢復設置來恢復備份。
除了定期備份您的計算機外,還建議使用 OneDrive 等第三方服務將您的文件存儲在雲中。這種方法將保護文件免受硬件故障、勒索軟件或盜竊。
或者,通過簡單的複制和粘貼(只要您沒有大量數據)將文件複製到外部驅動器是保護文檔、圖片、視頻和其他文件的另一種方法。
使用 Windows 11 上的常識提示保護您的計算機
大多數情況下,由於系統中未修補的漏洞或用戶的意外操作(例如單擊電子郵件上的特製鏈接或附件或安裝惡意應用程序),設備會受到黑客和惡意軟件的攻擊。
根據經驗,只檢查來自您認識的人和易於識別的發件人的電子郵件。通常,您可以確定一封電子郵件是惡意的,因為它的設計很糟糕,帶有奇怪的字體和語法錯誤。此外,源電子郵件地址與情況不匹配。如果您發現任何可疑內容,請單擊刪除按鈕。
您還可以通過單擊專門製作的在線彈出窗口來為惡意軟件或惡意個人打開大門。儘管許多網站使用彈出窗口來宣傳服務和產品,但某些網站可能會使用這種技術來迷惑用戶點擊可能以多種不同方式感染計算機的應用程序。通常,您只需要在瀏覽不安全和不受信任的網站時擔心專門製作的彈出窗口和鏈接。
盡可能避免瀏覽不安全和不受信任的網站。您通常會知道網站是否不安全,因為該網站地址將在地址欄中以“HTTP”而不是“HTTPS”開頭。此外,Chrome、Edge、Firefox 和大多數現代網站會通過“您的連接不是私人的”消息讓您認為該網站不安全。
如果已知該網站不受信任,現代瀏覽器甚至不會讓您打開該網站。但是,網絡上有無數不受信任的網站,由於無數的彈出窗口和不適當的廣告,您很容易發現它們。
此外,避免安裝來自不受信任來源的軟件。您應該只使用 Microsoft Store 下載 Windows 11 上的應用程序。如果您安裝未經許可的軟件,則設備被惡意軟件和其他惡意代碼破壞的風險會更高。
最後,您不應該將不屬於您的 USB 或外部驅動器連接到您的計算機。如果是這種情況,您應該考慮使用備用計算機來格式化驅動器,以確保它沒有病毒。
收拾東西
本指南向您展示了許多可用於保護您的計算機免受病毒和黑客攻擊的步驟。但是,在大多數情況下,沒有必要實施所有這些建議。您可以隨時挑選您認為對您的情況最有效的那些。
例如,如果您的設備處於安全環境中,您可能不需要配置“動態鎖定”功能。如果您沒有支持 Windows Hello Face 的相機,則使用指紋讀取器或 PIN 應該足以提供保護。如果您決定使用內置的勒索軟件保護並獲得大量誤報,您可能需要考慮切換到其他解決方案或禁用該功能。
Windows 11 引入了新的 Stoplight 桌面儀表板,但目前它是一個隱藏功能。您可以通過以下步驟啟用它。
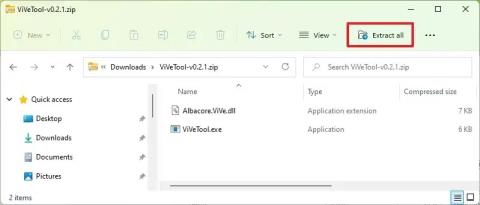
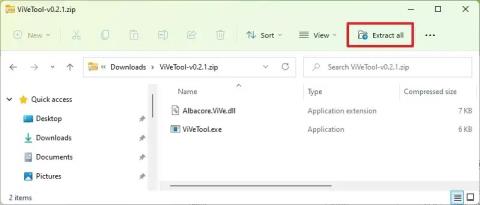
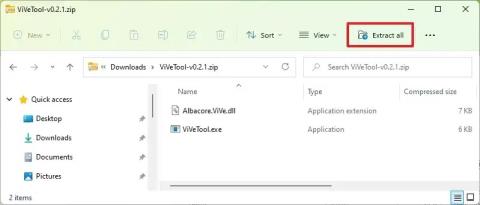
要在 Windows 11 上啟用觸摸優化任務欄,請啟動 ViveTool 命令工具並運行 Vivetool /enable /id:26008830 命令。
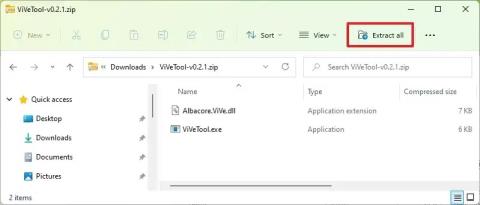
要在 Windows 11 上啟用系統組件設置頁面,請打開命令提示符 (admin) 並運行 vivetool /enable /id:44702824 命令。
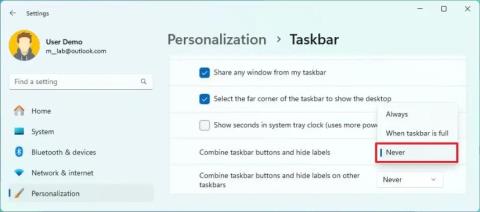
Windows 11 現在包含一個新的“從不組合”選項,用於在任務欄中顯示標籤,以下是啟用和使用該功能的方法。
要在 Windows 11 上啟用新的小部件選擇器,請在命令提示符 (admin) 上運行 vivetool /enable /id:43040593 命令。
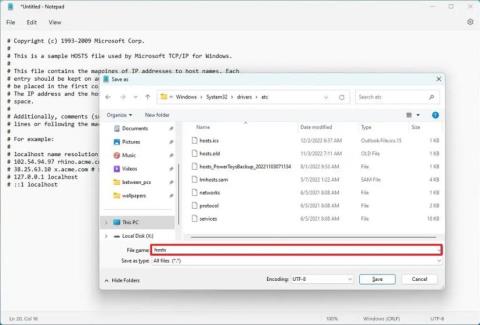
要將 Hosts 文件重置為 Windows 11 上的默認設置,請使用默認內容創建一個新的文本文件並替換以前的配置。
要啟用新的“開始”菜單選項來刪除建議,請打開命令提示符 (admin) 並運行 vivetool /enable /id:42916428 命令。
要在 Windows 11 上為 SDR 顯示器啟用自動色彩管理 (ACM),請打開命令提示符 (admin) 並運行 vivetool /enable /id:36371531
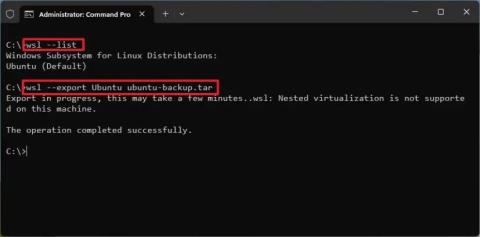
要在 Windows 11 上克隆 WSL 發行版,請打開命令提示符 (admin),使用 wsl --export 命令進行複制,然後使用 wsl --import 進行克隆。
要在 Windows 11 上啟用新的系統托槃體驗,請使用 vivetool /enable /id:26008830 和 vivetool /enable /id:38764045 命令。
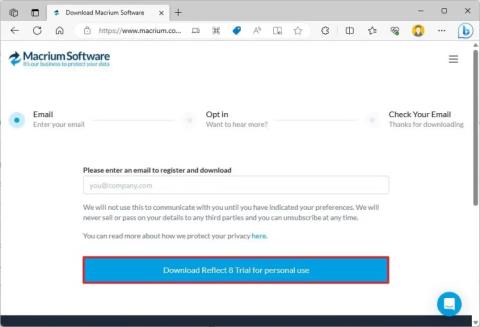
要在 Windows 11 上將 HDD 克隆到 SSD,請打開 Macrium Reflect,選擇驅動器,然後單擊克隆此磁盤,選擇目標,然後克隆驅動器。
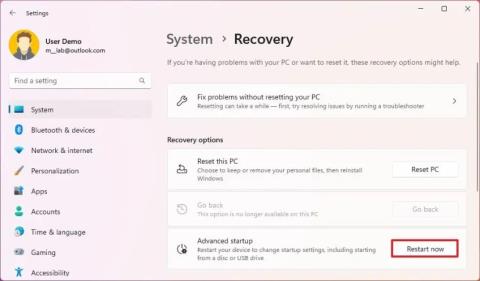
要在 Windows 11 上禁用驅動程序簽名強制執行,請從恢復設置中打開 WinRE,打開啟動設置,然後禁用強制執行。
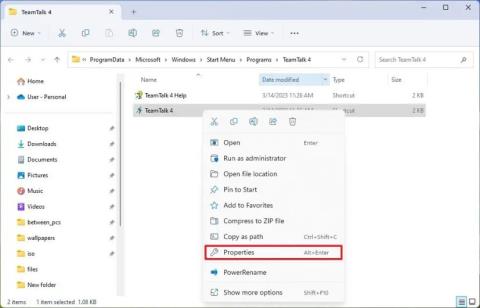
要在 Windows 11 上以兼容模式運行舊應用程序,請打開應用程序“屬性”,然後在“兼容性”選項卡中啟用“兼容模式”。
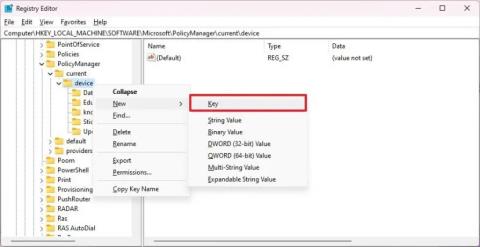
要在 Windows 11 上啟用隱藏主題,請在註冊表項中創建 Education 項和 EnableEduThemes DWORD,並將值更改為 1。
Windows 11 上提供了新的任務管理器設計,以下是在內部版本 22557 上實現早期開發的步驟。
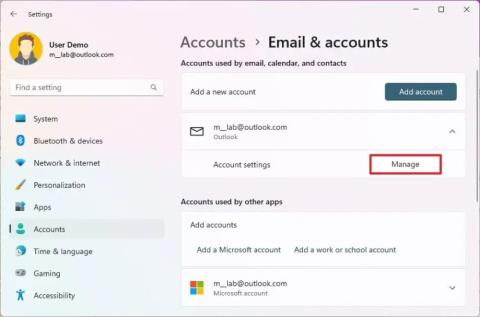
要刪除 Windows 11 上應用程序的電子郵件帳戶,請使用電子郵件和帳戶設置或通過 StoredIdentities 密鑰進行註冊表。就是這樣。
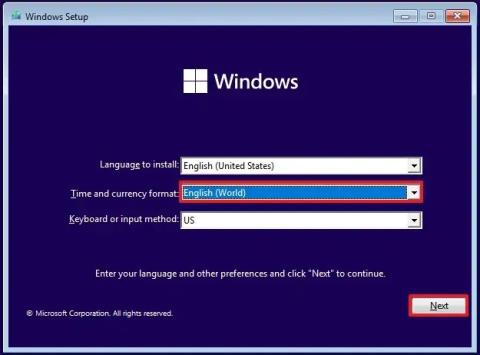
要安裝沒有英國媒體報導軟件應用程序的 Windows 11,請在安裝過程中,在時間和貨幣格式設置中選擇英語(世界)選項。
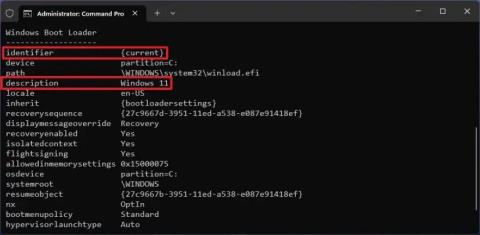
要在 Windows 11 上的啟動管理菜單中更改操作系統名稱,請打開命令提示符 (admin) 並運行 bcdedit /set {IDENTIFIER} description NEW-NAME
要在 Windows 11 上啟用即將推出的建議操作自定義設置,請運行 vivetool /enable /id:42623125 和 41058795 命令。
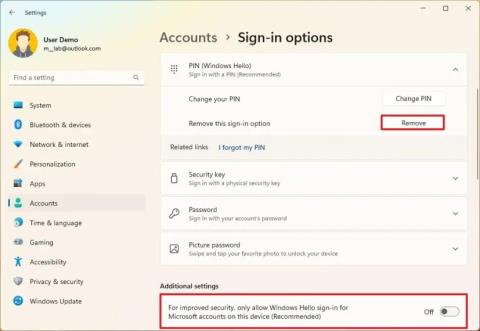
要在 Windows 11 上啟用增強型網絡釣魚防護,請禁用 Window Hello,然後在 Windows 安全應用程序中打開網絡釣魚防護。
發現解決 Google Meet 麥克風問題的有效方法,包括音頻設置、驅動程序更新等技巧。
在 Twitter 上發送訊息時出現訊息發送失敗或類似錯誤?了解如何修復 X (Twitter) 訊息發送失敗的問題。
無法使用手腕檢測功能?以下是解決 Apple Watch 手腕偵測不起作用問題的 9 種方法。
解決 Twitter 上「出錯了,重試」錯誤的最佳方法,提升用戶體驗。
如果您無法在瀏覽器中登入 Google 帳戶,請嘗試這些故障排除提示以立即重新取得存取權限。
借助 Google Meet 等視頻會議工具,您可以在電視上召開會議,提升遠程工作的體驗。
為了讓您的對話更加安全,您可以按照以下步驟在行動裝置和桌面裝置上為 Instagram 聊天啟用端對端加密。
了解如何檢查您的 Dropbox 安全設定有助於確保您的帳戶免受惡意攻擊。
YouTube TV 為我們提供了許多堅持使用的理由,因為它融合了直播電視、點播視頻和 DVR 功能。讓我們探索一些最好的 YouTube 電視提示和技巧。
您的三星手機沒有收到任何通知?嘗試這些提示來修復通知在您的 Samsung Galaxy 手機上不起作用的問題。

