如何自动翻页 Microsoft PowerPoint 365

本教程展示如何通过设置幻灯片自动播放的时间,使 Microsoft PowerPoint 365 自动播放演示文稿。

這是執行租戶到租戶遷移 Office 365 的完整指南。
遷移前 2 週或更長時間
1. 檢查域名所有權並獲取信息並保存。2. 使用此鏈接
捕獲所有 DNS 記錄。
3. 識別並捕獲與 Exchange 相關的 DNS 記錄(如果執行域轉移) - TXT、MX和SPF。
4. 在每條 MX 記錄上記下 TTL 值
5. 使用此鏈接檢查域可用性。


6. 確定域需要哪些 Microsoft 365 服務。
7. 需要決策——討論域和 DNS 要求
域名:
DNS 記錄:
所有(不僅僅是 Exchange)記錄的副本,以便在目標 DNS 服務器上設置記錄。
8. 與項目團隊討論哪些項目不會使用 BitTitan 遷移工具進行遷移。
9. 在源頭向 O365 Admin Portal 請求域管理員權限
在我們需要從源的管理門戶中刪除域,然後將域添加到目標的過程中,需要管理員權限。
10. 在 Source 登錄 O365 管理門戶並查看 EXO 郵件規則和連接器
11.使用mxtoolbox blacklists檢查域/IP 地址未列入黑名單。
重要提示:如果列入黑名單,當我們將域/IP 地址列入白名單時。
12. 在 Source 登錄 O365 管理門戶,將接受的域、組、郵箱、資源、共享郵箱和用戶列表導出到 EXCEL。
13. 查看要遷移的每個郵箱的大小。
14. 查看郵件設置
15. 最終確定要遷移的用戶、組和共享郵箱列表
16. 在目的地創建所有用戶郵箱、共享郵箱、通訊組、安全組、聯繫人和資源。
17.添加代理訪問目的地郵箱/日曆
18.創建用戶通信
19. 在源頭創建 2 個測試賬戶
20. 使用以下數據在源頭填充 2 個測試帳戶
21. 在目的地創建 2 個測試賬戶
22. 授予全局管理員帳戶對郵箱的完全訪問權限:
Get-Mailbox -ResultSize 無限制 | Add-MailboxPermission -User “admin account” -AccessRights FullAccess -InheritanceType All -AutoMapping $false
23. EWS 必須在源 Exchange 服務器上運行
24. 通過使用 OWA 使用管理員帳戶打開任何其他郵箱來測試郵箱訪問
25. 將tenantname.onmicrosoft.com 帳戶作為代理地址添加到Source 中的每個郵箱。
我們需要執行此操作,我們將從所有郵箱中刪除域電子郵件地址,然後才能從租戶中刪除域。
26. 在 SOURCE 連接到 EXO Powershell
27. 導出和更新代理地址以包括@tenantname.onmicrosoft.com
Get-Mailbox -ResultSize Unlimited -Filter “emailaddresses -notlike '*@tenantname.onmicrosoft.com'” | 選擇別名、primarysmtpaddress、emailaddresses |export-csv -NoTypeInformation “C:\Temp\mailboxes_output.csv”
導入-csv C:\Temp\mailboxes_output.csv| ForEach-Object {
$ID = $_.PrimarySmtpAddress
$alias = $_.Alias
$365Email = $alias + “@tenantname.onmicrosoft.com”
Set-Mailbox -Identity $ID -EmailAddresses @{add = $365Email}
}
28. 確認所有郵箱都已更新。結果應該為零。
Get-Mailbox -ResultSize Unlimited -Filter “emailaddresses -notlike '*@tenantname.onmicrosoft.com'” | 選擇別名、主要smtp地址、電子郵件地址
29. 授予管理員帳戶對目標郵箱的完全訪問權限
30. 在目的地連接到 EXO Powershell
授予對目標所有獲取域郵箱的 BitTitan 服務帳戶的完全郵箱訪問權限。
Add-MailboxPermission -Identity “目標郵箱 -User “BitTitan 服務帳戶” -AccessRights FullAccess -InheritanceType All -AutoMapping $false
31. 通過使用 OWA 使用管理員帳戶打開任何其他郵箱來測試郵箱訪問
32. BitTitan 許可證要求
筆記:
每個郵箱最多可以使用一個許可證 10 次。這假設終點沒有改變。
如果您正在使用測試帳戶測試 BitTitan 遷移,請確保您在許可證計數中包含所需的測試帳戶總數。
33. 兌換許可證
注意:如果您沒有帳戶,請註冊 BitTitan 帳戶,通過驗證您的電子郵件地址確保您的帳戶處於活動狀態。
34.創建BitTitan項目
35. 在源設置:
36. 在目的地設置:
37. 在租戶到租戶遷移
38. 使用 BitTitan 將測試賬戶遷移到目標 – 階段前遷移
39. 執行預階段遷移
重要:
40.解決任何BitTitan錯誤消息
41.使用OWA確認郵箱是否包含遷移的數據
42. At Source:使用 OWA 發送和接收額外的電子郵件
43. 執行完整遷移
44. Resolve any BitTitan error messages
45. Use OWA to confirm the mailboxes contain the migrated data
46. Liaise with the business and confirms date and time of migration. Confirm other resources are available for migration
47. If the decision was made to take ownership of the domain and DNS before migration, initiate the transfer
1 week before migration
Export Exchange objects from Source:
48. Log into EXO Powershell at Source
49. Mailboxes: Export UPN, Alias, SMTP and Proxy addresses
Get-Mailbox -ResultSize Unlimited | select userprincipalname,alias,primarysmtpaddress,emailaddresses | export-csv -NoTypeInformation “Backup_Source_Mailboxes.csv”
50. Groups: Export Alias, SMTP and Proxy addresses
Get-DistributionGroup -ResultSize Unlimited | select alias,primarysmtpaddress,emailaddresses | export-csv -NoTypeInformation “Backup_ Source_Groups.csv”
51. Calendar Delegation:
Get-Mailbox | foreach {
write-host -fore green “Processing $_”
Get-MailboxFolderPermission -Identity “$($_.alias):\Calendar” | where {$_.User -notlike “Anonymous” -and $_.User -notlike “Default”}} | select Identity,User,@{name=’AccessRights’;expression={$_.AccessRights -join ‘,’}} | Export-Csv -NoTypeInformation “Backup_ Source_Calendar_Delegation.csv”
Export Exchange objects from Destination:
52. Log into EXO Powershell at Destination
53. Contacts: Export Name and Email addresses
Get-Recipient -Filter {RecipientType -eq “MailContact” -and EmailAddresses -like ‘domainname‘} | select DisplayName,RecipientType,ExternalEmailAddress,EmailAddresses | export-csv -NoTypeInformation “Backup_Destination_Contacts.csv”
54. Mailboxes: Export Forwarding
For each MAILBOX:
get-Mailbox -Identity | select UserPrincipalName,DeliverToMailboxAndForward,ForwardingAddress,ForwardingSmtpAddress | export-csv -notypeinformation ‘Backup_Destination_Forwarding.csv’ -append
55. Pre-Stage Migration of all Mailboxes – email older than 10 days
Important: For the Source, use the onmicrosoft.com address
Select the Project Name
Click on the drop-down arrow beside “Add” and select “Bulk Add”
Click on “Select File”, locate the CSV file created in step 1 then click “Open”
The contents of the CSV will get imported and displayed on screen, click “Save”
Pre-stage migration:
Important:
Allow time for the migration to complete
The Pre-Stage migrates emails only
Calendars, contacts, journals, notes, and tasks will only migrate during a full migration
56. Resolve any BitTitan error messages
57. Add the domain then request a TXT record to verify we own the domain
58. Setup IM federation so you have chat communications during pre-cutover
Important: Cannot migrate any IM contacts to Microsoft Teams.
59. 1 day before migration
Migrate mailboxes – Full migration
Important: Allow time for the migration to complete.
60. Resolve any BitTitan error messages
61. Migration day
[Optional] Change the TTL value on each MX record
Remove domain dependencies from Source:
62. Log into Azure AD and EXO Powershell at Source
[Optional] Change FEDERATED domains to MANAGED, if applicable.
63. Run the following cmdlet to determine which domains are FEDERATED or MANAGED
Get-MsolDomain
If FEDERATED change to MANAGED:
Set-MsolADFSContext -Computer ADFS_Server_FQDN
Convert-MsolDomainToStandard -DomainName “Domain Name Here” -SkipUserConversion:$true -PasswordFile C:\passwords.txt
64. Run the following cmdlets to verify the domains are managed
Get-MsolDomain
[If Applicable] Disable the directory synchronization
Set-MsolDirSyncEnabled -EnableDirSync $false
[If Applicable] SharePoint Online public website
65. If you had also set up your domain with a SharePoint Online public website, then before you can remove the domain, you first have to set the website’s URL back to the initial domain.
[If Applicable] Skype for Business and Teams
Remove all Skype for Business and Teams licenses from the users in the source tenant. This will remove the SIP attribute from their proxy addresses.
66. Set the default domain in source tenant to domainname.onmicrosoft.com
67. Change all Mailboxes UPNs to domainname .onmicrosoft.com domain. Replace the domainname with your domain name.
Get-MsolUser -all | select-object UserPrincipalName,ObjectID | export-csv -NoTypeInformation “User.csv”
Import-csv User.csv| ForEach-Object {
$ID = $_.UserPrincipalName
$ObjectID = $_.ObjectID
$365Email = $ID.Split(“@”)[0] + “@ domainname.onmicrosoft.com”
Set-MsolUserPrincipalName -ObjectId $ObjectID -NewUserPrincipalName $365Email}
68. Confirm the UPNs have been updated
Get-MsolUser -all | select-object UserPrincipalName,ObjectID
69. Change all Distribution Groups Primary SMTP address to domainname.onmicrosoft.com domain. Replace the domainname with your domain name.
Get-DistributionGroup -ResultSize Unlimited | select-object PrimarySMTPAddress | export-csv -NoTypeInformation “DL.csv”
Import-csv DL.csv| ForEach-Object {
$ID = $_.PrimarySmtpAddress
$365Email = $ID.Split(“@”)[0] + “@domainname.onmicrosoft.com”
Set-DistributionGroup -Identity $ID -primarysmtpaddress $365Email}
70. Confirm the primary smtp’s have been updated
Get-DistributionGroup -ResultSize Unlimited | select-object PrimarySMTPAddress
71. As we changed every mailboxes UPN, the primary SMTP addresses has also been updated to domainname.onmicrosoft.com. Now remove all aliases from every mailbox using this script:
$users = Get-Mailbox -ResultSize Unlimited | Where {$_.Emailaddresses.count -gt 1}
foreach ($user in $users) {
foreach ($email in $user.emailaddresses){
if ($email -ne “SMTP:”+$user.PrimarySmtpAddress){
Set-Mailbox -Identity $user.name -EmailAddresses @{Remove=$email}
}
}
Write-host $user.primarysmtpaddress “has been processed”
}
72. Confirm the Primary and Alias addresses are both domainname.onmicrosoft.com ONLY
Get-Mailbox | select PrimarySmtpAddress,EmailAddresses
73. Remove all aliases from every distribution group
$groups = Get-DistributionGroup -ResultSize Unlimited | Where {$_.Emailaddresses.count -gt 1}
foreach ($group in $groups) {
foreach ($email in $group.emailaddresses){
if ($email -ne “SMTP:”+$group.PrimarySmtpAddress){
Set-DistributionGroup -Identity $group.name -EmailAddresses @{Remove=$email}
}
}
Write-host $group.primarysmtpaddress “has been processed”
}
74. Confirm the Primary and Alias addresses are both domainname.onmicrosoft.com ONLY
Get-DistributionGroup | select PrimarySmtpAddress,EmailAddresses
[If Required] O365 Groups: User the cmdlets below to remove the domain:
Get-UnifiedGroup -Identity “name” | select primarysmtpaddress,emailaddresses
Set-UnifiedGroup -Identity “name” -PrimarySMTPAddress [email protected]
Set-UnifiedGroup -Identity “name” -EmailAddresses @{remove=”smtp:[email protected]”}
75. Confirm all dependencies have been removed. Replace the domainname with your domain name.
Get-MsolUser -DomainName domainname.com -all
Important:
76. Remove the domain from the source Microsoft 365 tenant
Important:
77. Add Mail Rules and Connectors at Destination
[If required]
78. Verify the domain
79. Verify changes
80. Check Domain
To check everything is setup as it should be, wait around an hour for all updates to take effect then launch: https://centralops.net/co/
Type in the domain name and check all records are set as in ‘View DNS Settings’ above.
81. Remove Email Forwarding at Destination
Log into EXO Powershell at Destination and run the following cmdlets for each user:
Set-Mailbox -Identity “DestinationUserEmailAddress” -ForwardingAddress $null -DeliverToMailboxAndForward $false
82. Add aliases for each user at Destination:
Set-RemoteMailbox -Identity “[email protected]” -EmailAddresses @{Add=”smtp:name1@domain”,”smtp:name2@domain”}
83. For each GROUP:
Set-DistributionGroup -Identity “groupname” -EmailAddresses @{add=”[email protected]”}
84. Change the TTL value on each MX record back to the original setting eg 1 hour
85. Migrate Mailboxes – Final Migration
Important: Allow time for the migration to complete
86. Resolve any BitTitan error messages
87. Delete Contacts at Destination
Connect to EXO at Destination and run the following cmdlet:
Import-csv “Backup_Destination_Contacts.csv”| ForEach-Object {
$DisplayName = $_.DisplayName
Remove-MailContact -Identity $Displayname}
88. Confirm the Contact has been deleted:
Import-csv “Backup_Destination_Contacts.csv”| ForEach-Object {
$DisplayName = $_.DisplayName
Get-MailContact -Identity $Displayname}
89. Set the default email address at Destination
For each USER:
Set-RemoteMailbox “[email protected]” -PrimarySmtpAddress “[email protected]”
90. For each GROUP:
Set-DistributionGroup -Identity ‘DisplayName’ -PrimarySmtpAddress “[email protected]” -EmailAddressPolicyEnabled $false
91. For each SHARED MAILBOX:
Important: Allow time for all changes to sync to O365.
Post-Migration Activities
92. Verify delegates / aliases have been correctly populated
Migrate Mailboxes – Final Migration
Important: Allow time for the migration to complete.
93. Resolve any BitTitan error messages
Select the accounts that errored
Click on the down arrow beside “Start” and select “Retry Errors”
In the “Retry Errors” window, review the settings
Click “Retry Errors”
Click on the “Refresh list” icon to get a status of the migration or click on the dashboard on the left-hand side menu
94. Execute End User Test Plan
Launch Outlook at Destination and verify the contents of the following:
Email
Contacts
Calendar
Send and Receive emails INTERNALLY and verify emails have been received
Send and Receive emails EXTERNALLY and verify emails have been received
Verify the sender’s email address
Send and Receive emails form a SHARED MAILBOX and confirm emails have been received.
Verify the sender’s email address
Send a test Calendar invite to a colleague and confirm the invite was received
95. Log into EXO Powershell at Destination
For each mailbox, remove the service account
Remove-MailboxPermission -Identity “User1” -User “BitTitan service account” -AccessRights FullAccess -InheritanceType All
96. Take ownership of Domain and DNS records
[如果尚未採取行動] – 如果當前所有者對 DNS 進行了必要的更改,則獲得域和 DNS 記錄的所有權。
退出計劃
97.將默認電子郵件地址更改回舊電子郵件地址
Set-RemoteMailbox “[email protected]” -PrimarySmtpAddress “[email protected]”
98.對於每個用戶:
登錄到本地 Exchange 服務器
運行 Exchange powershell 並執行以下 cmdlet:
Set-RemoteMailbox “[email protected]” -EmailAddresses @{remove=”[email protected]”}
99.對於每個組:
登錄到本地 Exchange 服務器
運行 Exchange powershell 並執行以下 cmdlet:
Set-DistributionGroup -Identity “groupname” -EmailAddresses @{remove=”[email protected]”}
100.驗證屬性是否已更新:
Get-RemoteMailbox -Identity | select userprincipalname,alias,primarysmtpaddress,emailaddresses
101. Re-create Contacts at Destination:
Log into EXO Powershell at Destination and run the following cmdlets:
Import-csv “Backup_Destination_Contacts.csv”| ForEach-Object {
$DisplayName = $_.DisplayName
$Email = $_.EmailAddresses
New-MailContact -Name $Displayname -ExternalEmailAddress $Email}
102. Enabling forwarding from Destination to CONTACT
Log into EXO Powershell at Destination
Run the following cmdlets:
Set-Mailbox -Identity “[email protected]” -DeliverToMailboxAndForward $true -ForwardingAddress “[email protected]”
103. Reverse DNS changes
104. Confirm all dependencies have been removed. Replace the domainname with your domain name.
Get-MsolUser -DomainName domainname.com -all
105. 從目標 Microsoft 365 租戶中刪除域
重要:
在將域添加到目標租戶之前最多允許 60 分鐘
O365 可能仍認為域仍在使用中
106. 在 Source 添加域,然後請求 TXT 記錄以驗證我們擁有該域
107.驗證域
108. 驗證更改
109. 檢查域
要檢查所有設置是否正確,請等待大約一個小時以使所有更新生效,然後啟動:http://centralops.net/co/
輸入域名並檢查所有記錄是否設置為“查看 DNS 設置” ' 以上。
110. 如果適用,從源租戶中的用戶添加所有 Skype for Business 和 Teams 許可證。這會將 SIP 屬性添加到他們的代理地址。
111、為所有用戶恢復原代理地址:
Set-Mailbox -Identity “alias” -EmailAddresses SMTP:[email protected],smtp:[email protected]
112.恢復所有用戶的UPN:
導入-csv “Backup_Mailboxes.csv”| ForEach-Object {
$NewUPN = $_.PrimarySmtpAddress
$alias = $_.Alias
$OldUPN = $alias + “@vivacityhealth.onmicrosoft.com”
Set-MsolUserPrincipalName -UserPrincipalName $OldUPN -NewUserPrincipalName $Newupn
}
113. 驗證 UPN、電子郵件和代理地址是否已更新:
獲取郵箱-身份 | 選擇用戶主體名稱、別名、主 smtp 地址、電子郵件地址
114. 將所有通訊組 SMTP 地址更改為 domainname.onmicrosoft.com 域。將域名替換為您的域名。
Get-DistributionGroup -ResultSize Unlimited | 選擇對象 PrimarySMTPAddress | 導出-csv -NoTypeInformation “DL.csv”
導入-csv DL.csv| ForEach-Object {
$ID = $_.PrimarySmtpAddress
$365Email = $ID.Split(“@”)[0] + “@domainname.onmicrosoft.com”
Set-DistributionGroup -Identity $ID -primarysmtpaddress $365Email}
115.從每個通訊組中刪除所有別名
$groups = Get-DistributionGroup -ResultSize Unlimited | 其中 {$_.Emailaddresses.count -gt 1}
foreach ($groups in $groups) {
foreach ($email in $group.emailaddresses){
if ($email -ne "SMTP:"+$group.PrimarySmtpAddress){
設置-DistributionGroup -Identity $group.name -EmailAddresses @{Remove=$email}
}
}
寫入主機 $group.primarysmtpaddress “已處理” $
}
這就是租戶到租戶遷移 Office 365 的工作方式。
本教程展示如何通过设置幻灯片自动播放的时间,使 Microsoft PowerPoint 365 自动播放演示文稿。
样式集可以瞬间为您的整个文档提供光滑且一致的外观。以下是如何在 Word 中使用样式集以及在哪里找到它们。
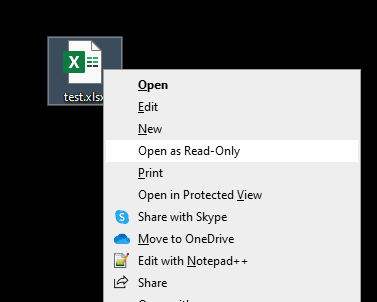
本指南将引导您在 Microsoft Excel Office 365 文件中强制提示用户以只读方式打开。
我们向您展示一个技巧,您可以使用它轻松将所有 Microsoft Outlook 365 联系人导出为 vCard 文件。
学习如何在 Microsoft Excel 中启用或禁用单元格中公式的显示。
通过本教程学习如何在Microsoft Excel 365中锁定和解锁单元格。
在 Microsoft Outlook 中“垃圾邮件”选项变为灰色是很常见的。本文将向您展示如何处理这个问题。
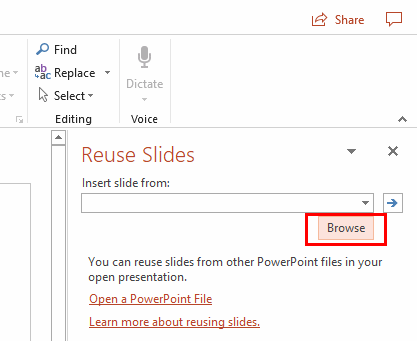
一个教程,展示如何从另一个 Microsoft PowerPoint 365 演示文稿文件导入幻灯片。
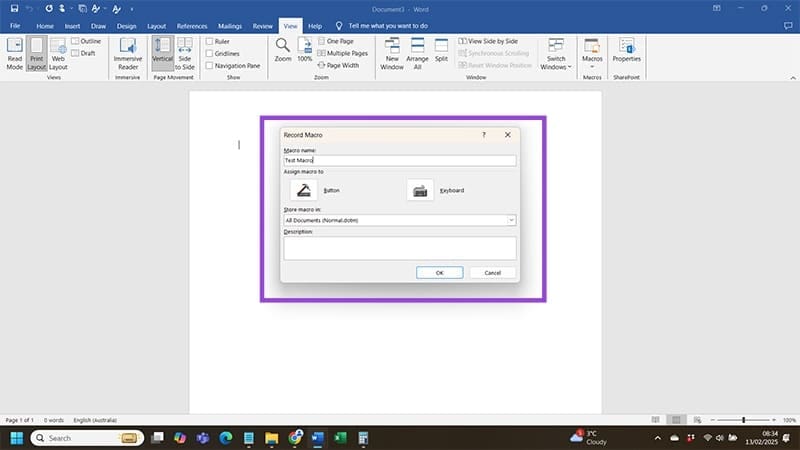
了解如何在Word中创建宏,以更快地执行您最常用的功能。
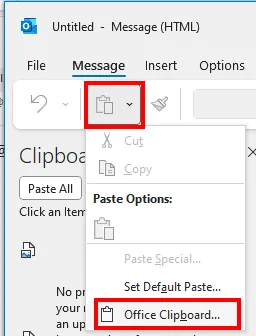
我们将向您展示如何在 Microsoft Office 365 应用程序中启用或禁用可见的剪贴板选项。


