Come Auto-Avanzare PowerPoint 365

Un tutorial che mostra come fare in modo che Microsoft PowerPoint 365 esegua automaticamente la presentazione impostando il tempo di avanzamento delle diapositive.

Questa è una guida completa per eseguire la migrazione da tenant a tenant Office 365.
2 o più settimane prima della migrazione
1. Verifica la proprietà del dominio, acquisisci le informazioni e salva.
2. Cattura tutti i record DNS utilizzando questo collegamento .
3. Identificare e acquisire i record DNS rilevanti per Exchange (se si esegue un trasferimento di dominio) – TXT , MX e SPF .
4. Su ogni record MX prendere nota del valore TTL
5. Verifica la disponibilità del dominio tramite questo link .


6. Determinare quali servizi Microsoft 365 sono necessari per il dominio.
7. Decisione necessaria – Discutere i requisiti di dominio e DNS
Nome del dominio:
Record DNS:
Copia di TUTTI i record (non solo di Exchange) in modo da impostare i record sui server DNS di destinazione.
8. Discutere con il team di progetto quali elementi NON vengono migrati utilizzando lo strumento di migrazione BitTitan.
9. Richiedi i diritti di amministratore di dominio per il portale di amministrazione O365 alla fonte
I diritti di amministratore sono richiesti come parte del processo necessario per rimuovere il dominio dal portale di amministrazione in Origine e quindi aggiungere il dominio a Destinazione.
10. Accedere al portale di amministrazione O365 alla fonte e rivedere le regole e i connettori di EXO Mail
11. Verificare che i domini/gli indirizzi IP NON siano inseriti nella blacklist utilizzando le blacklist di mxtoolbox .
Importante : se inserito nella lista nera, quando inseriamo nella lista bianca i domini/gli indirizzi IP.
12. Accedere al portale di amministrazione O365 all'origine ed esportare i domini accettati, i gruppi, le cassette postali, le risorse, le cassette postali condivise e l'elenco di utenti in EXCEL.
13. Esaminare le dimensioni di ciascuna cassetta postale di cui eseguire la migrazione.
14. Rivedere l'impostazione della posta
15. Finalizzare l'elenco di utenti, gruppi e le cassette postali condivise da migrare
16. Creare tutte le cassette postali degli utenti, le cassette postali condivise, i gruppi di distribuzione, i gruppi di sicurezza, i contatti e le risorse a destinazione.
17. Aggiungere l'accesso delegato alle cassette postali/calendari a destinazione
18. Creare comunicazioni utente
19. Crea 2 account di prova alla fonte
20. Popolare i 2 conti di prova alla fonte con i seguenti dati
21. Crea 2 account di prova a destinazione
22. Concedi all'account Global Admin l'accesso completo alle cassette postali:
Get-Mailbox -ResultSize illimitato | Add-MailboxPermission -Utente "account amministratore" -AccessRights FullAccess -InheritanceType All -AutoMapping $false
23. EWS deve funzionare sul server Exchange di origine
24. Testare l'accesso alla casella di posta aprendo qualsiasi altra casella di posta con l'account amministratore tramite OWA
25. Aggiungere l'account tenantname.onmicrosoft.com come indirizzo proxy a ciascuna cassetta postale all'origine.
Per eseguire questa operazione rimuoveremo gli indirizzi e-mail del dominio da tutte le cassette postali prima di poter rimuovere il dominio dal tenant.
26. Collegarsi a EXO Powershell su SOURCE
27. Esportare e aggiornare gli indirizzi proxy per includere @tenantname.onmicrosoft.com
Get-Mailbox -ResultSize Unlimited -Filtra "emailaddresses -notlike '*@tenantname.onmicrosoft.com'" | seleziona alias,indirizzoprincipalesmtpad,indirizziemail |export-csv -NoTypeInformation “C:\Temp\mailboxes_output.csv”
Import-csv C:\Temp\mailboxes_output.csv| ForEach-Object {
$ID = $_.PrimarySmtpAddress
$alias = $_.Alias
$365Email = $alias + "@tenantname.onmicrosoft.com"
Set-Mailbox -Identity $ID -EmailAddresses @{add = $365Email}
}
28. Conferma che tutte le caselle di posta sono state aggiornate. I risultati dovrebbero essere zero.
Get-Mailbox -ResultSize Unlimited -Filtra "emailaddresses -notlike '*@tenantname.onmicrosoft.com'" | selezionare alias, indirizzo indirizzo primario, indirizzi e-mail
29. Concedi all'account amministratore l'accesso completo alle cassette postali in Destinazione
30. Collegarsi a EXO Powershell a destinazione
Concedi l'accesso completo alla cassetta postale all'account del servizio BitTitan su tutte le cassette postali di dominio acquisite nella destinazione.
Add-MailboxPermission -Identity "Casella di posta di destinazione -Utente" Account di servizio BitTitan" -AccessRights FullAccess -InheritanceType All -AutoMapping $false
31. Testare l'accesso alla casella di posta aprendo qualsiasi altra casella di posta con l'account amministratore tramite OWA
32. Requisiti della licenza BitTitan
Nota:
Una licenza può essere utilizzata fino a 10 volte per casella di posta. Ciò presuppone che il punto finale non cambi.
Se stai testando la migrazione BitTitan con account di prova, assicurati di includere il numero totale di account di prova necessari nel conteggio delle licenze.
33. Riscattare le licenze
Nota : Registrati per un account BitTitan se non hai un account, assicurati che il tuo account sia attivo verificando il tuo indirizzo email.
34. Crea un progetto BitTitan
35. At Source Settings:
36. At Destination Settings:
37. At Tenant to Tenant Migration
38. Migrate Test accounts to Destination using BitTitan – Pre-Stage Migration
39. Perform a Pre-Stage Migration
Important:
40. Resolve any BitTitan error messages
41. Use OWA to confirm the mailboxes contain the migrated data
42. At Source: Use OWA to send and receive additional email
43. Perform a full migration
44. Resolve any BitTitan error messages
45. Use OWA to confirm the mailboxes contain the migrated data
46. Liaise with the business and confirms date and time of migration. Confirm other resources are available for migration
47. If the decision was made to take ownership of the domain and DNS before migration, initiate the transfer
1 week before migration
Export Exchange objects from Source:
48. Log into EXO Powershell at Source
49. Mailboxes: Export UPN, Alias, SMTP and Proxy addresses
Get-Mailbox -ResultSize Unlimited | select userprincipalname,alias,primarysmtpaddress,emailaddresses | export-csv -NoTypeInformation “Backup_Source_Mailboxes.csv”
50. Groups: Export Alias, SMTP and Proxy addresses
Get-DistributionGroup -ResultSize Unlimited | select alias,primarysmtpaddress,emailaddresses | export-csv -NoTypeInformation “Backup_ Source_Groups.csv”
51. Calendar Delegation:
Get-Mailbox | foreach {
write-host -fore green “Processing $_”
Get-MailboxFolderPermission -Identity “$($_.alias):\Calendar” | where {$_.User -notlike “Anonymous” -and $_.User -notlike “Default”}} | select Identity,User,@{name=’AccessRights’;expression={$_.AccessRights -join ‘,’}} | Export-Csv -NoTypeInformation “Backup_ Source_Calendar_Delegation.csv”
Export Exchange objects from Destination:
52. Log into EXO Powershell at Destination
53. Contacts: Export Name and Email addresses
Get-Recipient -Filter {RecipientType -eq “MailContact” -and EmailAddresses -like ‘domainname‘} | select DisplayName,RecipientType,ExternalEmailAddress,EmailAddresses | export-csv -NoTypeInformation “Backup_Destination_Contacts.csv”
54. Mailboxes: Export Forwarding
For each MAILBOX:
get-Mailbox -Identity | select UserPrincipalName,DeliverToMailboxAndForward,ForwardingAddress,ForwardingSmtpAddress | export-csv -notypeinformation ‘Backup_Destination_Forwarding.csv’ -append
55. Pre-Stage Migration of all Mailboxes – email older than 10 days
Important: For the Source, use the onmicrosoft.com address
Select the Project Name
Click on the drop-down arrow beside “Add” and select “Bulk Add”
Click on “Select File”, locate the CSV file created in step 1 then click “Open”
The contents of the CSV will get imported and displayed on screen, click “Save”
Pre-stage migration:
Important:
Allow time for the migration to complete
The Pre-Stage migrates emails only
Calendars, contacts, journals, notes, and tasks will only migrate during a full migration
56. Resolve any BitTitan error messages
57. Add the domain then request a TXT record to verify we own the domain
58. Setup IM federation so you have chat communications during pre-cutover
Important: Cannot migrate any IM contacts to Microsoft Teams.
59. 1 day before migration
Migrate mailboxes – Full migration
Important: Allow time for the migration to complete.
60. Resolve any BitTitan error messages
61. Migration day
[Optional] Change the TTL value on each MX record
Remove domain dependencies from Source:
62. Log into Azure AD and EXO Powershell at Source
[Optional] Change FEDERATED domains to MANAGED, if applicable.
63. Run the following cmdlet to determine which domains are FEDERATED or MANAGED
Get-MsolDomain
If FEDERATED change to MANAGED:
Set-MsolADFSContext -Computer ADFS_Server_FQDN
Convert-MsolDomainToStandard -DomainName “Domain Name Here” -SkipUserConversion:$true -PasswordFile C:\passwords.txt
64. Run the following cmdlets to verify the domains are managed
Get-MsolDomain
[If Applicable] Disable the directory synchronization
Set-MsolDirSyncEnabled -EnableDirSync $false
[If Applicable] SharePoint Online public website
65. If you had also set up your domain with a SharePoint Online public website, then before you can remove the domain, you first have to set the website’s URL back to the initial domain.
[If Applicable] Skype for Business and Teams
Remove all Skype for Business and Teams licenses from the users in the source tenant. This will remove the SIP attribute from their proxy addresses.
66. Set the default domain in source tenant to domainname.onmicrosoft.com
67. Change all Mailboxes UPNs to domainname .onmicrosoft.com domain. Replace the domainname with your domain name.
Get-MsolUser -all | select-object UserPrincipalName,ObjectID | export-csv -NoTypeInformation “User.csv”
Import-csv User.csv| ForEach-Object {
$ID = $_.UserPrincipalName
$ObjectID = $_.ObjectID
$365Email = $ID.Split(“@”)[0] + “@ domainname.onmicrosoft.com”
Set-MsolUserPrincipalName -ObjectId $ObjectID -NewUserPrincipalName $365Email}
68. Confirm the UPNs have been updated
Get-MsolUser -all | select-object UserPrincipalName,ObjectID
69. Change all Distribution Groups Primary SMTP address to domainname.onmicrosoft.com domain. Replace the domainname with your domain name.
Get-DistributionGroup -ResultSize Unlimited | select-object PrimarySMTPAddress | export-csv -NoTypeInformation “DL.csv”
Import-csv DL.csv| ForEach-Object {
$ID = $_.PrimarySmtpAddress
$365Email = $ID.Split(“@”)[0] + “@domainname.onmicrosoft.com”
Set-DistributionGroup -Identity $ID -primarysmtpaddress $365Email}
70. Confirm the primary smtp’s have been updated
Get-DistributionGroup -ResultSize Unlimited | select-object PrimarySMTPAddress
71. As we changed every mailboxes UPN, the primary SMTP addresses has also been updated to domainname.onmicrosoft.com. Now remove all aliases from every mailbox using this script:
$users = Get-Mailbox -ResultSize Unlimited | Where {$_.Emailaddresses.count -gt 1}
foreach ($user in $users) {
foreach ($email in $user.emailaddresses){
if ($email -ne “SMTP:”+$user.PrimarySmtpAddress){
Set-Mailbox -Identity $user.name -EmailAddresses @{Remove=$email}
}
}
Write-host $user.primarysmtpaddress “has been processed”
}
72. Confirm the Primary and Alias addresses are both domainname.onmicrosoft.com ONLY
Get-Mailbox | select PrimarySmtpAddress,EmailAddresses
73. Remove all aliases from every distribution group
$groups = Get-DistributionGroup -ResultSize Unlimited | Where {$_.Emailaddresses.count -gt 1}
foreach ($group in $groups) {
foreach ($email in $group.emailaddresses){
if ($email -ne “SMTP:”+$group.PrimarySmtpAddress){
Set-DistributionGroup -Identity $group.name -EmailAddresses @{Remove=$email}
}
}
Write-host $group.primarysmtpaddress “has been processed”
}
74. Confirm the Primary and Alias addresses are both domainname.onmicrosoft.com ONLY
Get-DistributionGroup | select PrimarySmtpAddress,EmailAddresses
[If Required] O365 Groups: User the cmdlets below to remove the domain:
Get-UnifiedGroup -Identity “name” | select primarysmtpaddress,emailaddresses
Set-UnifiedGroup -Identity “name” -PrimarySMTPAddress [email protected]
Set-UnifiedGroup -Identity “name” -EmailAddresses @{remove=”smtp:[email protected]”}
75. Confirm all dependencies have been removed. Replace the domainname with your domain name.
Get-MsolUser -DomainName domainname.com -all
Important:
76. Remove the domain from the source Microsoft 365 tenant
Important:
77. Add Mail Rules and Connectors at Destination
[If required]
78. Verify the domain
79. Verify changes
80. Check Domain
To check everything is setup as it should be, wait around an hour for all updates to take effect then launch: https://centralops.net/co/
Type in the domain name and check all records are set as in ‘View DNS Settings’ above.
81. Remove Email Forwarding at Destination
Log into EXO Powershell at Destination and run the following cmdlets for each user:
Set-Mailbox -Identity “DestinationUserEmailAddress” -ForwardingAddress $null -DeliverToMailboxAndForward $false
82. Add aliases for each user at Destination:
Set-RemoteMailbox -Identity “[email protected]” -EmailAddresses @{Add=”smtp:name1@domain”,”smtp:name2@domain”}
83. For each GROUP:
Set-DistributionGroup -Identity “groupname” -EmailAddresses @{add=”[email protected]”}
84. Change the TTL value on each MX record back to the original setting eg 1 hour
85. Migrate Mailboxes – Final Migration
Important: Allow time for the migration to complete
86. Resolve any BitTitan error messages
87. Delete Contacts at Destination
Connect to EXO at Destination and run the following cmdlet:
Import-csv “Backup_Destination_Contacts.csv”| ForEach-Object {
$DisplayName = $_.DisplayName
Remove-MailContact -Identity $Displayname}
88. Confirm the Contact has been deleted:
Import-csv “Backup_Destination_Contacts.csv”| ForEach-Object {
$DisplayName = $_.DisplayName
Get-MailContact -Identity $Displayname}
89. Set the default email address at Destination
For each USER:
Set-RemoteMailbox “[email protected]” -PrimarySmtpAddress “[email protected]”
90. For each GROUP:
Set-DistributionGroup -Identity ‘DisplayName’ -PrimarySmtpAddress “[email protected]” -EmailAddressPolicyEnabled $false
91. For each SHARED MAILBOX:
Important: Allow time for all changes to sync to O365.
Post-Migration Activities
92. Verify delegates / aliases have been correctly populated
Migrate Mailboxes – Final Migration
Important: Allow time for the migration to complete.
93. Resolve any BitTitan error messages
Select the accounts that errored
Click on the down arrow beside “Start” and select “Retry Errors”
In the “Retry Errors” window, review the settings
Click “Retry Errors”
Click on the “Refresh list” icon to get a status of the migration or click on the dashboard on the left-hand side menu
94. Execute End User Test Plan
Launch Outlook at Destination and verify the contents of the following:
Email
Contacts
Calendar
Send and Receive emails INTERNALLY and verify emails have been received
Send and Receive emails EXTERNALLY and verify emails have been received
Verify the sender’s email address
Send and Receive emails form a SHARED MAILBOX and confirm emails have been received.
Verify the sender’s email address
Send a test Calendar invite to a colleague and confirm the invite was received
95. Log into EXO Powershell at Destination
For each mailbox, remove the service account
Remove-MailboxPermission -Identity “User1” -User “BitTitan service account” -AccessRights FullAccess -InheritanceType All
96. Take ownership of Domain and DNS records
[Se non è già stato eseguito] – Se l'attuale proprietario ha apportato le modifiche richieste al DNS, diventa proprietario dei domini e dei record DNS.
Piano di ritorno
97. Riporta l'indirizzo e-mail predefinito al vecchio indirizzo e-mail
Set-RemoteMailbox “[email protected]” -PrimarySmtpAddress “[email protected]”
98. Per ogni UTENTE:
Accedere al server
Exchange locale Eseguire Exchange PowerShell ed eseguire i seguenti cmdlet:
Set-RemoteMailbox "[email protected]" -EmailAddresses @{remove="[email protected]"}
99. Per ogni GRUPPO:
Accedere al server
Exchange locale Eseguire Exchange PowerShell ed eseguire i seguenti cmdlet:
Set-DistributionGroup -Identity "groupname" -EmailAddresses @{remove="[email protected]"}
100. Verifica che gli attributi siano stati aggiornati:
Get-RemoteMailbox -Identità | selezionare userprincipalname,alias,primarysmtpaddress,emailaddresses
101. Ricrea i contatti a destinazione:
Accedi a EXO Powershell in Destinazione ed esegui i seguenti cmdlet:
Import-csv “Backup_Destination_Contacts.csv”| ForEach-Object {
$DisplayName = $_.DisplayName
$Email = $_.EmailAddresses
New-MailContact -Name $Displayname -ExternalEmailAddress $Email}
102. Abilitazione inoltro da Destinazione a CONTATTO
Accedi a EXO Powershell a destinazione
Esegui i seguenti cmdlet:
Set-Mailbox -Identity "[email protected]" -DeliverToMailboxAndForward $true -ForwardingAddress "[email protected]"
103. Invertire le modifiche al DNS
104. Conferma che tutte le dipendenze sono state rimosse. Sostituisci il nome di dominio con il tuo nome di dominio.
Get-MsolUser -DomainName nomedominio.com -all
105. Rimuovere il dominio dal tenant Microsoft 365 di destinazione
Importante :
Attendi fino a 60 minuti prima di aggiungere i domini al tenant di destinazione
O365 potrebbe pensare che il dominio sia ancora in uso
106. Aggiungi il dominio all'origine, quindi richiedi un record TXT per verificare che possediamo il dominio
107. Verifica il dominio
108. Verificare le modifiche
109. Controlla il dominio
Per verificare che tutto sia impostato come dovrebbe essere, attendi circa un'ora affinché tutti gli aggiornamenti abbiano effetto, quindi avvia: http://centralops.net/co/
Digita il nome di dominio e verifica che tutti i record siano impostati come in 'Visualizza impostazioni DNS ' sopra.
110. Se applicabile, aggiungi tutte le licenze Skype for Business e Teams degli utenti nel tenant di origine. Questo aggiungerà l'attributo SIP ai loro indirizzi proxy.
111. Ripristina l'indirizzo proxy originale per tutti gli utenti:
Set-Mailbox -Identità "alias" -EmailAddresses SMTP:[email protected],smtp:[email protected]
112. Ripristinare l'UPN per tutti gli utenti:
Import-csv “Backup_Mailboxes.csv”| ForEach-Object {
$NewUPN = $_.PrimarySmtpAddress
$alias = $_.Alias
$OldUPN = $alias + "@vivacityhealth.onmicrosoft.com"
Set-MsolUserPrincipalName -UserPrincipalName $OldUPN -NewUserPrincipalName $Newupn
}
113. Verifica che UPN, e-mail e indirizzo proxy siano stati aggiornati:
Get-Mailbox -Identità | selezionare userprincipalname,alias,primarysmtpaddress,emailaddresses
114. Modificare tutti gli indirizzi SMTP dei gruppi di distribuzione nel dominio nomedominio.onmicrosoft.com. Sostituisci il nome di dominio con il tuo nome di dominio.
Get-DistributionGroup -ResultSize Unlimited | select-oggetto PrimarySMTPAddress | export-csv -NoTypeInformation “DL.csv”
Import-csv DL.csv| ForEach-Object {
$ID = $_.
PrimarySmtpAddress $365Email = $ID.Split("@")[0] + "@domainname.onmicrosoft.com"
Set-DistributionGroup -Identity $ID -primarysmtpaddress $365Email}
115. Rimuovere tutti gli alias da ogni gruppo di distribuzione
$gruppi = Get-DistributionGroup -ResultSize Unlimited | Where {$_.Emailaddresses.count -gt 1}
foreach ($group in $groups) {
foreach ($email in $group.emailaddresses){
if ($email -ne “SMTP:”+$group.PrimarySmtpAddress){
Imposta -DistributionGroup -Identity $group.name -EmailAddresses @{Remove=$email}
}
}
Write-host $group.primarysmtpaddress “è stato elaborato” $
}
Ecco come funziona la migrazione da tenant a tenant Office 365.
Un tutorial che mostra come fare in modo che Microsoft PowerPoint 365 esegua automaticamente la presentazione impostando il tempo di avanzamento delle diapositive.
I Set di Stili possono fornire istantaneamente un aspetto curato e coerente a tutto il tuo documento. Ecco come utilizzare i Set di Stili in Word e dove trovarli.
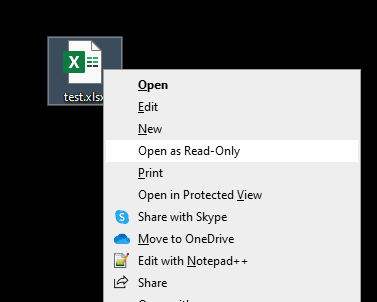
Forza un messaggio sui tuoi file Microsoft Excel per Office 365 che dice Apri come di sola lettura con questa guida.
Ti mostriamo un trucco per esportare facilmente tutti i tuoi contatti di Microsoft Outlook 365 in file vCard.
Scopri come abilitare o disabilitare la visualizzazione delle formule nelle celle di Microsoft Excel.
Scopri come bloccare e sbloccare celle in Microsoft Excel 365 con questo tutorial.
È comune che l
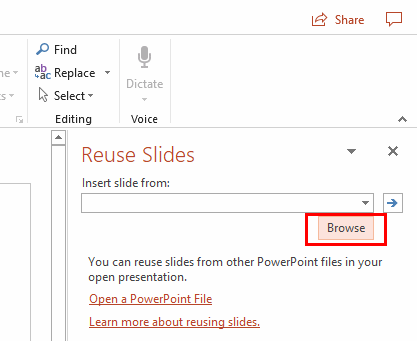
Un tutorial che mostra come importare le diapositive da un altro file di presentazione di Microsoft PowerPoint 365.
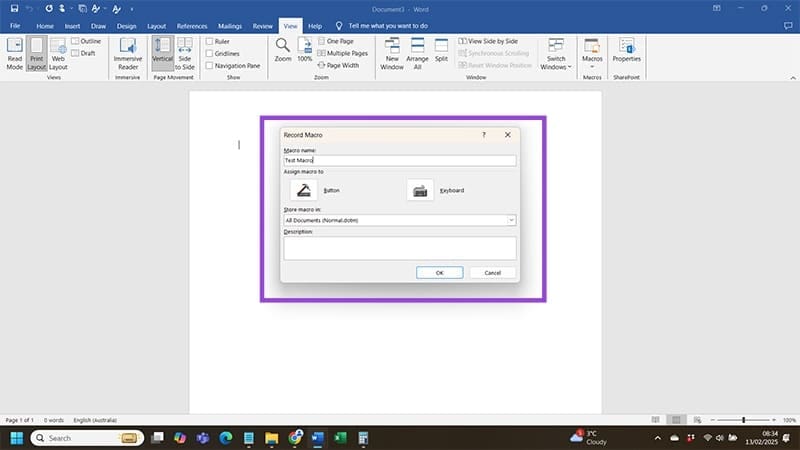
Scopri come creare una Macro in Word per facilitare l
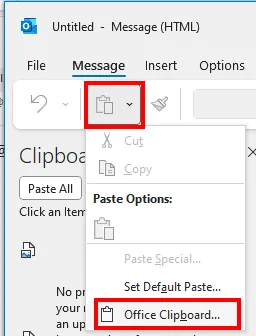
Ti mostriamo come abilitare o disabilitare le opzioni del clipboard visibile nelle applicazioni di Microsoft Office 365.


