Home
» How To
»
How Do You Clean the Inside of a Purse? A Safe Step-by-Step Method
How Do You Clean the Inside of a Purse? A Safe Step-by-Step Method
A purse can look spotless on the outside while the inside slowly collects crumbs, makeup dust, pen marks, lint, spilled lotion, and the stale smell that comes from carrying the same everyday items for months. The safest fix is not to pour cleaner into the bag or wash the whole purse in a sink. Start dry, identify the lining material, then add only as much moisture as the material and construction can tolerate.
That distinction matters because purse interiors are not all the same. Some are woven cotton or nylon. Others are suede, leather, coated textile, microfiber-like fabric, or a bonded lining attached to stiffeners and leather trim. A method that works on a removable cotton lining can stain natural leather, roughen suede, loosen adhesive, or leave tide marks on coated fabric.
Start with the easiest fix: empty the purse completely
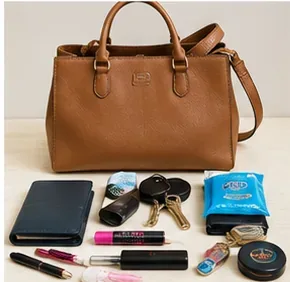
Take out everything, including items hidden in zip pockets, card slots, and small side compartments. Check for uncapped pens, broken cosmetics, leaking hand sanitizer, old receipts, gum wrappers, loose powder, coins, and food crumbs. If the lining can be gently pulled outward without forcing it, doing so may make the bottom corners easier to reach.
This first step is more important than it looks. Moisture turns dry crumbs and powder into paste, and a forgotten pen or lipstick can create a much harder stain while you are cleaning.
Empty every pocket before cleaning. Coins, crumbs, cosmetics, receipts, and uncapped pens are easier to deal with before moisture is introduced.
Remove crumbs and dust before using any liquid
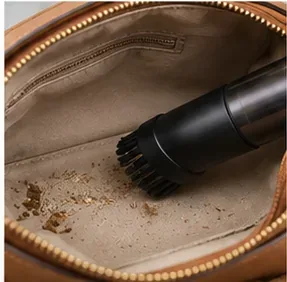
Turn the empty purse upside down over a trash can and shake it gently. Then use a clean soft brush, lint-free cloth, or a vacuum with a small brush attachment on low suction. Keep the nozzle moving and avoid pulling directly on loose seams, zipper tape, or a thin lining.
If the bag has a fragile lining, skip direct vacuum suction and use a soft brush to bring debris toward the opening. Dry cleaning is the least risky stage because it does not introduce water to leather trim, cardboard stiffeners, or glued construction.
Remove dry debris first with a soft brush or low-suction vacuum attachment, keeping the nozzle from pulling hard on loose lining or stitching.
Before spot-cleaning, identify the lining material
Look for a care card, material label, product page, or manufacturer cleaning instructions. Do not assume the inside is polyester just because the outside is leather. Dooney & Bourke, for example, lists 100% cotton woven linings on many current handbag collections, while other bags use different textiles.
Manufacturer guidance also shows why “just wash it” is risky. Longchamp advises using very little water on canvas, warns not to soak the fabric, and tells owners to avoid wetting leather parts. Its leather guidance notes that some natural leathers should never be wetted. See Longchamp care instructions and Longchamp material care guidance.
Interior material
Safer starting method
Main risk
Woven cotton or nylon lining
Dry debris removal, then carefully controlled spot cleaning if the maker permits
Water rings, dye transfer, saturation of backing or leather trim
Natural leather
Use the brand's leather-specific instructions
Darkening, spotting, finish change, stiffness
Suede or nubuck
Dry brushing with the type of brush the maker recommends
Water marks, flattened nap, color change
Coated or bonded textile
Minimal moisture and spot cleaning only if approved
Delamination, waviness, adhesive failure
Unknown or vintage lining
Dry cleaning only, then professional help for stains
Unpredictable dyes, weak fibers, old adhesives
For a washable fabric lining, make the cloth barely damp
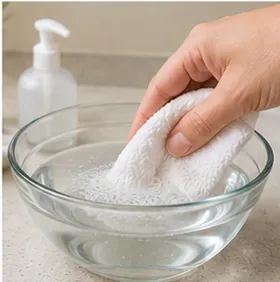
If the maker permits mild wet cleaning, mix a very small amount of mild, pH-neutral soap into cool or lukewarm water. Dooney & Bourke's current care guidance for nylon and woven cotton uses a soft cotton cloth slightly dampened with distilled water and mild bar soap, followed by a water-only wipe and complete drying. Longchamp likewise recommends a clean damp cloth or sponge with a small amount of mild pH-neutral white soap for applicable canvas, while specifically warning against soaking.
Those instructions support a useful general rule for fabric-lined purses: use less water than you think you need. The cloth should be damp enough to pick up soil but not wet enough to make the lining drip or soak through to the bag's structure.
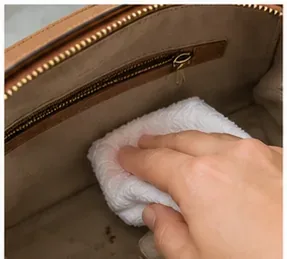
For a washable fabric lining, use only a small amount of mild soap in water and keep the cloth damp rather than dripping; the bag should not be soaked.
Clean the lining from light soil to heavier spots
Test first on a hidden corner. Press a clean white cloth against the test area and check whether color transfers. If the dye bleeds, the texture changes, or a dark water mark remains after the spot dries, stop home wet cleaning.
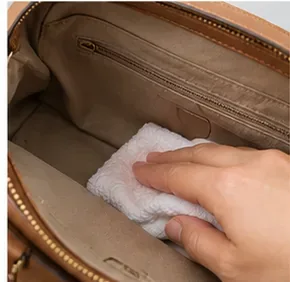
For ordinary dirt, wipe or blot rather than scrub. Work in small sections and keep leather trim, decorative piping, and hardware as dry as possible. If the lining is loose enough to pull partly outside the bag, support it while cleaning instead of stretching the stitches.
Do not flood the base of the purse. Structured bags may contain reinforcement materials that are not visible from the lining side and are not designed to be saturated.
Blot and wipe gently, working a small area at a time. Keep moisture away from leather trim, cardboard stiffeners, glued seams, and hardware unless the maker says they can get wet.
How should you handle corners, seams, and zipper areas?
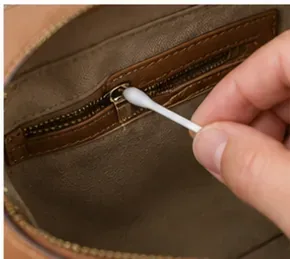
Use a cotton swab, soft white cloth, or very soft toothbrush for narrow seams only when the lining is sturdy enough. Light pressure is more useful than aggressive scrubbing. Dirt often accumulates beside zipper tape and in the folded corners of interior pockets, but these are also places where stitching and edge paint can be vulnerable.
Stop if the fabric pills, thread starts to lift, or dye comes off on the swab. A slightly visible stain is preferable to permanent abrasion.
Use a cotton swab or soft brush only for narrow seams and corners, and stop if color transfers or the fabric begins to fuzz.
What about lipstick, ink, and oily spills?
These stains are harder because they can contain dyes or oils rather than ordinary dirt. Blot fresh spills instead of rubbing them outward. For oil on a fabric that the manufacturer says can tolerate the treatment, use the brand's own stain directions rather than inventing a solvent mix.
Dooney & Bourke's current fabric-care guidance advises blotting excess oily material and, for some of its fabric products, briefly using talcum powder before brushing it away. The same company also warns that dye-containing marks such as ballpoint pen and lipstick may effectively re-dye a surface and may not be fully removable. See Dooney & Bourke care and cleaning and Dooney & Bourke non-leather bag care guide.
Avoid acetone, alcohol, bleach, makeup remover, and household degreasers unless the bag manufacturer specifically approves them for that exact lining. These products can remove dye, soften coatings, or create a larger ring than the original mark.
Rinse the cleaned area without soaking the purse
After soap treatment, use a second clean cloth dampened with plain water to lift detergent residue. Work over the same area without flooding it. Then press a dry white towel against the lining to absorb moisture.
The lining should feel damp at most. If water has reached leather trim, wipe that area according to the leather maker's instructions rather than adding more soap.
Follow with a separate clean, barely damp cloth to lift soap residue, then blot away excess moisture with a dry white cloth.
If the interior is leather or suede, change methods
Do not use the fabric-lining method by default on leather or suede. Longchamp's current leather care guidance emphasizes material-specific treatment and says natural leathers should not be wetted. For suede and nubuck, it recommends a suitable clean nylon brush and specifically says not to use leather cream on those surfaces.
If the purse has a suede interior with a greasy or ink stain, professional cleaning is often the lower-risk option. The nap can flatten or discolor quickly with water, detergent, and improvised solvents.
Let the purse air-dry completely
Leave the bag open in a well-ventilated room at normal room temperature. Do not put it on a radiator, aim a hot hair dryer into the lining, or leave it in strong direct sunlight. Longchamp specifically advises natural room-temperature drying and avoiding heat sources and direct sun.
If the bag needs support while drying, loosely fill it with clean, colorless tissue paper without packing it tightly. Keep the pockets open and let air reach the bottom corners. Replace damp tissue if necessary.
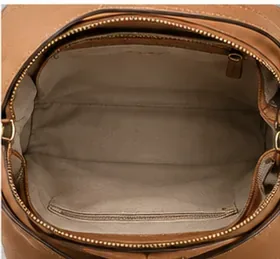
Leave the purse open to air-dry at room temperature. Keep it away from heaters and direct sunlight, and do not refill it until the lining is completely dry.
What if the inside still smells?
First make sure the lining is completely dry; trapped moisture itself can cause an unpleasant smell. Air the empty purse in a dry, ventilated room. If you use a commercial odor-control sachet, keep it sealed in its own pouch and do not rub loose powder into the lining unless the bag maker explicitly recommends that treatment.
A persistent sour, musty, smoke, perfume, or mildew-like odor may be embedded deeper than the visible lining. Repeatedly wetting the bag can make the problem worse. For a valuable purse, strong odor after careful drying is a reasonable point to use a professional handbag cleaner.
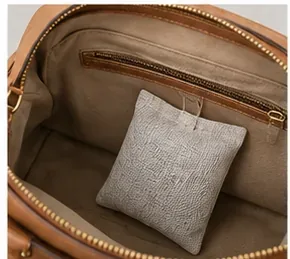
Finish by checking for moisture, odor, color transfer, stiff spots, and damaged seams. If you use an odor-control sachet, keep it contained and separate from the lining.
When should you stop cleaning at home?
Switch to professional care if the purse is valuable, vintage, heavily structured, made from exotic or natural leather, lined with suede, or has extensive ink, lipstick, oil, mold, or unknown dye transfer. Also stop if a hidden-area test shows color loss, if water creates a halo, if the lining is separating from its backing, or if stitching is weakening.
Home cleaning is most successful when the problem is loose debris, ordinary surface dirt, or a small fresh spill on a lining whose material and care method you know.
Final self-check: is the inside actually clean and ready to use?
No crumbs, grit, or loose powder remain in corners or pockets.
The lining is fully dry, including the bottom seams and zip pockets.
There is no tacky soap residue when you run a clean dry finger over the fabric.
No color transfers to a clean white cloth.
The lining has not puckered, stretched, or pulled away from its seams.
Leather, suede, hardware, and trim show no new water spots or finish changes.
Zippers and pocket closures still move normally.
Odor is improved rather than masked by strong fragrance.
If those checks pass, return the contents only after wiping dirty items before they go back in. Cosmetic pouches, pen cases, and small organizers can reduce future spills and keep powders and loose items from grinding into the lining.