Home
» How To
»
How to Clean an Ice Maker in a Freezer: A Beginner-Friendly Guide
How to Clean an Ice Maker in a Freezer: A Beginner-Friendly Guide
Cleaning an ice maker in a freezer is mostly about cleaning the parts that safely come into contact with stored ice: the removable ice bin, the area beneath it, the dispenser chute if your refrigerator has one, and any fixed surfaces the manufacturer says you may wipe. The mounted ice-making mechanism itself contains electrical, mechanical, and water-supply parts, so a good cleaning routine is deliberately conservative.
This guide is for a refrigerator with an ice maker built into the freezer compartment or freezer door. It is not a cleaning procedure for a freestanding or undercounter ice machine, which may have a dedicated reservoir, drain, sanitizer cycle, or descaling procedure. Whirlpool's current refrigerator-ice-maker guidance says to turn the unit off and disconnect refrigerator power before cleaning, while its 2025 refrigerator manual specifically says to turn the ice maker off before removing the storage bin for cleaning. See the manufacturer's refrigerator ice maker cleaning instructions and 2025 refrigerator owner's manual.
Before you start: know the parts
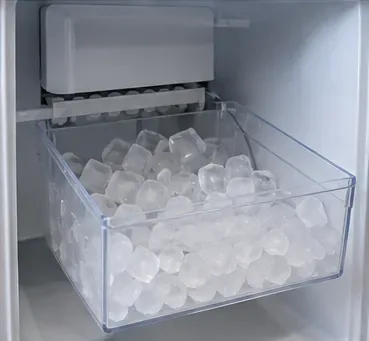
The ice storage bin is the removable bucket that catches finished cubes. The ice mold is the tray-like part of the mounted mechanism where water freezes into cubes; on many refrigerators it is not meant to be removed for routine cleaning. The ice dispenser chute is the passage that carries ice from the bin to an external dispenser. A fill tube delivers water to the ice-making mechanism.
These distinctions matter because the bin can usually be hand-washed, while the mounted mechanism, fill tube, sensors, wiring, and drive components should not be soaked, flooded, or dismantled unless your exact owner's manual tells you to do so.
What you need
A soft microfiber cloth or soft washcloth
A non-abrasive sponge
Warm water
Mild dish soap for removable parts
A clean towel or drying rack
An optional plastic utensil for loose ice clumps, if your manufacturer permits it
Your refrigerator's model-specific owner's manual
Avoid starting with bleach, strong disinfectant, abrasive powder, oven cleaner, or a heavy-duty descaler. Those products are not universal refrigerator-ice-maker cleaners. If your manual specifies an approved cleaner or sanitizer, follow that exact concentration and rinse procedure instead of improvising.
Quick reference: what to clean and how
Area
Beginner-safe approach
What to avoid
Ice storage bin
Hand-wash with warm water and mild soap, rinse, and dry thoroughly
Dishwasher unless the manual specifically says it is safe
Loose or frozen-on ice
Discard loose ice; use warm water or a warm damp cloth to loosen stuck ice
Knives, screwdrivers, picks, or other sharp tools
Accessible freezer surfaces
Wipe with a soft damp cloth, then dry
Flooding openings, sensors, motors, or wiring
Dispenser chute
Warm damp cloth, then dry completely
Sharp tools or leaving standing moisture
Mounted ice-maker mechanism
Only wipe accessible surfaces if your manual allows it
Disassembly, soaking, spraying cleaner into the mechanism
Fill tube or internal water path
Inspect visually; follow model-specific service instructions for internal contamination
Pushing brushes, swabs, chemicals, or tools into the line without instructions
How to clean an ice maker in a freezer
1. Turn the ice maker off
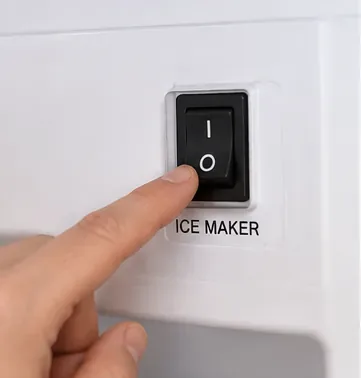
First stop ice production using the method for your refrigerator. Depending on the model, this may be an on/off switch, a shutoff arm, or a control-panel setting. Do not copy a button sequence from another refrigerator: control layouts vary widely.
Turning the ice maker off before removing the bin prevents new cubes from dropping into the empty freezer space. Whirlpool explicitly gives this instruction for freezer-mounted ice makers in its current refrigerator manual.
Turn off ice production using the control provided on your refrigerator; the exact switch, arm, or menu varies by model.
2. Disconnect power before cleaning fixed parts
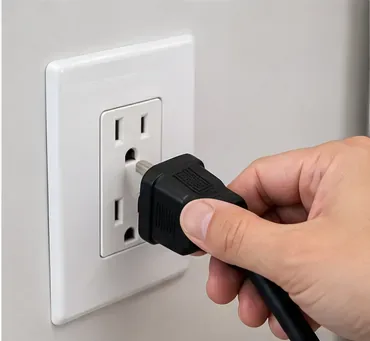
If you plan to wipe around the mounted ice-maker assembly rather than simply remove and wash the bin, disconnect the refrigerator's power as directed by the manufacturer. Keep the freezer door open only as long as necessary, and have your cloths and washing area ready before you start.
If the outlet is not safely accessible, do not pull or tilt a heavy refrigerator just to reach it. Check the owner's manual for the approved power-disconnect method or stop at removable-bin cleaning.
Disconnect refrigerator power before wiping fixed ice-maker components when the manufacturer's cleaning instructions require it.
3. Remove the ice bin and discard the old ice
Lift or slide out the storage bin according to your model's instructions and discard the ice. Do not save it for later: the purpose of cleaning is to start with a clean bin and fresh ice.
If the bin is frozen in place, do not force it. Samsung's June 14, 2026 guidance for a stuck refrigerator ice bucket says to let a frozen bucket defrost naturally and warns against sharp tools or heat sources such as a hair dryer. Whirlpool likewise warns against sharp objects for breaking up ice. See Samsung's stuck ice bucket guidance.
Remove the storage bin carefully and discard all existing ice before washing the bin.
4. Hand-wash the ice storage bin
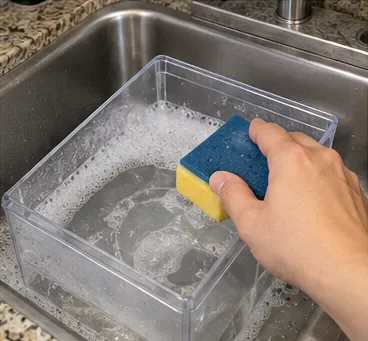
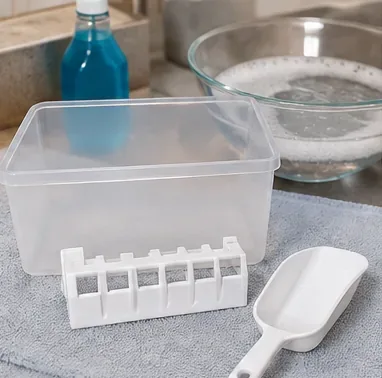
Wash the removable bin with warm water and mild dish soap using a soft sponge or cloth. Pay attention to corners, the bottom surface, and any removable scoop or simple removable insert your manual identifies as washable. Rinse thoroughly so no soap film remains.
If ice is frozen onto the bin, warm water can help melt it. Do not chip at the plastic with a knife or screwdriver. Current Whirlpool refrigerator guidance specifically recommends warm water for ice that needs to be melted and says to avoid harsh or abrasive cleaners.
Hand-wash the removable ice bin with warm water, mild soap, and a non-abrasive sponge.
5. Rinse and dry removable parts completely
Rinse the bin and any approved removable parts with clean water, then dry them thoroughly with a clean towel or let them air-dry. This step is more important than it looks: leftover water can freeze into a sheet or glue cubes together when the bin returns to the freezer.
Do not automatically put the bin in a dishwasher. Some ice bins and plastic components are not designed for dishwasher temperatures. Unless your exact manual says otherwise, hand-washing is the safer default.
After washing, rinse away soap and let the bin and approved removable parts dry fully before reassembly.
6. Wipe accessible ice-maker surfaces and the dispenser chute
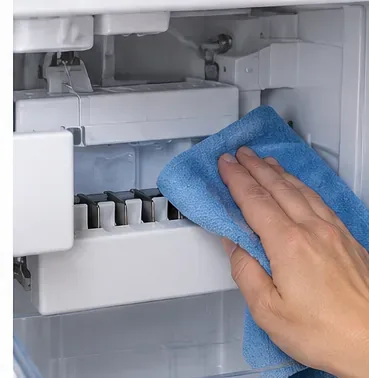
With power disconnected when required, use a soft damp cloth to wipe accessible surfaces around the ice maker and the area beneath the bin. If your refrigerator dispenses ice through the door, wipe the ice delivery chute with a warm damp cloth and dry it thoroughly. Whirlpool's product support recommends this warm-cloth method for ice particles that accumulate in the chute.
Do not pour water into the mounted mechanism, spray cleaner into openings, scrub wiring or sensors, or push a brush or cotton swab into the fill tube. If residue appears to be inside a sealed water path or inside a mechanism you cannot safely reach, that is a model-specific service issue rather than a routine wiping task.
Use a soft damp cloth on accessible surfaces only; keep excess water and cleaner away from electrical and mechanical openings.
7. Reinstall the completely dry bin
Once everything is dry, slide the storage bin back into its normal position. Make sure it seats fully and evenly. A bin that is not installed correctly can interfere with dispensing or ice production.
Reconnect refrigerator power if you disconnected it, then turn the ice maker back on using the model-specific control. Do not assume production resumes immediately; ice-making time and startup behavior vary by refrigerator.
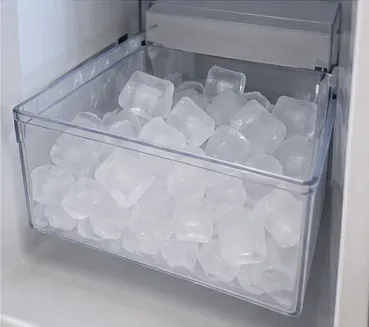
Reinstall the dry bin so it sits squarely beneath the ice maker before restoring normal operation.
8. Make fresh ice and follow any discard instructions
If an approved ice-machine cleaner contacted an ice-making surface or water path, follow the manufacturer's flushing and discard directions exactly. Whirlpool's refrigerator ice-maker cleaning article instructs users to run and discard a few cycles after cleaning with its approved cleaner so solution is removed from the system.
If you only hand-washed the removable bin with mild soap, rinsed it well, and did not introduce cleaner into the water path, do not invent a special flush routine. Check your manual for any startup or first-batch instruction that applies to your model.
After restarting the ice maker, follow your model's instructions for any batches that should be discarded before normal use.
Mistakes to avoid
Using a knife to free ice: sharp tools can damage the bin, chute, or dispenser mechanism.
Using a hair dryer on frozen parts: manufacturer support warns against forced heating because it can damage refrigerator components.
Reinstalling a wet bin: residual water can refreeze and promote clumping or sticking.
Spraying cleaner into the mounted mechanism: the ice maker includes electrical and mechanical parts that are not meant to be flooded.
Assuming vinegar, bleach, or descaler is universal: cleaning chemistry and rinse requirements depend on the appliance. Use only what your model documentation permits.
Forcing a stuck bucket: removal methods differ, and some bins have a latch, release mechanism, or specific lift-and-pull motion.
Replacing the water filter on a guessed schedule: use the refrigerator's filter indicator and owner's manual. Filter type and replacement interval vary by model and water conditions.
How often should you clean it?
There is no single cleaning interval that fits every freezer ice maker. Empty and clean the bin whenever it develops visible residue, stale odor, persistent clumping, or contamination from food or spills. If you rarely dispense ice, the chute may need attention more often because small ice particles can accumulate. Whirlpool notes that on some dispenser setups used infrequently, cleaning the bin, chute, and area beneath it every two weeks may be necessary; treat that as model-specific guidance rather than a universal schedule.
When cleaning is not enough
Stop and investigate the appliance instead of repeatedly cleaning it if the ice maker leaks, repeatedly freezes the bin in place, produces recurring heavy frost, has visible contamination inside a non-removable water line, or continues to produce bad-smelling or bad-tasting ice after the bin and accessible surfaces are clean.
Persistent frost can point to warm-air leakage, a door or gasket problem, or another mechanical issue. Samsung's refrigerator support notes that heavy frost may require a proper freezer defrost rather than scraping or heating the area. If you see a damaged fill tube, wiring, sensor, motor, or water connection, arrange model-specific service rather than dismantling the ice maker.
Final beginner checklist
Ice maker turned off before bin removal
Power disconnected before cleaning fixed parts when required
Old ice discarded
Bin hand-washed with warm water and mild soap
Bin rinsed and dried completely
Accessible surfaces and chute wiped without flooding the mechanism
No sharp tools or forced heat used on frozen parts
Bin reinstalled fully and squarely
Power and ice production restored
Any model-specific flush or first-batch discard instructions followed
The safest rule is simple: wash the parts designed to come out, gently wipe the parts designed to stay in place, and let the owner's manual decide anything involving disassembly, chemicals, the water path, or electrical components. That approach keeps a routine freezer ice-maker cleaning job practical without turning it into an unnecessary repair.