Home
» How To
»
How to Get Sticker Residue Off Clothes Without Damaging the Fabric
How to Get Sticker Residue Off Clothes Without Damaging the Fabric
Sticker residue on clothing is usually easier to remove than it looks, but the safest method is not to reach for the strongest solvent first. Start with the garment’s care label, remove as much adhesive as you can mechanically, pretreat the spot, and only escalate to a fabric-safe solvent if the residue remains.
The basic approach is well established. The American Cleaning Institute’s stain-removal guide recommends hardening adhesive with ice or cold water, scraping it with a dull edge, pretreating, rinsing, and laundering. The Federal Trade Commission’s care-label guidance explains why the label matters: U.S. garment care instructions are intended to tell you which regular cleaning procedures can be used without substantial harm.
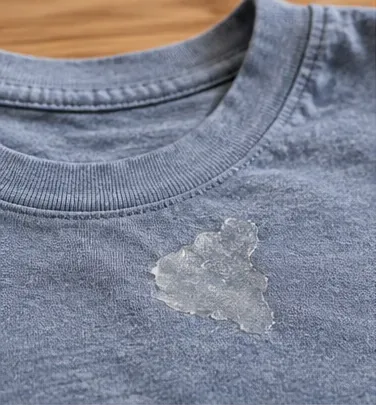
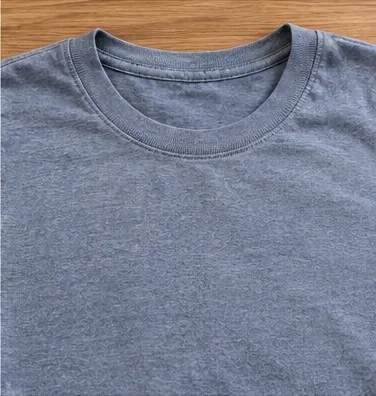
Start by identifying exactly where the sticker glue remains and whether the fabric itself shows discoloration or damage.
What You Need Before You Start
You do not need a cabinet full of specialty chemicals. For most washable everyday clothing, start with a small set of tools and use the least aggressive option that works.
Ice cubes in a plastic bag or cold water
A dull butter knife, spoon edge, or plastic scraper
Liquid laundry detergent or a prewash stain remover
Clean white cloths or cotton pads
A soft toothbrush or laundry brush, used gently
Optional: rubbing alcohol or a fabric-safe adhesive remover, only after a spot test and only when compatible with the garment
Gather simple tools first. A solvent such as rubbing alcohol is an optional escalation step, not the default treatment for every fabric.
How to Get Sticker Residue Off Clothes Step by Step
1. Read the care label before applying anything
Check whether the garment is machine washable, hand washable, or dry-clean-only. Also note any warnings about bleach, water temperature, or drying. This should override generic stain-removal advice.
If the item is silk, leather, suede, velvet, heavily embellished, vintage, or marked dry-clean-only, household solvent experiments are a poor tradeoff. A professional cleaner is the safer choice, especially when the garment is valuable or colorfastness is uncertain.
For a washable garment, choose a hidden area such as an inside seam and test any stain remover or solvent there first. Let the test area dry before deciding that the product is safe. Color change, stiffness, surface damage, or dye transfer to your white cloth are signs to stop.
2. Peel away any remaining sticker and harden the adhesive
If part of the sticker is still attached, peel it slowly rather than yanking it. Then place ice in a sealed bag and hold it against the sticky area, or use cold water, to firm up the adhesive. Hardening makes it easier to remove the bulk of the residue without smearing it deeper into the fibers.
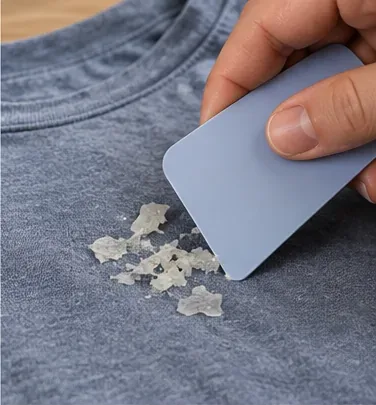
Use a dull edge to lift the residue. Work from the outside toward the center and keep the tool nearly flat against the fabric. Do not use a razor blade or sharp knife; cutting or shaving the fibers creates permanent damage that no stain remover can fix.
Lift adhesive with a dull plastic edge instead of a sharp blade, using light pressure so the fabric surface is not cut or abraded.
3. Pretreat the sticky area
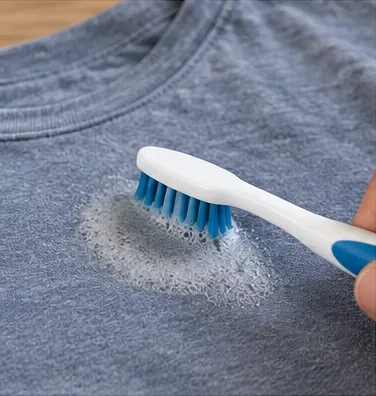
Once the loose material is gone, apply liquid laundry detergent or a prewash stain remover to the remaining spot. Work in only enough product to coat the residue. If the garment’s care instructions allow it, gently massage the fabric with your fingers or use a soft brush with short, light strokes.
The goal is to loosen adhesive from the fibers, not to scrub the fabric aggressively. Excessive rubbing can spread a sticky patch, roughen knits, and distort delicate weaves. The American Cleaning Institute advises pretreating stains and laundering according to the fabric-care instructions rather than jumping straight to maximum heat or harsh chemicals.
Work detergent into the affected area gently; vigorous scrubbing can spread residue or damage the fabric surface.
4. If residue remains, use a solvent only after a spot test
Some sticker glues respond to alcohol, but this is the point where fabric type matters most. The University of Georgia Cooperative Extension’s adhesive and tape stain guidance recommends testing color first before using alcohol on cellulose-tape residue. The safest interpretation is simple: alcohol is an optional second-line treatment, not a universal one.
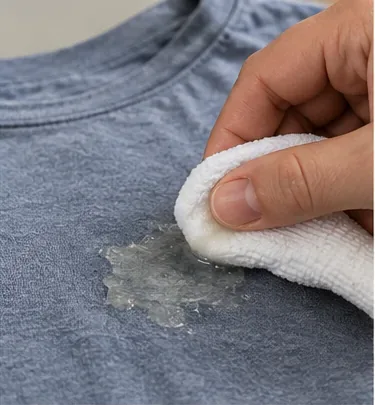
If the hidden-area test is successful and the care label does not prohibit the treatment, dampen a clean white cloth with a small amount of rubbing alcohol and blot the residue. Do not saturate a large section of the garment. Transfer loosened adhesive onto the cloth, moving to a clean part of the cloth as needed.
A commercial adhesive remover labeled for clothing can also be appropriate when used exactly as directed. For example, the Goo Gone Original product directions list fabric among compatible surfaces but instruct users to pretest first and exclude materials such as silk, leather, and suede. Product directions can change, so check the current label on the container you actually use.
If a spot test confirms compatibility, blot a stubborn adhesive patch with a small amount of approved solvent rather than soaking the fabric.
5. Gently loosen the residue again
After pretreatment or a compatible solvent has had a short time to work according to its label, lift the softened adhesive with the dull scraper or your fingernail through a clean cloth. Repeat small cycles of blotting and lifting instead of adding a large amount of product all at once.
If the spot becomes gummy and spreads, stop scraping. Blot away excess product, let the fabric stabilize, and return to gentle pretreatment. More pressure is not necessarily more effective.
6. Rinse thoroughly
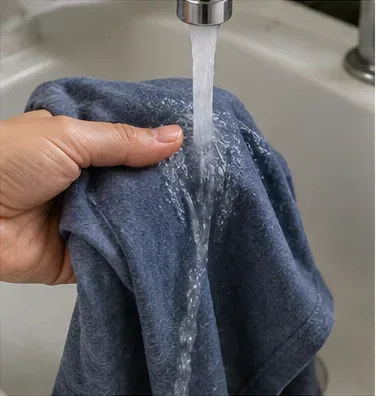
Rinse the treated area with water at a temperature permitted by the care label. If practical, rinse from the back of the fabric so water helps push loosened residue outward rather than farther through the fibers.
This step matters when you have used a stain remover, detergent concentrate, alcohol, or an adhesive-removal product. Leaving treatment chemicals in the fabric can cause its own discoloration, odor, or stiffness.
Rinse the treated area well to carry away loosened adhesive and cleaning-product residue before the garment goes into the wash.
7. Launder according to the care label
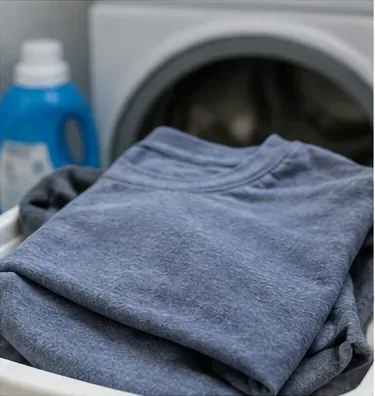
Wash the garment with laundry detergent using the warmest water that is safe for that specific item, not simply the hottest setting on the machine. If the label calls for cold water, use cold water. If it calls for hand washing, hand wash.
Do not add chlorine bleach unless the garment label and the stain-removal product instructions both permit it. Bleach does not solve every adhesive problem and can create irreversible color loss.
After the sticky material has been lifted and rinsed away, wash the garment exactly as its care label directs.
8. Air-dry first, then inspect
Do not put the garment into a heated dryer until you are satisfied that the residue is gone. The American Cleaning Institute specifically recommends repeating stain-removal steps when a stain remains and avoiding the dryer until removal is complete. Clorox’s current sticker-residue guidance for clothing likewise ends with air-drying and repeating treatment if needed.
Let the garment air-dry, then inspect it in good light. Feel the area with clean fingers. A patch can look clear while still feeling tacky. If stickiness remains, repeat the pretreat-rinse-wash cycle rather than baking the residue in with dryer heat.
Inspect the garment only after air-drying; repeat treatment if the area still feels tacky before using a heated dryer.
Quick Reference by Fabric Type
Fabric or garment
Best starting approach
What to be careful about
Cotton and sturdy washable blends
Cold treatment, dull scraping, detergent or prewash stain remover, then laundering
Spot-test any alcohol or adhesive remover before wider use
Polyester and other washable synthetics
Use the same low-aggression sequence and follow the care label
Do not assume a solvent is safe just because the fabric is synthetic
Silk, leather, suede, velvet, delicate or embellished items
Use care-label instructions and consider professional cleaning
Avoid improvised solvent treatment that can alter color, finish, or texture
Dry-clean-only clothing
Remove loose sticker material gently and take the item to a professional cleaner
Do not turn a dry-clean-only garment into a home solvent experiment
What If the Sticker Went Through the Dryer?
Dried-on residue may take more than one cycle of treatment. Start over with the same sequence: cool the adhesive, lift what you can, pretreat, rinse, wash, and air-dry to inspect. Do not compensate for an older residue spot by immediately using more concentrated solvent or aggressive scraping.
Patience is usually safer than intensity. Several controlled treatments are less likely to damage fibers or dye than one heavy application of an unsuitable chemical.
Common Mistakes to Avoid
Putting the garment in the dryer before checking it. Air-dry first so you can repeat treatment if needed.
Skipping the care label. The same adhesive can require a different treatment on cotton than on a delicate or dry-clean-only garment.
Using a sharp scraper. A dull edge can lift glue; a blade can cut yarns and leave a permanent mark.
Soaking the garment in solvent. Use the minimum amount needed and follow the product label.
Assuming rubbing alcohol is safe for every fabric. Spot-test first and avoid it when the care label or material guidance says not to use it.
Mixing cleaners. Do not combine stain removers, bleach, ammonia, solvents, or other chemicals unless the product instructions explicitly direct you to do so.
Scrubbing hard. Adhesive removal is mainly a lift, pretreat, rinse, and repeat process.
A Simple Decision Rule
For an ordinary washable shirt, the practical sequence is: care label first, cold treatment, dull scraping, laundry pretreatment, rinse, wash, and air-dry. Add a pretested fabric-safe solvent only if the basic process leaves residue behind.
That order matters because every escalation carries more risk. Starting gently gives you the best chance of removing sticker residue without replacing one small sticky patch with faded dye, damaged fibers, or a new chemical stain.