Home
» How To
»
How to Clean a Pool Sand Filter: Backwash, Rinse, and Know When to Go Deeper
How to Clean a Pool Sand Filter: Backwash, Rinse, and Know When to Go Deeper
A pool sand filter is usually cleaned by reversing water through the sand bed, not by opening the tank and scrubbing it every time. The practical goal is simple: restore normal flow and bring filter pressure back near the system’s established clean baseline without sending dirty water back to the pool.
This guide covers swimming-pool sand filters that use a multiport or similar backwash valve. It does not apply to drinking-water sand filters, aquarium filters, septic sand filters, or every specialty pool system. Valve positions, allowed pressure, backwash duration, media type, and service procedures vary by model, so the owner’s manual remains the final authority.
What a successful sand-filter cleaning should achieve
Do not judge the job only by how long the pump ran in BACKWASH. A good result has several observable signs. If those signs do not appear, repeating the same procedure indefinitely is usually less useful than changing the diagnosis.
What to check
Good result
When to change approach
Backwash water
Discharge or sight-glass water becomes visibly clearer.
Water stays dirty after a reasonable model-approved cycle, or flow is weak.
Filter pressure
Pressure returns close to the filter’s known clean baseline.
Pressure remains materially above baseline after a correct backwash and rinse.
Pool return flow
Return jets regain normal strength.
Flow remains poor even though filter pressure looks normal.
Leaks and media
No new leaks, and no filter sand appears in the pool.
Sand enters the pool, the valve leaks internally, or the tank/pipework leaks.
Manufacturer thresholds are not identical. For example, the current Hayward high-rate sand-filter manual instructs owners to backwash when pressure rises about 8–10 psi above the recorded clean pressure, while other models may use different guidance. Use your own filter’s manual rather than copying a number from another system.
Before cleaning: identify the system and make it safe
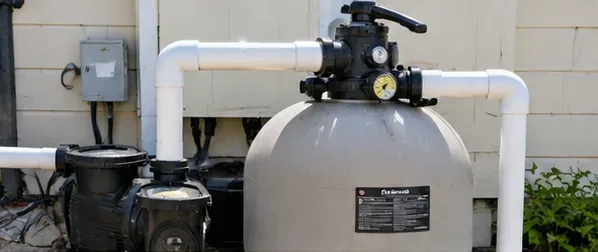
Find the filter model, valve type, pressure gauge, waste/backwash outlet, and any air-relief device. Make sure the waste hose is unrolled and not kinked, and route discharge water to a location allowed by local rules. A backwash can move a substantial volume of water, so do not direct it where it can undermine equipment pads, flood neighboring property, or flow back toward electrical equipment.
Never move a multiport valve while the pump is running. Major manufacturers explicitly instruct users to stop the pump before changing valve positions. If the tank must be opened for service, shut off electrical power and automatic controls, isolate the system as required, and fully relieve internal pressure before loosening clamps, lids, or fittings. Stand clear of the filter when restarting a pressurized system.
How to clean a pool sand filter in 8 steps
1. Stop the pump and prepare the waste path
Turn the circulation pump off before touching the valve. If your system has automation, make sure it cannot restart unexpectedly while you are changing settings. Open any required waste-line valve and lay out the backwash hose so water can discharge freely.
If you already know the filter’s clean pressure, keep that number available for comparison later. If you do not, record the pressure after this cleaning once the system is operating normally; that becomes a much more useful maintenance reference than a generic pressure target.
Start with the pump off. Confirm the waste line is ready and note the filter’s normal clean-pressure baseline before moving the valve.
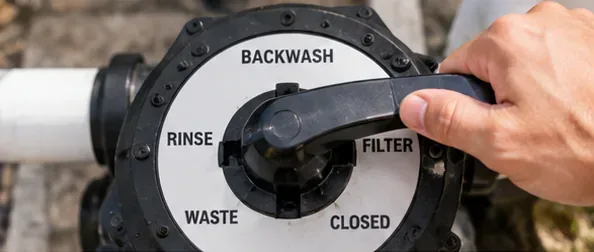
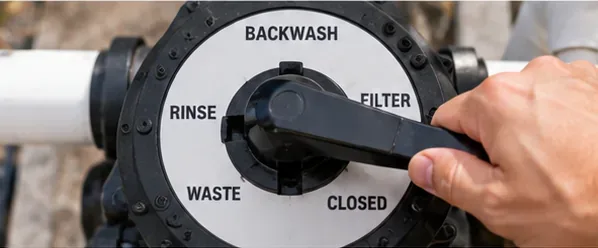
2. Set the valve to BACKWASH with the pump off
Press or operate the valve handle exactly as the manufacturer specifies and place it fully into the BACKWASH detent. Do not leave the selector between positions. Confirm that the suction path from the pool and the waste path are open so the pump is not dead-headed against a closed line.
Some sand filters use a slide or push-pull valve instead of a six-position multiport valve. The flow direction is still reversed for cleaning, but the handle positions and the presence of a separate RINSE stage can differ. Follow the procedure for the valve actually installed on your system.
With the pump stopped, select the exact BACKWASH position shown on your valve. Valve layouts differ, so use the label and model manual.
3. Run BACKWASH until the water clears
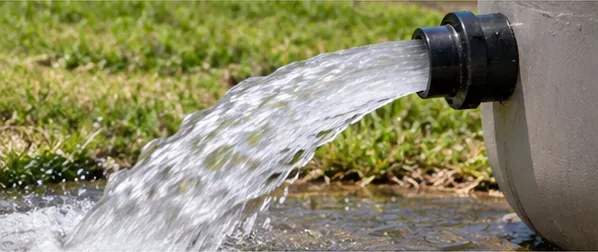
Start the pump and watch the backwash sight glass, if fitted, or the discharged water. The goal is to flush trapped debris out of the sand bed until the waste stream becomes clear. Hayward’s current residential manual describes roughly two minutes or less depending on dirt accumulation, while a Pentair Sand Dollar/Cristal-Flo II guide gives about three minutes or until the backwash water is clean. The visible result and your model instructions matter more than forcing every filter to run for the same number of minutes.
Watch for a kinked waste hose, unusual vibration, leaks, or unexpected pressure. Stop the pump if anything looks abnormal.
Run the backwash cycle and watch the sight glass or discharge water. The useful endpoint is clear water, not an arbitrary timer alone.
4. Stop the pump and run the RINSE stage
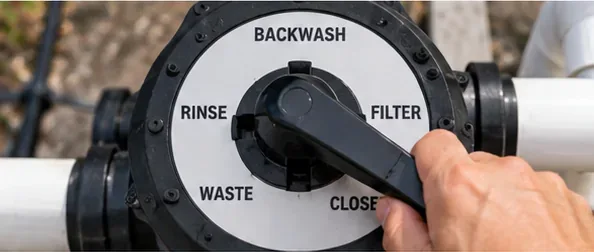
When the backwash water is clear, stop the pump. Move the valve to RINSE if your system provides that position, then restart the pump for the duration specified by the manufacturer. Rinsing settles the sand bed and sends residual dirty water to waste instead of returning it to the pool.
Typical manufacturer examples are short: Hayward describes about 30–60 seconds for the cited residential filter, while Pentair’s cited guide specifies about 30 seconds. Treat those as examples, not universal settings.
Stop the pump again before changing positions, then use RINSE if your multiport valve and manufacturer instructions call for it.
5. Stop again, return to FILTER, and restart
Stop the pump before moving the valve from RINSE to FILTER. Verify that the normal pool-return line is open, then restart the pump. If your filter has a manual air-relief procedure, use it exactly as described in the manual and remain clear of the tank while the system repressurizes.
Look for steady return flow to the pool, water leaks around unions or the valve, and abnormal sounds from the pump. Do not continue running a system that cannot maintain prime or shows a pressurized leak.
After rinsing, stop the pump and return the valve to FILTER before restarting normal circulation.
6. Evaluate the result with pressure and flow
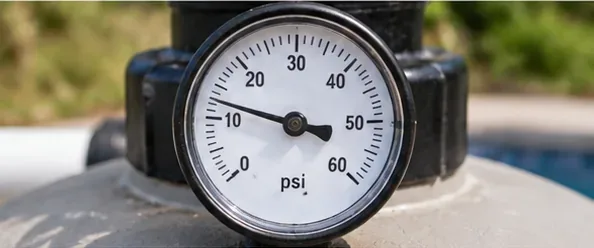
Once circulation stabilizes, read the pressure gauge and compare it with the known clean-pressure baseline. The absolute gauge number is less informative than the change from the same system when clean because pump speed, plumbing, filter size, valves, heater configuration, and elevation all affect pressure.
A successful backwash usually produces two linked improvements: lower filter pressure and stronger normal return flow. If pressure remains high after a correct backwash, do not immediately assume the sand must be replaced. Check the manual’s troubleshooting guidance and look for restrictions, a dirty or oil-loaded media bed, closed return valves, scale, or other system problems.
Judge the result by pressure and flow. A successful cleaning should bring pressure back near the established clean baseline and improve return flow.
7. Deep-clean or inspect the media only when the basic clean is not enough
Routine maintenance normally stops after backwash, rinse, and verification. Opening the filter is a different service task. Consider a deeper clean only when a proper backwash no longer restores performance, the manufacturer recommends chemical cleaning, or inspection is needed for a suspected internal problem.
Pentair’s Sand Dollar/Cristal-Flo II guidance, for example, describes using an industry-standard filter cleaner to remove oil, scale, and rust from the sand bed when needed. That procedure is model-specific and includes draining steps, soaking, and a subsequent backwash. Follow the cleaner label and the filter manual exactly. Do not improvise by mixing pool chemicals, acids, chlorine products, or household cleaners; incompatible chemicals can create hazardous reactions and may damage equipment.
Opening the tank is not part of routine backwashing. Inspect internally only after isolating power, relieving pressure, and following the filter manual.
8. Replace sand only when evidence supports it
Sand replacement should not be treated as the automatic next step after every disappointing backwash. Media may need to be removed because it is contaminated, because internal components require repair, or because the manufacturer’s inspection criteria indicate that the bed is no longer serviceable. Commercial Pentair guidance, for example, calls for media removal when the bed is contaminated or internal inspection and repair require access.
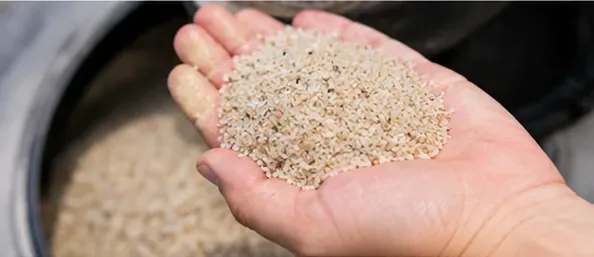
If replacement is justified, use the exact media specification and quantity listed for your filter. Do not substitute play sand, masonry sand, or an arbitrary bag labeled simply “sand.” Incorrect grain size or loading can reduce filtration quality, create excessive pressure loss, or allow media to escape through the laterals.
Do not replace sand on a fixed schedule alone. Replace media when its condition, contamination, or a manufacturer-directed repair justifies it.
How often should you backwash a sand filter?
Use filter condition rather than a rigid weekly schedule. The most useful trigger is a meaningful rise above the clean-pressure baseline together with reduced flow, using the threshold in your owner’s manual. A pool that has just been opened, has a heavy debris load, or is clearing an algae event may need more frequent cleaning for a period. A lightly used, well-balanced pool may go much longer.
Backwashing unnecessarily wastes water and may temporarily disturb the settled sand bed, so “more often” is not automatically better. Record clean pressure after service and use that reference the next time performance changes.
When backwashing does not solve the problem
Symptom after cleaning
What it may indicate
Next useful check
Pressure stays high and flow stays weak
Media fouling, return-side restriction, scale, or an incomplete backwash.
Verify valves and plumbing, repeat only if the first procedure was clearly incomplete, then consult the manual for chemical cleaning or service.
Pressure is lower than normal and flow is weak
Possible suction restriction, air leak, clogged pump basket, low water level, or pump/impeller issue.
Inspect the pump and suction side before blaming the filter media.
Pressure looks normal but the pool remains cloudy
Water chemistry, algae, circulation pattern, filter sizing, or particles outside the filter’s practical capture range.
Test and correct water chemistry and confirm adequate circulation time.
Stop treating it as a cleaning problem and inspect/service the filter internals.
Water leaks from the valve or waste line in FILTER mode
Valve seal, spider gasket, actuator, or internal valve wear.
Service the valve according to its parts diagram instead of repeatedly backwashing.
Common mistakes that reduce cleaning quality
Turning the valve while the pump runs: this can damage the valve or create unsafe pressure conditions.
Backwashing by timer alone: use water clarity, pressure, flow, and the model manual together.
Skipping RINSE when the valve requires it: residual dirty water can be sent back toward the pool.
Using another model’s pressure limit: working-pressure ratings and cleaning thresholds vary.
Opening the tank for routine cleaning: a properly functioning sand filter is normally cleaned hydraulically by backwashing.
Replacing sand before diagnosing plumbing or pump problems: poor flow is not always a media problem.
Using unspecified media: use only the sand or alternative media size and quantity approved for the specific filter.
The limit of what filter cleaning can fix
A clean sand filter can improve circulation and remove suspended particles within the filter’s capability, but it cannot correct every cause of cloudy or unhealthy pool water. Sanitizer level, pH, algae control, circulation design, pump performance, bather load, debris, and water balance all affect clarity. If the filter’s pressure and flow return to normal but the pool does not clear, the next step is broader water-quality diagnosis rather than more backwashing.
Likewise, cleaning cannot repair a cracked tank, damaged lateral, worn multiport valve, broken gauge, leaking plumbing, or undersized equipment. Stop and service the system when the evidence points to a mechanical fault.
Official references
Manufacturer procedures were checked in September 2026. Because product revisions differ, match the manual to the exact model on your equipment label before servicing it.