Home
» How To
»
How to Clean a Coffee Grinder Safely: An 8-Step Guide for Burr and Blade Grinders
How to Clean a Coffee Grinder Safely: An 8-Step Guide for Burr and Blade Grinders
A coffee grinder can look clean from the outside while still holding a surprising amount of coffee dust, chaff, and oily residue around the burrs, blade chamber, and grounds chute. That buildup can contribute to stale aromas, slower grinding, clumping, and flavor carryover between coffees. The safest cleaning method depends on the grinder design, so the first rule is simple: use your model's manual as the final authority.
Illustrative example: imagine Alex, a home coffee drinker, notices that his morning coffee tastes slightly stale even after opening a fresh bag. His burr grinder also has a visible ring of dark coffee residue under the hopper. This is a hypothetical example, not a product test or a reported customer experience. We will use Alex's situation to show how a careful cleaning routine works in practice.
Before You Start: Know What Kind of Grinder You Have
Most home grinders fall into two broad categories. A burr grinder crushes beans between two abrasive surfaces, usually conical or flat burrs. A blade grinder uses a fast-spinning blade inside a small chamber. Burr grinders generally have more removable parts and more places where grounds can collect, while blade grinders have a simpler chamber but require extra care around the sharp blade.
Manufacturer guidance matters because removable parts and water resistance vary by model. For example, OXO instructs users of its Brew Conical Burr Grinder to unplug the unit, remove the upper burr, and clean the burrs and grounds chute with a small bristle brush, while specifically warning against water or other liquids inside the grinder. Breville manuals similarly direct users to brush the burrs and chute and to keep cleaning procedures model-specific. See the OXO Brew Conical Burr Grinder instruction booklet and Breville's coffee grinder care and cleaning manual.
What You Need
A soft, dry grinder brush or small clean bristle brush
A clean microfiber cloth
Mild dish soap and warm water for parts your manual says are washable
A clean towel or drying rack
A small container for removed beans
Your grinder's instruction manual
Optional: a grinder-cleaning product specifically approved for your type of grinder
Avoid improvising with sharp metal tools around burrs or electrical parts. Do not immerse the motor base. Do not put burrs, the grind chamber, or other internal assemblies under running water unless the manufacturer explicitly says those parts are washable.
How to Clean a Burr Coffee Grinder in 8 Steps
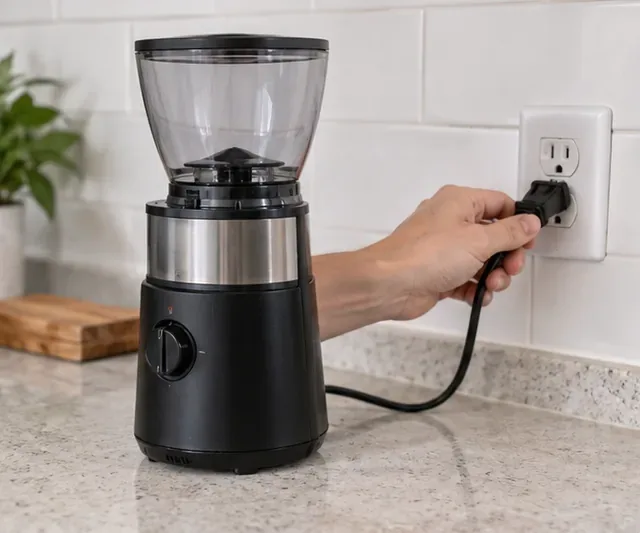
1. Empty the Beans, Run Out Loose Grounds, and Unplug the Grinder
Start by removing the beans from the hopper. If your manual permits it, briefly run the grinder empty to clear loose beans or grounds from the burr area, then switch it off and unplug it before opening or touching internal parts. OXO, Breville, and other manufacturers make the unplugging step explicit for internal cleaning.
In Alex's example, he returns the remaining beans to an airtight container, runs the grinder only long enough to clear loose coffee, and disconnects the power before taking anything apart.
Step 1: Disconnect power before opening or cleaning the grinder. Remove beans first and follow your model's instructions for clearing loose grounds.
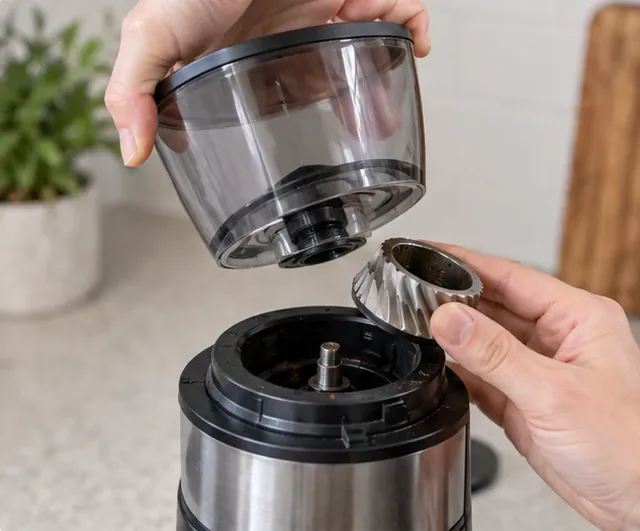
2. Remove Only the Parts Your Manual Says Are Removable
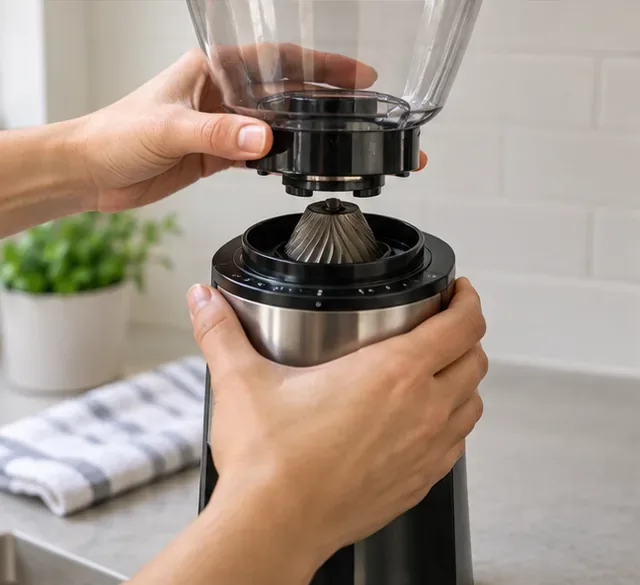
Take off the hopper and remove the upper burr only if your grinder is designed for user removal. Many conical-burr grinders allow the upper burr to lift or twist out, but the exact release mechanism varies. Do not force a burr carrier, adjustment ring, or fastener that does not move as described in the manual.
Keep small washers, seals, or clips in order if your model includes them. A quick phone photo before disassembly can help you remember the original orientation, but the manual should still be your reference for reassembly.
Step 2: Remove the hopper and user-serviceable burr components only as directed by the grinder manufacturer.
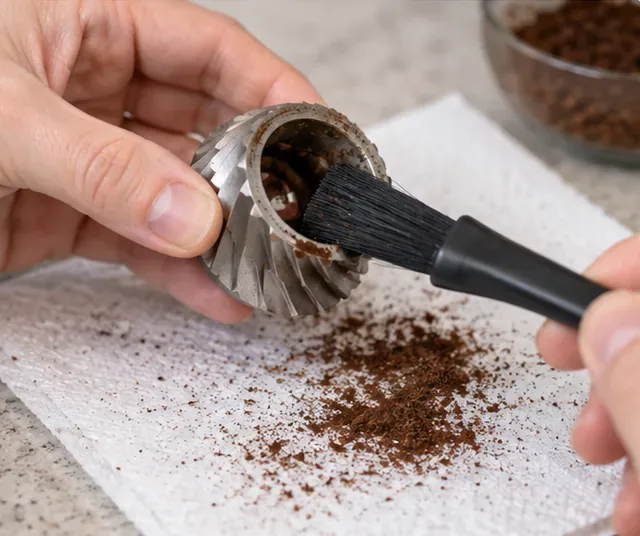
3. Dry-Brush the Removable Burr
Use a soft, dry brush to loosen coffee particles from the teeth, grooves, and back side of the removable burr. Work over a towel or tray so the debris is easy to collect. Avoid soaking the burr unless the manufacturer specifically authorizes it; water can cause grounds to stick inside some grinders and may be unsuitable for metal burr assemblies.
For Alex, this is where most of the dark residue becomes obvious. Brushing is more important than polishing: the goal is to remove loose grounds and accumulated coffee material without bending, scratching, or misaligning the burr.
Step 3: Brush the removable burr dry, working debris out of the teeth and crevices without soaking the burr.
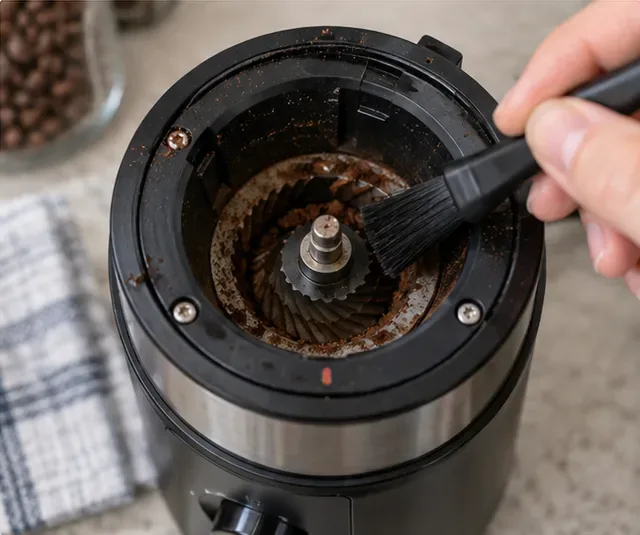
4. Brush the Lower Burr Area and Grounds Chute
Next, brush loose grounds from the exposed burr chamber and the path that carries grounds toward the collection bin or portafilter. Use gentle strokes and keep the brush away from any fragile sensors, wires, or seals. If the chute is packed with coffee, consult the model's clog-clearing instructions rather than forcing a hard object into an unknown mechanism.
Baratza's maintenance guidance notes that coffee oils, fine particles, and chaff can build up in the grind chamber and exit chute, and recommends routine brushing for its grinders. Its current cleaning guidance also notes that dark roasts can leave more oil and may require more frequent care. See Baratza's Grinder Cleaning Essentials.
Step 4: Brush the lower burr area and grounds path gently, keeping liquids out of the grinder's internal chamber unless the manual says otherwise.
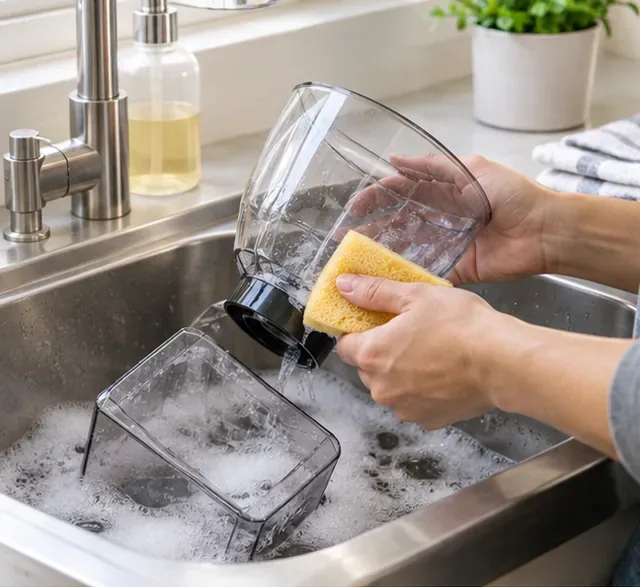
5. Wash the Hopper and Grounds Bin Only If They Are Washable
Many grinders have plastic hoppers, lids, and grounds bins that can be washed with warm soapy water after they are removed from the motor base. Breville and Baratza both provide examples of washable hopper or bin parts in their care instructions, but this is not a universal rule for every grinder.
Wash only the parts your manual identifies as safe for water. Keep electronic lids, anti-static components, integrated scales, metal burr assemblies, and the motor housing dry unless your manufacturer gives different instructions.
Step 5: Hand-wash only the removable parts your manual identifies as washable; keep the motor base and internal burr area out of the sink.
6. Dry Washable Parts Completely
Rinse away soap residue and let washed parts dry fully before they go back on the grinder. Water droplets around the hopper throat or grind path can make coffee dust cling and form paste-like buildup. Drying is especially important if a washable part sits directly above the burr chamber.
In the illustrative scenario, Alex leaves the hopper and grounds bin on a clean towel until no moisture remains. He does not rush reassembly just because the outside feels dry.
Step 6: Let washable parts dry completely before reassembly so moisture does not enter the grind chamber or trap coffee dust.
7. Reinstall the Burr, Hopper, and Adjustment Parts Correctly
Reassemble the grinder in the reverse order specified by the manual. Seat the removable burr fully, lock any burr carrier or hopper ring into its correct position, and restore the grind setting if you changed it during cleaning. A burr that is not seated correctly can produce abnormal noise, inconsistent grind size, or a jam.
Do not use force as a substitute for alignment. If the hopper will not lock or the adjustment ring suddenly feels unusually tight, stop and check the manual before powering the grinder.
Step 7: Reassemble the burr and hopper carefully, confirming that removable parts seat and lock in their intended positions.
8. Test With a Small Amount of Coffee
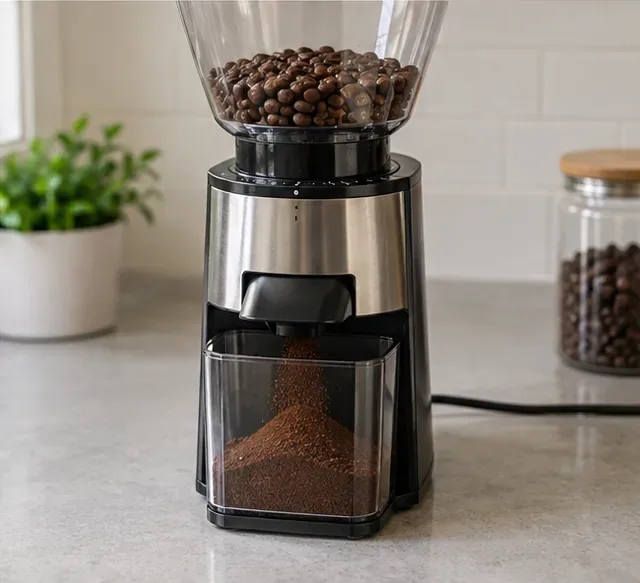
Once everything is dry and correctly assembled, plug the grinder back in and run a small amount of coffee through it. Listen for normal sound, confirm that grounds exit freely, and check that the grind looks consistent with your chosen setting. If you used a dedicated grinder cleaner, follow that product's purge instructions before brewing.
In Alex's hypothetical case, the test is not about proving that cleaning improved flavor; it is a practical safety and function check. If the grinder sounds wrong, stalls, or produces no grounds, he stops it and rechecks assembly rather than continuing to run the motor.
Step 8: Run a small test dose after reassembly and confirm normal sound, free grounds flow, and the expected grind consistency.
Can You Use Grinder-Cleaning Tablets?
Yes, if the product is designed for your grinder type and the grinder manufacturer permits it. Cleaning tablets can help remove coffee oils and residue without a full teardown. Follow the cleaner's label rather than guessing the dose or grind setting.
For example, Urnex instructs users of Grindz to empty the grinder, add the specified amount of cleaner, run it at a medium setting, and then purge with coffee. Urnex also states that standard Grindz should not be used in integrated grinders inside superautomatic machines. See the current Urnex Grindz instructions. Superautomatic machines may require a different product and a manufacturer-specific cycle.
What About Rice?
Do not treat rice as a universal coffee-grinder cleaner. Breville's current consumer guidance says uncooked rice may be used for a blade grinder but warns against running rice through a burr grinder because it can damage the machinery and may affect warranty coverage. Other manufacturers may give different guidance, so the safest general rule is to skip rice unless your grinder's own documentation explicitly allows it. See Breville's official coffee grinder cleaning guide.
How to Clean a Blade Coffee Grinder
A blade grinder needs a simpler routine, but the blade itself can be sharp. Unplug the grinder first. Brush or wipe out loose dry coffee particles. If the manufacturer's instructions allow it, wipe the chamber and blade carefully with a lightly damp cloth, keeping liquid away from the motor and electrical openings. Then dry the chamber completely before use.
Unplug and empty: remove all coffee and disconnect power.
Brush out dry residue: use a soft brush to clear loose grounds from the chamber and lid.
Wipe only as allowed: use a barely damp cloth on approved surfaces, keeping fingers away from sharp blade edges.
Dry and test: let the chamber dry fully, reassemble, and test briefly with a small amount of coffee.
How Often Should You Clean a Coffee Grinder?
There is no single schedule that fits every grinder, roast level, and usage pattern. Baratza suggests routine cleaning every four to six weeks for its grinders, while also noting that dark, oily roasts may call for more frequent cleaning. A high-volume household may need attention sooner than an occasional user. Your model's manual should take priority over a generic interval.
Useful signs that cleaning is due include visible residue around the burrs, a noticeably oily hopper, grounds collecting in the chute, slower-than-normal grinding, increased clumping, or stale-smelling residue. If cleaning does not resolve abnormal noise, repeated jams, or a sudden change in grind performance, stop using the grinder and consult the manufacturer or an authorized service provider.
Common Cleaning Mistakes to Avoid
Cleaning while plugged in: internal cleaning should begin only after power is disconnected.
Washing burrs by default: many manufacturers specify dry brushing for internal burrs and grind chambers.
Reassembling damp parts: trapped moisture can make coffee particles adhere and may reach areas that should stay dry.
Forcing a stuck adjustment ring: a clog, misaligned burr, or retained grounds may be the real problem.
Assuming every removable part is dishwasher-safe: Breville, for example, warns against dishwasher cleaning for certain grinder parts. Check your own manual.
Using a cleaner meant for a different machine type: standard burr-grinder tablets may not be appropriate for an integrated superautomatic grinder.
A Practical Final Check
Return to the illustrative Alex scenario. He has removed loose grounds, dry-brushed the burrs and chute, washed only the approved plastic parts, dried them fully, reassembled the grinder, and run a small test dose. At this point, he should confirm three things: the grinder sounds normal, coffee exits freely, and the grind setting behaves as expected. Those checks matter more than making the grinder look spotless.
A good cleaning routine is conservative: keep electricity disconnected during internal work, keep water away from non-washable parts, use the manual as the model-specific authority, and use dedicated cleaners only when they match the grinder. That approach removes the residue that matters without turning routine maintenance into an unnecessary repair job.
Official Sources Checked
Source review completed September 13, 2026. This guide relies on manufacturer and product-maker instructions rather than third-party cleaning roundups.