Home
» How To
»
How to Clean a Mechanical Keyboard Safely: A 4-Step Deep-Clean Guide
How to Clean a Mechanical Keyboard Safely: A 4-Step Deep-Clean Guide
The safest general method is simple: disconnect the keyboard, photograph the layout, remove only keycaps that are designed to come off, wash those keycaps separately, clear dry debris from the exposed board, use as little moisture as possible on the keyboard itself, and do not reconnect anything until every part is completely dry. Never spray cleaner directly onto the keyboard or immerse the assembled board.
That approach fits most conventional mechanical keyboards with removable keycaps. It is not automatically appropriate for every low-profile board, optical keyboard, laptop-style mechanism, or model with non-removable caps. Manufacturer instructions take priority whenever they differ from general advice.
Choose the Right Level of Cleaning First
You do not need a full teardown every time a few crumbs appear. Match the cleaning method to the problem:
What you see or feel
Best starting point
Light dust on key tops
Unplug the board and wipe the keycaps with a dry or barely damp microfiber cloth.
Crumbs or hair between keys
Use a soft brush or light compressed air. Keycap removal may help.
Greasy or visibly dirty removable keycaps
Remove the caps and wash them separately in warm water with mild dish soap.
Sticky residue around switches
Remove the affected keycaps and clean the accessible surface cautiously. Check your maker's guidance before using alcohol or removing switches.
Liquid reached the electronics or several keys stopped working
Stop ordinary cleaning and follow spill or repair guidance for your specific model.
For example, a board that only has pet hair under the spacebar does not need its switches removed. A keyboard with dried soda around several key stems may need more careful model-specific service than a routine home cleaning can provide.
What You Need
A wire keycap puller, if your keycaps are removable
A phone or camera to record the original layout
A soft, clean brush
Compressed air, used in short controlled bursts if the manufacturer allows it
A microfiber cloth
Warm water and a small amount of mild dish soap for removable keycaps
A clean towel and a dry place where keycaps can air-dry thoroughly
Cotton swabs for narrow areas, used dry or only with a manufacturer-approved cleaner
Avoid knives, metal screwdrivers, abrasive pads, bleach, acetone, and strong household solvents. Also avoid assuming that high-concentration isopropyl alcohol is universally safe. Surface coatings and plastics vary by brand and model.
How to Clean a Mechanical Keyboard in 4 Steps
1. Disconnect the Keyboard and Record the Layout
Turn the keyboard off if it has a power switch, unplug its cable, and disconnect any pass-through devices. Wireless boards should be switched off; if the battery is designed to be user-removable, follow the manufacturer's instructions for removing it. Give the keyboard a few seconds after power is removed before cleaning.
Next, take a clear photo of the entire key layout. This matters more than it sounds. Compact boards, alternate bottom rows, media keys, and regional layouts can make reassembly surprisingly easy to get wrong.
Before removing anything, disconnect power and photograph the complete key layout so every cap can return to the correct position.
If your keyboard has low-profile caps, unusual stabilizers, or caps that the manual says are not removable, stop here and clean around the installed keys instead. Corsair, for instance, states that the ultra-low-profile keycaps on its K100 AIR are not designed to be replaced, illustrating why model-specific instructions matter.
2. Remove Removable Keycaps Gently
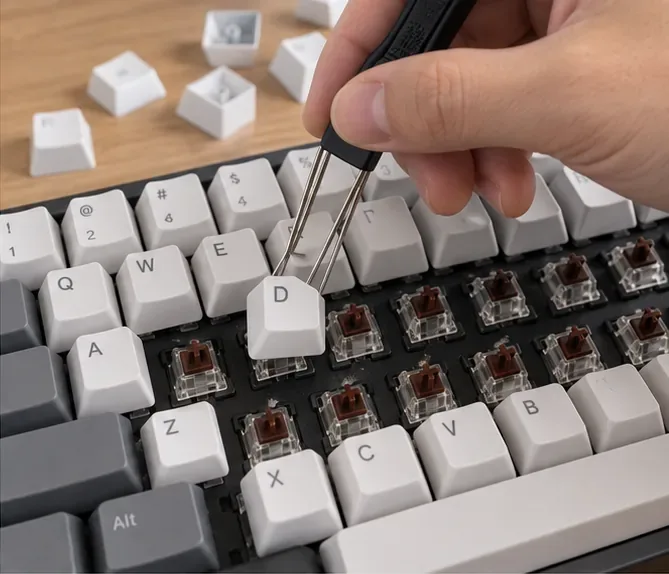
Slide a wire keycap puller around a cap and pull upward with steady, even pressure. Work in small sections so you can keep parts organized. Larger keys such as the spacebar, Enter, Shift, and Backspace may use stabilizers; do not twist or yank them if they resist.
Use a keycap puller and lift straight up; large stabilized keys deserve extra care because their mounting hardware can differ.
This is also a good point to inspect rather than automatically disassemble. Dust on the plate is normal. A cracked stem, bent stabilizer wire, liquid residue, or a switch that sits differently from the others may require model-specific repair rather than more aggressive cleaning.
3. Wash the Keycaps Separately
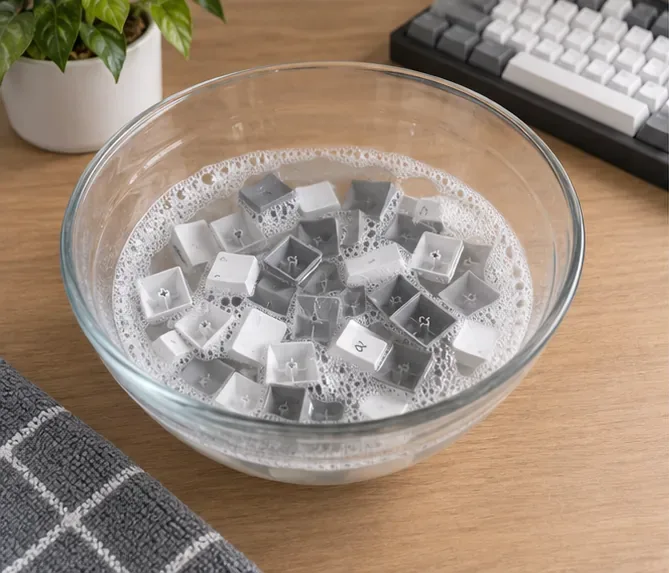
Put ordinary removable plastic keycaps in a bowl of warm, not boiling, water with a small amount of mild dish soap. Gently agitate them and let the soap loosen skin oils and grime. Corsair's support guidance recommends soaking keycaps in warm soapy water, then rinsing and leaving them to air-dry overnight. Keychron likewise recommends warm soapy water for removable caps.
Wash removable keycaps away from the electronics with warm water and mild dish soap, then rinse them well.
After rinsing, shake off excess water, spread the keycaps on a clean towel, and let them air-dry until there is no moisture inside the stems or undersides. Drying time depends on airflow, humidity, cap shape, and how much water remains, so a fixed number of hours is less important than confirming that the caps are completely dry.
Do not use very hot water simply to speed the job up. Heat can be unnecessary risk for plastic parts, legends, coatings, and warped caps. Likewise, do not put wet keycaps back onto a keyboard just because their top surfaces feel dry.
4. Remove Debris from the Board, Dry Everything, and Reassemble
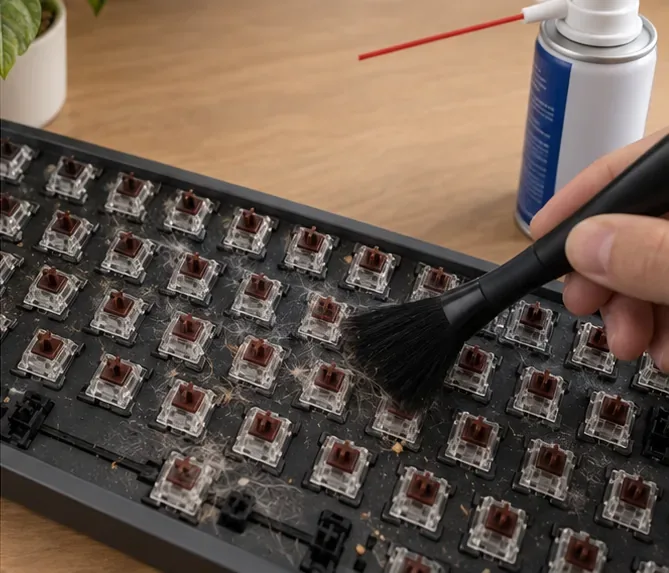
With the keycaps off, use a soft brush to lift hair, dust, and crumbs from the plate and around the switch housings. If you use canned air, keep the can in the orientation specified on its label and use short bursts rather than flooding one area. Hold the board so loosened debris can leave instead of being pushed deeper into it.
Brush loose debris away from the exposed switch area; use compressed air cautiously if your keyboard maker permits it.
For grime on the case or accessible plate, start with a microfiber cloth that is only slightly damp, then follow the specific cleaning instructions for your keyboard. Do not drip liquid into switch openings, sockets, LEDs, or the printed circuit board.
When both the board and keycaps are fully dry, reinstall the keycaps using your reference photo. Align each cap with its stem and press straight down with moderate pressure. Reconnect the keyboard only after you have checked for trapped moisture, loose parts, or misplaced stabilizers.
Can You Use Isopropyl Alcohol on a Mechanical Keyboard?
Sometimes, but not as a universal rule. Manufacturer guidance conflicts, so the correct answer depends on the specific keyboard and surface.
The practical takeaway is to check the support page or manual for your exact model before using alcohol. If you cannot verify compatibility, a dry brush plus a minimally damp microfiber cloth is the more conservative starting point for external surfaces.
Should You Remove the Switches Too?
Usually not for routine cleaning. Hot-swappable keyboards may allow switch removal without soldering, which can provide better access to the plate, but that does not mean every cleaning session should include it. Removing switches adds opportunities to bend contacts, damage sockets, disturb stabilizers, or create a reassembly problem.
Keychron's mechanical-keyboard FAQ notes that hot-swap sockets can make direct plate cleaning easier. However, Keychron also warns on model-specific disassembly pages that unnecessary disassembly can damage the keyboard and may affect return or warranty coverage. Treat switch removal and case disassembly as separate repair-level decisions, not default cleaning steps.
What If You Spilled a Drink on the Keyboard?
A spill changes the problem from surface cleaning to possible electronic contamination. Disconnect power immediately and do not repeatedly reconnect the keyboard to “see if it works.” Remove only parts that your manual says are user-removable, blot accessible liquid without forcing it farther inside, and check the manufacturer's spill, warranty, or repair instructions.
If liquid reached the PCB, sockets, battery area, or multiple switches, an ordinary cleaning guide cannot confirm that the electronics are safe. Sugary drinks are especially difficult because residue can remain after visible moisture is gone. In that situation, professional service or model-specific teardown guidance may be the better choice.
How Often Should You Clean a Mechanical Keyboard?
Use the keyboard's condition rather than a rigid calendar. A quick brush or wipe is sensible when you can see dust, hair, or crumbs. A deeper keycap cleaning is appropriate when the caps feel oily, grime is visible around the stems, or debris is building up below the keys.
Environment changes the interval. Someone who eats at the desk, owns shedding pets, works near construction dust, or shares the keyboard may need more frequent cleaning than someone using a covered board in a clean office. Keychron's July 14, 2025 cleaning guide suggests frequent light cleaning and a deeper clean every few months as a general maintenance pattern, but it is better treated as an example than a universal schedule.
How to Check Your Work Before You Are Done
After reassembly, inspect the board before reconnecting it. Every cap should sit level, large stabilized keys should move normally, and no visible moisture should remain. Then reconnect the keyboard and test it in a simple text field or keyboard-test utility.
Press every letter, number, modifier, arrow, and function key once.
Check the spacebar, Enter, Shift, and Backspace for smooth return.
Listen for a key that suddenly sounds or feels very different from neighboring keys.
If one key binds, disconnect the board again and inspect that cap and stabilizer before assuming the switch is defective.
If several keys fail after a spill, stop troubleshooting by repeated power cycles and consult the manufacturer or a repair professional.
A successful cleaning should leave the keyboard visibly free of loose debris, with dry keycaps, normal key travel, and no new input problems. The goal is not to make every mechanical keyboard look factory-new; it is to remove contamination without trading a cosmetic problem for electrical or mechanical damage.