Home
» How To
»
How Often Should I Clean My Retainer? A Practical Daily and Weekly Schedule
How Often Should I Clean My Retainer? A Practical Daily and Weekly Schedule
If you are wondering how often you should clean your retainer, the most useful answer is simple: clean a removable retainer at least once every day, and rinse it whenever you take it out. For many removable retainers, a deeper clean about once a week can help control buildup that daily brushing does not fully remove.
There has not been a major recent change that overturns this basic schedule. As of September 2026, current guidance remains consistent. The American Association of Orthodontists (AAO), in a guide published June 5, 2025, recommends rinsing removable retainers each time they are removed, brushing them daily, and using a retainer-cleaning tablet or solution about once a week. Cleveland Clinic's medically reviewed retainer guidance, updated October 22, 2025, likewise says to clean a retainer at least once a day. See the AAO retainer-cleaning guide and Cleveland Clinic's retainer care guidance.
The exact method still depends on the type and material of your retainer. If your orthodontist or manufacturer gave you specific cleaning instructions, follow those first.
The Best Cleaning Schedule for Most Removable Retainers
When
What to do
Why it matters
Every time you remove it
Rinse with cool or lukewarm water.
Fresh saliva and loose debris are easier to remove before they dry onto the surface.
At least once a day
Gently clean all surfaces with a dedicated soft toothbrush and mild soap or a retainer-safe cleanser.
Daily cleaning helps limit plaque, odor, and visible film.
About once a week
Use a retainer-cleaning tablet or solution that is safe for your appliance, following the product directions.
A periodic deeper clean can loosen buildup that survives the daily routine.
Whenever it looks or smells different
Inspect closely and adjust your cleaning routine or contact your orthodontist if the problem persists.
Persistent odor, discoloration, cracks, warping, or a changed fit can signal more than ordinary surface buildup.
Step 1: Rinse It Every Time You Take It Out
Rinsing is not a substitute for the daily clean, but it is an easy way to keep saliva and loose particles from drying on the retainer. Use cool or lukewarm water rather than hot water. The AAO specifically warns that high temperatures can distort plastic retainers and change how they fit.
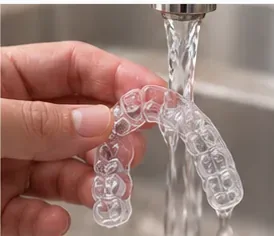
Rinse a removable retainer with cool or lukewarm water whenever you take it out so fresh saliva and loose debris do not dry on the surface.
If you wear your retainer only at night, that usually means rinsing it in the morning when you remove it. If you are still in a full-time wear phase and remove it for meals, rinse it whenever practical before putting it back in its case.
Step 2: Give It One Thorough, Gentle Cleaning Every Day
Once a day, clean the entire retainer rather than only the areas that look dirty. The AAO recommends a dedicated toothbrush and dish soap for daily removable-retainer care. Cleveland Clinic similarly recommends brushing a removable retainer with soap and water and notes that some toothpastes can be too harsh.
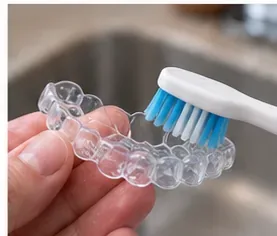
For the daily clean, gently brush all surfaces with a dedicated soft toothbrush and a mild, retainer-safe cleanser rather than an abrasive toothpaste.
Use light pressure. Clear plastic can develop scratches, and roughened surfaces are harder to keep looking clear. Avoid assuming that “scrubbier” is better. The goal is to remove fresh film without damaging the appliance.
Should you use toothpaste?
For most clear removable retainers, it is safer to avoid ordinary toothpaste unless your orthodontist specifically says it is appropriate for your appliance. Many toothpastes contain abrasive particles. AAO guidance advises against toothpaste for routine retainer cleaning for that reason, while individual hospital or manufacturer instructions can differ by material. When instructions conflict, the care directions for your specific retainer should win.
Step 3: Add a Deeper Clean About Once a Week
A weekly deep clean is useful when the retainer is worn regularly. The AAO recommends using a retainer-cleaning tablet or solution once per week, typically for the time stated by the product or professional instructions. Do not assume that a longer soak is better; prolonged exposure to a cleanser that was not designed for your retainer may damage the material.
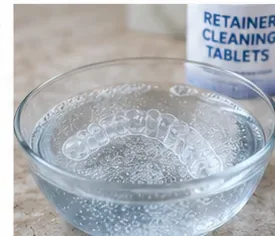
A weekly soak with a cleanser labeled safe for retainers can help loosen buildup that daily brushing leaves behind; follow the cleanser's stated soaking time.
If your orthodontist gave you a specific branded cleanser or method, use that instead of improvising with household chemicals. Bleach, strong detergents, and alcohol-heavy mouthwashes can be too aggressive for some retainer materials. Hot or boiling water is also a poor choice because heat can distort plastic.
Step 4: Rinse, Let It Dry, and Store It Properly
After cleaning, rinse the retainer thoroughly so no soap or cleanser remains. Let it drain and dry before putting it away, unless your retainer's instructions tell you otherwise. Keep it in a protective case when it is not in your mouth. A case also deserves regular cleaning because putting a freshly cleaned retainer into a dirty container defeats part of the purpose.
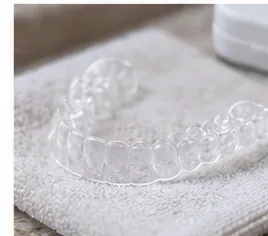
After rinsing away the cleanser, allow the retainer to dry before storing it in its protective case, following any material-specific instructions from your orthodontist.
How Do You Know Your Routine Is Working?
A clean retainer does not have to look brand-new forever, but several practical signs suggest your routine is adequate:
There is no persistent unpleasant odor after cleaning.
You do not see a growing layer of soft film or chalky deposits.
The retainer is comfortable and fits the same way it normally does.
There are no new rough edges, cracks, or warped areas.
Your gums and mouth are not becoming irritated where the retainer contacts them.
Appearance alone is not a perfect hygiene test. Clear plastic can gradually become less transparent with age, and some stains or mineral deposits may not disappear with ordinary home care. The purpose of cleaning is not to make an old retainer look factory-new at any cost.
When Should You Clean It More Often?
The once-daily schedule is a baseline, not a ceiling. You may benefit from more frequent rinsing or cleaning if you are wearing the retainer nearly full time, if visible film develops quickly, or if you notice odor before the end of the day. The safest adjustment is usually to increase gentle cleaning frequency rather than to jump immediately to stronger chemicals or harder scrubbing.
If you have been sick, follow your dentist or orthodontist's instructions for oral-appliance hygiene rather than trying to “sterilize” the retainer with boiling water or household disinfectants. Retainers are not designed for every disinfectant used on hard household surfaces.
What About a Fixed or Permanent Retainer?
A fixed retainer is different because you do not remove it for a sink-side cleaning. The AAO recommends brushing and flossing around the wire and the teeth every day. Floss threaders, interdental brushes, or a water flosser can help you reach areas that are difficult to clean around a bonded wire.
If plaque or tartar builds up around a fixed retainer despite good home care, a dental professional can clean areas that home tools cannot safely remove. Do not pry at hardened deposits with metal objects.
When Should You Stop Cleaning and Call Your Orthodontist?
Home cleaning has limits. Contact your orthodontist or dentist if you notice any of the following:
Persistent odor or discoloration: If a weekly deep clean and consistent daily care do not improve the problem, the material may be aging or buildup may be too established for safe home removal.
Cracks or rough edges: Cleaning cannot restore structural integrity, and damaged plastic may irritate your mouth.
Warping: A retainer distorted by heat or pressure should be evaluated rather than forced onto the teeth.
A changed fit: If the retainer suddenly feels unusually tight, loose, or no longer seats fully, the issue may be tooth movement or appliance distortion, not dirt.
Gum irritation that persists: Plaque can contribute to irritation, but so can a damaged or poorly fitting retainer.
AAO guidance specifically recommends professional help for persistent odor, discoloration, cracks, warping, loose wires, or meaningful fit changes. Cleveland Clinic likewise advises contacting your provider if the retainer breaks or no longer fits properly.
A Simple Routine You Can Actually Maintain
For most people with a removable retainer, the sustainable pattern is straightforward: rinse after removal, clean gently once a day, add a deeper clean about once a week, and keep the case clean. That is more useful than waiting until the retainer smells bad or looks cloudy and then trying to rescue it with aggressive products.
If your retainer is made from an unusual material, has metal components, or came with care instructions that differ from general guidance, follow the instructions from the clinician or manufacturer who supplied it. Retainers are not all made the same way, and the safest cleaning method is the one that preserves both hygiene and fit.