Home
» How To
»
How to Clean a Garbage Disposal With Ice: A Safe, Manufacturer-Aligned Method
How to Clean a Garbage Disposal With Ice: A Safe, Manufacturer-Aligned Method
Reviewed September 2026: Current manufacturer guidance still supports ice as a light-cleaning aid for many garbage disposals, but it is not a cure-all. InSinkErator says ice with cold water can help freshen its disposers, while also noting that there are better ways to clean some buildup. Whirlpool's current product guidance similarly recommends a small amount of ice with citrus for light periodic cleaning. The practical takeaway is simple: use ice to help scour the grinding chamber, keep cold water running, and treat persistent odor, a jam, or a slow drain as a separate problem.
If you want the shortest answer, this is the method: run cold water, operate the disposal according to its feed type, add a small amount of ice gradually, let the ice grind completely, and keep cold water flowing briefly afterward. Never reach into the chamber while the unit can receive power.
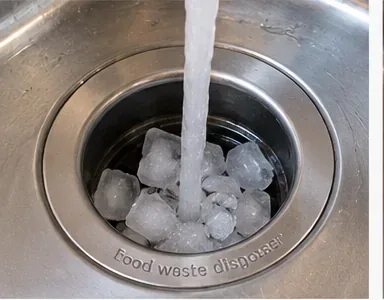
A small batch of ordinary ice cubes is enough for a light cleaning cycle; there is no need to pack the disposal full.
What does ice actually do inside a garbage disposal?
Ice is useful mainly because hard particles can create a mild scouring action as they move through the grind chamber. That can help loosen soft residue and food film. It is better to think of ice as a mechanical cleaning aid than as a disinfectant, degreaser, or repair tool.
One common explanation says ice “sharpens the blades.” That is not a reliable reason to use it. InSinkErator explicitly notes in its current support material that its disposers have no conventional blades. Its care instructions instead describe hard materials such as ice as creating a scouring action. Other brands use different internal designs, so your model's manual remains the final authority.
Ice can help with
Ice is not a good fix for
Light film inside the grind chamber
A disposer that hums but will not turn
Some mild food odors
A clogged drain line or standing water
Routine freshening when the manufacturer permits it
Grease buildup deeper in the plumbing
Flushing small loose food particles while cold water runs
Sanitizing the appliance or replacing manual baffle cleaning
How to clean a garbage disposal with ice in five steps
1. Check your model and make sure the disposal is ready to run
First, confirm that the unit is operating normally. If it is jammed, humming, leaking, tripping its reset, or backed up with water, do not start an ice-cleaning cycle. Those symptoms call for troubleshooting rather than more material in the chamber.
Also identify whether you have a continuous-feed or batch-feed disposer. A continuous-feed model normally runs from a wall switch and can accept small amounts of material while operating. A batch-feed model starts only when its stopper is locked into the operating position. Follow the starting sequence in your own manual, because the safe order differs between those two designs.
If you need to inspect the chamber, remove an object, or touch the splash guard, disconnect power first. Whirlpool's current jam guidance says to unplug the disposer or switch off the circuit breaker and never put your hand inside the chamber; use tongs or pliers for visible objects instead. See Whirlpool's disposer jam safety instructions.
2. Start a steady stream of cold water
Run cold water into the disposal side of the sink before grinding the ice. A moderate stream is generally enough unless your manual specifies otherwise. Cold water is the consistent recommendation in the current manufacturer material reviewed for this article.
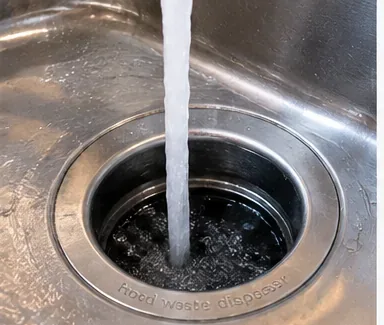
Run cold water into the disposer before and during the ice-cleaning cycle so loosened particles can move through the drain line.
Whirlpool advises cold water during grinding and says to keep it running after grinding is complete to help flush the drain line. InSinkErator likewise instructs users to run a medium stream of cold water when using its ice method. You can compare those instructions at Whirlpool's continuous-feed disposer guidance and InSinkErator's garbage disposal support page.
3. Add a small amount of ice according to the feed type
For a continuous-feed disposer, start the unit with cold water running, then feed in a few ice cubes at a time. Do not force a large bowlful through the opening at once. Whirlpool describes a “handful” of ice for light cleaning, while InSinkErator does not specify a universal quantity on its current support page, so a modest amount is the safer general recommendation.
For a batch-feed disposer, place only the amount allowed by your manual in the chamber, then use the stopper to activate the unit. Do not bypass the stopper or safety interlock.
Feed a modest amount of ice through the disposal while cold water is running; avoid packing the chamber tightly.
You may see advice online to add coarse salt. That is not necessary for the basic ice method in the current InSinkErator and Whirlpool instructions cited here. If your own manual specifically recommends salt, follow that model-specific direction; otherwise, plain ice and cold water are sufficient for this approach.
4. Let the ice grind completely, then continue the cold-water flush
Let the disposal run until the sound of loose ice disappears and operation returns to its normal tone. Do not keep adding ice merely to make the cycle longer. The goal is a brief scouring pass, not to load the motor continuously.
After the ice is gone, keep cold water flowing for a short period so loosened particles can move through the trap and drain line. Whirlpool's current guidance commonly specifies about 15 seconds after ordinary grinding; your model may differ, so use the manual if it gives a specific time.
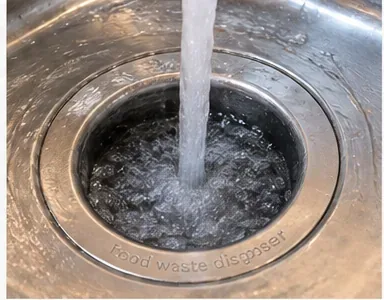
Keep cold water running briefly after the ice is gone to carry loosened residue out of the grind chamber.
5. Turn the disposal off and judge the result
Turn off the disposer, then stop the water. A successful light cleaning should leave the chamber sounding normal and reduce minor stale-food odor. If the smell remains strong, repeating the ice cycle over and over is usually less useful than cleaning the area where residue actually collects.
InSinkErator notes that food waste can build up under the sink baffle. Its support instructions recommend turning the disposer off, removing the baffle when the model permits it, cleaning the underside, reinstalling it, and then using cold water and ice as a freshening step. Whirlpool also advises cleaning the splash guard as part of odor control. Before touching the baffle or upper chamber, disconnect power.
Should you add lemon or lime with the ice?
Small citrus pieces are optional, not mandatory. Current InSinkErator guidance suggests ice cubes mixed with lemon or lime wedges for freshening, and Whirlpool also mentions a few citrus peels in light-cleaning guidance. Citrus mainly contributes fragrance and some mechanical contact; it should not be treated as a sanitizer.
Use small pieces rather than stuffing large quantities of peel into the disposal. If your manual lists citrus rind or fibrous material as restricted, skip it. The safest universal version of this method is still simply cold water plus a modest amount of ice.
How often should you clean a garbage disposal with ice?
There is no single schedule that applies to every brand and household. Whirlpool currently suggests monthly light cleaning in one of its disposer care pages. InSinkErator describes its units as low-maintenance and focuses more on cleaning when odor or residue appears rather than setting one universal interval.
For most people, an occasional ice cycle is more sensible than doing it after every use. If you cook frequently, process a lot of food scraps, or notice odor sooner, you may need to clean the splash guard and chamber more often. If the disposer stays clean-smelling and runs smoothly, there is little benefit in constantly grinding extra ice.
What should you avoid while cleaning?
Do not put your hand into the chamber while power is connected. Disconnect the disposer before manual cleaning or object removal.
Do not use ice to force through a jam. A humming or stalled unit needs a jam-clearing procedure, not more ice.
Do not pour grease or fat down the disposal. Ice does not undo grease buildup in the drain line.
Do not rely on harsh chemical drain cleaner unless your manufacturer explicitly allows it. Whirlpool advises avoiding harsh chemical drain cleaners in its current disposer care guidance.
Do not use hot water during the actual grinding cycle when your manual calls for cold water. Current Whirlpool operating guidance specifically calls for cold water during disposal operation.
When ice cleaning is not enough
Change tactics if the disposal still smells after the chamber has been flushed, because the odor may be on the underside of the splash guard or upper lip. Disconnect power and clean those surfaces with a small brush or cloth if your model allows access.
If water drains slowly, backs up into the sink, or returns from the other basin, the problem may be in the trap or drain pipe rather than the grind chamber. If the disposer hums, stops, trips the reset repeatedly, leaks, or makes a new metallic noise, stop using it and follow the manufacturer's jam or service procedure.
The bottom line
Cleaning a garbage disposal with ice is a useful maintenance trick when the unit is working normally and the manufacturer permits it. Run cold water, grind a modest amount of ice, flush afterward, and stop there if the disposal sounds normal and the odor improves. The method works best for light residue; it does not replace splash-guard cleaning, clog removal, or repair.