Home
» How To
»
How to Clean a Guitar Fretboard Without Damaging the Wood or Finish
How to Clean a Guitar Fretboard Without Damaging the Wood or Finish
Cleaning a guitar fretboard is simple only after you answer one question: what surface are you actually cleaning? An unfinished rosewood, ebony, or pau ferro fingerboard can often use a purpose-made fretboard cleaner or conditioner. A finished maple board usually needs a different approach. Treating both the same is one of the easiest ways to create stains, residue, or finish problems.
This guide separates what manufacturers clearly verify from what depends on the guitar. The practical rule is conservative: identify the fretboard material and finish first, use the least aggressive method that works, and never assume a popular cleaner is safe for every instrument.
First, is your fretboard unfinished or finished?
Verified: Fender specifies its Magic Fretboard Oil for unfinished rosewood, ebony, and pau ferro. D’Addario likewise limits its Hydrate and Lemon Oil products to dark, unfinished fingerboards and says not to use them on maple or finished fingerboards. PRS separately recommends fretboard conditioner for rosewood and ebony but a different guitar cleaner for maple. These are manufacturer instructions, not universal chemistry rules.
Your action: check the specifications for your exact guitar model before opening a bottle. If the maker describes the fingerboard as finished, clear-coated, gloss, satin, lacquered, polyurethane, or similar, do not treat it as bare wood. If the specifications are unclear, start with a dry microfiber cloth and ask the manufacturer or a qualified repair technician before conditioning.
Fretboard situation
What is verified
Useful action
Rosewood, ebony, or pau ferro that is explicitly unfinished
Several manufacturers sell cleaners/conditioners specifically for unfinished dark woods.
Use a small amount of a product approved for unfinished fretboards, then wipe away excess.
Finished maple
D’Addario says its dark-wood Hydrate/Lemon Oil products should not be used; PRS recommends its guitar cleaner instead of fretboard conditioner on maple.
Clean according to the guitar maker’s finish-care instructions rather than oiling by default.
Unusual wood, vintage finish, relic finish, or unknown construction
No single method is verified for every instrument.
Pause and identify the exact material/finish before using solvent, oil, polish, or abrasive material.
Do you need to remove the strings?
For a thorough cleaning, usually yes. D’Addario’s care instructions say removing the strings gives the best access, and Taylor’s fretboard-maintenance guidance also assumes the strings are off. A quick post-playing wipe does not require a full string change.
Your action: plan deep cleaning for a normal string-change session. If your guitar has a floating tremolo, locking system, or another bridge that has a specific restringing procedure, follow that instrument’s manual rather than removing everything in a way that complicates setup.
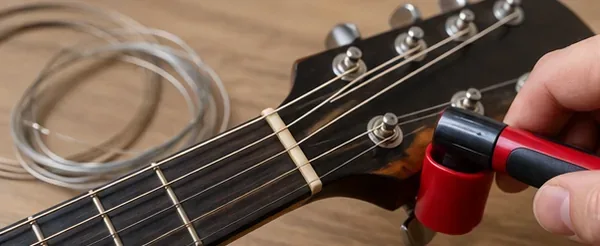
Loosen or remove the strings so the full fretboard is accessible. For bridges with special restringing requirements, follow the guitar manufacturer’s procedure.
How to clean a guitar fretboard safely
1. Confirm the finish and gather only compatible supplies
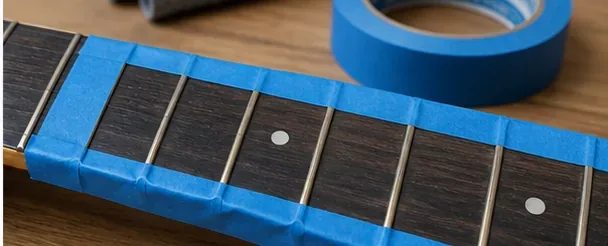
Use clean microfiber cloths, a soft dry brush, and—only when appropriate—a fretboard cleaner or conditioner approved for the material. Painter’s tape can protect nearby finished surfaces during detailed work, but it is not required for a normal wipe-down.
Avoid improvising with household degreasers, glass cleaner, hand sanitizer, or strong solvents. Whether a solvent is safe depends on the finish and adhesives used on the instrument, and that cannot be determined from the color of the wood alone.
Protect adjacent finished surfaces if the maintenance method for your instrument calls for masking. Do not cover or treat the fretboard blindly before confirming its finish.
2. Remove loose dust before using any liquid
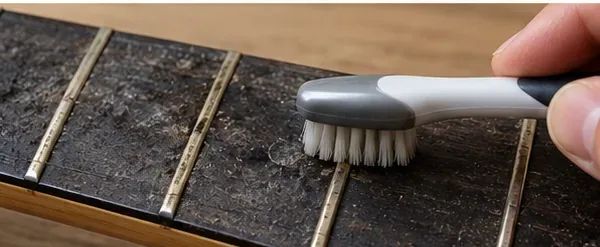
Dry cleaning first reduces how much product you need. Use a soft brush or clean cloth to move dust, skin particles, and loose debris away from fret edges and inlays. Work gently along the board rather than grinding debris into the surface.
Your action: if most of the dirt comes off dry, stop there for routine maintenance. Cleaning is not improved by adding liquid when it is unnecessary.
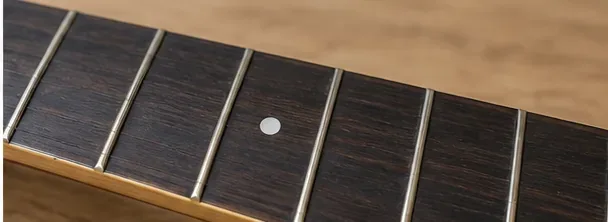
Start dry: a soft brush can lift loose debris from the fretboard and the edges of the frets before any cleaner or conditioner is introduced.
3. Wipe away grime with the least aggressive compatible method
On an unfinished dark-wood board, use the cleaner recommended by the guitar or care-product manufacturer, normally in a small amount on a cloth rather than flooding the wood. On a finished board, follow the finish-care instructions for that guitar. Taylor, for example, says some sealed satin areas can be wiped with a slightly damp cloth, while D’Addario warns that its unfinished-fretboard products are not for finished fingerboards.
Your action: work one small section at a time and keep liquid away from places where it can pool. If a deposit does not release with gentle wiping, do not automatically escalate to solvent or abrasion. Check the manufacturer’s care guidance first.
Use a clean cloth and minimal moisture or an approved cleaner for the specific surface. The goal is to lift grime, not soak the wood.
4. Condition only a compatible unfinished fretboard
If the board is confirmed unfinished rosewood, ebony, pau ferro, or another wood for which the maker approves conditioning, apply a thin film of the approved product. Fender’s current fretboard oil is explicitly for unfinished rosewood, ebony, and pau ferro. Taylor says its unfinished fingerboards may be conditioned when the wood looks dry, using a small amount of conditioning oil.
Your action: put the product on a cloth or applicator in a controlled amount. Do not pour enough onto the fretboard to leave standing liquid. More oil is not better.
Condition only when the wood and product are compatible. Apply a small amount in a thin, controlled layer rather than saturating the board.
5. Remove all visible excess
Taylor’s guidance is particularly clear on this point: after conditioning, wipe away the excess. When finished, the surface should not have visible liquid sitting on it. A greasy board attracts grime and can transfer residue to the strings.
Your action: use a fresh dry cloth until the board feels clean rather than oily. Give extra attention to the edges of frets and inlays where product can collect.
After conditioning, wipe off the excess completely. The fretboard should look clean and even, not wet or greasy.
6. Restring, tune, and inspect the result
Install the correct strings, bring the guitar back to pitch, and inspect the neck under good light. You are looking for a clean surface, no oily film, no cleaner trapped around frets, and normal fret seating. Cleaning will not repair a loose fret, cracked board, deep divot, lifted binding, or damaged finish.
Your action: if you find structural damage, stop treating it as a cleaning problem. A qualified guitar technician or luthier can determine whether the instrument needs fret work, humidity correction, finish repair, or another service.
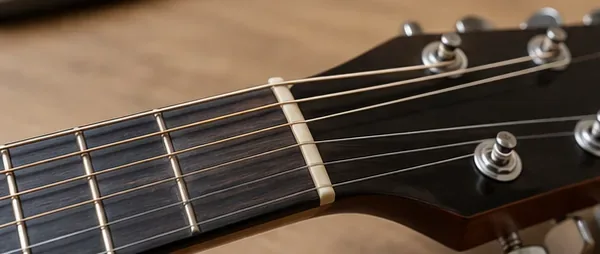
Restring and tune after the fretboard is clean and free of excess product, then inspect the frets, board, and nut under good light.
7. Finish with a clean, dry wipe
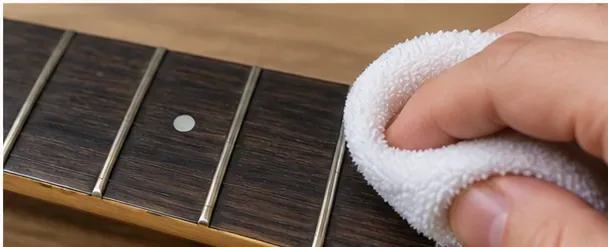
A final dry microfiber pass removes fingerprints left during restringing and makes it easier to spot any remaining residue. This is also the safest routine habit between deeper cleanings.
Your action: keep one clean cloth in the case and wipe the strings and accessible fretboard area after playing, especially if your hands sweat heavily.
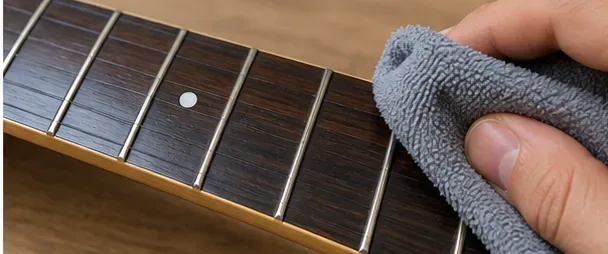
A final dry microfiber wipe removes handling marks and any last trace of residue after restringing.
Is lemon oil bad for a guitar fretboard?
Not as a universal statement. This is a good example of advice that changes with product chemistry and manufacturer guidance. PRS describes its own fretboard conditioner as a light lemon oil for rosewood and ebony. D’Addario sells Lemon Oil for dark unfinished woods but explicitly says not to use it on maple or finished fingerboards. Fender’s current Magic Fretboard Oil takes a different approach and advertises that it contains no lemon-oil extracts.
Those positions are not actually contradictory once the products and surfaces are separated. “Lemon oil” on a label does not tell you that every lemon-derived product, household citrus oil, or cleaner is safe on every fretboard.
Your action: use a guitar-care product that explicitly lists your fretboard type as compatible. Do not substitute concentrated citrus essential oil or generic household polish because the name sounds similar.
Should you use 0000 steel wool on the fretboard?
It depends on the instrument. Taylor specifically recommends 0000 extra-fine steel wool for cleaning its unfinished fingerboards and frets, while protecting the guitar body and soundhole from debris. That is verified guidance for Taylor’s stated application, not proof that steel wool is the best choice for every guitar.
Different finishes, pickups, inlays, binding materials, and manufacturer instructions can change what is appropriate. For an electric guitar, metallic debris is an additional practical concern around magnetic pickups. If your guitar maker does not tell you to use steel wool, a soft cloth, soft brush, and compatible cleaner are the more conservative starting point.
Your action: reserve abrasives for a procedure explicitly supported by the guitar maker or a technician who has inspected the instrument.
Does maple need fretboard oil?
Often no, but verify the finish rather than relying on wood color. D’Addario says its Hydrate and Lemon Oil products are for dark unfinished woods and should not be used on maple or finished fingerboards. PRS tells owners to use its Guitar Cleaner on maple instead of its fretboard conditioner or tung oil. Yamaha also notes that maple fingerboards commonly have satin or gloss finishes, whereas rosewood and ebony are generally left unfinished.
Your action: look up the exact neck/fingerboard specification. If it is finished maple, clean the finish as the manufacturer directs. If you have an unusual unfinished maple board, do not assume the dark-wood conditioner on your bench is suitable; verify compatibility first.
How often should you clean and condition a fretboard?
There is no single verified schedule that fits every player. Cleaning frequency depends on playing time, sweat, grime, string-change intervals, climate, and the surface itself. Manufacturer recommendations also differ: some care guidance ties cleaning to string changes, while Taylor staff guidance for conditioning is typically only a few times a year and as needed when the unfinished wood appears dry.
That difference is useful: cleaning and conditioning are not the same task. You may wipe a board frequently while using conditioner much less often. Oil also does not replace proper humidity control for a wooden instrument.
Your action: clean when dirt is present, condition only when the compatible unfinished wood and its manufacturer guidance call for it, and avoid turning oiling into an automatic weekly routine.
When should you stop and take the guitar to a professional?
The fretboard has a crack, lifting section, or separated binding.
A fret is loose, raised, deeply worn, or sharp enough to catch a string or your hand.
The finish is flaking, clouding, sticky, or reacting to a cleaner.
You do not know whether a valuable, vintage, or custom instrument has an original or refinished surface.
Grime remains only after aggressive scraping or solvent would be required.
Cleaning should remove contamination without changing the instrument. If the next step feels like repair, refinishing, fret dressing, or chemistry experimentation, that is a sensible stopping point.
Manufacturer sources checked
The compatibility guidance above was checked against current manufacturer/support material available in September 2026. Product formulas and care recommendations can change, so re-check the maker’s instructions for your guitar and care product before use.