Home
» How To
»
How to Clean a Keurig Needle Safely: An 8-Step Guide
How to Clean a Keurig Needle Safely: An 8-Step Guide
If your Keurig is brewing a partial cup, sputtering, or dropping coffee grounds into the mug, a clogged needle may be the cause. The safest fix is usually simple: power the brewer off, unplug it, use a straightened paper clip to loosen coffee grounds from the needle openings your model exposes, reassemble any removable pod-holder parts, then run two cleansing brews with water and no pod.
This guide was checked against Keurig Use & Care documents available on September 13, 2026. One important limitation is that Keurig models do not all use exactly the same pod-holder and needle layout. Follow your model-specific guide whenever its instructions differ from the general process below.
First, know what needle cleaning does—and what it does not do
Verified: Keurig manuals identify coffee grounds as a reason to clean the entrance and, on many models, the exit needle. They also describe descaling separately as the process for removing mineral buildup inside the brewer. That means needle cleaning and descaling solve different maintenance problems.
Action: If the problem looks like a coffee-ground clog—grounds in the cup, interrupted flow, or a partial cup—inspect the needle area first. If your machine shows a descale alert or has symptoms associated with scale, follow the model-specific descaling procedure instead of trying to “descale the needle.”
Verified safety point: Keurig warns that the needles are sharp and tells users not to put fingers into the K-Cup pod holder. Keurig also instructs users to turn off and unplug the brewer before cleaning.
Action: Keep your fingers away from the needle tips. Use the paper clip only in openings that your model guide identifies for cleaning.
What you need
A straightened metal paper clip
A mug large enough for a water-only cleansing brew
Fresh water
A damp, lint-free cloth for nearby removable or wipeable surfaces
Your brewer’s model name or model-specific Use & Care guide
You do not need to pour vinegar directly onto a needle. Keurig’s reviewed needle-cleaning instructions use a straightened paper clip to loosen grounds, followed by water-only cleansing brews. Descaling solution belongs in the separate descaling procedure specified for the brewer.
How to clean a Keurig needle step by step
1. Identify the model and confirm that a needle clog is plausible
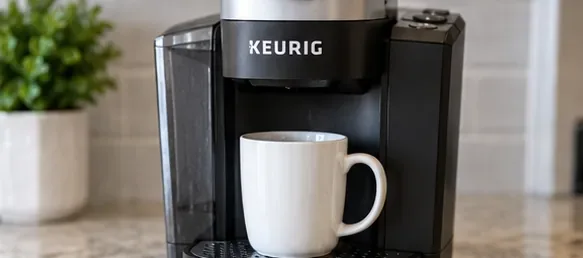
Start by identifying your brewer model and placing a clean mug nearby for the later water-only cleansing brews.
Before taking anything apart, check the model label and look up the matching Keurig care guide. This matters because a K-Mini Go guide, for example, explicitly describes both an exit needle in the removable pod holder and an entrance needle under the lid, while newer designs may describe the pod holder differently.
Action: If you cannot positively identify a lower or exit needle from the manual, do not probe around blindly. Clean only the components and openings the guide names.
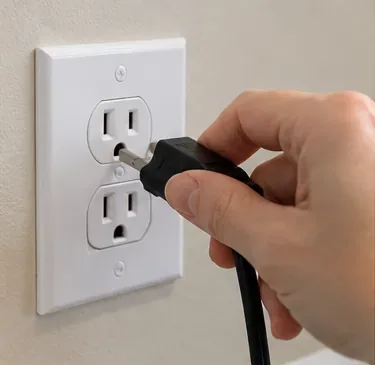
2. Turn the brewer off and unplug it
Disconnect power before working near the brew head or pod holder.
Unplugging reduces the chance that the brewer can start while your hand is near the sharp puncture needles. If the brewer was just used, wait until it is comfortable to handle; the Keurig guides reviewed here do not specify a universal cooling time.
Action: Do not continue until the brewer is off, unplugged, and stable on the counter.
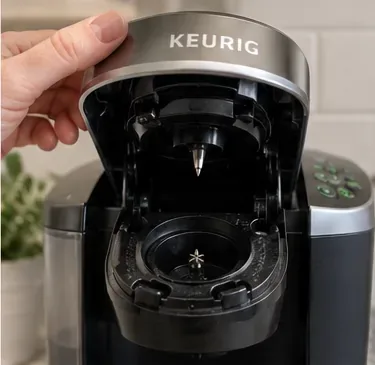
3. Lift the handle and remove any used K-Cup pod
Open the handle and remove the used pod so the brew head and pod-holder area are accessible.
With the handle raised, remove and discard any used pod. Keurig’s maintenance instructions repeatedly note that the brewer should be cleaned without a pod in place.
Action: Leave the handle fully open so you can see the underside of the lid without putting fingers into the pod chamber.
4. Locate the entrance needle under the lid
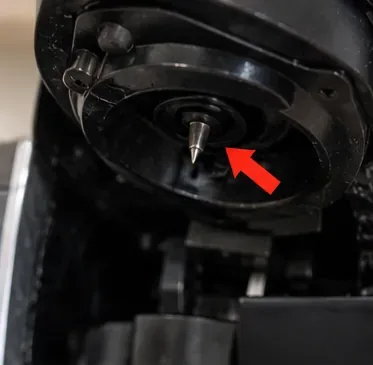
The entrance needle is located on the underside of the raised brew head on models that use this arrangement.
Keurig calls the upper puncture point the entrance needle. Depending on the model, it can have more than one opening. The K-Mini Go guide instructs users to insert a straightened paper clip into all the holes; older guides likewise describe clearing the needle openings gently.
Action: Look for the actual openings in the needle instead of pushing against the pointed tip.
5. Gently loosen grounds from the entrance-needle openings
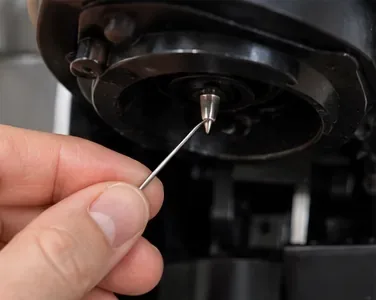
Use a straightened paper clip only at the needle opening, moving it gently to loosen trapped coffee grounds.
Insert the straightened paper clip carefully into each opening identified in your manual and move it gently to loosen compacted grounds. The goal is to free debris, not to enlarge the hole, bend the needle, or force the clip deep into the brewer.
Action: Stop if the clip meets hard resistance that does not feel like loose debris. Recheck the model guide rather than adding force.
6. Clean the exit needle only if your model guide shows one you can service
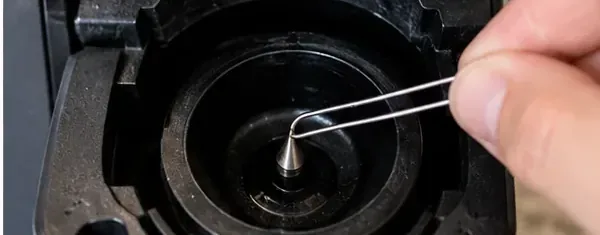
On models with a serviceable exit needle, clear the opening according to the model-specific pod-holder instructions.
On models such as the K-Mini Go and K-Supreme Plus, Keurig instructs users to remove the pod-holder assembly, detach the funnel, locate the exit needle inside the bottom of the pod holder, and insert a straightened paper clip to loosen coffee grounds. Other models may use a different pod-holder design or emphasize rinsing the holder instead.
Action: If your manual does not show an exit-needle cleaning step, do not improvise one. Rinse or clean the pod holder exactly as your model guide specifies.
7. Clean the surrounding pod-holder parts and reassemble them
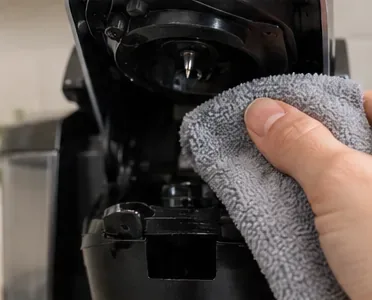
Wipe accessible surrounding surfaces without pressing fingers or cloth directly onto the sharp needle tips.
Grounds can collect around the pod holder as well as inside the needle opening. Keurig guides commonly instruct users to wash or rinse removable pod-holder and funnel parts, then snap them back into place. The exact removal method varies by model.
Action: Confirm that all removable parts are seated correctly before lowering the handle. Keep cloth and fingers away from exposed needle points.
8. Run two cleansing brews with fresh water and no pod
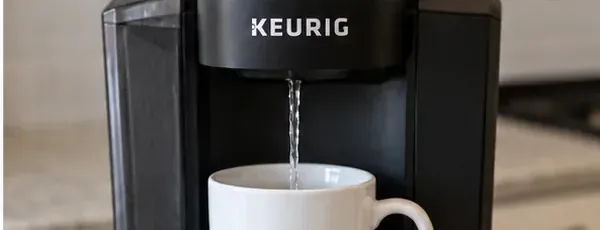
Finish by running two water-only cleansing brews with no K-Cup pod installed.
After cleaning the entrance needle, Keurig manuals instruct users to lower the handle and run two cleansing brews without a K-Cup pod. This flushes loosened coffee particles out of the brew path.
Action: Plug the brewer back in, add fresh water as needed, place the mug on the drip tray, and run two water-only cycles. Discard the rinse water.
Common myths about cleaning a Keurig needle
Myth: “Descaling will automatically clean a clogged needle”
What is verified: Keurig treats these as separate maintenance tasks. Needle care is aimed at coffee grounds lodged in the puncture system; descaling is aimed at mineral deposits in the water path.
Action: If you see grounds or suspect a localized clog, clean the needle. If the brewer calls for descaling or mineral scale is the likely problem, descale according to the specific model procedure. Some machines can need both tasks, but one does not substitute for the other.
Myth: “If a little pressure works, more pressure works better”
What is verified: Keurig’s wording is to insert the straightened paper clip carefully and move it gently to loosen grounds. The manuals do not instruct users to force, drill, scrape, or reshape the needle.
Action: Use small, controlled movements. If debris does not release, stop and reassess rather than forcing the paper clip farther.
Myth: “Every partial cup means the needle is clogged”
What is verified: Keurig troubleshooting guides list multiple possible causes of a partial cup. Depending on the model, those can include a clogged exit needle or pod holder, an issue with the water reservoir, or the need to descale.
Action: If needle cleaning and the cleansing brews do not restore normal volume, move to the other troubleshooting steps in your model’s manual instead of repeating needle cleaning indefinitely.
Myth: “All Keurig needles are arranged the same way”
What is verified: The reviewed Keurig guides show meaningful model differences. K-Mini Go documentation describes a removable pod holder, funnel, exit needle, and entrance needle. The newer K-Crema guide emphasizes its entrance needle and gives model-specific pod-holder rinsing instructions.
Action: Treat photos and general instructions as orientation, not as a substitute for the diagram in your exact model guide.
How do you know the cleaning worked?
After the two water-only brews, check for three practical signs: the water stream is reasonably steady, the expected amount of water reaches the mug, and you no longer see loose coffee grounds washing into the cup. These are useful observations, not a manufacturer diagnostic test.
If flow is still weak, the next step depends on the brewer. Keurig manuals may direct you to clean the pod holder, check the reservoir, or descale. If the prescribed maintenance steps have been repeated and the brewer still produces a partial cup, some Keurig guides advise contacting Customer Service.
How often should you clean the needle?
There is no single needle-specific cleaning interval stated across the Keurig guides reviewed for this article. The manuals provide scheduled maintenance for other items—for example, some recommend regular rinse-pod use and periodic descaling—but needle cleaning is commonly presented as a response to grounds, clogs, or brewing trouble.
Action: Clean the needle when symptoms point to trapped grounds, and follow your brewer’s separate routine-maintenance schedule for rinsing, water filters, and descaling.
Quick troubleshooting table
Symptom
What is reasonably supported
Next action
Coffee grounds in cup
Grounds may be trapped in entrance or exit needle areas on applicable models
Clean the needle openings and run two water-only brews
Partial cup
A needle or pod-holder clog is one possible cause, but not the only one
Clean the applicable needle/pod holder, then follow model-specific troubleshooting if volume stays low
Descale alert
Mineral buildup requires the brewer’s descaling procedure
Descale according to the exact model guide
Cannot identify the lower needle
Model layouts differ
Do not probe blindly; consult the model-specific guide
If your exact model guide conflicts with a general instruction here, use the model guide. That is especially important for removable pod-holder parts, needle count, descaling controls, and reassembly.