Home
» How To
»
How to Clean a Phone Camera Lens Safely: A Practical Reference Guide
How to Clean a Phone Camera Lens Safely: A Practical Reference Guide
For most phone camera smudges, the correct first step is a clean, dry microfiber cloth. Gently wipe every camera lens you use, then test the camera before trying anything stronger. Apple, Samsung, and Google all recommend a soft cloth as the starting point when phone photos look blurry, hazy, or out of focus.
This matters because the visible circle on the back of a phone is not simply an exposed camera lens. The actual optics sit behind protective exterior glass, often called the lens cover. The surrounding camera module may also include a flash, microphone, laser-focus sensor, or other hardware. A method that is safe for a fingerprint on glass may not be appropriate for an opening, sensor, damaged seal, or third-party camera protector.
Quick reference: what to use and what to avoid
Situation
Best first action
Avoid
Fingerprints or oily smudges
Clean, dry microfiber cloth
Hard pressure, tissues, rough fabric
Light dust
Very gentle wipe with clean microfiber
Canned compressed air
Stubborn residue
Check the exact phone maker's cleaning instructions before adding moisture
Spraying liquid directly on the camera
Blur with a camera lens protector
Remove the protector or accessory and retest
Assuming more cleaning will fix optical distortion
Haze under the glass
Stop external cleaning and seek device support
Trying to force liquid or tools into the camera area
Lens looks clean but photos remain blurry
Test focus, lighting, accessories, software, and hardware
Repeated aggressive polishing
Before you start: a 30-second checklist
Use a clean, soft, lint-free microfiber cloth.
Unplug the phone before a more thorough cleaning.
Remove a case if it blocks access to the camera module.
Do not spray cleaner directly onto the phone.
Do not use canned compressed air.
Do not use abrasive cleaners, paper towels, or rough fabric.
If the camera glass is cracked or moisture appears underneath it, stop and consider service rather than continued cleaning.
Apple's current iPhone cleaning guidance says to turn the device off, unplug cables, use a soft lint-free cloth, avoid moisture in openings, and avoid compressed air. Samsung recommends a soft microfiber or camera-lens cloth for Galaxy devices and also warns against compressed air. Google Pixel guidance similarly starts with a soft, clean cloth and tells users to keep moisture out of openings. See the official Apple iPhone cleaning guidance, Samsung Galaxy cleaning guidance, and Google Pixel cleaning guidance.
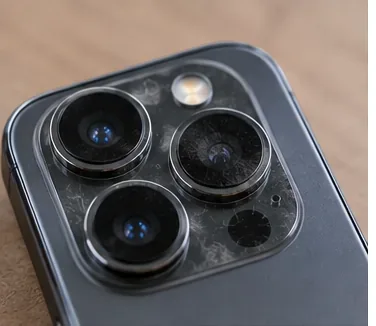
Step 1: Inspect the camera in bright, indirect light so you can distinguish removable fingerprints from scratches, trapped moisture, or damage.
Step 1: Inspect the lens before cleaning it
Tilt the phone under a lamp or near a bright window. Look across the surface rather than straight into it. Fingerprints usually appear as oily streaks or cloudy patches that change with the reflection. Dust sits on top of the glass. A scratch tends to stay sharply defined as the phone moves. Condensation or haze trapped beneath the exterior glass cannot be wiped away from the outside.
Check every rear camera lens. Modern phones often switch between wide, ultrawide, telephoto, or other cameras depending on zoom level, lighting, and shooting mode. Samsung specifically advises cleaning all lenses when troubleshooting poor image quality because different lenses and sensors can contribute to preview, rangefinding, autofocus, and capture.
Also inspect the front camera area. On many phones, the selfie camera sits behind the same front glass as the display, so makeup, skin oil, sunscreen, or fingerprints on that glass can soften the image.
Remove accessories that can imitate a dirty lens
If you use a stick-on camera lens protector, clip-on lens, filter, magnetic accessory, or a case that overlaps the camera area, remove it temporarily before judging the camera. Apple recommends removing cases, films, or accessories that may block or interfere with the camera. Samsung notes that camera protectors can cause focus problems or light distortion.
This is especially useful when a camera looks clean but night photos show unexpected flare, halos, or reflections. Cleaning the phone itself will not fix optical artifacts caused by another layer of glass or plastic sitting over the camera.
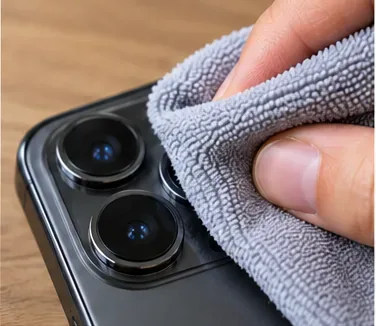
Step 2: Use a clean, dry microfiber cloth with light pressure. Wipe all rear camera lenses rather than cleaning only the largest one.
Step 2: Clean the camera with a dry microfiber cloth
Fold the cloth so a clean section touches the camera. Wipe one lens at a time using small, controlled motions. The exact motion matters less than using a clean cloth and light pressure. If the cloth becomes oily, move to a fresh section rather than spreading the residue around.
For ordinary fingerprints, this is often all that is needed. Apple tells users with blurry photos to clean the front and rear camera lenses with a microfiber cloth. Samsung recommends a soft, dry microfiber cloth for fingerprints, smudges, and dust on Galaxy camera lenses. Google Pixel troubleshooting says to wipe the camera lens and laser sensor gently with a soft, clean cloth.
Do not scrape dried particles with a fingernail, pin, knife, or other hard object. If visible grit is present, minimize pressure so it is not dragged across the glass. Do not use canned compressed air: Apple, Samsung, and Google all publish warnings against compressed air in their phone-cleaning guidance.
What if the smudge does not come off?
Do not immediately jump to alcohol or glass cleaner. Manufacturer guidance is more conservative for the camera lens than for general exterior disinfection. Samsung's camera-specific support page explicitly says to avoid liquids or cleaning solutions on the camera lens because they can damage the lens area or seep into the phone.
Apple and Google do permit certain damp-cleaning or disinfecting methods for exterior phone surfaces, but those instructions should not be treated as a universal recommendation to wet the camera lens. If dry microfiber does not remove a stubborn deposit, check the instructions for your exact model before escalating.
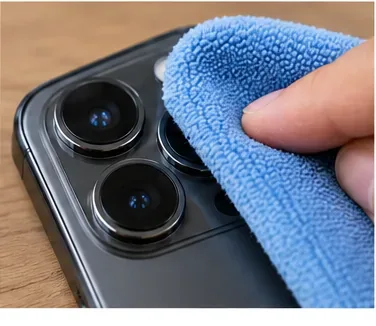
Step 3: Make a final dry pass with a fresh section of microfiber to remove remaining streaks and inspect the glass again before testing the camera.
Step 3: Dry-polish and recheck the surface
Use a clean, dry part of the cloth for a final pass, then tilt the phone under the same light you used during inspection. The goal is not a mirror-like cosmetic finish; it is a clear optical surface without visible grease or debris.
If a streak keeps returning, the problem may be the cloth itself. Microfiber can hold skin oil, lotion, fabric softener, or cleaning residue. Switch to a clean lens cloth rather than increasing pressure.
If a mark remains sharply visible and does not change after gentle cleaning, consider whether it is a scratch, damaged coating on the surrounding glass, or contamination beneath the cover. Cleaning cannot repair those problems.
Front camera and sensor areas
Use the same conservative approach on the front glass: clean microfiber first. If your Pixel model has an external laser-focus sensor, Google's camera troubleshooting guidance says to clean the lens and laser sensor gently with a soft, clean cloth. Do not push cotton swabs, pins, or cleaning fluid into openings around a camera module.
When is alcohol appropriate?
Alcohol is most relevant to device disinfection, not routine camera-lens polishing. Apple currently permits a 70% isopropyl alcohol wipe, 75% ethyl alcohol wipe, or specified disinfecting wipes on the exterior surfaces of supported iPhones. Google allows 70% isopropyl-alcohol-based wipes for disinfecting Pixel phones. Samsung also publishes alcohol-based options for compatible exterior glass, ceramic, and metal surfaces.
The important distinction is application. These manufacturers tell users not to spray liquid directly onto the device and to keep moisture out of openings. Samsung's lens-specific guidance is stricter and says to avoid liquids or cleaning solutions on the camera lens. For a simple fingerprint on camera glass, there is little reason to begin with alcohol when dry microfiber is the manufacturer-supported common denominator.
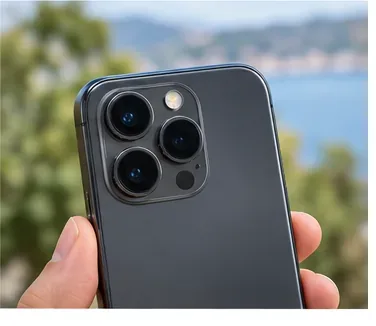
Step 4: After cleaning, test the camera in good light. If images are still blurry with clean glass, move on to focus, accessory, software, or hardware troubleshooting.
Step 4: Test the camera before cleaning again
Open the camera app and photograph a stationary subject in good light. Hold the phone steady and give autofocus a moment to settle. Test the front and rear cameras separately. If your phone offers multiple focal lengths, test those as well so you can tell whether the problem affects one camera or all of them.
If the image is now clear, stop. Repeated cleaning does not improve an already clean lens.
If the image is still blurry, remove any remaining case, camera protector, filter, or magnetic accessory and test again. Apple specifically calls out magnetic mounts and lens accessories as possible contributors to camera problems. Samsung's current troubleshooting material also identifies lens protectors as a source of focus issues and light distortion.
If the lens is clean but photos are still blurry
Symptom
Likely next check
Blur only at very close range
Move farther from the subject; you may be inside the camera's minimum focusing distance
Blur only in low light
Hold the phone steadier, add light, and rule out motion blur
Halos or flare around lights
Remove camera protectors or extra optical accessories and retest
One zoom level is blurry
That specific camera may be dirty, obstructed, or malfunctioning
All images remain hazy after cleaning
Restart the phone, update software, and follow manufacturer camera troubleshooting
Visible fog appears beneath the glass
Allow condensation to clear naturally if appropriate for your device, or seek support if it persists
Cracked camera glass or persistent autofocus failure
Cleaning is unlikely to help; consider professional service
Samsung notes that shooting distance and motion can create blur even when a lens is clean. Its current support guidance also explains that internal condensation can make a camera look foggy and should be allowed to clear naturally rather than treated as surface dirt. Apple recommends restarting the phone, updating iOS, testing both cameras, and seeking service if camera problems remain after basic troubleshooting. Google follows a similar escalation path for Pixel devices after lens cleaning.
Common mistakes that create more problems than they solve
Spraying glass cleaner directly on the camera. Liquid can reach seams and openings; phone makers generally tell users to apply permitted moisture to a cloth instead.
Using paper towels or tissues as a polishing tool. Samsung specifically recommends soft microfiber for camera lenses and warns against paper towels or tissues in its camera-cleaning guidance.
Using canned compressed air. Apple, Samsung, and Google advise against it for phone cleaning.
Scrubbing harder because a mark remains. A permanent scratch or internal haze will not become removable through extra force.
Cleaning only one rear lens. Multi-camera phones can switch lenses automatically.
Leaving a dirty or low-quality lens protector installed while troubleshooting. The protector may be the optical problem.
Treating disinfecting guidance as lens-cleaning guidance. Alcohol-based products may be allowed on some exterior surfaces without being the preferred way to clean camera optics.
Assuming every blurry photo means a dirty lens. Focus distance, movement, lighting, software, accessories, and hardware can all matter.
Simple maintenance routine
There is no need to clean a phone camera on a rigid schedule. Wipe it when fingerprints, lotion, makeup, pocket grime, or visible dust accumulate, or when image quality suddenly looks hazier than expected.
Keep one clean microfiber cloth in a camera pouch, desk drawer, or phone bag where it will not pick up sand or grit. Before an important photo, one quick dry wipe is usually more useful than repeated chemical cleaning. If you use a camera lens protector, inspect and clean that surface too—and periodically test the camera without it if image quality seems worse than expected.