Home
» How To
»
How to Clean a Refrigerator Water Dispenser Safely: An 8-Step Guide
How to Clean a Refrigerator Water Dispenser Safely: An 8-Step Guide
There has not been a meaningful shift to one universal refrigerator-dispenser cleaning method. Current manufacturer guidance still depends on the model and on which part you are cleaning. That matters because the visible dispenser recess, the removable drip tray, the nozzle, the water filter, and the internal tubing are different maintenance jobs.
For example, LG's refrigerator maintenance guidance published January 22, 2026 recommends wiping the dispenser area and using a small brush or cotton swab around the nozzle. GE Appliances' dispenser-cleaning guidance says the water tube itself does not need routine cleaning and recommends service if the tube needs attention. The practical takeaway is simple: clean the parts you can safely reach, but do not inject vinegar, soap, bleach, or another cleaner into the refrigerator's internal water system unless your model's instructions explicitly tell you to do so.
Quick answer: what is the safest way to clean a refrigerator water dispenser?
For most refrigerators, start with the dispenser lock, remove any tray or grille that is intended to come out, wash removable pieces with mild soap and water, wipe the dispenser recess with a soft damp cloth, and gently clean the nozzle with a clean soft brush or cotton swab. Treat hard-water deposits only on surfaces that the manufacturer says can tolerate the cleaner you choose. Dry everything, reassemble it, then test the water flow.
If the water itself tastes unusual, flows slowly, looks cloudy after a filter change, or has an odor, cleaning the exterior dispenser may not solve the problem. The filter, trapped air, supply water, or another component may be involved.
Choose the cleaning method by the problem you actually have
Problem
Best first choice
Tradeoff or caution
Fingerprints, splashes, sticky residue
Soft cloth with mild soap and water
Low risk, but keep liquid away from electronic controls and dry the surface afterward.
Mineral spots on a compatible spill shelf
Manufacturer-approved descaling method; GE permits undiluted vinegar on the dispenser shelf for mineral deposits
Acids can affect some metals, coatings, and stone-like finishes. Check your manual before using vinegar broadly.
Residue around the water nozzle
Small clean brush or cotton swab
Good access without flooding the nozzle; do not scrape with metal tools.
Dirty removable drip tray or grille
Hand wash with mild detergent if the part is removable and washable
Simple and thorough, but not every tray is meant to be forced out.
Slow flow or poor taste
Check the water filter and follow the model's flushing instructions
This addresses the water path rather than surface dirt; cleaning the dispenser face alone may do nothing.
Suspected buildup inside tubing
Use the model's service guidance
Do not improvise by pumping household cleaner through internal tubing. GE specifically says routine tube cleaning is not required.
What you need
Two soft microfiber cloths
A small bowl of warm water
A few drops of mild dish soap
A clean soft toothbrush, narrow bottle brush, or cotton swabs
A soft towel for drying
White vinegar only if your manufacturer's instructions allow it for mineral deposits on the surface you are treating
Avoid abrasive pads, sharp picks, concentrated detergent, and harsh chemicals unless the refrigerator manual explicitly approves them. Whirlpool's general refrigerator-care guidance warns against many abrasive or harsh cleaners on refrigerator plastics and liners, so a mild approach is the better default.
How to clean a refrigerator water dispenser in 8 steps
1. Prevent accidental dispensing
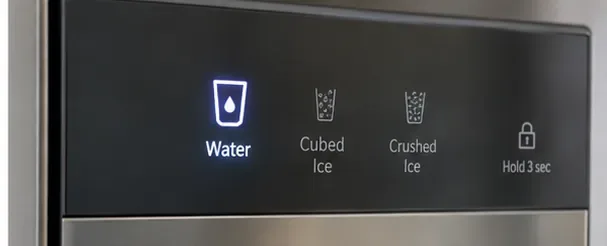
If your refrigerator has a dispenser-control lock, turn it on before wiping the paddle or touch panel. Some models also let you disable the dispenser for cleaning. If your owner's manual tells you to disconnect power for the maintenance you plan to do, follow that instruction. You do not need to invent an electrical shutdown procedure for a basic exterior wipe-down; use the model's directions.
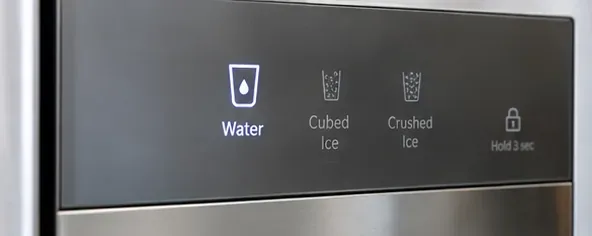
Check for a dispenser lock before cleaning so the paddle or touch controls are not activated accidentally.
2. Remove the drip tray or grille if it is designed to come out
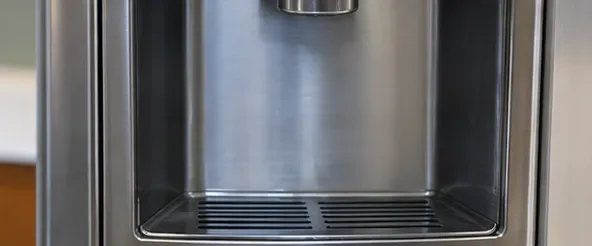
Lift or slide out the removable tray without forcing it. Wash a washable plastic tray or grille with warm water, mild dish soap, and a soft sponge or cloth, then rinse it well. If the part resists removal, stop and check the manual rather than prying it loose.
This is also the best time to look underneath the tray for dried drips. Standing water and repeated evaporation can leave mineral marks, especially in hard-water areas.
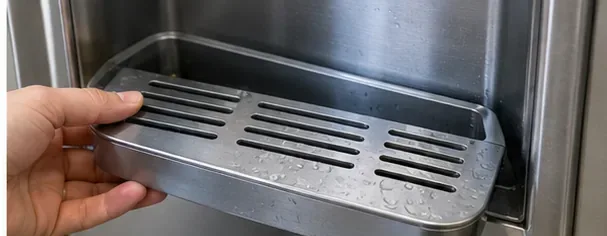
Remove the drip tray or grille only if your model is designed for it, then wash it separately with a mild cleaner.
3. Wipe the dispenser recess, paddle, and surrounding surfaces
Dampen a microfiber cloth with mild soapy water and wring it out well. Wipe the recess, the glass cradle or paddle, and the surrounding trim. Put cleaner on the cloth rather than spraying directly into the dispenser, because liquid can migrate into seams, switches, or display electronics.
Follow with a second cloth dampened with clean water to remove soap residue. For stainless-steel trim, wipe gently and follow the refrigerator maker's finish-care instructions if they differ from this general method.
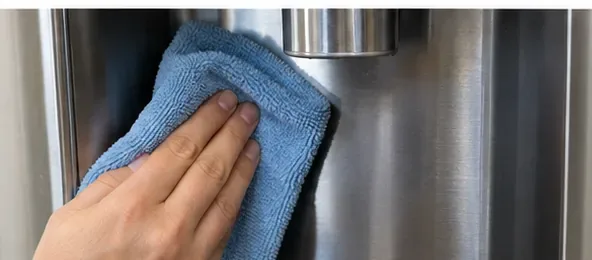
Use a damp soft cloth on the dispenser recess, paddle area, and nearby surfaces instead of spraying cleaner into the controls.
4. Treat mineral deposits only where the material allows it
White or chalky marks are often mineral deposits from evaporated water. GE Appliances says its dispenser spill shelf can be soaked with undiluted vinegar until deposits loosen, noting that about 30 minutes is often adequate. GE also lists a citric-acid option but specifically says that option should not be used on stainless-steel dispensers.
That does not make vinegar a universal refrigerator cleaner. Use it only on a compatible surface and only as directed for your appliance. Do not pour vinegar into the dispenser nozzle or water tubing as a DIY deep-cleaning shortcut. After loosening deposits, wipe the area with clean water and dry it.
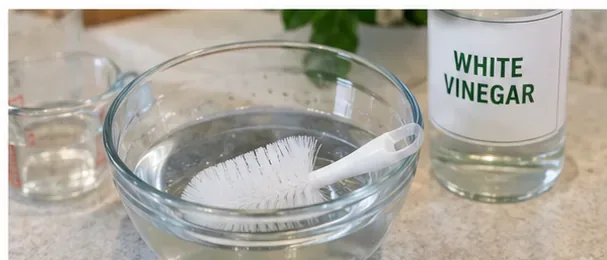
White vinegar can help loosen mineral deposits on compatible dispenser shelves or removable parts; do not pour it into the refrigerator water line.
5. Clean around the water nozzle gently
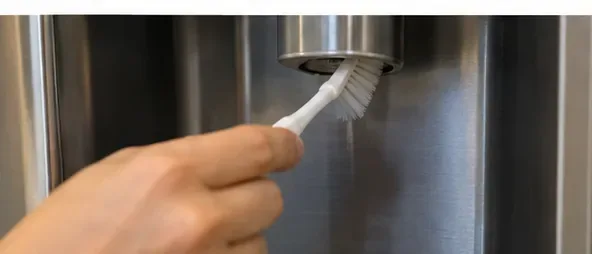
Use a clean soft toothbrush, small soft brush, or cotton swab to loosen residue around the nozzle opening. LG's current maintenance guidance specifically recommends a small brush or cotton swab for cleaning inside and outside the dispenser nozzle.
Some refrigerators have a nozzle piece that can be removed; others do not. Only remove it when the owner's manual for your exact model describes that procedure. Do not use a needle, screwdriver, wire, or other hard object to scrape the outlet, because you can damage the nozzle or push debris farther inside.
A clean soft brush or cotton swab can remove residue around the nozzle without using sharp tools.
6. Wipe away residue and test with clean water
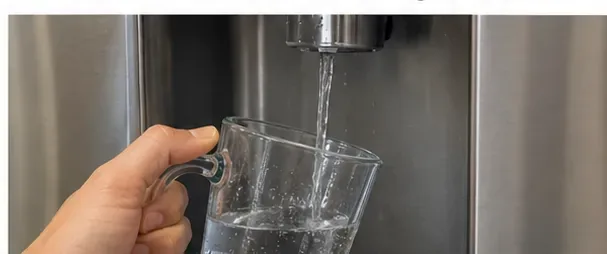
Use a clean damp cloth to remove any remaining soap or loosened mineral residue from the accessible dispenser surfaces. Then dispense water into a clean glass or measuring cup and check the stream.
This test is not the same as flushing a newly installed filter. If you replaced the filter, follow the exact flushing procedure for the refrigerator or filter. Whirlpool's water-system flushing instructions, for example, explain that flushing after filter replacement helps remove trapped air and excess carbon. Other brands and models can specify different volumes or timing.
After reassembly, dispense water to confirm normal flow; after a filter change, follow the model-specific flushing procedure.
7. Dry and reassemble the dispenser
Dry the tray, grille, recess, and surrounding trim before reassembly. Drying matters because repeated standing water is what produces many of the spots that make a dispenser look dirty again quickly. Make sure removable parts sit flat and do not interfere with the paddle or glass cradle.
Dry the dispenser recess and removable parts thoroughly before putting everything back in place.
8. Restore the controls and do a final check
Turn off the dispenser lock if you enabled it, restore power if your model's procedure required disconnecting it, and dispense water again. Check for a normal stream, unusual dripping, leaks around removable parts, and any cleaner odor.
A drop or two after dispensing can be normal on some models, but persistent dripping, weak flow, or leaks after reassembly deserve troubleshooting rather than more surface cleaning.
Restore the dispenser controls and check that water mode, lock status, and dispensing behavior are normal.
Should you use vinegar, baking soda, bleach, or commercial cleaner?
Vinegar
Vinegar is useful for certain mineral deposits, but its main advantage is targeted descaling, not universal cleaning. Use it where the manufacturer allows it, keep it out of internal water lines unless directed otherwise, and rinse the treated surface afterward.
Baking soda
Baking soda can be appropriate for some removable or soft-touch parts when a manufacturer specifically recommends it. GE, for example, describes a warm-water and baking-soda solution for certain removable soft-touch dispenser pads. It is not automatically the right choice for every stainless or coated surface.
Bleach and strong disinfectants
Do not assume that a stronger cleaner is safer because the dispenser handles drinking water. Harsh products can damage plastics, finishes, seals, or labels. Follow the appliance manual. If the manufacturer only recommends mild soap and water, stay with that method.
When cleaning the dispenser will not fix the problem
Bad taste or odor: Check the filter age, correct filter installation, recent plumbing work, and household water supply. If the taste started after installing a new filter, the system may need the prescribed flush.
Slow water flow: A clogged or incorrectly installed filter, kinked supply line, low water pressure, or dispenser issue can reduce flow. Surface cleaning is unlikely to solve those causes.
Cloudy water after a filter change: Trapped air can make water look cloudy temporarily. Use the manufacturer-specified flush procedure instead of cleaning the nozzle repeatedly.
Persistent slime, mold-like growth, or contamination inside inaccessible tubing: Stop treating it as a cosmetic cleaning job. GE states that routine cleaning of the dispenser water tube is not required and recommends service if the tube needs cleaning. Contact the manufacturer or a qualified appliance technician for the correct procedure.
How often should you clean it?
There is no single interval that fits every dispenser. Wipe fresh spills and drips promptly, clean the tray when residue or mineral scale appears, and clean around the nozzle when you see buildup. High-use households and hard-water areas may need surface cleaning more often.
Water-filter replacement is a separate schedule. Some manufacturers commonly recommend replacement around every six months, but the correct interval depends on the filter, refrigerator, water quality, use, and indicator light. Whirlpool, for example, recommends changing its refrigerator water filter every six months, when the indicator comes on, or as needed. Always use the schedule for your model rather than treating six months as a universal rule.
A simple maintenance checklist
Wipe drips before they dry into mineral spots.
Keep the removable tray clean and dry.
Use a soft brush or cotton swab around the nozzle.
Do not spray cleaner directly into controls or seams.
Do not pump household cleaner into the internal water tube without model-specific instructions.
Replace and flush the water filter according to the refrigerator or filter manual.
Call for service if an inaccessible water line appears contaminated or the dispenser leaks internally.