Home
» How To
»
How to Clean a Traeger Pellet Grill: A Practical Maintenance Guide
How to Clean a Traeger Pellet Grill: A Practical Maintenance Guide
Traeger’s current pellet-grill maintenance guidance, updated April 14, 2026, gives owners a useful rule of thumb: clean spills and cooking grates after use, and deep-clean the interior about every 2–3 cooks or roughly every 20–24 hours of cooking. Fatty foods such as brisket, pork belly, burgers, or bacon can justify cleaning sooner. The same guidance calls for monthly hopper cleaning, exterior cleaning about every three months, and periodic attention to the grease chute or downdraft system. See Traeger’s current pellet-grill cleaning instructions.
This guide is for Traeger wood-pellet grills. Traeger flat-top griddles such as Flatrock and IronTop use a different cleaning and seasoning process. Within the pellet-grill family, parts also vary: older and D2 models commonly use a drip tray, heat baffle, grease bucket, and chimney or downdraft; newer Timberline, Ironwood, Woodridge, and Westwood models may use an EZ-Clean Grease & Ash Keg, grease tube, ash cap, or removable firepot. Use the steps below as a practical reference, then match component names to your model’s owner’s manual.
Quick Traeger Cleaning Schedule
When
What to do
Why it matters
After each cook
Brush food residue from warm grates and wipe fresh spills.
Prevents cooked-on residue from becoming harder to remove.
Every 2–3 cooks or about 20–24 cooking hours
Deep-clean the barrel, firepot area, drip tray, heat baffle, and grease path.
Controls ash and grease buildup that can affect airflow, temperature stability, and fire risk.
Monthly
Empty pellets and vacuum sawdust from the hopper and accessible pellet-feed area as your model allows.
Reduces loose sawdust and debris entering the firepot.
About every 3 months
Clean the exterior; do it more often if the grill is uncovered.
Removes grease film, smoke residue, and weather grime.
About every 6 months
Clean the grease chute, chimney, backpack, or downdraft path used by your model.
Keeps grease and soot from restricting drainage or airflow.
What You Need
A nylon-bristle or other non-wire grill brush, wooden scraper, or non-abrasive grate tool.
A stiff non-metallic scraper for drip-tray grease, such as a plastic or silicone putty knife where appropriate.
Disposable shop towels or heavy-duty paper towels.
A vacuum suitable for completely cold ash and pellet dust.
An all-natural, non-chemical grill degreaser. Traeger also lists common household options such as distilled white vinegar and dish soap in its cleaning guidance.
A soft damp cloth for final wiping.
Fresh drip-tray or grease-keg liners if your grill uses them.
Heat-resistant gloves for the brief warm-grate cleaning step.
Traeger specifically advises against wire brushes on the cooking grates because bristles can break off and end up in food. For the EZ Clean drip tray used on certain Timberline and Ironwood grills, the company also recommends non-abrasive, non-metal tools instead of steel wool or steel brushes.
How to Clean a Traeger Pellet Grill
1. Brush the grates while they are still warm
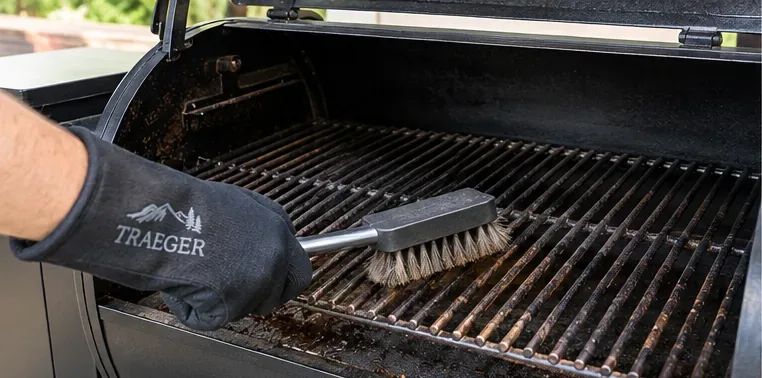
After removing the food, give the cooking grates a quick pass with a long-handled, non-wire brush while the grates are warm rather than blazing hot. Warm residue generally releases more easily than residue that has cooled into a hard layer. Wear heat-resistant gloves and keep your hands away from hot metal surfaces.
Brush food residue from the grates while they are still warm, using a non-wire tool.
2. Complete shutdown, let the grill cool, unplug it, and remove the grates
For the deep-cleaning portion, let the grill complete its normal shutdown procedure. Once it is fully shut down and completely cool, switch off the power and disconnect the power cord before starting maintenance. Traeger’s support guidance emphasizes that the grill and ash must be cold before ash removal or vacuuming.
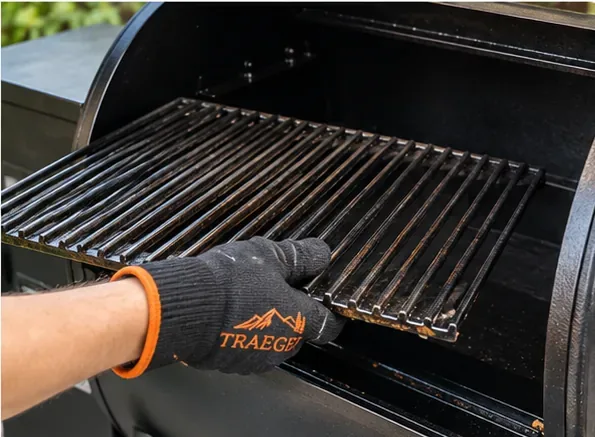
Open the lid and remove the cooking grates. Set them on a stable, washable surface. This exposes the grease-management components underneath.
Once the grill is fully cool and unplugged, remove the cooking grates to access the internal components.
3. Remove the drip tray and heat baffle, then vacuum the firepot area
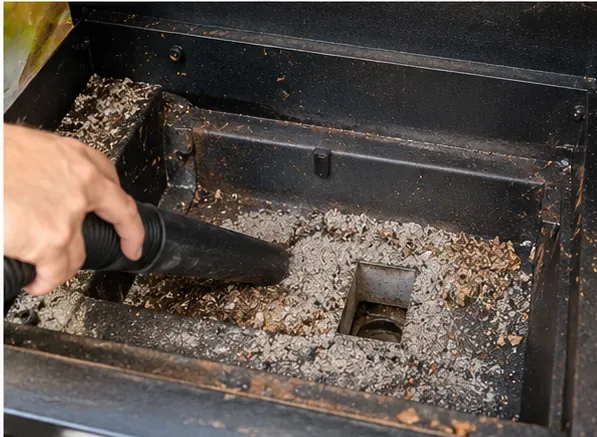
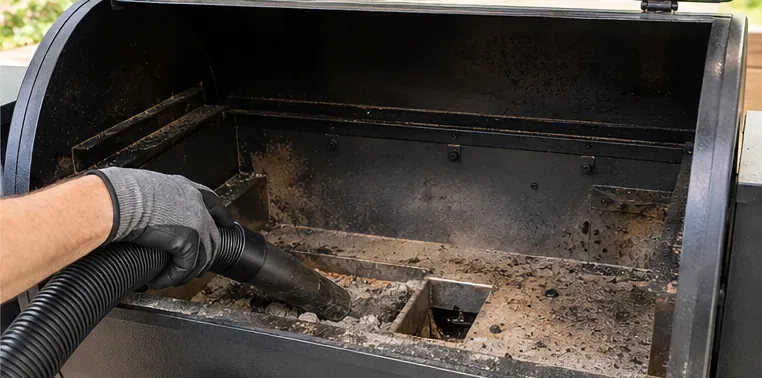
On traditional Non-WiFIRE and D2 WiFIRE layouts, remove the old drip-tray liner or foil, then remove the drip tray and heat baffle. If your model has a lower heat shield, clean underneath it as well. Vacuum loose ash from the barrel and firepot only after everything is cold. Traeger recommends a dedicated vacuum for this job and says firepot ash should be removed at least about every 20 hours of cooking.
Touchscreen Timberline and Ironwood grills have a different arrangement: their deep-clean procedure includes removing the EZ Clean Drip Tray, EvenFlow Heat Shield, and firepot before vacuuming residual ash. Do not force a component that does not match the layout shown in your owner’s manual.
Vacuum only cold ash and loose debris from the barrel and firepot area after internal parts are removed.
4. Clean the grates, drip tray, and heat-management parts
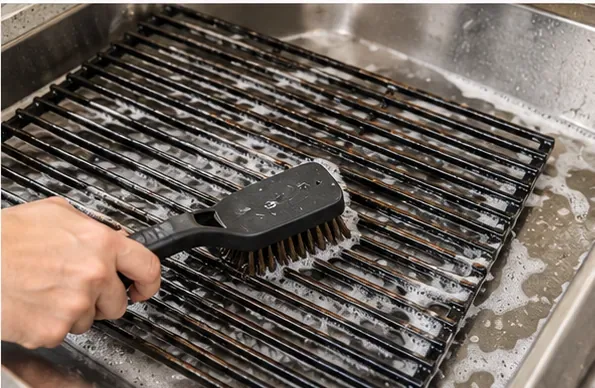
Scrape or brush residue from both sides of the grates using a non-wire, non-abrasive tool. For stubborn grease, use an all-natural grill cleaner or a mild cleaning solution allowed by Traeger. If you use dish soap on removable parts, rinse away residue and dry the parts completely before they go back into the grill.
For drip trays, scrape off food and grease with a stiff non-metallic scraper, then degrease and wipe. Replace disposable liners rather than trying to restore a heavily soiled liner. Traeger’s drip-tray guidance notes that the tray needs to drain toward the grease system and should be replaced if deterioration creates holes.
Deep-clean removable grates with a non-wire brush; rinse away any approved cleaner and dry completely before reinstalling.
5. Vacuum the rest of the barrel and check the grease path
With the major internal parts out, vacuum loose ash and pellet debris from the bottom of the barrel, corners, and areas around the firepot. Then inspect the grease route: drip tray, trough or grease tube, grease chute, bucket, or Grease & Ash Keg depending on the model.
Grease should be able to move toward its collection point instead of pooling in the body of the grill. A blocked grease path, incorrect drip-tray position, or excessive buildup can contribute to leaks and flare-ups. Traeger says an unclean grill is a common cause of grill fires and recommends not exceeding about 20 hours of cooking between cleanings; greasier cooks may need a shorter interval. See Traeger’s grill-fire prevention guidance.
Vacuum loose ash from the exposed barrel and inspect the grease path for buildup or obstructions.
6. Degrease and wipe the interior surfaces
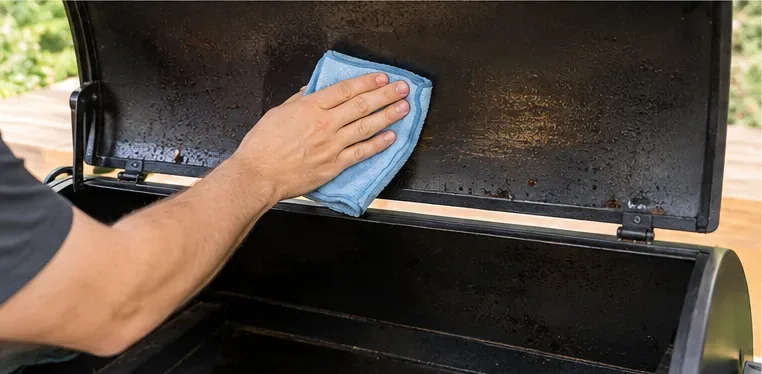
Scrape off loose, cooked-on residue first. Then apply an all-natural, non-chemical degreaser to the appropriate interior surfaces and wipe with a soft cloth or paper towel. Traeger’s current instructions for its All-Natural Grill Cleaner say to scrape residue, spray the interior, let the cleaner work for about 10 minutes, scrub with a non-wire tool, and wipe with a damp soft cloth. Follow the directions for whichever cleaner you actually use.
Do not treat every dark interior surface as a stain that must be polished to bare metal. The goal is to remove loose soot, grease, food debris, and obstructions without damaging coatings or components. Traeger also says not to clean the thermocouple or RTD unless visible buildup needs removal. For cleaner directions, see Traeger’s All-Natural Grill Cleaner instructions.
Wipe interior surfaces after loose ash and grease have been removed; avoid unnecessary scrubbing of sensors.
7. Clean the hopper and exterior
About monthly, empty pellets from the hopper and vacuum accumulated sawdust from the bottom of the hopper and accessible feed area according to your model’s design. Keep hands out of the hopper whenever the grill is powered. Pellets that have absorbed moisture, crumble easily, or have broken down into excessive sawdust should not be returned to the hopper.
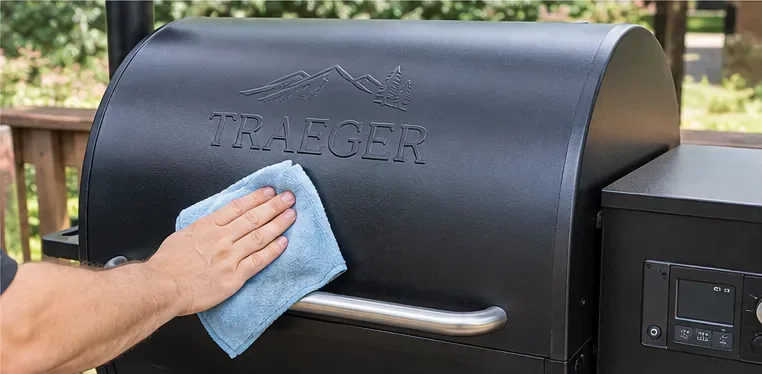
For the exterior, use a soft damp cloth and an appropriate cleaner. Pay attention to greasy fingerprints, the lid handle, side shelves, the hopper exterior, and rear vents or downdraft openings. Avoid flooding the controller, electrical connections, hopper, or pellet-feed system with liquid.
Finish by wiping the exterior with a soft cloth while keeping excess liquid away from the controller and pellet system.
8. Reassemble carefully and perform a pre-cook check
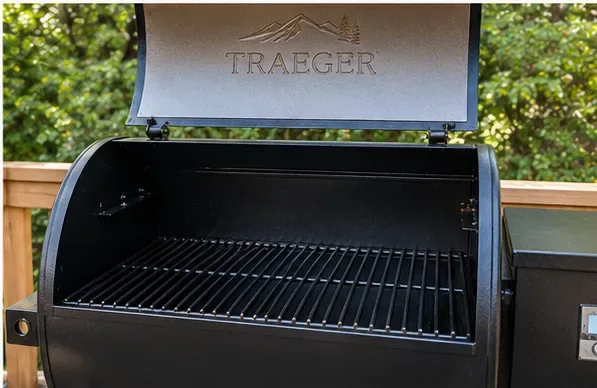
Return the heat baffle, drip tray, grease components, fresh liners, and cooking grates to their correct positions. The order and orientation matter because the drip tray must drain correctly and heat-management parts control airflow and heat distribution. On touchscreen Timberline and Ironwood models with a removable firepot, Traeger notes that the firepot lip should sit flush and not catch on the auger tube.
Before the next cook, confirm that nothing blocks the drip tray, the grease collection container is in place, the grates are seated properly, and the hopper contains dry, sound pellets. You do not need to invent a special high-temperature “cleaning burn” after every maintenance session unless your model’s manual specifically instructs you to do so.
Reinstall the internal parts in their proper positions and verify the grill is ready for the next cook.
Model-Specific Differences to Know
Traeger type
Cleaning details that differ
Non-WiFIRE and D2 WiFIRE pellet grills
Typically remove grates, liner, drip tray, and heat baffle; vacuum barrel and firepot; clean the chimney or downdraft and grease chute.
Touchscreen Timberline and Ironwood
Use the EZ Clean Drip Tray, Grease Tube, Grease Governor, removable firepot, EvenFlow Heat Shield, and Grease & Ash Keg. Use non-metallic scrapers on the drip tray.
Woodridge series
Uses an EZ-Clean Grease + Ash Keg and model-specific grease chute/ash-cap arrangement. Traeger’s current guidance includes monthly hopper and firepot cleaning.
Westwood series
Deep cleaning includes removing grates, drip tray, and heat baffle, vacuuming ash, checking the firepot, cleaning the hopper, and replacing the Grease + Ash Keg liner as needed.
How to Tell Whether Your Traeger Needs Cleaning Sooner
Do not rely only on the calendar. Move your next cleaning forward if you see a thick grease layer on the drip tray, heavy ash around the firepot, grease pooling where it should not, unusual black smoke, slower ignition, difficulty reaching or holding temperature, or more ash landing on food. These symptoms can have causes other than maintenance, so cleaning is a first check rather than proof of a specific fault.
Common Cleaning Mistakes
Vacuuming warm ash: wait until the grill and ash are fully cold. Hidden embers can remain hot longer than the metal feels hot from the outside.
Using a wire brush: Traeger recommends non-wire grate-cleaning tools because loose wire bristles can contaminate food.
Ignoring the grease system: a shiny grate does not mean the grill is clean if the drip tray, grease tube, trough, chute, bucket, or keg is packed with residue.
Over-cleaning sensors: do not scrub the thermocouple or RTD as routine maintenance unless visible buildup needs to be removed.
Putting wet parts back into the grill: dry cleaned components before reassembly, especially around ash, pellets, and steel surfaces.
Using the pellet-grill method on a flat-top: Traeger flat tops have a seasoned cooktop and require a different procedure.
Fast Pre-Cook Checklist
Grates are clean enough for direct food contact.
Drip tray is seated correctly and not blocked by loose foil or debris.
Grease bucket or Grease & Ash Keg is installed and not overfilled.
Firepot does not have excessive ash or unburned pellet buildup.
Heat baffle and other internal components are installed in the correct orientation.
Pellets are dry and not breaking down into excessive sawdust.
Controller and electrical areas are dry.
A clean Traeger is less about making every surface look new and more about preserving airflow, grease drainage, ignition reliability, and safe operation. The simplest routine is to brush the grates after cooking, watch grease accumulation, and schedule a cold deep clean before ash and grease become performance problems. When your grill’s parts do not match the examples above, use Traeger’s model-specific support guide rather than forcing a generic procedure.