Home
» How To
»
How to Clean a Vacuum Filter Without Damaging It
How to Clean a Vacuum Filter Without Damaging It
A vacuum can still sound normal while picking up less dirt, running hotter, pulsing, or leaving a dusty smell behind. A clogged filter is one possible cause, but the safest fix is not simply to wash every filter you can remove. Some vacuum filters are designed to be rinsed; others are meant to be tapped clean, brushed only as directed, or replaced.
The practical rule is simple: identify the filter first, then use only the cleaning method the manufacturer allows. For a washable filter, that usually means removing loose dust, rinsing it as directed, and letting it dry completely before reinstalling it. For a non-washable filter, water can damage the filter media or its seals, so dry cleaning or replacement is the better approach.
This guide focuses on the quality of the result: what “clean enough” looks like, how to tell whether cleaning helped, when to change methods, and where general advice stops being reliable. Manufacturer support guidance cited below was checked in September 2026.
What a good cleaning result should look like
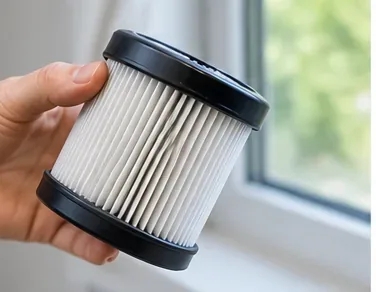
A successful filter cleaning does not require an older filter to become perfectly white. What matters is that it is free of heavy dust loading, fully dry, structurally intact, installed correctly, and no longer causing an obvious restriction.
The filter media is not packed with lint, hair, or a visible cake of fine dust.
A washable filter has no remaining rinse water and does not feel damp or unusually cool to the touch.
The frame, foam, pleats, gasket, and seals are not torn, crushed, warped, or separating.
The filter seats fully in its housing and the dust bin or filter cover closes normally.
After reassembly, the vacuum runs steadily and airflow or pickup is normal for the machine.
If suction is still weak after the filter is correctly cleaned and reinstalled, the filter may not be the main problem. A full bin, blocked hose or airway, tangled brush roll, incorrectly seated seal, worn filter, or machine fault can produce similar symptoms.
First, find out whether the filter is washable
Do this before putting a filter anywhere near a sink. Check the owner's manual, the filter label, or the manufacturer's support page for your exact model. “HEPA” does not mean “washable.” HEPA is a performance classification for high-efficiency particulate filtration, not a cleaning instruction. The U.S. Environmental Protection Agency describes HEPA as a pleated mechanical filter capable of at least 99.97% removal of 0.3-micron particles under the applicable definition; it also advises following manufacturer recommendations for maintenance and replacement. See the EPA's HEPA filter explanation.
Filter situation
What to do
What not to assume
Manufacturer says washable or rinsable
Follow the specified water temperature, rinsing method, drying time, and cleaning interval.
Do not assume soap, hot water, squeezing, or brushing is allowed.
Manufacturer says tap clean or dry clean only
Remove loose debris gently and replace the filter when specified.
Do not rinse it just because the media looks like another washable filter.
HEPA or pleated filter with unclear instructions
Find the exact model manual or support page before cleaning.
HEPA labeling alone does not tell you whether water is safe.
Filter is torn, warped, separating, or permanently clogged
Replace it with the correct part for the model.
Cleaning cannot restore damaged filter media.
Brand guidance differs for good reasons. Dyson's current cordless filter-care instructions call for cold water without detergent on the washable filters covered by that guide and at least 24 hours of drying. A Shark cordless manual likewise specifies water only for its washable filters and complete air drying, while one BISSELL CleanView guide distinguishes a washable pre-motor foam filter from a post-motor filter that must not be washed. These examples are why model-specific instructions should override a generic method. See Dyson filter care, the Shark cordless vacuum manual, and BISSELL CleanView filter guidance.
How to clean a vacuum filter step by step
1. Turn the vacuum off and remove the filter
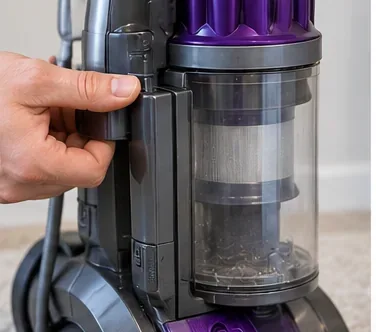
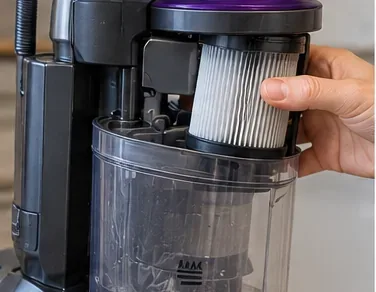
Unplug a corded vacuum. For a cordless model, switch it off and disconnect it from the charger if the manufacturer's instructions call for that. Empty the bin first if doing so gives cleaner access to the filter area. Remove the filter using the release tabs, twist-lock, cover, or housing described in the manual; forcing the wrong part can damage a seal or latch.
Start with the vacuum switched off and disconnected from power, then remove the filter according to the model's instructions.
2. Remove loose dust before deciding whether to wash
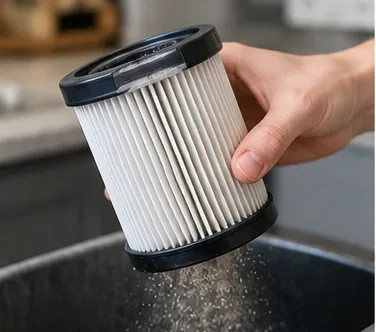
Take the filter outdoors or hold it low inside a trash bin if practical. Gently tap off loose dust. This first step reduces the amount of dirt that has to be flushed out of a washable filter and may be the only cleaning method allowed for some non-washable filters.
Avoid hard impacts on a pleated cartridge. Deep dents, torn pleats, or loose end caps are not signs of a cleaner filter; they are reasons to consider replacement.
Loose dust should come off before any washing; gentle tapping is safer than aggressive scrubbing for many pleated filters.
3. Rinse only if the exact filter is washable
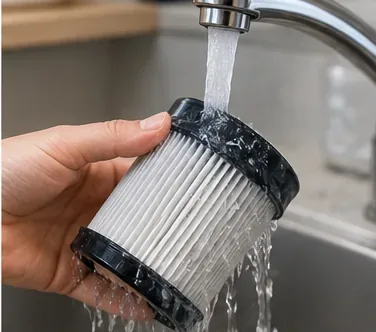
If the manual says the filter is washable, rinse it using the specified method. Dyson's current cordless guidance says cold tap water and no detergent for the models covered by that support page. Other manufacturers and models may permit warm water or mild detergent for specific foam filters. BISSELL, for example, allows mild detergent on some washable pre-motor filters but explicitly says certain post-motor filters are not washable.
Keep rinsing only as long as the manufacturer directs. For many washable filters, clearer runoff is a useful sign that most loose contamination has been removed. Do not use that sign to justify washing a filter that is labeled non-washable.
Only rinse a filter that the manufacturer identifies as washable or rinsable, using the water temperature and method specified for that model.
4. Air-dry the filter completely
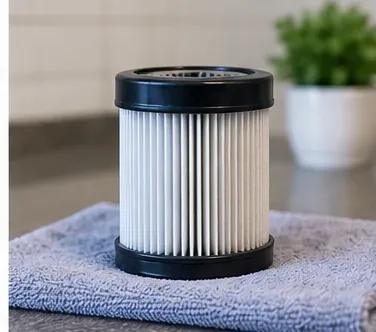
Drying is part of the cleaning process, not an optional waiting period. Shake off excess water only if the instructions permit it, then leave the filter in a well-ventilated place. Dyson specifies at least 24 hours for the filters in its current cordless guide, while some BISSELL support pages advise 24 to 48 hours for certain washable filters. Your manual's instruction is the one that matters.
Do not reinstall the filter merely because the surface looks dry. Thick foam and pleated assemblies can retain moisture inside. If the filter still feels damp or cool compared with the room, give it more time.
A washed filter must be fully air-dried before it goes back into the machine; a filter that still feels cool or damp needs more time.
5. Inspect the dry filter before reinstalling it
Cleaning is not the right answer for every dirty filter. Once the filter is dry, inspect it in good light. Check for torn pleats, crumbling foam, split seams, warped plastic, loose gaskets, embedded debris that did not rinse away, or a persistent odor that suggests contamination remains.
Replace rather than repeatedly wash a filter that is structurally damaged. A filter is a fitted component of the vacuum's airflow path; a compromised seal or filter medium can let dust bypass the intended filtration system.
After drying, inspect the media, seals, and frame. Tears, deformation, persistent odor, or embedded dirt can be signs that replacement is more appropriate.
6. Reinstall it in the correct orientation
Put the filter back only when it is completely dry. Seat it fully, close the housing, reinstall the dust bin, and check that any locking tabs or twist marks line up. A clean filter installed crookedly can still create poor airflow or allow bypass around the seal.
Reinstall the completely dry filter in the correct orientation and make sure covers, bins, and seals are fully seated.
7. Test the vacuum and judge the result
Turn the vacuum on and listen for stable operation. Test pickup on an ordinary floor area rather than using your hand to block the nozzle. If the vacuum previously pulsed, sounded strained, or lost suction because of a clogged washable filter, correct filter maintenance may improve the behavior. It is not a guarantee, because the machine may also have a blockage or another fault.
If performance is still poor, stop repeating the same filter-washing cycle. Empty the bin, check the hose and airways, remove hair from the brush roll as the manual allows, verify that covers and seals are closed, and follow the manufacturer's troubleshooting path. Dyson's support material, for example, pairs filter cleaning with blockage checks when diagnosing suction or pulsing problems.
Test the vacuum after reassembly. Normal airflow and stable operation are more useful checks than expecting an old filter to look brand-new.
8. Set a maintenance schedule based on the model
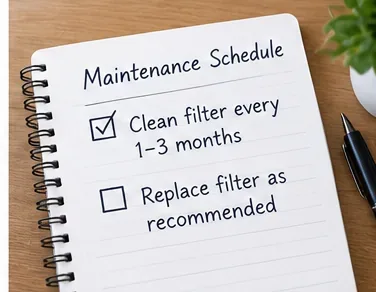
There is no universal “every three months” rule for all vacuum filters. Dyson recommends at least monthly cleaning for many cordless filters in its current general guide. The Shark manual cited above calls for monthly cleaning of certain pre-motor filters and much less frequent washing of its post-motor HEPA filter. Some BISSELL models use monthly inspection with washing or replacement at different intervals.
Heavy use, pet hair, fine construction dust, flour-like powders, and very dusty rooms can load a filter faster. Treat the manufacturer's interval as a baseline and inspect more often when the machine's manual recommends it.
Use the maintenance interval in the owner's manual. Different brands and even different filters in the same vacuum can have very different cleaning schedules.
When should you switch from cleaning to replacement?
Cleaning has limits. Replacement is usually the more sensible choice when the manufacturer identifies the filter as disposable, when the media is torn or deformed, when a gasket no longer seals, or when repeated approved cleaning no longer restores acceptable airflow.
Persistent odor can also matter. If a washable filter is fully dry yet still smells strongly musty, oily, smoky, or sour after an approved cleaning, do not keep soaking it indefinitely. Check the manual for replacement guidance and inspect the dust bin, brush roll, hose, and other washable parts because the odor source may be elsewhere.
Common cleaning mistakes that can make things worse
Washing a non-washable filter: water can alter pleated media, adhesives, coatings, or seals.
Using detergent by default: some manufacturers allow it on specific foam filters; others explicitly prohibit it. Follow the exact filter instructions.
Reinstalling while damp: manufacturers repeatedly warn that filters should be completely dry before reuse.
Speed-drying with high heat: Dyson specifically warns against tumble dryers, ovens, microwaves, and open flames for its washable filters.
Aggressive brushing or scraping: a cleaner-looking pleat is not worth damaged filter media.
Assuming every filter in one machine is cleaned the same way: a vacuum may contain a washable pre-motor filter and a dry-clean-only or replaceable post-motor filter.
Final self-check: is the vacuum ready to use?
Before you consider the job finished, run through this short check:
The correct filter was cleaned using the method allowed for that exact model.
Any washed filter is completely dry inside and out.
The filter is intact and seated correctly.
The dust bin, filter cover, and seals are closed properly.
The vacuum starts and runs normally without a new warning, unusual pulsing, or obvious loss of airflow.
If performance is still poor, you move on to blockage checks, brush-roll maintenance, or filter replacement instead of repeatedly washing the same filter.
The best vacuum-filter cleaning method is therefore not the most aggressive one. It is the least damaging method that removes enough accumulated debris to restore normal airflow while preserving the filter's structure and fit. When the filter's washability is unclear, the owner's manual is the deciding source.