Home
» How To
»
How to Clean Fabric Blinds Without Leaving Water Marks or Creases
How to Clean Fabric Blinds Without Leaving Water Marks or Creases
Fabric blinds can look dramatically better after cleaning, but the best result is not simply “as clean as possible.” A good result is an even surface with less dust and visible soil, while the fabric keeps its original color, texture, pleats, shape, and ability to raise or lower normally. If cleaning creates a pale patch, water ring, puckering, crushed pleats, or color transfer, the method is too aggressive for that material.
Current manufacturer guidance still supports a conservative approach. Hunter Douglas updated its general home-care guidance on August 4, 2026, and continues to distinguish between routine dust removal, product-specific spot cleaning, and professional deep-cleaning methods. Some fabrics should not be spot-cleaned at all. Bali likewise distinguishes among fabric types and warns that fabric vertical vanes should not simply be immersed in water. The practical lesson is simple: start dry, add as little moisture as necessary, and stop when the fabric tells you the method is causing a change.
What a successful cleaning should look like
Area to check
Good result
Change course if you see
Surface
Dust and loose soil are reduced evenly
A noticeably cleaner patch surrounded by dingier fabric
Fabric shape
Pleats, folds, or vanes keep their original form
Crushing, stretching, puckering, or permanent creases
Color
No obvious change once dry
Dye on the cloth, fading, darkening, or a water ring
Feel
Fabric is dry and free of cleaner residue
Sticky, stiff, or damp areas
Operation
The blind raises, lowers, or rotates normally
Binding, uneven movement, or a damp headrail/mechanism
The phrase “fabric blinds” is often used broadly for Roman shades, cellular or honeycomb shades, roller shades, fabric vertical vanes, and sheer products. Their care limits can differ substantially, so the exact product matters more than the generic label.
Step 1: Identify the fabric and its cleaning limits
Before adding water or cleaner, look for the manufacturer name, product family, care label, order paperwork, or online care instructions. This is especially important for blackout fabrics, coated materials, delicate sheers, fabric-covered rails, and specialty Roman shades. Hunter Douglas specifically lists several products and fabrics that should not be spot-cleaned, even though spot cleaning is acceptable for many other fabric treatments.
If you cannot identify the blind, use the least invasive method first: gentle dusting or very light vacuuming. Do not assume a fabric window treatment can be washed because it looks like ordinary upholstery. Also do not assume that “professional cleaning” always means dry cleaning. Bali states that dry cleaning is not recommended for its window treatments, while some deeper cleaning methods are product-specific.
Useful action: Find the product-specific care instructions before you mix a cleaning solution. If the instructions are missing, treat water and detergent as unverified rather than automatically safe.
Prepare only the tools your blind's care instructions permit. Mild detergent is optional and should be used only on fabrics approved for spot cleaning.
Step 2: Remove dry dust before trying to remove stains
Dry soil should usually come off before any wet treatment. Otherwise, moisture can turn surface dust into a muddy mark that is harder to remove evenly.
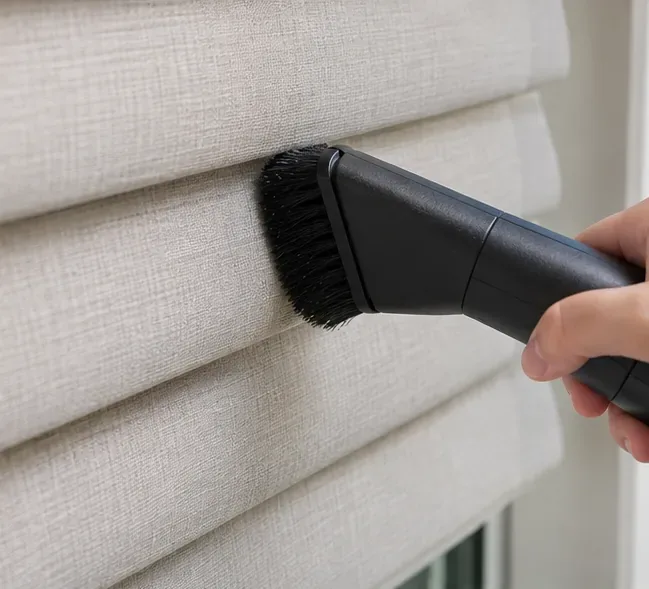
For many fabric shades, a feather duster, microfiber duster, or gentle vacuum is enough for routine maintenance. Hunter Douglas recommends light pressure and, for most products, a brush attachment. Bali similarly recommends light vacuuming with an upholstery attachment. The word “gentle” matters: suction that pulls the fabric toward the nozzle can stretch the face material or deform folds.
If your care instructions allow forced air, a hair dryer on a cool setting or clean compressed air can help with pleats and difficult-to-reach areas. Hunter Douglas advises cool air rather than warm or hot air because heat can distort delicate materials. Some sheer products have their own vacuuming rules, so do not treat every fabric shade the same way.
Quality check: Stop after dry cleaning and view the blind in daylight from several feet away. If the surface now looks even and the remaining issue is only a small stain, move to spot cleaning only if your product permits it. If the blind already looks clean enough, there is no benefit in adding moisture.
Use low suction and light contact. The goal is to lift surface dust without pulling, stretching, or crushing the fabric.
Step 3: Spot-clean only where the fabric allows it
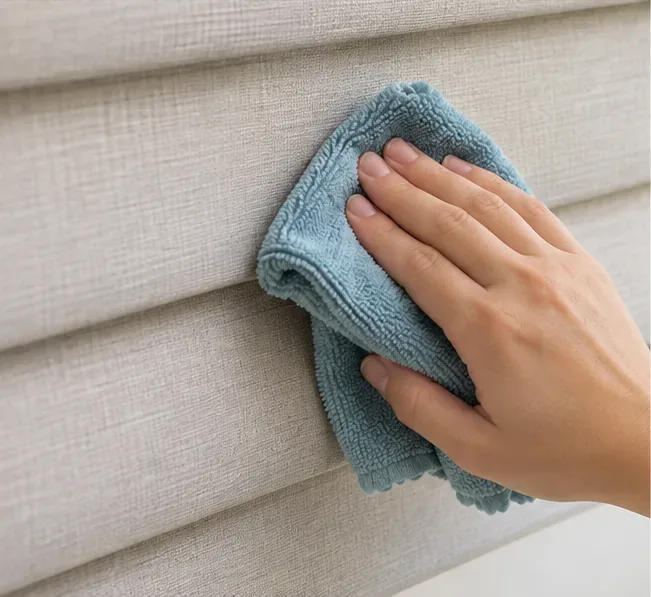
For approved fabrics, the common manufacturer pattern is a soft white cloth or sponge, lukewarm water, and a small amount of mild detergent only if needed. The important technique is blotting rather than scrubbing. Hunter Douglas warns that rubbing can crease or permanently damage some fabrics, and its Roman-shade guidance notes that spot cleaning can leave a visibly cleaner area than the surrounding material.
Work from the least visible edge of the mark toward the center. Use very little liquid. A white cloth makes color transfer easier to detect. Support delicate fabric from behind if possible rather than pressing hard against an unsupported fold. For pleated or cellular fabrics, follow the direction of the pleats and avoid crushing them.
Do not keep scrubbing because a stain is slow to disappear. A stubborn mark can be less damaging than an aggressively cleaned patch. If you see dye on the cloth, a change in sheen, fuzzing, stretching, or a rapidly expanding wet ring, stop and let the area dry before deciding what to do next.
Useful action: Blot a small test area first. Continue only if the fabric dries without a color change, halo, texture change, or distortion.
Blot rather than scrub. Stop if the cloth picks up dye or the fabric begins to distort, pill, or develop a water ring.
Step 4: Let the blind dry fully, then judge the result
Do not judge a damp fabric blind by color alone. Wet textile often looks temporarily darker, and a spot-cleaned area may not reveal a ring until it is fully dry. Allow the treatment to air-dry in the position recommended for your product. Bali tells owners of cellular and pleated shades to keep the shade fully open while it air-dries after spot cleaning.
Keep the fabric away from direct heat. Do not accelerate drying with a hot hair dryer unless the specific product instructions explicitly permit heat. Keep electrical or motorized components dry and follow the manufacturer's motorization guidance if the headrail or controls are involved.
When dry, lower or extend the blind and inspect it in side light. Side light is useful because it reveals puckering, crushed folds, residue, and texture changes that can be hard to see head-on. Raise and lower the blind once to confirm that the fabric and mechanism still move normally.
Quality check: The job is finished when the fabric is dry, hangs evenly, looks more uniform from normal viewing distance, and shows no new ring, shine, crease, or residue. Chasing a tiny remaining mark can produce a worse result than stopping.
Inspect the blind only after it is fully dry. Even folds, consistent color, and normal operation are better signs of success than trying to remove every faint mark.
When home cleaning is no longer the best option
Switch methods when the problem is deeper than loose dust or a small approved spot-cleaning job. Embedded grime across the entire shade, greasy cooking residue, smoke soil, large water marks, deep stains, or delicate specialty fabrics can require professional cleaning. Hunter Douglas describes ultrasonic and injection/extraction cleaning for certain fabric products, but also lists materials and components for which those methods are unsuitable. A professional service should therefore identify the product and use a method compatible with that fabric, not simply apply one process to every shade.
Professional help is also the safer choice when the shade is expensive, motorized, difficult to remove, or no longer supported by clear care instructions. If previous cleaning has already changed the color or texture, further home cleaning may enlarge the visible difference.
Methods to avoid unless your manufacturer specifically approves them
Soaking or immersing the entire blind: Some products may tolerate water, but fabric vertical vanes and many assembled shades should not be immersed.
Hard scrubbing: It can flatten texture, distort pleats, or create a permanently cleaner patch.
Strong detergents or aggressive spot removers: Bali specifically warns against strong detergents and spot removers.
Hot air: Heat can warp or distort delicate window-treatment materials.
Steam by default: Steam is product-specific; Hunter Douglas explicitly excludes some materials from steaming.
Dry cleaning by assumption: It is not a universal solution for fabric blinds and may be excluded by the manufacturer.
What cleaning cannot reliably fix
Cleaning removes soil; it does not restore every kind of damage. Sun fading, dye loss, permanent creases, delaminated blackout backing, stretched fabric, chemical discoloration, and some old water stains may remain even after careful cleaning. Mildew that has penetrated deeply into a textile or backing can also be more than a surface-cleaning problem.
If the blind looks uneven because one side has faded in sunlight, cleaning the darker section will not restore the original color. If a blackout liner has cracked or separated, moisture may make the problem worse. In those cases, repair or replacement can be more appropriate than stronger cleaning.
A practical maintenance routine
Regular light cleaning is easier on fabric than infrequent aggressive cleaning. Dust lightly before visible buildup becomes embedded. Vacuum gently when dusting is no longer enough. Address fresh spots promptly, but only with a method approved for that fabric. Keep window-cleaning spray off nearby textiles, and clean the glass before the blind if overspray is likely.
The best standard is not perfection at any cost. Aim for a cleaner, more even blind that still looks and functions like the product you started with. If the next cleaning pass threatens color, texture, folds, backing, or operation, that is the signal to stop and choose a more suitable method.