Home
» How To
»
How to Disinfect a Hairbrush Safely: Clean First, Then Disinfect When Needed
How to Disinfect a Hairbrush Safely: Clean First, Then Disinfect When Needed
A hairbrush can collect shed hair, skin flakes, oils, dust, and styling-product residue, but that does not mean it needs a strong disinfectant every time you clean it. The most useful distinction is between cleaning and disinfecting. Cleaning physically removes debris and many germs with soap, water, and scrubbing. Disinfecting uses a chemical product to kill germs that remain after cleaning.
According to the CDC's cleaning and disinfecting guidance, updated June 3, 2025, cleaning with soap and water is enough in most household situations; extra disinfection is mainly useful when someone is sick or at higher risk of illness. That principle applies well to a personal hairbrush: remove the buildup first, then add a disinfecting step only when there is a reason and the brush material can tolerate it.
Do You Actually Need to Disinfect Your Hairbrush?
For routine personal use, usually not. A brush covered with hair spray residue, scalp oil, or lint needs a thorough cleaning before anything else. The CDC notes that dirt and organic material can interfere with disinfectants, so spraying a dirty brush and calling it sanitized skips the most important first step.
Disinfection becomes more reasonable after a household illness, when a brush has been shared in a situation where germ transfer is a concern, or when a healthcare professional has told you to take extra precautions. Head lice are a separate case with their own CDC procedure, covered below.
Action: If the brush is for one healthy person and there is no known exposure, clean it thoroughly and dry it completely. If there is a specific infection or contamination concern, clean first and then use a compatible disinfection method.
Can Your Hairbrush Safely Get Wet?
Before washing or disinfecting anything, look at how the brush is built. A one-piece plastic detangling brush can usually tolerate much more water than a wooden brush, a natural-bristle brush, a pneumatic cushion brush, or a powered styling brush.
Brush type
Practical starting point
Main caution
Solid plastic or metal brush
Warm soapy water, rinse, then optional compatible surface disinfectant
Check the disinfectant label for the surface type and contact time
Cushioned or vented brush
Clean the bristles and exposed base with limited water
Avoid flooding holes, seams, or the cushion unless the maker permits immersion
Wooden handle or natural bristles
Use minimal moisture and the manufacturer's care method
Soaking can damage finishes, wood, natural fibers, or adhesives
Electric or heated brush
Unplug it and follow the manufacturer's cleaning directions
Do not immerse powered components
Manufacturer instructions really do vary. Tangle Teezer's current FAQ tells users to remove loose hair, scrub with soap and warm water, rinse, and let the brush dry naturally. By contrast, Mason Pearson's care guidance for its pocket brushes calls for warm water and mild shampoo and says to dry with the bristles facing down. There is no one drying orientation or soaking rule that fits every brush.
Action: If your brush has wood, a rubber cushion, natural bristles, glued parts, or electronics, check the maker's instructions before immersing it or applying a disinfectant.
What Do You Need?
A comb tail, hair pick, or your fingers for lifting trapped hair
Mild liquid soap or shampoo
A clean soft toothbrush or small cleaning brush
Warm water
A clean towel and a well-ventilated place to air-dry
Optional: an EPA-registered disinfectant labeled for the relevant hard, nonporous surface, if disinfection is actually needed
How Do You Disinfect a Washable Plastic or Metal Hairbrush?
1. Remove all trapped hair first
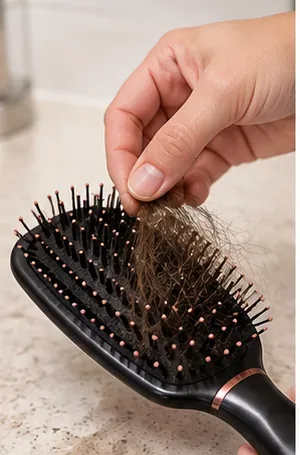
Pull out loose strands from the bristles or teeth. For a dense paddle brush, lift hair from the base with a comb tail or hair pick before pulling it away. Removing this layer makes the next cleaning step much more effective.
Start by removing trapped hair so soap and water can reach the bristles and brush base.
Action: Keep working until you can see the base of the brush between the bristles. If hair is tightly wound around a round brush, loosen it carefully without cutting or scratching the bristles or barrel.
2. Wash away oil and styling-product residue
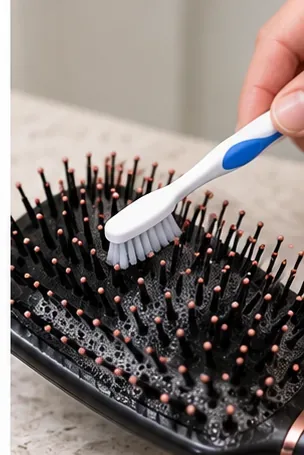
For a fully washable plastic or metal brush, use warm water and a small amount of mild soap or shampoo. Scrub between the bristles, around the base, and along the handle with a soft toothbrush. Rinse away soap and loosened residue. For a cushioned, wooden, natural-bristle, or partly glued brush, clean only the parts the manufacturer says may be wetted rather than automatically soaking the whole tool.
A soft toothbrush helps remove oily buildup and styling residue between bristles before any disinfecting step.
This cleaning step is not optional if you plan to disinfect. The CDC's household guidance says surfaces should be cleaned before sanitizing or disinfecting because soil can make it harder for chemicals to reach and kill germs.
Action: Do not move on until visible residue is gone. If the brush still feels waxy or sticky, wash it again rather than compensating with more disinfectant.
3. Disinfect only if there is a reason—and follow the label
If the cleaned brush is made of a compatible hard, nonporous material and you have a reason to disinfect it, choose an EPA-registered surface disinfectant whose label covers that type of surface and application method. The EPA's registered disinfectant guidance emphasizes that the surface must stay visibly wet for the full contact time listed on the product label. Some products may also require a rinse afterward.
Do not guess the contact time, dilute a ready-to-use product without instructions, or mix disinfectants. EPA guidance also warns that a product's safety and effectiveness can change when it is applied in a way that is not on the label.
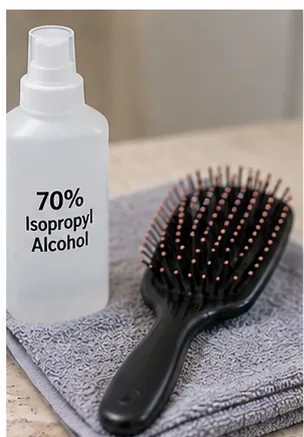
Seventy-percent isopropyl alcohol is a common household shortcut, but the concentration alone does not prove that it is the right registered disinfectant or material-safe choice for every hairbrush.
Action: Read both the brush-care instructions and the disinfectant label. If either one rules out the material, do not improvise with a stronger chemical.
4. Let the brush dry completely before using or storing it
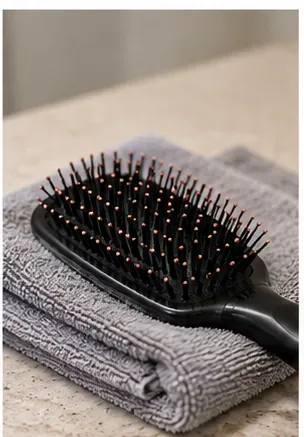
After washing—and after any label-required post-disinfection rinse—remove excess water and let the brush air-dry in a clean place. Do not trap a damp brush in a drawer or closed container. Complete drying helps prevent moisture from sitting inside cushions, seams, or around the bristle base.
Let the cleaned brush air-dry completely in the orientation recommended for that brush design before returning it to storage.
Do not assume every brush should face the same direction while drying. As noted above, manufacturers give different instructions for different constructions.
Action: Wait until the brush is fully dry to the touch, including around the base and any cushion or vent openings, before using it again.
What If the Hairbrush Was Used by Someone With Head Lice?
This is one situation where there is a specific public-health instruction. The CDC's head lice guidance says to disinfest combs and brushes used by an infested person by soaking them in hot water at least 130°F (about 54.4°C) for 5 to 10 minutes.
That recommendation is about lice control, not ordinary weekly brush cleaning. It also assumes the item can tolerate the hot-water treatment. The CDC page does not provide a universal chemical substitute for a brush that would be damaged by that temperature.
Action: For a lice-exposed brush that cannot safely tolerate 130°F water, do not invent a chemical treatment. Check the brush manufacturer's guidance and use a different brush while the lice-treatment plan is underway if necessary.
Can You Use 70% Isopropyl Alcohol?
Sometimes an alcohol-containing product may be appropriate for a particular hard, nonporous surface, but “70% alcohol” is not a universal hairbrush-disinfection rule. The EPA regulates products that make surface-disinfection claims and ties effectiveness to a specific product label, organism claim, application method, surface type, and contact time. A concentration printed on a bottle does not answer all of those questions.
Alcohol can also affect finishes, adhesives, rubber components, paints, and some plastics. That compatibility question depends on the brush, not just the germ you are trying to kill.
Action: Use alcohol only when the brush manufacturer permits it and the product instructions support the intended surface-disinfection use. Otherwise, stick with thorough cleaning or choose a compatible registered product.
What About Bleach?
The CDC states that correctly diluted household bleach can disinfect many hard household surfaces, but that does not make bleach appropriate for every hairbrush. Natural bristles, wood, plated metal, rubber cushions, colored finishes, and adhesives may react badly to strong oxidizing chemicals.
If you use bleach for a compatible hard surface, follow current CDC and product-label directions, provide ventilation, wear any recommended protective equipment, and never mix bleach with other cleaners or disinfectants. The CDC's bleach guidance specifically warns against mixing disinfectants because dangerous vapors can result.
Action: Do not use bleach simply because it is “stronger.” Use it only when both the product directions and the brush material support it.
How Often Should You Disinfect a Hairbrush?
There is no universal CDC or EPA schedule saying a personal hairbrush must be disinfected every week, month, or after a fixed number of uses. Frequency depends on buildup, whether the brush is shared, whether someone has been ill, and what the manufacturer recommends.
Routine cleaning can be based on visible hair and product buildup. If you use heavy styling products, brush oily hair frequently, or keep the brush in a dusty environment, you may need to clean it more often. Chemical disinfection should be driven by a real exposure reason rather than a calendar alone.
Action: Check the brush when you remove trapped hair. If you see sticky residue, flakes, or visible grime, wash it. Add disinfection only when the situation calls for it.
How Do You Know the Brush Is Ready to Use Again?
No loose hair or visible styling-product film remains between the bristles.
The base and handle no longer feel greasy or sticky.
Any disinfectant-required contact time and post-rinse directions were completed exactly as labeled.
The brush is fully dry, including around seams, vents, cushions, or the bristle base.
There is no new cracking, swelling, rust, loosening, or finish damage after cleaning.
If cleaning repeatedly leaves a persistent odor, damaged cushion, corroded pins, or material that no longer dries properly, replacement may be more sensible than escalating to harsher chemicals.
Quick Decision Guide
Situation
Best next move
Normal personal use, no illness
Remove hair, wash with a compatible mild cleaner, rinse as appropriate, and dry completely
Someone in the household has been sick
Clean first, then use a compatible EPA-registered disinfectant if appropriate
Known head lice exposure
Follow CDC: soak the comb or brush in water at least 130°F for 5–10 minutes if the material can tolerate it
Wood, natural bristles, rubber cushion, or specialty finish
Follow the brush maker's care instructions; do not assume full immersion is safe
Powered or heated brush
Unplug and follow the manufacturer's cleaning instructions; do not immerse electrical components
The Bottom Line
The safest way to disinfect a hairbrush starts with a less dramatic step: clean it well. Remove trapped hair, wash away oils and product film, then decide whether disinfection is actually necessary. For a washable hard-plastic or metal brush, a compatible EPA-registered product can be used when its label directions are followed exactly. For wood, natural bristles, cushions, adhesives, and powered brushes, manufacturer instructions take priority over generic cleaning hacks.
And if the concern is head lice, use the CDC's specific hot-water instruction rather than treating ordinary surface-disinfection advice as interchangeable. Matching the method to the actual risk and the actual brush material is more reliable than reaching for the strongest chemical in the cabinet.