Home
» How To
»
How to Get Chewing Gum Out of Clothes Without Damaging the Fabric
How to Get Chewing Gum Out of Clothes Without Damaging the Fabric
Chewing gum is easier to remove from clothing when you stop trying to pull it off while it is soft. The most reliable first move for washable everyday fabrics is to harden the gum with ice or a freezer, lift it away with a dull tool, treat any remaining residue, and then wash according to the garment's care label. This approach is supported by current guidance from Clorox's gum-removal guide and Whirlpool's fabric-care guide.
Quick reference: choose the safest method first
Situation
Best starting point
When to switch methods
Soft gum on washable cotton, denim, or similar everyday fabric
Ice or freezer, then a dull scraper
If residue remains after the bulk is removed, pretreat with liquid laundry detergent
Dried gum that is already firm
Chill it further if needed, then scrape gently
If scraping starts pulling fibers, stop and re-freeze the gum
Sticky film after the gum is gone
Spot-test liquid detergent or a fabric-safe stain remover
If the fabric changes color, texture, or sheen, rinse and stop
Dry-clean-only, suede, leather, embellished, or very delicate clothing
Follow the care label and consider professional cleaning
Do not improvise with solvents or aggressive scraping
The care label matters because fiber blends, dyes, finishes, elastic, trim, and construction can change what a garment can tolerate. The U.S. Federal Trade Commission requires care instructions for covered textile apparel and explains that those instructions identify washing, drying, dry-cleaning, and warning conditions. Check the label before you add heat, solvents, or a wash cycle. See the FTC Care Labeling Rule.
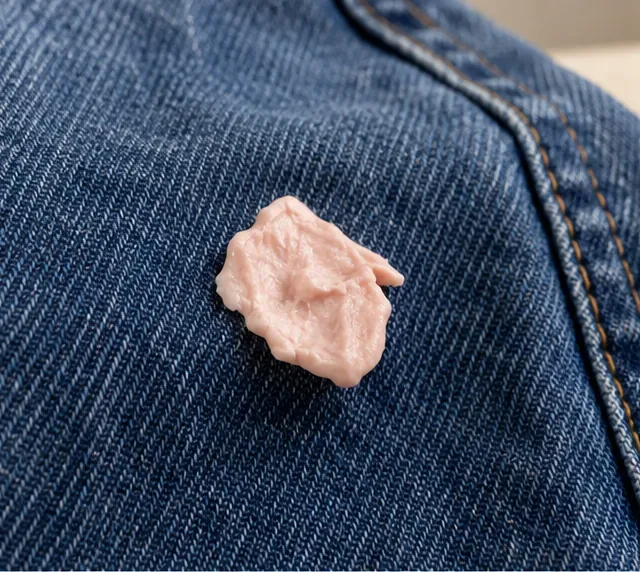
Start by looking at how much gum is sitting on the surface and whether it has been pushed deeply into the weave. Do not stretch or pull the fabric while the gum is soft.
The 4-step method for getting chewing gum out of clothes
1. Check the care label and keep the gum from spreading
Lay the garment flat with the gum facing up. Do not rub it, knead it, or pull at it while it is soft. Tugging can push the gum farther into the fibers or distort a knit. If the item is marked dry-clean-only, or if it is made from leather, suede, or another specialty material, stop here and use the care method on the label rather than treating it like ordinary washable clothing.
What success looks like: the gum is confined to its original area, and the fabric around it is not stretched or smeared. If handling the garment makes the gum spread, move directly to chilling.
2. Harden the gum with ice or a freezer
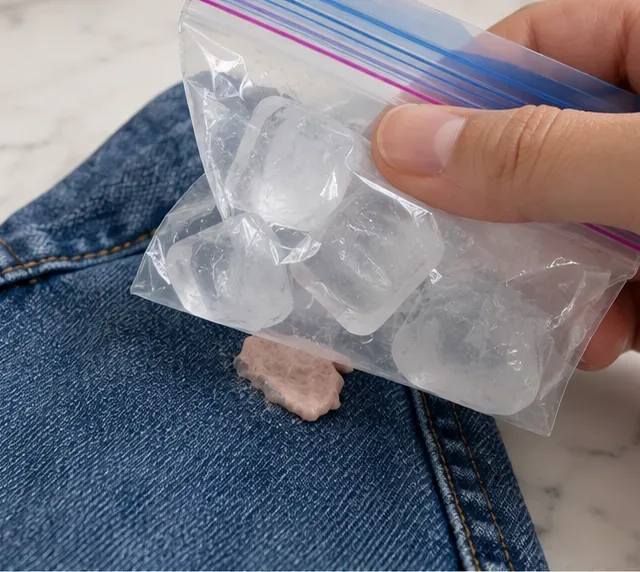
Place ice in a sealed bag and hold it against the gum. Whirlpool suggests roughly 10 to 15 minutes, or until the gum feels hard and brittle. For a small washable item, placing the garment in a clean plastic bag and putting it in the freezer is another practical option. The goal is not a specific number of minutes; the useful endpoint is gum that is firm enough to lift rather than stretch.
Clorox similarly recommends pressing ice against the gum until it hardens. If the gum is only cold but still bends and strings when touched, keep chilling it. Trying to scrape too early makes the next step harder.
Chill the gum until it becomes firm and brittle. A sealed ice bag limits meltwater while keeping the cold directly over the stuck gum.
3. Lift the hardened gum with a dull edge
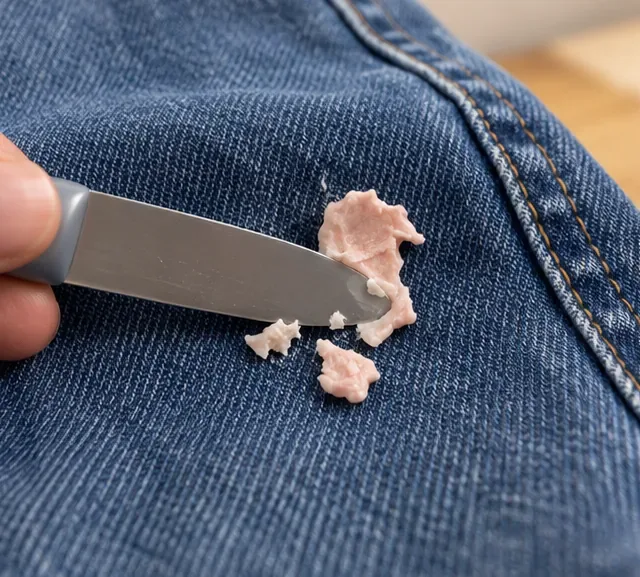
Use the edge of a spoon, a plastic scraper, or another dull tool. Work from the outside of the gum toward the center and lift small pieces at a time. Keep the tool nearly flat against the fabric instead of digging downward. If the gum softens while you work, stop and apply more ice.
Both Clorox and Whirlpool warn against aggressive scraping. The practical reason is simple: removing the gum is not a win if the fabric ends up fuzzy, snagged, thinned, or torn. A few extra chilling cycles are safer than forcing a stubborn patch.
What success looks like: the raised gum is gone and the fabric structure still looks normal. A faint sticky film or discoloration may remain; that is a separate residue-treatment step.
Use a dull edge and light pressure to lift frozen gum. Stop and re-chill the spot if the gum starts stretching or the fabric begins to pull.
4. Treat residue, wash, and inspect before drying
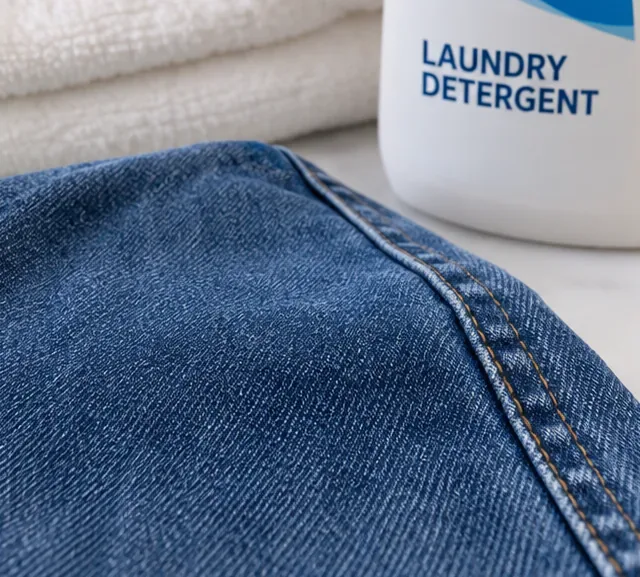
After the bulk gum is removed, apply a small amount of liquid laundry detergent or a fabric-safe stain remover to the remaining mark. Whirlpool recommends spot-testing first and notes that stubborn residue can be gently worked with a soft toothbrush. Let the treatment sit for the product's directed time; Whirlpool's example uses about 10 to 15 minutes for liquid detergent.
Wash the garment in the warmest water allowed by its care label, using your normal detergent. Then inspect the spot while the fabric is still damp or air-dried. Do not automatically move the item into a heated dryer if you can still feel gum or see a residue mark. Whirlpool advises repeating treatment before machine drying because heat can make a remaining stain harder to remove.
After pretreating and washing according to the care label, inspect the fabric before using a heated dryer. The surface should feel clean rather than tacky.
How to deal with leftover gum residue
A thin sticky film is common after the main lump comes off. Start with the least aggressive option: liquid laundry detergent or a stain remover that is labeled for the fabric. Work it in gently, rinse or wash as directed, and reassess. This is usually a better first choice than reaching immediately for a household solvent.
Whirlpool also describes vinegar, rubbing alcohol, adhesive remover, and tape-based methods, but those are more conditional. Vinegar is acidic and may not be appropriate for delicate fabric or items containing elastic. Alcohol-based products and adhesive removers require label checks, spot testing, thorough rinsing, and attention to the product's own safety instructions. For most readers, the ice-plus-detergent route is the simpler reference method because it introduces fewer compatibility questions.
Should you use hot vinegar, rubbing alcohol, or an iron?
These methods appear in some manufacturer stain guides, but they are not universal upgrades. Tide and Whirlpool both describe warm vinegar as an option after colorfastness testing, while Tide also documents an iron-and-cardboard transfer method. Those techniques add heat, acidity, or both, so they are more dependent on fabric type and construction than the ice method.
Use vinegar only when: the care label and a hidden-area test suggest the fabric and color can tolerate it, and you can rinse it thoroughly afterward.
Use rubbing alcohol or adhesive remover only when: the product label specifically allows use on the fabric, the garment passes a spot test, and the chemical can be fully rinsed out before laundering or drying.
Use an iron method only when: the garment's care label permits ironing at the needed temperature and there are no heat-sensitive trims, coatings, prints, or elastic components in the area.
If you are unsure, return to chilling, gentle scraping, and detergent pretreatment. More aggressive chemistry is not automatically more effective, especially when the garment itself is the thing you are trying to preserve.
What not to do
Do not pull soft gum off by force. It can stretch into strings and pull fibers with it.
Do not use a sharp blade. A dull spoon or plastic edge gives you more control with less risk of cutting the cloth.
Do not scrub before the bulk gum is removed. Scrubbing soft gum can spread it over a larger area.
Do not ignore the care label. A method that is harmless on denim may be wrong for wool, silk, elastic, coated fabric, or dry-clean-only clothing.
Do not machine-dry the garment while residue remains. Inspect first and repeat the treatment if necessary.
When the freezer method is especially useful
The freezer can be convenient when the gum covers a larger area, is stuck inside a pocket, or becomes soft again too quickly under an ice bag. Put the garment in a clean bag so the gum does not stick to the freezer interior or other food packaging. Position the gum so it does not press against another part of the garment while it freezes. Once it is firm, scrape immediately before it warms.
For thick garments, you may need to freeze, scrape, and freeze again in short rounds. That is normal. The useful endpoint is gradual removal without damaging the weave.
When to stop treating the garment at home
Home treatment has limits. Switch to a professional cleaner when the label says dry-clean-only, the garment is valuable or structurally delicate, the gum is embedded in suede or leather, or a spot test changes the color or surface. Clorox specifically advises professional cleaning for dry-clean-only suede and suggests escalating when gum cannot be removed safely by gentle scraping.
Also stop if the gum is gone but the material itself has been altered. A shiny patch, roughened nap, stretched knit, color loss, or damaged coating is no longer simply a gum-removal problem. Additional scraping or solvents may make that damage more visible.
Final checklist
Read the care label before starting.
Harden the gum completely with ice or a freezer.
Lift it with a dull tool and light pressure.
Re-freeze instead of forcing stubborn pieces.
Spot-test detergent, stain remover, or any optional treatment.
Wash according to the garment label.
Inspect for tackiness or discoloration before machine drying.
Use a professional cleaner for dry-clean-only or delicate specialty fabrics.
For most washable everyday clothing, getting chewing gum out is less about finding a powerful chemical and more about changing the gum's texture first. Harden it, remove the bulk mechanically, treat what remains, and let the care label decide how you wash and dry the item. That sequence gives you clear checkpoints and reduces the chance of turning a small sticky accident into permanent fabric damage.