Home
» How To
»
How to Get Gum Out of Sheets Without Spreading the Sticky Residue
How to Get Gum Out of Sheets Without Spreading the Sticky Residue
The best result is not simply “the gum came off.” A properly cleaned sheet should have no visible gum, no tacky patch, no greasy or discolored ring, and no stretched, abraded, or weakened fibers. If it is a fitted sheet, the elastic should also remain undamaged.
Current manufacturer guidance from Whirlpool, Tide, Clorox, and Maytag points to the same dependable sequence: harden the gum, remove as much as possible mechanically, treat any remaining residue, wash according to the care label, and inspect before drying. The dryer is the decision point that matters most because heat can make remaining gum or residue harder to remove.
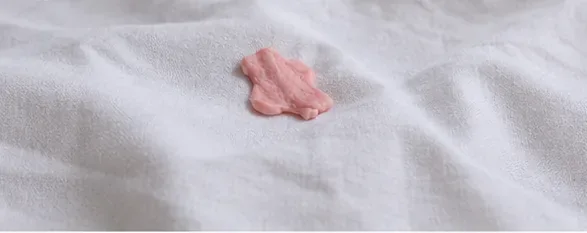
Start by checking the sheet's care label and the size of the gum spot before choosing a treatment.
Before using ice, detergent, vinegar, alcohol, or an adhesive remover, check the sheet's care label. Most cotton and cotton-polyester sheets tolerate routine laundering, but delicate fibers, specialty finishes, and fitted-sheet elastic may limit what you should use.
Look at the gum itself. If it is still soft and stretchy, do not pull at it. Tide warns that pulling can tear the fabric because gum can bond strongly to fibers. If the gum is already dry and brittle, you may be able to remove part of it immediately with a dull edge, but chilling it usually gives you more control.
Quality target: preserve the weave. If the fabric starts puckering, stretching, or pulling up with the gum, stop and harden the gum before trying again.
Step 2: Harden the gum with ice or the freezer
Cold hardens gum so it is less stretchy and easier to lift from fabric without pulling the fibers.
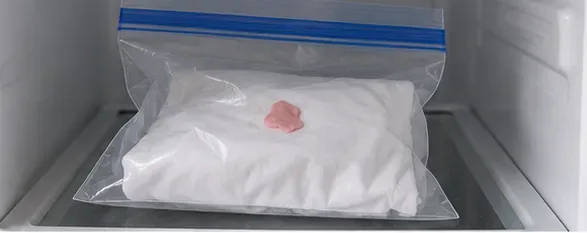
Whirlpool recommends holding ice on the gum for about 10 to 15 minutes, or until the gum feels hard and brittle. Tide also recommends a bag of ice or putting a small enough item in the freezer to solidify the gum. Clorox likewise uses direct ice as the first step.
For sheets, you have two practical choices:
Ice method: keep the sheet on a flat surface and hold a sealed bag of ice against the gum. This is easiest when you do not want to put a large sheet in the freezer.
Freezer method: fold the affected section so the gum faces outward, place the sheet in a clean bag, and freeze it until the gum becomes firm.
Quality target: the gum should feel firm enough to chip or lift rather than stretch. If it bends or smears under the tool, it is not cold enough.
Step 3: Gently lift the hardened gum
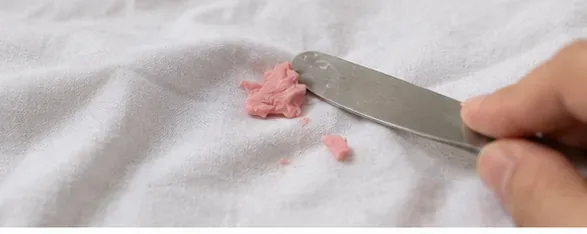
Use a dull edge to lift hardened gum slowly; stop and chill it again if it starts to soften or smear.
Use the edge of a spoon, a dull butter knife, or another smooth, blunt scraper. Work from the outside edge of the gum toward the center. Do not dig the tool into the weave. Whirlpool and Clorox both recommend a dull-edged tool and caution against aggressive scraping because it can distort or damage fabric.
If the gum begins to soften while you work, stop and reapply ice. This is a better choice than increasing pressure. Re-chilling preserves the advantage of brittle gum and reduces the chance of pushing it deeper into the sheet.
Quality target: remove the raised mass of gum while leaving the sheet's surface flat. A faint sticky film can be treated later; torn fibers cannot be repaired by laundering.
Step 4: Treat the residue, not the whole sheet
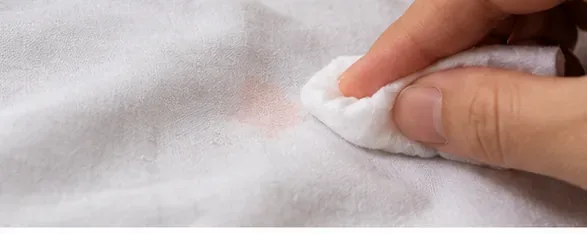
After the bulk gum is gone, treat remaining tackiness or discoloration with a fabric-safe laundry pretreatment.
After most of the gum is gone, inspect the spot with your fingertips. If it still feels tacky, use a small amount of liquid laundry detergent or a fabric-safe stain remover on the affected area. Whirlpool recommends applying liquid detergent to stubborn residue and gently working it with your fingers or a soft toothbrush. Tide similarly recommends pretreating remaining gum residue with liquid detergent after the excess has been removed.
Keep the treatment local. There is no advantage to soaking the entire sheet if only a small spot is affected.
For fitted sheets: Whirlpool specifically cautions that vinegar is not recommended for delicate fabrics or items containing elastic, such as fitted sheets. That makes detergent pretreatment the more conservative first choice for an elasticized sheet.
Quality target: after pretreatment, the area should lose its gummy feel without showing color loss, whitening, or surface roughness.
Step 5: Let the pretreatment work, then wash by the care label
Whirlpool recommends allowing detergent or stain treatment to work for about 10 to 15 minutes before laundering. Tide's current instructions also give the pretreatment time to work before washing. Do not let a liquid detergent dry into the fabric unless its product directions specifically allow that.
Wash the sheet according to its care label after the gum has been removed and residue has been pretreated.
Wash the sheet using the normal cycle and the warmest water temperature permitted by the care label. “Warmest safe” is more useful than a fixed temperature because sheet materials differ. A white cotton sheet may tolerate a hotter wash than a bamboo-viscose, silk, or blended sheet.
If you used an adhesive remover or rubbing alcohol as a last-resort method on a durable fabric, follow the product directions and rinse the material thoroughly before it goes near a washer or dryer. Whirlpool and Maytag warn that alcohol-containing products must be removed before machine laundering or drying because alcohol is flammable.
Quality target: the wash should remove pretreatment residue and the final gum film without changing the sheet's color or texture.
Step 6: Inspect the sheet before any dryer heat
Inspect the treated area while the sheet is still damp; do not use dryer heat if gum or tackiness remains.
This is the most important quality-control step. Spread the damp sheet flat and inspect the treated area under good light. Rub the spot gently between clean fingers. If you can still feel tackiness, see a residue ring, or detect small gum particles, do not put the sheet in the dryer.
Whirlpool, Tide, and Maytag all advise checking before drying because heat can set remaining gum or stain and make later removal more difficult.
Quality target: the treated spot should look and feel like the surrounding fabric. If it does not, return to the residue-treatment step rather than proceeding to heat.
Step 7: Dry only after the gum is fully gone
Once the treated area is fully clean, dry the sheet only as the care label allows.
Once the sheet is clean, dry it according to the care label. If you are uncertain whether a faint mark is still present, air drying is the safer checkpoint because it avoids setting residue with heat. You can inspect again after the sheet is dry and decide whether another wash is necessary.
Do not raise the dryer temperature in an attempt to “finish” the stain removal. Dryer heat is for drying a clean sheet, not for dissolving or removing gum.
Quality target: after drying, the fabric should be flexible, smooth, and free of any sticky or stiff patch.
Step 8: Confirm the final result before remaking the bed
The goal is a sheet with no visible gum, no sticky residue, and no damage to the fabric or elastic.
Run your hand across the former gum spot. A successful result should not feel different from the surrounding sheet. Check the back side of the fabric too, especially if the gum had been pressed deeply into the weave.
For a fitted sheet, stretch the elastic edge gently and make sure it still recovers normally. If a treatment has made the elastic brittle, discolored, or loose, stop using stronger chemicals on future attempts.
Quality target: no gum, no tackiness, no visible residue, and no fabric damage.
When should you change methods?
What you see
What it means
Next move
Gum stretches while scraping
It is too warm
Reapply ice or return the area to the freezer
Bulk gum is gone but the spot feels sticky
Residue remains in the fibers
Use liquid laundry detergent or a fabric-safe stain treatment
Color transfers during spot testing
The treatment may not be color-safe
Stop and choose a gentler option
Fabric begins to fuzz or pull
Mechanical scraping is too aggressive
Stop scraping and switch to pretreatment
Residue remains after washing
The stain is not ready for dryer heat
Repeat pretreatment and washing
Sheet is silk, wool, dry-clean-only, or highly delicate
Home treatment risk is higher
Use the care-label method or a professional cleaner
Should you use vinegar?
Vinegar appears in some manufacturer stain-removal guides, including Tide's and Maytag's gum advice, because warm vinegar can help loosen gum. But it is not the best default for every sheet. Whirlpool warns against vinegar on delicate fabrics and on items containing elastic, explicitly giving fitted sheets as an example.
For ordinary washable sheets, hardening the gum and using a small amount of liquid detergent is a simpler first route. If you consider vinegar on a flat sheet with no elastic, spot-test it first and follow the care label. If you have a fitted sheet, skip vinegar unless the sheet manufacturer specifically says it is safe.
What about rubbing alcohol or adhesive remover?
These are stronger options for stubborn residue, not the first step. Maytag says rubbing alcohol should be limited to durable fabrics such as canvas or some denim and should not be used on delicate fabrics such as silk. Whirlpool likewise says to spot-test solvent-type products and rinse them thoroughly before machine washing or drying.
Because bed sheets spend hours against your skin and may include elastic, coatings, printed dyes, or specialty fibers, a standard laundry pretreatment is usually the more predictable choice.
What if the gum went through the dryer already?
Heat can make gum removal more difficult, but the same sequence still gives you a sensible starting point: cool the gum, remove what can be lifted safely, pretreat the remaining residue, wash, and inspect before using heat again. Expect more than one treatment if the gum has been pressed or melted deeply into the weave.
If the fabric is thinning, the gum has fused into a delicate fiber, or the residue will not improve after repeated care-label-safe treatment, stop. More scraping or stronger chemistry may damage the sheet more than the gum itself.
When to stop DIY treatment
The care label says dry clean only.
The sheet is silk, wool, or another delicate material and the gum is embedded deeply.
Color comes off during a spot test.
The fabric begins to tear, pill, or stretch.
A solvent leaves a ring, odor, or visible finish change.
Repeated detergent pretreatment and washing no longer improve the residue.
At that point, a professional cleaner is the safer next step. Clorox specifically suggests taking an item to a dry cleaner if the gum cannot be scraped away successfully in situations where home treatment is not getting the job done.
Bottom line
The most reliable way to get gum out of sheets is to control the process rather than attack the gum with heat or strong chemicals. Harden it, lift it gently, treat only the remaining residue, wash by the care label, and inspect before drying. That sequence gives you clear decision points: if the gum stretches, cool it more; if the bulk is gone but tackiness remains, pretreat; if residue survives the wash, repeat before dryer heat.
The finished sheet should not merely look cleaner. It should feel normal, show no sticky residue, and retain its original texture and elasticity. If a method starts damaging the fabric, the correct result is to stop and change methods—not to keep pushing until the gum disappears.