Home
» How To
»
How to Get Ink Out of a Pen: Restore Ink Flow Without Damaging It
How to Get Ink Out of a Pen: Restore Ink Flow Without Damaging It
If by “get ink out of a pen” you mean make a pen write again, the safest approach is to identify the pen type, clean only accessible residue, and replace the refill when the ink supply or refill mechanism has failed. If you literally want to remove the ink from inside a sealed ballpoint, gel, or rollerball refill, do not cut, puncture, heat, or squeeze the tube. Remove the entire refill instead.
This practical guide focuses on restoring ink flow without damaging the pen. Manufacturer support information was checked in September 2026. Because pen designs vary, model-specific instructions always take priority.
Quick reference: what to do for each pen type
Pen type
Best first move
What to avoid
Ballpoint
Check the refill, wipe exterior residue from the tip, then test on clean paper.
Open flames, high heat, puncturing the refill, or soaking the refill in liquid.
Gel pen
Inspect the refill and tip; replace the refill if it is empty, dried out, or damaged.
Squeezing the ink tube or adding household solvents.
Rollerball
Clean visible residue from the writing tip and replace the correct refill if flow does not return.
Substituting a ballpoint refill unless the manufacturer specifically lists it as compatible.
Fountain pen
Flush the nib and feed with cool or lukewarm water when dried ink is blocking flow.
Harsh chemicals, abrasive scrubbing, or detergent unless the manufacturer explicitly recommends it.
One important distinction is that ballpoint, gel, and rollerball pens commonly use self-contained refills, while a fountain pen is designed to move liquid ink through a nib and feed. Cross notes that ballpoint and rollerball refills are generally not interchangeable, so the correct refill type matters when replacement is the solution. See the Cross Help Center for current refill guidance.
Step 1: Open the pen only as far as it is designed to open
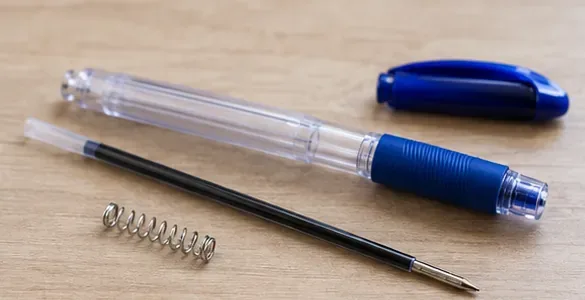
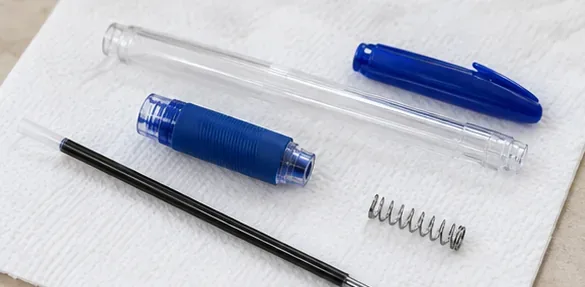
Retract the point if the pen is retractable, then unscrew or pull apart the barrel using the normal refill-access mechanism. Do not pry glued seams or cut the refill tube. For a typical refillable ballpoint, the goal is simply to expose the refill so you can check whether ink remains and whether the refill is seated correctly.
A refillable pen opened into its normal removable parts. Remove the refill rather than cutting or puncturing the ink tube.
Look for obvious problems: an empty transparent reservoir, a cracked tube, ink leaked into the barrel, a missing spring, or a refill that does not match the pen. If the refill is empty, replacement is the correct fix. Parker's current support material directs users to use the appropriate refill for the writing instrument and provides separate refill categories for ballpoint, gel, and rollerball pens. See Parker's ballpoint and gel pen support.
Step 2: Clean only visible residue around the writing tip
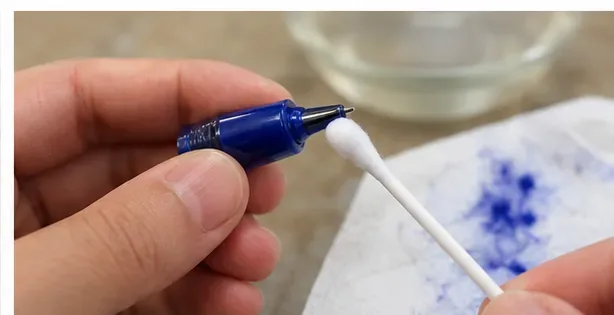
If ink is present but the pen skips or will not start, inspect the metal writing tip. Dried ink, paper fibers, or debris around the outside can interfere with smooth contact. Start with a clean, dry, lint-free cloth. Wipe the exterior gently without forcing material into the tiny ball or opening.
Clean only visible residue on the exterior of the writing tip. Do not push fibers, liquid, or tools into the point.
A cotton swab can be useful around the outer collar or threads, but it can shed fibers, so use it lightly and keep it away from the moving ball itself. For ordinary ballpoint, gel, and rollerball refills, there is no universal manufacturer-backed reason to soak the entire refill in water, rubbing alcohol, vinegar, or another household liquid.
After wiping, draw several loops and straight lines on clean scrap paper using normal writing pressure. This is a test, not a reason to press hard. If the pen starts but repeatedly skips, the refill may be near the end of its life or internally dried.
Step 3: Decide whether to replace the refill or flush a fountain pen
For a ballpoint, gel pen, or rollerball, replacement is usually preferable to trying to extract or recondition the ink inside a sealed refill. Cross's refill guidance explains that ballpoint and rollerball refills use different mechanisms and normally cannot be swapped. Cross also describes refill replacement as removing the old refill and installing the correct new one rather than opening the refill itself.
If the pen is a fountain pen
A fountain pen is different. Its feed is the channel system beneath the nib that carries liquid ink from a cartridge, converter, or built-in reservoir to the writing point. Dried ink in the feed can often be removed with water.
Waterman's current care guidance recommends cleaning a fountain pen between ink refills, placing the nib and gripping section in cool water, then rinsing with a slow stream of cool water. LAMY similarly advises that dried ink can be removed by flushing with water or soaking the front section in plain water, and specifically warns not to add soap or detergent. See Waterman's fountain pen cleaning recommendations and LAMY's cleaning FAQ.
Remove the fountain pen cartridge or converter according to its manual. Rinse or soak only the components the manufacturer identifies as washable. Continue with clean water until little or no ink color remains. Then let the cleaned components dry thoroughly before installing fresh ink. Do not apply this water-flushing method to a sealed ballpoint, gel, or rollerball refill.
Let any washable pen components dry fully before reassembly. Keep sealed ballpoint, gel, and rollerball refills out of water.
Step 4: Reassemble the pen and test it without forcing the point
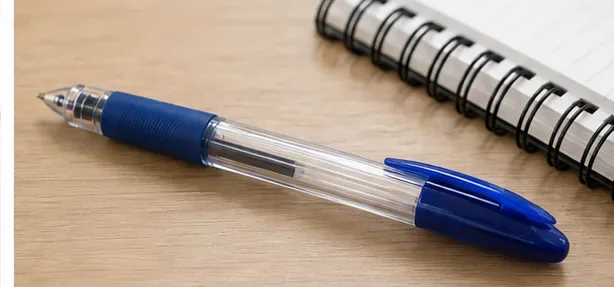
Install the correct refill or fresh fountain pen ink, return any spring to its original position, and close the barrel without overtightening it. A refill should sit securely and extend or retract normally. If it feels loose, check compatibility rather than padding or modifying the refill.
After reassembly, test the pen on clean paper with normal pressure and confirm that the point extends, retracts, and writes consistently.
Test with a few lines, circles, and short words. A healthy pen should produce a consistent line without requiring excessive pressure. If a new, correct refill still does not extend properly, the problem may be the spring, click mechanism, barrel, or refill fit rather than the ink.
What if you literally need to remove ink from inside the pen?
For most disposable ballpoint, gel, and rollerball refills, the practical answer is to remove the complete refill and contain it rather than trying to drain it. These small reservoirs are not normally designed as user-serviceable ink tanks. Cutting or squeezing them can release ink suddenly onto skin, clothing, furniture, or eyes.
If ink has leaked into the empty pen barrel, remove the refill first. Wipe loose ink with disposable absorbent material. Clean the barrel only if the pen maker's material and care instructions allow it. Keep liquid away from click mechanisms, decorative finishes, electronics in stylus pens, and any refill you plan to reuse.
Methods that are better avoided
Heating the tip with a lighter, match, candle, or boiling water: heat can deform plastic, damage seals, change ink behavior, and create a burn or fire risk.
Blowing into or sucking on an ink tube: this can put ink in the mouth or force it out unpredictably.
Adding rubbing alcohol, acetone, vinegar, or household cleaner to the refill: compatibility with the ink, seals, and pen materials is not universal.
Puncturing a refill with a needle: it can create leaks and does not repair a worn or blocked writing point.
Pressing extremely hard on paper: force can damage the ball socket, rollerball tip, or fountain pen nib.
Troubleshooting checklist
Confirm the refill actually contains ink.
Make sure the refill is the correct type and size for the pen.
Remove visible dried residue from the exterior of the tip.
Test on clean paper with normal pressure.
Replace a sealed refill that is empty, cracked, leaking, or persistently dry.
Use water flushing only for fountain pen parts that the manufacturer says can be cleaned that way.
Stop if the nib is bent, the tip is physically damaged, or the mechanism is broken.
When replacement is the better answer
Replace the refill when there is no visible ink left, the tube is damaged, ink is leaking, the writing tip is bent, or normal cleaning does not restore reliable flow. If the pen is inexpensive and uses a nonreplaceable refill, replacing the pen may be more practical than trying to open the sealed ink reservoir.
For a valuable fountain pen, repeated flow problems after a proper water flush can indicate a damaged nib, misaligned feed, or another mechanical issue. In that case, manufacturer service or a qualified pen repair specialist is safer than aggressive DIY cleaning.
The simplest rule is also the most useful: clean the part designed to be cleaned, replace the part designed to be replaced, and do not force open a sealed ink refill.