Home
» How To
»
How to Get Permanent Marker Off a Dry-Erase Board: A Beginner-Safe Method
How to Get Permanent Marker Off a Dry-Erase Board: A Beginner-Safe Method
Accidentally writing on a dry-erase board with a permanent marker looks worse than it usually is. On many standard whiteboards, the best first move is surprisingly simple: cover the permanent ink with a fresh dry-erase marker, then erase it. Board manufacturers such as Quartet and 3M publish versions of this method for their own dry-erase surfaces.
If you are new to whiteboard care, the main thing to understand is that not every board surface is identical. A melamine whiteboard, painted-steel board, porcelain board, glass board, and dry-erase film can have different cleaning limits. Start with the gentlest manufacturer-supported method, then move to a stronger option only when the maker of your specific surface allows it.
First, know what you are dealing with
A dry-erase marker is designed to release from a compatible nonporous writing surface when wiped with an eraser or soft cloth. A permanent marker uses ink intended to adhere more strongly. When permanent ink ends up on a dry-erase surface, fresh dry-erase ink can sometimes help lift it because the new ink rewets the mark and lets both inks wipe away together.
You may also see the term ghosting. Ghosting means a faint haze, shadow, or leftover image remains after erasing. Quartet explains that ink particles can remain in a board's surface and recommends an erase-clean-dry routine to reduce residue. See Quartet's current board care and maintenance guidance.
What to prepare
A fresh dry-erase marker, preferably a dark color so you can see where you have covered the old ink
A clean whiteboard eraser or clean microfiber cloth
A board cleaner approved for your board type, if needed
A second clean, dry microfiber cloth
Optional isopropyl rubbing alcohol only if your board manufacturer specifically says it is safe for that surface
Avoid starting with random household cleaners, abrasive pads, acetone, paint thinner, or scraping tools. Quartet specifically says it does not recommend general household cleaners for its whiteboards or glass boards. Strong solvents can also damage coatings or change how well the board erases later.
How to get permanent marker off a dry-erase board
Step 1: Identify the mark and the board surface
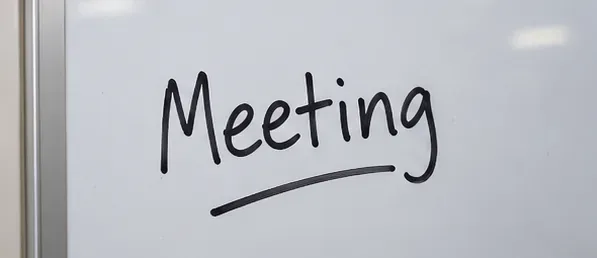
Before cleaning, confirm that the problem is permanent marker on the writing surface rather than damage to the board itself.
Look at the writing and the board. If ordinary dry-erase writing wipes away but this mark does not, permanent marker is a reasonable possibility. Then check the board's label, packaging, product page, or model information if you still have it.
This matters because a standard whiteboard and a specialty film may have different instructions. For example, 3M's Post-it Easy Erase surface is specifically designed so permanent marker can be removed with water and a cloth, while other 3M dry-erase films tell users not to use permanent marker at all.
Step 2: Gather the gentlest supplies first
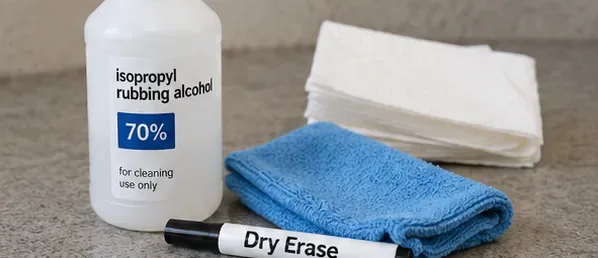
A fresh dry-erase marker and clean microfiber cloth are the first tools; rubbing alcohol is a backup only when the board maker permits it.
Put the fresh dry-erase marker and a clean cloth within reach. If you have the board maker's cleaner, keep that nearby for the finishing step. Do not assume the rubbing alcohol shown here belongs in the first step. It is an optional fallback for surfaces whose manufacturer permits it.
For Quartet boards, the company's FAQ recommends trying a fresh dry-erase marker over the permanent ink, then cleaning with a Quartet cleaning solution. For 3M Post-it Dry Erase Surface, 3M says permanent marker can be covered with dry-erase marker and wiped away, with isopropyl rubbing alcohol listed as a gentle alternative for that specific product. See the 3M application and removal guidelines.
Step 3: Cover the permanent ink with fresh dry-erase ink
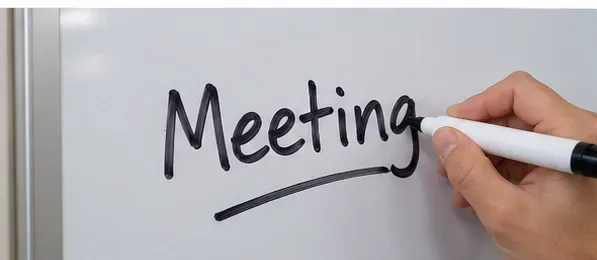
Draw directly over the permanent mark so the fresh dry-erase ink fully covers the old line.
Work on a small section at a time. Trace directly over the permanent mark with the fresh dry-erase marker. Cover the line rather than drawing next to it.
This is the key beginner-friendly technique because it does not require a strong solvent. Quartet's product FAQ says to trace over permanent marker with a fresh dry-erase marker and then wipe the ink away. Quartet says to wait a few minutes on its boards before erasing. By contrast, 3M's DI-NOC Whiteboard Film technical sheet tells users to write over an accidental non-specified mark with dry-erase marker and wipe it off immediately. That difference is a good reason to follow the instructions for your actual surface rather than using one universal waiting time.
Step 4: Wipe with a clean eraser or microfiber cloth
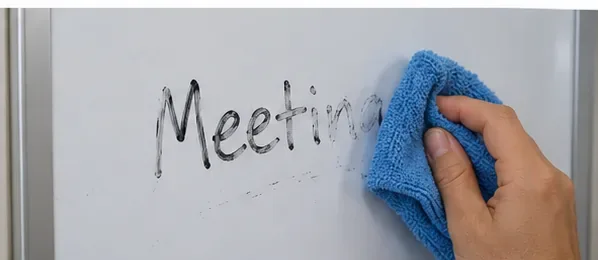
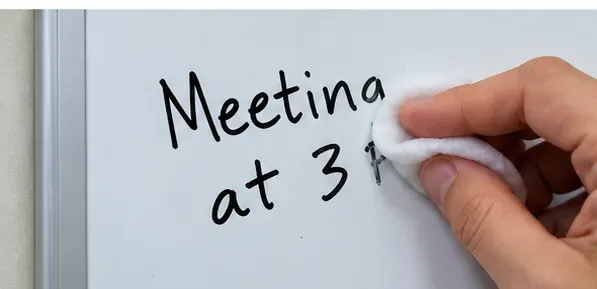
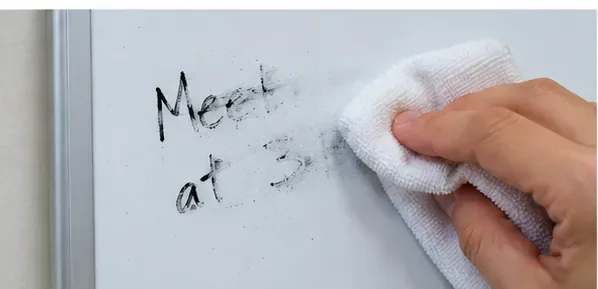
Wipe the covered area with a clean microfiber cloth or whiteboard eraser, using a clean section of the cloth as ink lifts.
Erase the treated area with a clean whiteboard eraser or microfiber cloth. If the cloth becomes dark with ink, rotate to a clean section instead of rubbing the residue back over the board.
If most of the line disappears but a faint shadow remains, repeat the dry-erase-marker method on that small area. Two gentle passes are usually a better choice than one aggressive pass with an unknown chemical.
Step 5: If residue remains, choose the backup method by board type
Use a stronger cleaning step only after checking that it is approved for the specific dry-erase surface.
This is where many cleaning guides become too broad. Rubbing alcohol is not a universal whiteboard rule. Some manufacturers approve it for particular surfaces; others recommend their own board cleaner instead.
For example, 3M's March 2022 Technical Data Sheet, Revision J, for DI-NOC Whiteboard Film WH-111 says an accidentally used non-specified marker can be covered with dry-erase marker, then wiped using the maintenance method. A separate 3M Post-it Dry Erase Surface guide states that permanent marker may also be gently cleaned with isopropyl rubbing alcohol. Those instructions are product-specific, not permission to use alcohol on every whiteboard.
If your board's maker approves isopropyl alcohol, dampen the cloth rather than flooding the board, test a small inconspicuous area first, and wipe gently. If the maker does not approve it, stay with the recommended board cleaner or contact the manufacturer.
Step 6: Clean away ink residue with the proper board cleaner
After the permanent ink is gone, remove leftover haze with the cleaner recommended for the board surface.
Once the dark permanent line is gone, you may still see gray haze or dry-erase residue. Clean the area using the product recommended for your board. Quartet's maintenance guide says its standard cleaner is suitable for its porcelain, melamine, and painted-steel marker boards, while it recommends a different glass-board cleaner for glass surfaces.
Use only enough cleaner to wet the surface lightly, then wipe it off. Avoid saturating seams, frames, or edges where liquid can collect.
Step 7: Dry the board completely and inspect it in good light
Inspect the dry board from an angle; a remaining shadow is easier to see once all cleaner has evaporated.
Drying is not just cosmetic. Quartet advises wiping the board with a dry towel and then using a second dry towel so no cleaning solution remains. Residual cleaner can mix with marker ink during the next use and make later erasing more difficult.
Look at the board from the side as well as straight on. If you see only a faint shadow, decide whether another gentle pass is worth it. On an older or heavily worn melamine board, some staining may be permanent because the surface itself has become more porous or worn.
Step 8: Test the cleaned area with a dry-erase marker
After the surface is fully dry, write a small test mark with a dry-erase marker and confirm that it erases cleanly.
Make a small dry-erase test mark in the cleaned area, let it dry normally, and erase it. The goal is not only to remove the permanent marker but also to preserve the board's normal erase performance.
If the test mark smears badly, sticks, or leaves a new haze, stop adding chemicals. The surface may still contain cleaner residue or may have been damaged by an earlier solvent or abrasive treatment.
Special case: some dry-erase surfaces are designed for permanent marker
Do not assume a mark needs the same treatment just because the surface looks like a whiteboard. 3M's Post-it Easy Erase Permanent Marker Whiteboard Surface is designed for both dry-erase and permanent markers; 3M says permanent marker on that product can be removed with water and the provided cloth. If you have that exact surface, follow the maker's simpler water-cleaning method rather than adding solvents. See 3M's Post-it Easy Erase product guidance.
Mistakes to avoid
Using a dirty eraser: old ink residue can spread across the board and create a gray haze.
Scrubbing with an abrasive pad: scratches can permanently change the writing surface.
Jumping straight to acetone or paint thinner: strong solvents can damage coatings and are not part of the manufacturer guidance cited here.
Using a generic household cleaner without checking: Quartet specifically advises against general household cleaners on its boards.
Soaking the board: excess liquid can collect at seams and edges.
Skipping the final dry wipe: leftover cleaner can make future marker use harder to erase.
Assuming all whiteboards have the same surface: glass, melamine, painted steel, porcelain, and dry-erase films can require different maintenance.
What if the permanent marker has been there for weeks?
Start with the same dry-erase-overlay method. Age alone is not a reason to begin with a harsh solvent. If the mark does not lift, identify the board material and follow the manufacturer's stain-removal instructions. Older melamine boards can become more prone to ghosting as the surface wears, so a completely invisible result is not always possible.
Quick beginner checklist
Question
Best next move
Do you know the board brand or surface?
Check its care instructions before using chemicals.
Is it a standard dry-erase board?
Try tracing over the permanent mark with fresh dry-erase marker first.
Did most of the ink erase?
Repeat gently on the remaining small areas.
Is there only haze left?
Use the board-specific cleaner, then dry thoroughly.
Are you considering rubbing alcohol?
Use it only if the manufacturer approves it for that surface.
Does the board no longer erase normally?
Stop adding cleaners and consult the board manufacturer.
The simplest safe rule to remember
For a typical accidental permanent-marker line, begin with a fresh dry-erase marker over the old ink, erase with a clean cloth or eraser, then finish with the cleaner recommended for your board. Treat rubbing alcohol as a surface-specific fallback, not a universal first step. That approach matches the published guidance from major board manufacturers while minimizing the chance of turning a removable ink mistake into permanent surface damage.
Sources checked: Quartet's current product FAQ and board-maintenance pages, 3M's Post-it Dry Erase Surface application/removal guide, 3M DI-NOC Whiteboard Film Technical Data Sheet Revision J (March 2022), and 3M's Post-it Easy Erase product page. Manufacturer instructions can change, so check the current care information for your exact board model before using a chemical cleaner.